

3.3 Constructing a concept map
There is no one right way to construct a concept map. However, there are some key steps and principles that need to be kept in mind. Read the following example before making your own concept map.
Identify the concepts or key terms
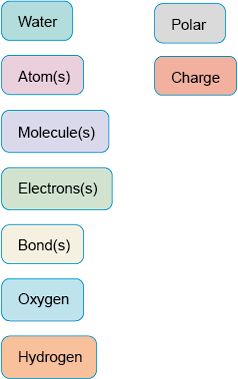
Focus on a few key concepts. Single words should be used to represent each concept, so for example, the chemistry of water might include ‘molecule(s)’, ‘water’, ‘electron(s)’, ‘charge’, ‘polar’, ‘atom(s)’, ‘bond(s)’, ‘oxygen’ and ‘hydrogen’.
Concepts can be represented by pictures. When working with children you might provide them with a list of concepts or generate them with children through a brainstorm activity.
Sort through the concepts
Write the concept words or draw pictures on small pieces of paper so they can be moved about. Sort through the concepts and leave out ones you do not know or do not think are related to the other words (Figure 7).
Forming the map
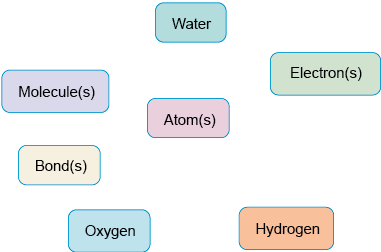
Put the remaining concept words on a sheet of paper. Arrange them in a way that makes sense to you, so that words that you see as closely connected are near each other (Figure 8).
Sticking down the terms
When you are satisfied with the arrangement, stick them down or write the concepts on the sheet, surrounding each with a box to denote that it is a concept.
Linking the pairs
Next, identify pairs of concepts that you see as being directly connected (Figure 9).
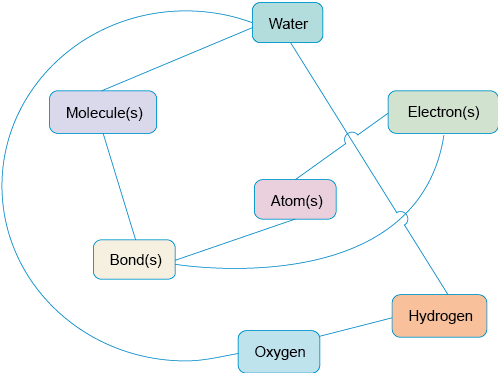
Remember that in a concept map, only pairs of concepts are linked – each line is a separate, independent link and can be read forwards or backwards.
Adding the connecting phrases
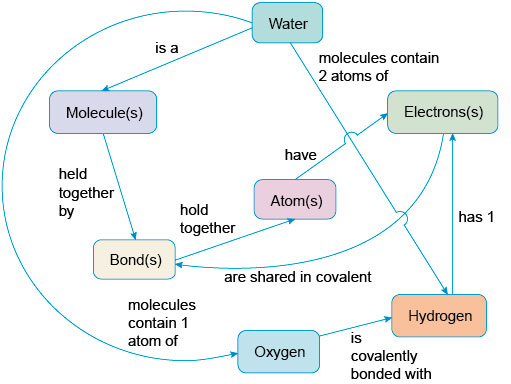
Writing in the link words and adding arrows are crucial steps. Without these, concept maps are of little value (White and Gunstone, 1992).The arrow indicates the direction in which to read – which word is first in the ‘sentence’ (Figure 10).
Final checks
Go back to any concept words that you did not include in the first step, and see if you can include them in your map.