
3 Preparing the tomb
When a wealthy individual decided it was time to begin building a tomb for himself and members of his family, the first job would have been to engage a team of workers and to find a site – and to determine its approximate size. This process would have varied, depending on the circumstances of the individual, the scope of the task, and the physical conditions imposed by the prospective site. It is worth underlining that the workers were not slaves. They were appointed according to their skills, and they would have received payment, probably in grain.
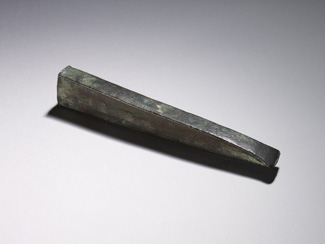
First of all the chambers of the tombs had to be hollowed out of the living rock. Even though a relatively small private tomb was a minor enterprise compared to major state building and quarrying projects, this in itself was no mean feat. Remember that we are talking about bronze-age technology and toolsmade of relatively soft metal such as copper and bronze would soon lose their edge (Figure 7). Much of the work would have been done by using harder stones, such as flint. The labour-intensive and time-consuming nature of even this preparatory work should not be overlooked.
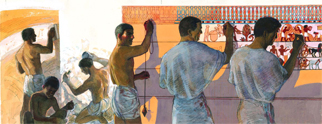
These factors have a consequence for the decorated tomb-chapels. On the west bank of the Nile at Thebes, much of the stone into which they were cut was not of very good quality in terms of hardness or fine grain. As such it was not very often suitable for carving even shallow reliefs. Furthermore, as restoration of the backs of the paintings has recently revealed, the hollowed-out rock surface as it was left was not smooth enough to paint on directly. The solution was to coat the relatively rough hewn walls with plaster (Figure 8).
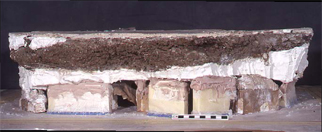
The Nebamun tomb makes use of two different kinds of plaster. First there is a coarse, thick kind of render, made from Nile mud incorporating various bits of vegetation, most notably short lengths of straw. This would be applied to the rough, somewhat ‘bobbly’ surface of the hollowed-out rock chamber. When that was dry, it had a layer of finer, thinner lime-plaster put on top, like a modern ‘skim’ coating, to provide a suitable surface for painting (Figure 9).
At this preparatory stage, the decoration of the tomb must be born in mind. Paleolithic cave paintings, for example, were painted directly onto the rock, often taking advantage of the shape and contour of the rock itself to help animate the depicted scenes. Some ancient Egyptian tomb decoration also took advantage of this, for example the tomb-chapel of Senneferi (Theban Tomb 96B), where the rough surface of the rock-cut ceiling is decorated with painted vines.
However, the majority of Egyptian paintings were flat, and as David Summers has convincingly argued, the conception of – and the technical ability to realise – a plane surface on which to situate representations was itself a major advance in the realm of ‘art’.