
5 Adding an observation
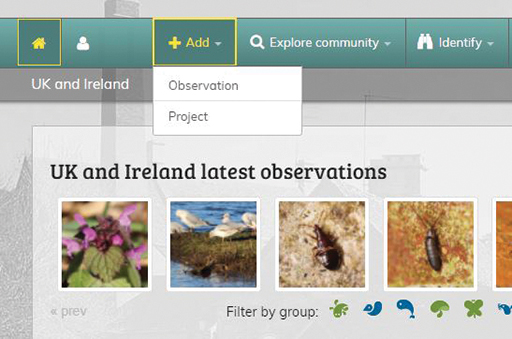
Adding your own observations to iSpot allows you to get the most out of using iSpot and to participate fully. When logged in, you can post observations simply by clicking on the ‘Add observation’ button, or by clicking on the ‘Add’ tab in the taskbar at the top of the home page, as shown in Figure 7.
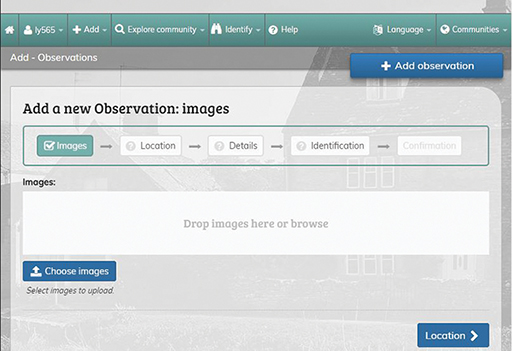
Once you’ve arrived at the Add observation [Tip: hold Ctrl and click a link to open it in a new tab. (Hide tip)] page (Figure 8), just fill in the details requested there (e.g. location, date, habitat). Note that you don’t have to complete every box on the page, only those marked with a red asterisk.
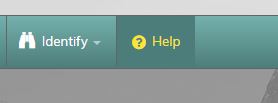
Help on the individual sections is available wherever you see the small green question-mark symbol shown in Figure 9.
Activity 2: Adding an observation in iSpot
First, log into your iSpot account. Make sure you have any photos and notes you took about your observation ready. Then follow this six-stage process of creating an observation:
Upload a photo
Add one or more images to your observation. You can select them by browsing through your files or simply drag and drop them directly onto the page. You can add several photos of the same plant, animal, etc.
If you don’t have a photograph but would still like to post an observation, just describe what you saw in as much detail as possible, including size, colour, behaviour, etc.
Add a location
As part of making an observation, you need to provide the location of where you saw it. There are several ways to do this:
- The location may be added automatically when you upload a photo if you took it using a camera with GPS functionality.
- You can add a new location manually by entering a place name, postcode or grid reference, or simply by navigating to the location on the map. When you have found the target area on the map, click on the exact location. You will also need to provide a location name.
Note that when you set up the location, you can choose to hide its precise point on the map. If you tick the option for ‘Hide precise location’, iSpot will display only a 1 km grid square and other users won’t be able to see the precise location of your observation. This can be useful if you do not want to disclose an exact location and would like to ensure it remains private.
Other details
Now is the time for you to provide as much detail as you can to describe what you saw. Add a title and the date of your observation, and select the type of habitat in which you observed your species.
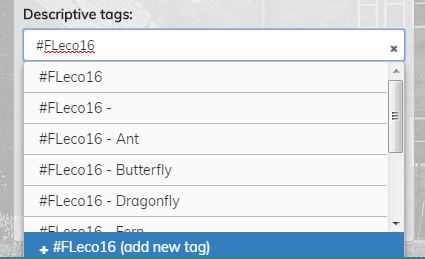
Tag your observation
Tagging helps to group observations together and works in the same way as using hashtags in Twitter. To tag an observation, simply add some descriptive words as a reference for any activity (Figure 10). For example, to make it easier to share your observations with fellow learners on this course, entering the tag ‘#BOC CitizenScience’ in the ‘Descriptive tags’ box will make sure that all contributions containing this tag will be grouped together.
Identification – what did you see?
Next, click on the ‘Identification’ button to go to the next stage of the process: adding an identification. If you don’t know the name of your species, that’s fine; just leave the boxes blank and other users on iSpot might be able to help. However, if you do know the name of the species you have observed, you can add it in here, either by entering either its scientific name or its common name. Wherever possible, it is advisable to choose a name from the drop-down list that appears when you start typing in these boxes. (Taxonomy and species dictionaries will be discussed in more detail later this week.)
Once you have filled in a name, select an option from the drop-down menu under the heading ‘How sure are you?’ to indicate your level of certainty about your observation. Then add any relevant notes you’ve recorded in the box under the heading ‘ID notes’.
Confirmation!
Simply click on the ‘Confirmation’ button to post your observation to the community.
It’s that simple. And if you’d like to add other observations, simply repeat the steps above.
Seeing your contribution – iSpot’s reputation system
If you want to see all of the observations you’ve made on iSpot so far, simply click on the ‘Profile’ button on the menu bar and then select ‘Your iSpot’ from the drop-down menu that appears. Then select the ‘Observations’ tab from the next page to see any activity or changes associated with your posts.
If you have contributed observations, or have some knowledge of any species group, you can now go ahead and assist other users (including your fellow learners ) by agreeing with or adding identifications to their observations.
iSpot rewards you as you contribute, scoring your activity on the site with badges for each of the species groups represented: birds, fish, amphibians and reptiles, invertebrates, mammals, plants, fungi and lichens and other organisms. Points (shown by an icon representing each group) are awarded based on ‘the weighted agreements given by other participants for identifications’ (Silvertown et al., 2015, p. 133). These ‘reputation points’ demonstrate your skills and knowledge and can be earned when you propose an ID that is then confirmed by others in the community. The number of points is weighted in proportion to the reputation scores of the individuals who support your identification.