Training guide
| Site: | OpenLearn Create |
| Course: | Active teaching and learning for Africa (2): Inclusive teaching |
| Book: | Training guide |
| Printed by: | مستخدم ضيف |
| Date: | Wednesday, 24 June 2026, 6:36 PM |
Table of contents
1. Introduction
Welcome back to this enhanced SPRINT school-based continuing professional development (SBCPD) programme designed to support active teaching and learning in line with the revised Zambian school syllabus. The programme will take six terms (two school years) and will be the focus of your Teacher Group Meetings (TGMs). If you are outside Zambia, you can use the activities and resources to work with colleagues, to support your professional development. It is suggested that you study courses 1-3 in year 1 and course 4–6 in year 2. The titles of the courses are:
Year 1
- Course 1: Classroom management for learner-centred teaching
- Course 2: Inclusive teaching
- Course 3: Assessment for Learning
Year 2
- Course 4: Managing and supporting learner-centred classrooms
- Course 5: Literacy across the curriculum
- Course 6: Being a reflective practitioner
In the previous course you worked on Classroom management for learner-centred teaching and you explored how to use questioning, pair work and local resources to support active teaching and learning in your class. You have practised these approaches and have hopefully recorded your thoughts and ideas in your Teacher Notebook. In the TGMs you have also discussed the different approaches and how to use them.
In this course you will be looking at what is meant by inclusive teaching, how you can use a variety of teaching approaches and strategies such as group work, storytelling, songs, games and roleplay to involve all the learners in your class. You will end the course looking at the Zambian Revised School Curriculum and how the approaches you have tried so far can support you in teaching skills and values alongside knowledge.
Teachers in Chisamba who followed the first course of these training resources reported that it made them realise that some of the lower attaining children could do more than they thought. This was because through careful questioning, pair work and the use of local resources, children became more engaged. Teachers noticed this because they were spending more time walking around the room, listening to children while they talked about their work.

Picture: A poster created by a group of head teachers and SICs in Chisamba after one term of the SBCPD programme, describing the benefits and the challenges.
Activity 2.1: Learning from othersWatch the DESO from Chisamba talking about the impact of the enhanced SBCPD programme in Chisamba in the video below. As you listen, make notes in your Teacher Notebook about the changes the DESO has seen in relation to:
What did you find the most interesting, the most surprising and the most inspiring of the things she said? Write your thoughts in your Teacher Notebook. |
TESSA examples
As you work through these resources you will find examples of how teachers in Africa have used different strategies to support inclusive teaching. These examples are drawn from the Teacher Education in Sub-Saharan Africa (TESSA) resources. In year 2 you will be looking in more depth at these resources and how they can help your teaching, but if you want to find out more you can do so on the TESSA Website: http://www.tessafrica.net/.
2. Being inclusive
Inclusive education means involving ALL students in your class. It is a process, not something you do occasionally. It is every teacher’s responsibility, not just those who have been asked to support children with a special need. The activities this course will help you to think about how you can be inclusive in your school.
It can be difficult to include everyone in the lesson, especially if:
- you have a large class
- some children’s behaviour is challenging at times
- you have few resources
- some children have a need as a result of poor hearing, a physical disability or visual impairment.
The inclusivity challenge which affects many teachers is dealing with a large class.
Some strategies for teaching a large class include:
- Concentrate on a few students in each lesson, making sure that over time, you assess and support everyone. Each day record the names of students you have helped and every few days, try to get around to everyone;
- Move around the room while children are working.
- Set tasks to do in groups and pairs so you can observe students working and they can help each other.
- Use local resources or action songs to engage everyone.
- Share information about your children with other teachers to help each other get to know them.
- Share teaching resources and ideas for collaborative tasks with colleagues.
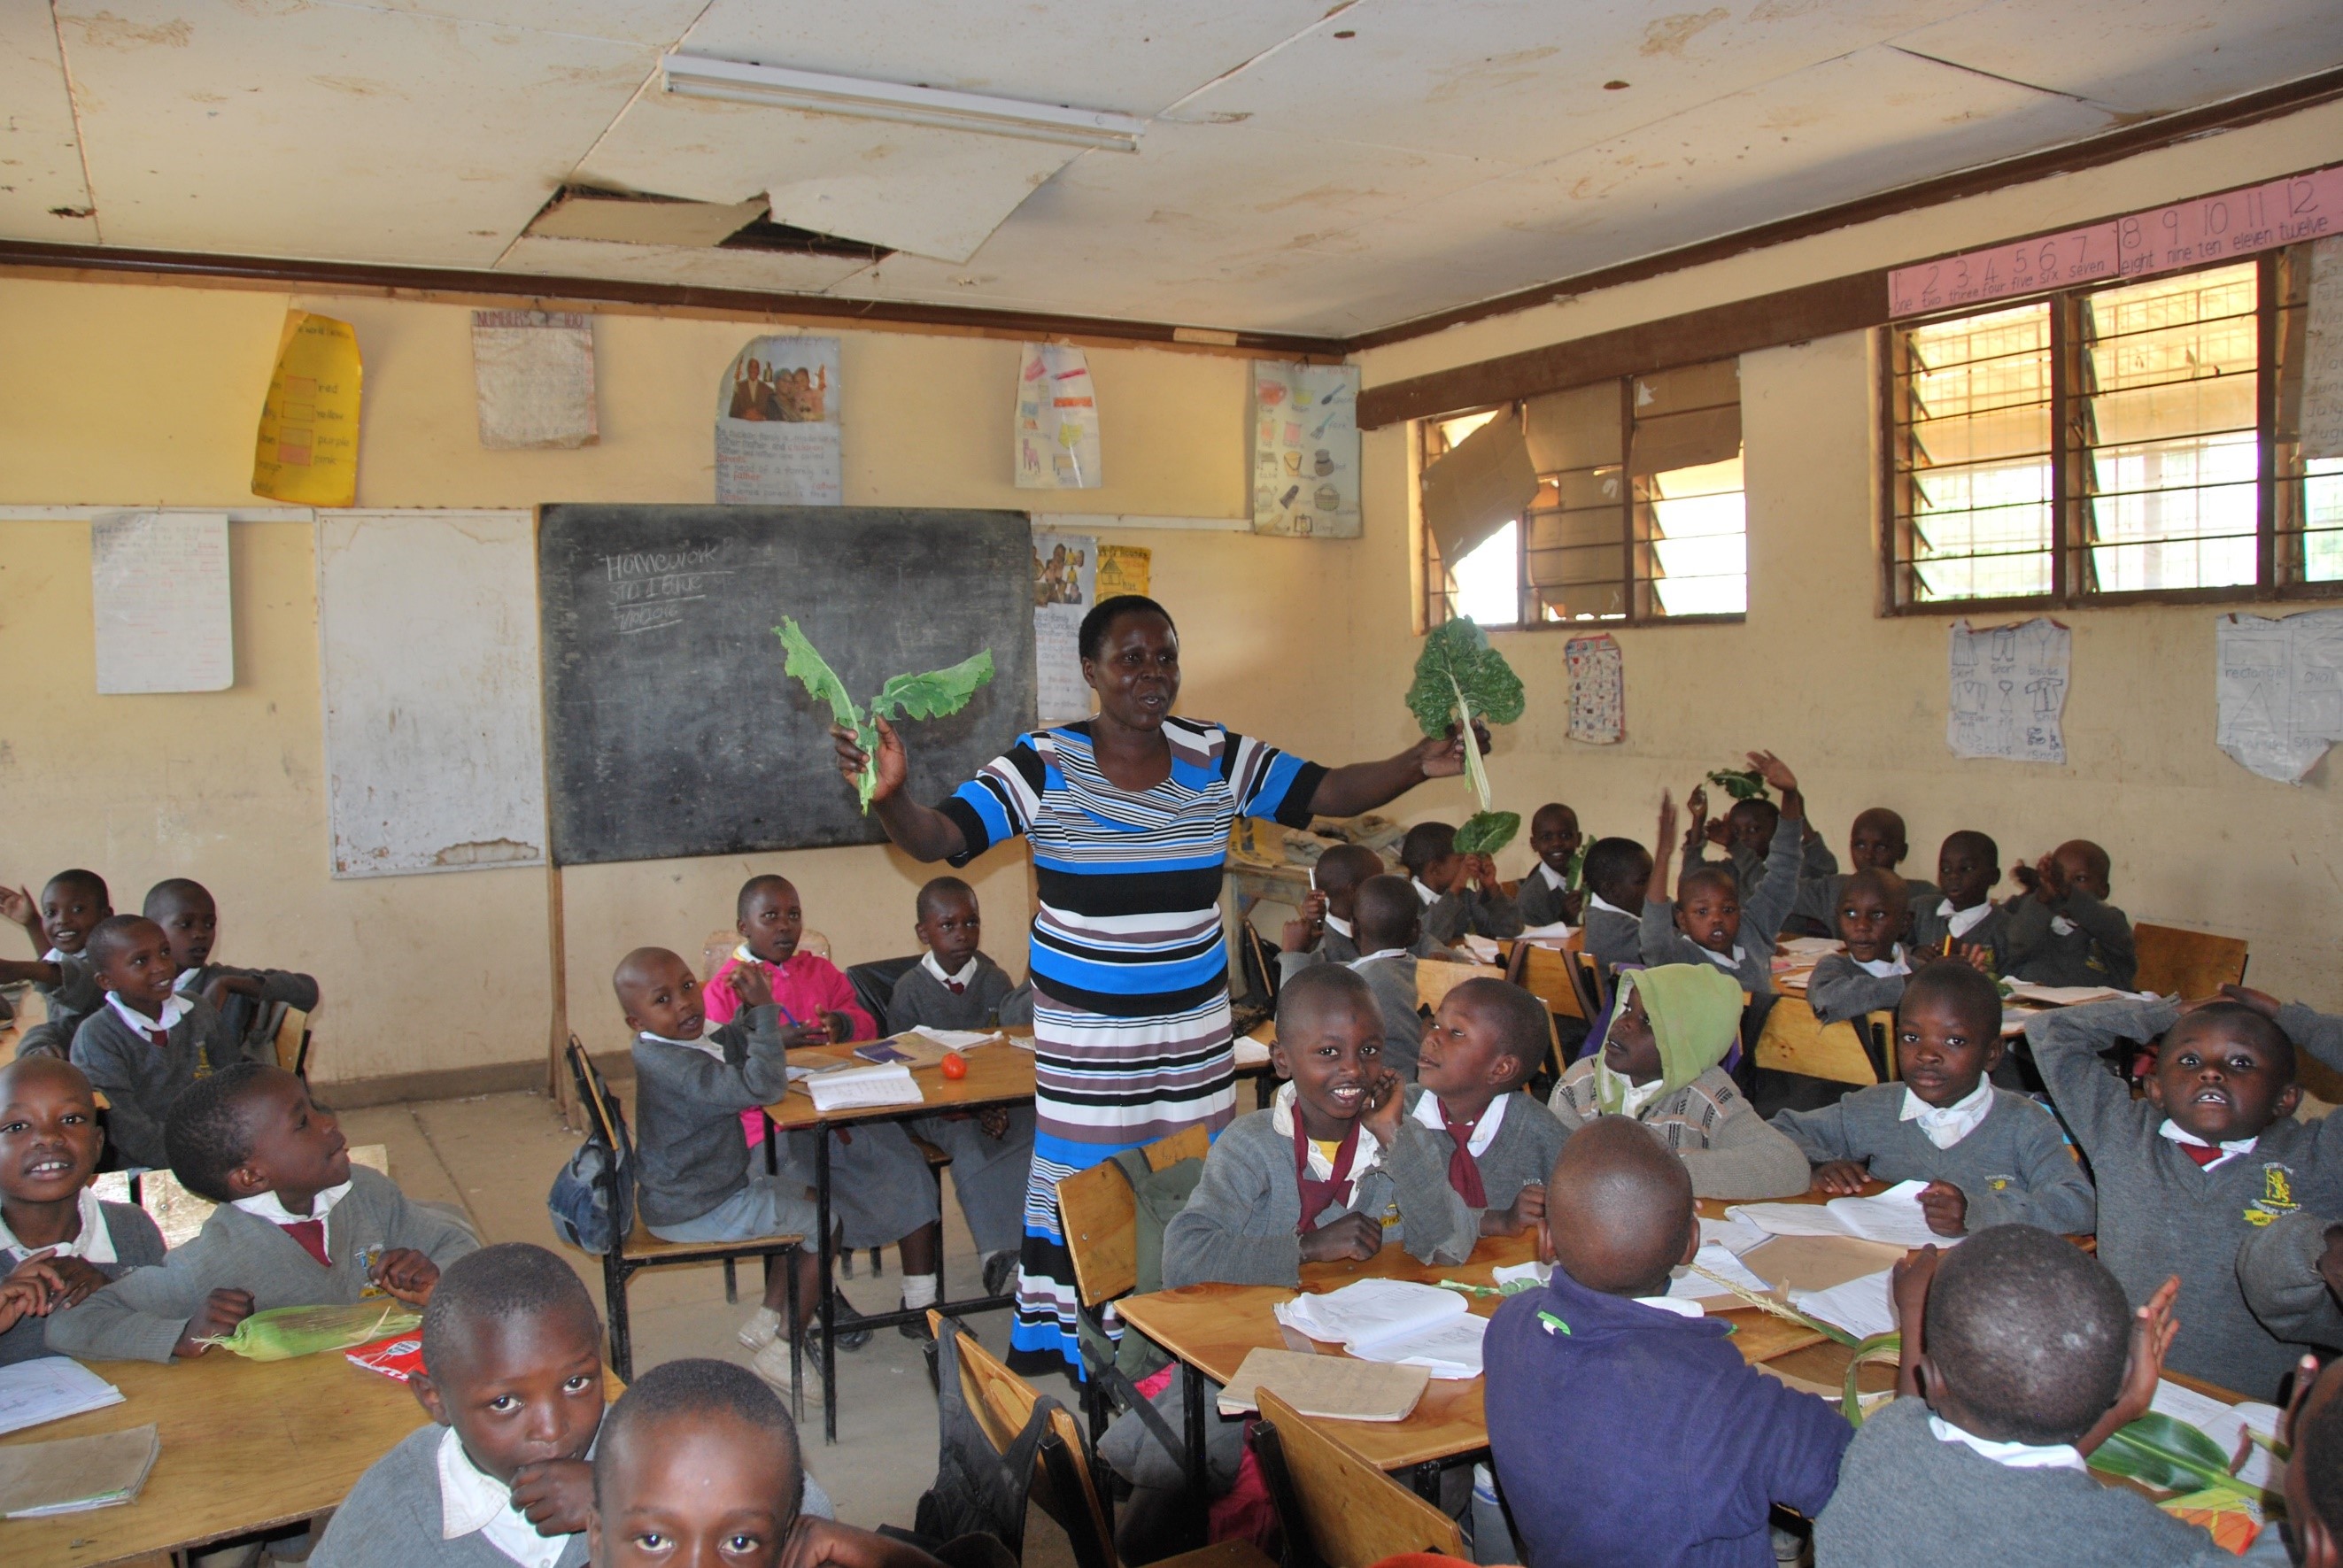
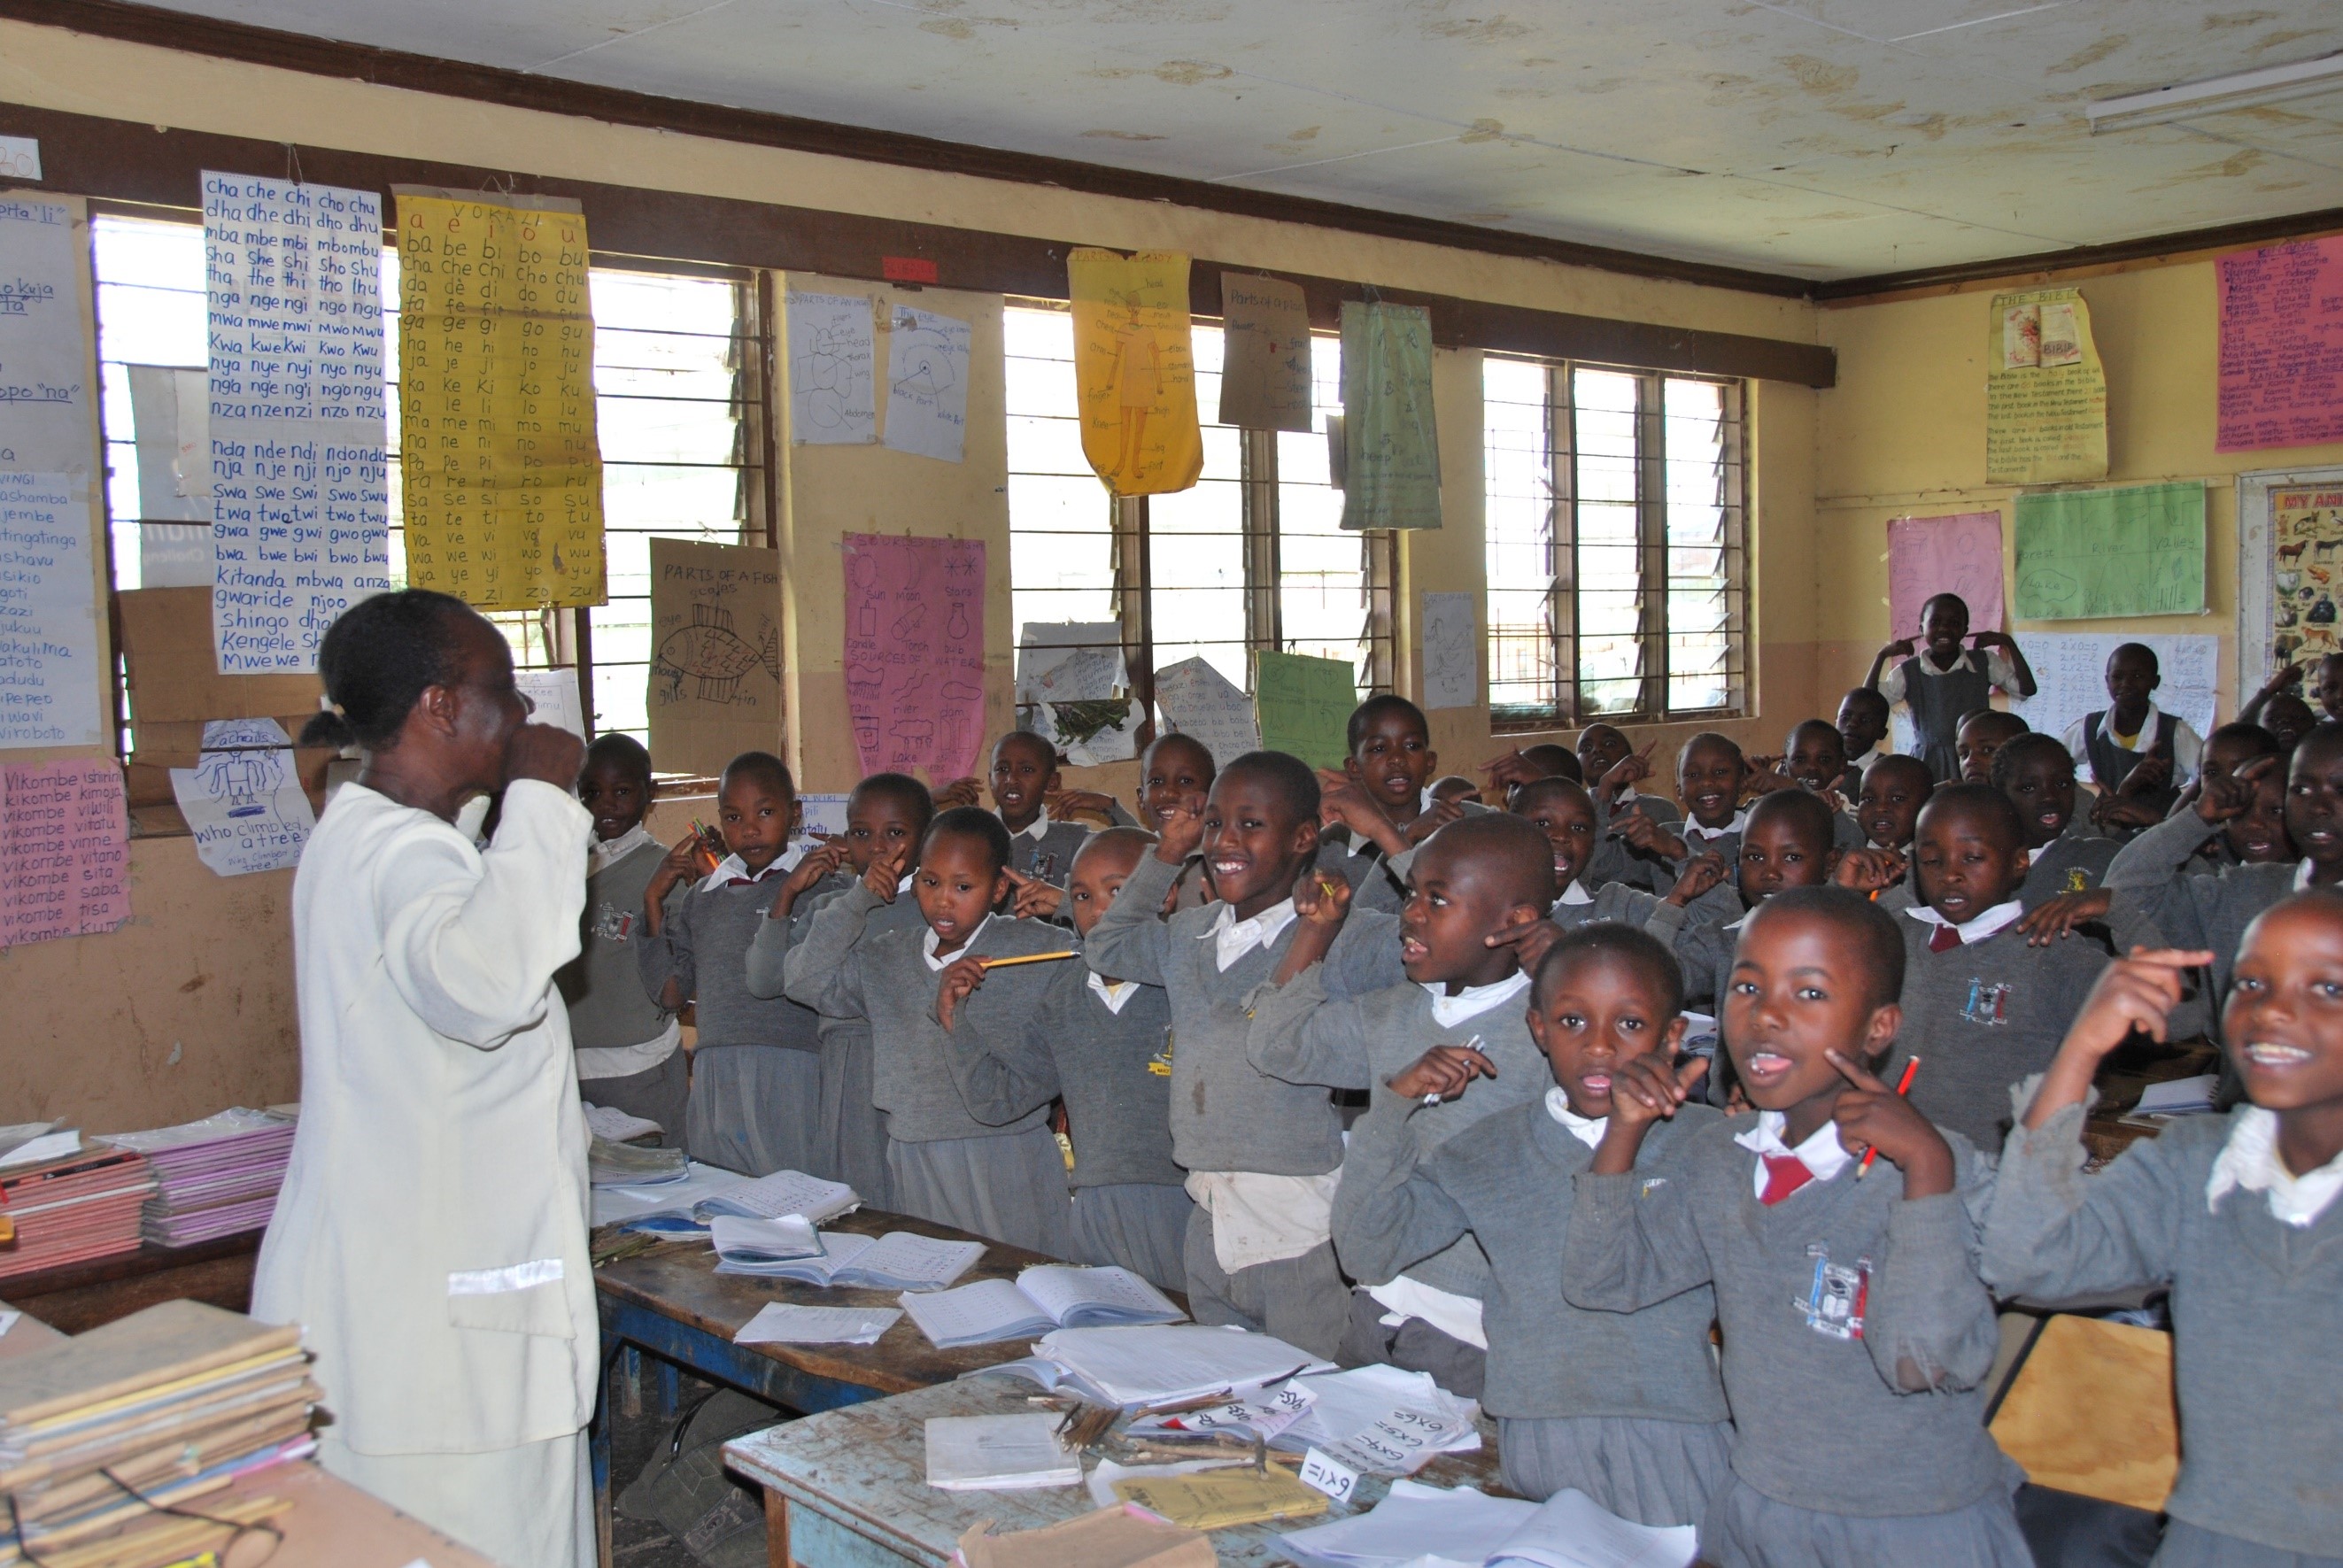
Activity 2.2: Teaching a large classLook at the pictures below. Both classes have over 60 children in the class. What strategies are the teachers using? With a partner, go through the list above and talk about the ideas. Write your top three in your Teacher Notebook, then share your choice with another pair. Which of these ideas could you use most easily in your school?
|
2.1. TOP TIPS for being inclusive
If you have children with special needs in your class, but no specialist equipment – such as braille resources, special chairs or hearing aids – it is tempting to think that there is nothing you can do to help that child. That is not the case.
All teachers can:
- get to know students as individuals
- represent ideas and concepts in different ways using written, visual or audio resources
- organise well-structured, purposeful pair and group work
- regularly revise key knowledge and concepts
- display key words and pictures related to topics on the wall
- create a welcoming atmosphere which promotes participation and praises effort
- model good manners
- use concrete objects and experiences whenever possible, relating subject content to the experiences of students’ lives
- move students to the most appropriate part of the classroom (so they can maximise use of hearing/vision and are minimally distracted by others).
This will benefit all the children in the class.
You might notice that despite good quality teaching, some students are still not achieving as well as you would like because they have specific needs or challenges. At this stage teachers can help each other by:
- providing simple, locally made teaching aids if necessary (e.g. a writing frame/enlarged print)
- working closely with parents and other teachers
- pairing students with a peer supporter
- switching the time of a lesson (for example move agriculture to the first lesson so that a pupil with albinism is less affected by the sun).
After implementing this additional support, you may feel that the student is still not achieving as expected. Speak to the headteacher about the possibility of accessing support and advice from more specialist sources. It may be possible to:
- arrange for assessment by a specialist
- liaise with the appropriate authorities for the provision of specialist resources (e.g. braille material/mobility equipment)
- make links with special schools to share expertise
- make links with other schools or teachers who might have students with similar needs.
The first list includes things that everyone can do in their lessons to help all children feel included. The second list is things you can do together with others and the third list is things that are outside your control. While you are waiting for a proper assessment or special equipment, you can support all children by paying attention to the first and second lists.
2.2. Being inclusive in the classroom
Activity 2.3: Being inclusive
Watch the video below which shows a Grade 1 teacher being inclusive. As you watch, make notes in your Teacher Notebook.
Working in groups of two or three, plan an activity to try in your lesson which uses one of the ideas from the first two lists above. You can use the classroom examples provided below to help you. Try out your activity in a lesson. Afterwards, note down in your Teacher Notebook any observations you made and be prepared to discuss your experience with a colleague. If there is the opportunity to observe each other, ask your colleague to focus on one or two children and to notice how involved they are in the lesson. |
Classroom Example 2.1: Science
Read Martha’s experience of teaching integrated science. How does she ensure all learners take part in the lesson? Martha was teaching integrated science to Grade 3. They need to know the main parts of the human skeleton (skull, neck, arms, ribs, hips, legs, feet, spine). Although their lessons are in the local language, Martha knows that next year, they will be taught in English. She uses an old cereal packet to make ten sets of labels for the parts of the body. She writes the Zambian word on one side and the English word on the other side. She arranges the children in groups of six. One child acts as the model, and one child holds the cards and reads out the Zambian words. The other children have to decide where on the model they should put the card. When they have used all the cards, they check the model of the group next to them. She asks them to change roles and repeat the process, but to use the English word instead. At the end each child draws a picture of a figure and labels the skeleton using the Zambian and the English word. |
|
Did you notice...
|
Classroom Example 2.2: Social studies
Listen to the audio below or read about how teacher James ensures all learners are included when he teaches about the Zambian family in his class. Audio transcript James teaches social studies to Grade 7. Their examination is fast approaching and he is getting a bit behind with the syllabus. The next topic is the Zambian Family. He is apprehensive about teaching this topic because he is aware that Precious’ mother has recently died after a long illness and he’s worried that talking about families will make her sad. He talks to the Grade 6 teacher, Namwinga, who taught them last year. She remembers that in that class Changu is looked after by her granny and Joseph’s family is headed by his older sister. So there are several types of family in the class. By focusing on this, she suggests James could emphasise that whatever the type of family, the reasons why families are important still apply. Before the lesson he gets to talk to Changu and Joseph and tells them about Precious. He asks them to sit near her during the lesson. He also asks Precious how she and her brothers and sisters are coping. He tells her they will be talking about families and that Changu and Joseph would like to work with her as they are in a similar situation. James starts the lesson with a brainstorming session about all the different types of family groups that exist. The class suggests nuclear families, extended families, single-parent families, child-headed families. They do a quick survey of all the different kinds of family in the class and then work in groups to discuss why humans live in families and why it is important to respect differences in family types. In Maths the next day they draw a bar-chart of the results.
(Adapted from TESSA Life Skills Module 2, Section 2). |
|
Did you notice...
|
3. Using group work in your classroom
Group work can be a great way of helping your learners; it encourages them to think, exchange ideas and make decisions. Your learners can teach and learn from each other, a powerful and active form of learning.
Group work is more than learners sitting in groups; it involves working on a shared learning task with a clear purpose. You need to be clear why you are using group work for learning rather than learners working on their own or in pairs. Successful group work has to be well-planned and purposeful. Using group work effectively requires practise – by trying, reflecting and trying again, you will become expert.
Before you start, be clear about what you want to achieve. Group work needs to have a clear purpose or objective. For example: ‘by the end of the session we will be able to describe how rain is formed and what it does to our local landscape.’
Activity 2.4: Using group workListen to the audio or read the transcript about how Olivia, a Grade 4 class teacher from Mumbwa used group work to teach about duties and obligations of citizens. She is now reflecting on the activity she planned. Before you listen to the audio or read the transcript, write in your Teacher Notebook the things you think Olivia would need to think about before organising a group work activity. After you have listened to Olivia or read the transcript reflect on and discuss with colleagues how this would work in your classroom.
Write your thoughts in your Teacher Notebook to review when you plan future lessons.
Audio transcript Hello, my name is Olivia and I am a Grade 4 teacher with 50 learners. We are currently studying citizenship and the obligations and duties of a citizen. I decided to use some group work to reinforce the work my learners have been doing over the past few days. It’s quite difficult to do group work in my Grade 4 classroom as the desks are in rows and are very heavy. I decided to put the students in groups of four by asking students in rows 1, 3 and 5 to turn their chairs round to face the students in the row behind them. This way I can easily make a group of 4 without spending too much time moving the furniture! I told the students that they have 10 minutes to make a list of the obligations and duties of a citizen. They must decide on one student to be the scribe and one person to be the spokesperson. I told them I will be very strict with timekeeping. After 10 minutes, I stopped the activity. I asked the spokesperson from each group to share one item from their list and as they spoke, I wrote it on the board. I stressed that there must be no repetition, so all the groups must listen when each student speaks. As each group added a different item, I wrote it on the board. After going around all the groups I asked if there are any other things to add and if there are any points that are missing. To finish the activity the class copied the list from the blackboard into their books, and I walked round the classroom overseeing the learners’ work and helping those who needed assistance.
|
3.1. Planning group work
When you are introducing the group work:
- Put learners in groups. Don’t make them too big. Groups of 3–6 mean that everyone can contribute.
- Once learners are sitting in their groups, tell them how you expect them to behave (e.g. to respect each other, listen, contribute).
- Give out individual roles (e.g. a spokesperson or a recorder).
- Explain the task clearly and write it on the board.
- Tell the learners what they have to do, and how long they have.
- Ensure they understand what you expect of them. A good way of doing this is to ask one or two to explain to you what they have to do. This is very important because if they do not understand what they have to do, the session will get off to a bad start.
- Allow learners to ask questions before you start and be helpful with your answers.
|
Remember Olivia who was teaching Grade 4. Did you notice that…
|
While learners are working in groups:
- Walk around the groups and check how they are doing.
- Give them time to work things out for themselves. If you give them answers too quickly, they will rely on you rather than on themselves.
- If necessary, repeat your instructions, or respond to a question with a question. For example, ‘what do you think would be best?’
- Be positive about how learners are doing and help them where necessary.
- If the task enables you to carry out formative assessment, be ready to make notes about the contributions of individuals as you are observing the learners at work.
To finish the group work
- End with a whole-class session. Try to make the final session an exchange of ideas and avoid repetition as learners will get bored and stop listening. You could:
- Collect one idea from each group about something they have learnt.
- If they had to make a poster or picture, display the pictures and give them time to walk around and look at each other’s work. Ask general questions about which posters learners liked and why.
- If they all researched something different, they could give a short presentation (but not if they all considered the same question as it will become repetitive and boring).
- Think about how well you did in managing the group session. In your Teacher Notebook, write down what went well, and what you could have done differently to make the groups more effective. Use this information to develop your techniques for the next time and note your own improvement and that of your learners.
3.2. Group work in practice
Activity 2.5: Analysing teachingWatch the video below which features a Grade 1 teacher using group work to teach about wild and domestic animals. Think about what you have read about using group work in your lesson.
Write your observations in your Teacher Notebook as they will be helpful to you when you plan group work activities for your lessons.
|
Activity 2.6: Planning group workThink of a lesson in the next week where you could use a group work activity. Make notes in your Teacher Notebook:
Share your answers with your partner/s and add to your notes if you want to add anything to your initial thoughts. Use the top tips and classroom example to help you. |
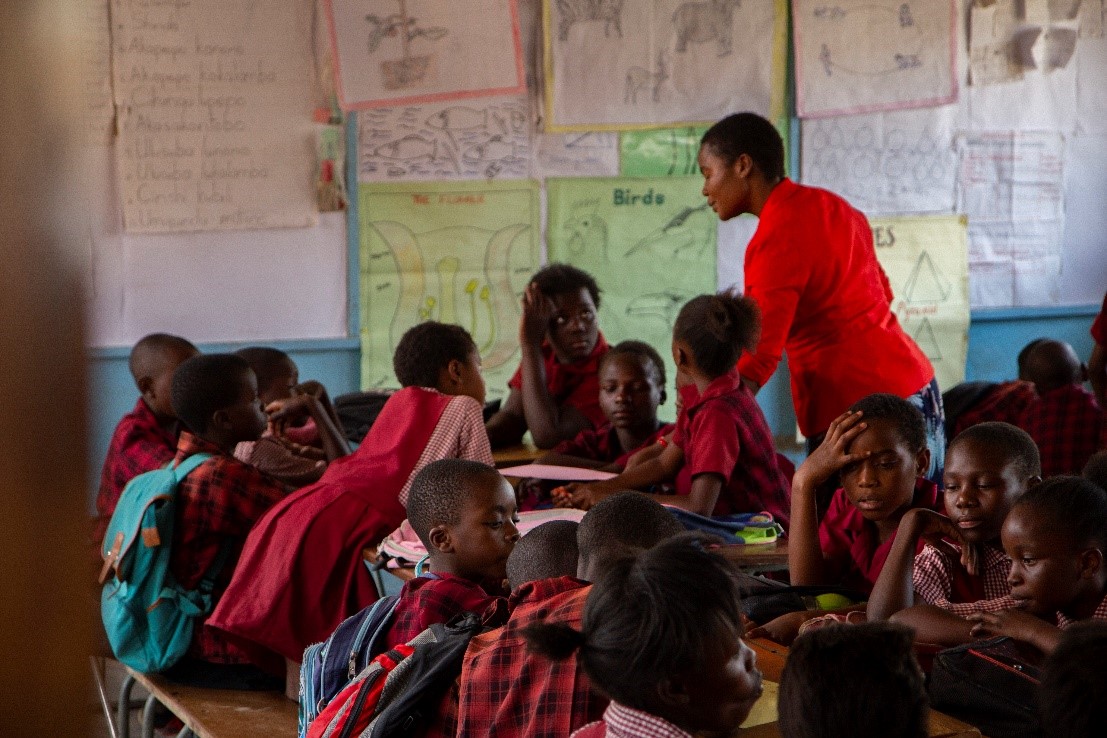
Group work in a classroom in Zambia – teacher supporting one group while other learners work together in groups
3.3. TOP TIPS Group work suggestions
Some examples of tasks that work well in groups are:
- Presentations: learners work in groups to prepare a presentation for the rest of the class. This works best if each group has a different topic or focus to avoid repetition when/if they present to the class. Be very strict about the time that each group has to present and decide on a set of criteria for a good presentation. Write these on the board before the lesson.
Learners can use the criteria to plan their presentation and assess each other’s work. The criteria could include:
- Was the presentation clear?
- Was the presentation well-structured?
- Did I learn something from the presentation?
- Did the presentation make me think?
- Problem solving: learners work in groups to solve a problem or a series of problems. This could include conducting an experiment in science, solving problems in mathematics, sequencing a story in English.
- Creating something: learners work in groups to create a story, a song, a model to explain a concept, a news report on an issue or a poster to summarise information or explain a concept. Spending five minutes at the start of a new topic to brainstorm their ideas will tell you a great deal about what they already know.
- Envoys: this involves each group working on a different task. Then, in turn, each group splits up and one or two people from each group move to another to teach them what they have found out or learnt. This has the advantage that everyone in the group has to become an expert.
- Circle of Voices: this involves learners taking turns to speak. Learners are in groups of four or five. Give students a topic and allow them a few minutes to organise their thoughts about it. Then the discussion begins, with each student having up to three minutes to speak. During this time, no one else is allowed to say anything. After everyone has spoken once, students can ask each other questions.
Classroom example 2.3: Exploring SoundsMartha was teaching her Grade 6 class about sound. First, she prepared some resources in order to make different noises. She collected the following:
She organised her 50 students putting them into groups of five to investigate ways to change the sounds made by a range of objects. She gave each group one set of resources (some ‘drums’, five glass bottles with water, four plastic bottles with sand etc.). She asked her pupils to discuss the following two questions in their groups and then carry out investigations to find the answers:
Each group recorded their results on a poster, including any patterns that they found. Martha mixed up the high and low attaining pupils and while she walked around, she checked that the students who find the work more difficult were being involved in the activity. After the activity had finished, she put the posters on the wall and they walked around the room to look at each other’s. She asked them to discuss:
(Adapted from TESSA Primary Science, Module 3, Section 2, Activity 2) |
|
Did you notice...
|
4. Storytelling, songs, games and roleplay
Children learn best when they are actively engaged in learning. Storytelling, songs, poems or rhymes, and roleplay are some of the methods that can be used with all ages and across most curriculum areas, including maths and science.
Storytelling
Stories help us make sense of our lives. Many traditional stories have been passed down from generation to generation. We were told them when we were young, and they explain some of the rules and values of the society that we were born into.
Storytelling can lead to many different activities to support learning. For example:
- Learners can be asked to:
- write down all the colours or animals mentioned in the story
- draw pictures
- recall key events
- make up dialogue
- work in groups to act out a story
- change the ending of a story.
- Learners can be divided into groups and given pictures or props to retell the story from the point of view of a character.
- By analysing a story, older learners can be asked to determine fact from fiction, debate scientific explanations or solve mathematical problems.
If you give structure, content and language to work with, the learners can tell their own stories, even about quite difficult ideas.
Activity 2.7: Storytelling to support learningRead the text about Delia, a Grade 3 teachers who has used a story to teach Science. As you read the story, make notes in your Teacher Notebook about what teacher Delia would need to have planned and prepared before the lesson. Delia teaches Grade 3. In Science, during the past week, she has been teaching the students about the types of vertebrates. They have pictures that she has cut out from magazines and stuck on the wall. The students have labelled them with the correct names and grouped them by animal type. Today, Delia wants to make sure that the students are familiar with the different animals, their names and type before she moves on to the next topic. She sits the students in groups of six and gives each child a card with one of the six animal types written on it – mammal, invertebrate, bird, amphibian, reptile and fish. She tells them that she is going to read them a story and each time she mentions an animal they have to quickly decide which type it is and hold up the correct card. This means that they have to listen very carefully to the story. As Delia tells the children the story, she is able to easily see which ones are still having difficulties with identifying the animal groups. By sitting them in groups, the high attainers are able to help their friends by prompting them to show their cards. After telling the story, Delia asks the children to retell the story in their groups and moves around the classroom monitoring and helping where necessary. |
|
Did you notice...
|
You can use stories from your own knowledge and local traditions, but there are also some useful websites where you can find stories for your lessons, for example the African Storybook website http://www.africanstorybook.org. Here you will find hundreds of stories at different levels in a range of African languages. You can download some on to your phone.
4.1. Songs, poems and rhymes
Singing together and reciting poetry or rhymes can help to make all learners feel included because individual performance is not in focus. The rhyme and rhythm in songs and poems makes them easy to remember and helps language and speech development.
Activity 2.8: Using songsWatch the video below where the teacher is using songs in a Grade 1 lesson. As you watch, take notes in your Teacher Notebook to answer these questions:
Check your answers with other teachers.
Plan your own song activity Think about what you are teaching next week and with the teachers in your TGM think of a song, poem or rhyme that could support learning. Think about how you can use it and anything you might need to prepare before the lesson. |
4.2. Games
Through games, learners can gain a variety of important skills, such as critical thinking, creativity and teamwork. Choose games that are appropriate for the level of your learners and for the classroom environment. Games can be used across content areas and over a variety of age ranges to support content and deepen learning.
Classroom Example 2.4: Using gamesListen to the audio or read the transcript of Patricia explaining how she used a game to support her numeracy lesson in Grade 2. While you listen, think about these questions. Afterwards, discuss them in pairs.
Audio transcript Patricia is a teacher in Liteta. In Grade 2 children need to be able to add and subtract numbers up to 100, in columns. Patricia noticed that some of her class were struggling to recognise two-digit numbers up to 100, even though they had done it in Grade 1. She invented a Bingo game to help her learners practise recognising numbers. She played the game with the whole class first. She gave each pupil a card and some buttons, and some stones she had collected on her way to school. Each card was different. The cards had 24 numbers between 1 and 99, arranged in 4 rows and 6 columns. A few drew pieces of paper, numbered 1 to 99, from a box and read them to the class. If a pupil found the number read out on their card, they placed a button or stone over it. The first pupil who had buttons/stones covering a row, column, or diagonal correctly won the game. As the pupils played the game, Patricia went round the class helping. The successful completion of a row, column, or diagonal is evidence of the ability to recognise two-digit numbers correctly. Next, she divided the class into groups of eight and they played the game at their own pace, taking it in turns to be the caller. Patricia also allowed pupils to play Bingo at break and she was surprised how many pupils played, especially on a wet day. She also noticed how much more confident they had become in mathematics classes. She extended the game by making more cards and more pieces of paper to include numbers up to 1000. (Adapted from TESSA Numeracy, Module 1, section 1, Case study 2) |
4.3. Roleplay
Roleplay is when learners have a role to play and they speak and act in that role, taking on the behaviour of the character they are playing. There is no script but it is important that learners are given enough information by the teacher to be able to take on the role.
Roleplay can help learners develop the confidence to speak in different situations, for example, by pretending to shop in a store, provide tourists with directions to a local attraction, or buy a ticket.
You can set up simple scenes with a few props and signs, such as ‘Restaurant’, ‘Clinic’ or ‘Church’.
Ask your learners, ‘who works here?’, ‘what do they say?’ and ‘what do we ask them?’ and encourage them to act out the scene and make notes of the language they use. In rural areas, roleplays could involve chiefs, hunters, family life etc.
Roleplay can develop older learners’ life skills. For example, in class, you may be exploring how to resolve conflict. Rather than using an actual incident from your school or your community, you can describe a similar but detached scenario that presents the same issues by asking learners to play the role of someone who experienced a specific situation.
With older children, roleplays can be used to explore controversial issues, with different groups researching different sides of the argument and then having a structured debate.
Roleplay has a number of advantages, because it:
- develops an understanding of other people’s feelings through exploring real-life situations
- promotes development of decision-making skills
- actively engages learners in learning and enables all learners to contribute
- promotes a higher level of thinking.
Activity 2.9: Planning a lesson using roleplay, a story or a gameChoose a lesson from next week. With your partner/s think of a situation in which you could use roleplay, a story or a game. Think back to group work and plan the roleplay with learners in groups; make notes in your Teacher Notebook on the setting, characters, resources and language needed. Alternatively, think of a game that would be appropriate and useful for your learners to play in a specific lesson. Plan the game with your partner/s. |
4.4. TOP TIPS for storytelling, games, songs and roleplay
When you are telling stories in the classroom:
- make eye contact with learners to see if they are following you
- use different voices for different characters
- vary the volume and tone of your voice by whispering or shouting
- bring in props such as objects or clothes to bring the story to life
- use gestures and body movement that help explain the story.
When you use songs, poems or rhymes in your lesson:
- use movement and gestures to liven up the song, poem or rhyme and to help to convey meaning
- use songs, poems or rhymes you know and change the words to fit your purpose or ask your learners to change the words based on the topic you are working on
- even formulas and lists can be put into a song or poem format. Your learners might be quite inventive at generating songs or chants for revision purposes.
When using roleplay to support your teaching:
- give learners roles or ask them to choose
- give them planning time so that they are clear about their roles
- the roleplay can be performed to the class
- learners can work in small groups.
When using games in your lessons:
- think whether the game is better completed individually, in pairs, in small groups or as the whole class
- make sure you prepare any resources you and the learners might need
- make sure you know how long you want the game to last.

Teachers and Learners participating in a game/song to
support learning
5. Involving all learners
What does it mean to ‘involve all’?
Every learner is different, and these differences can help us learn more about each other and the world around us. All learners have the right to an education regardless of their status, gender, ability and background. As a teacher, you can influence every learner’s experience of education in a positive or negative way. How you act in the classroom will affect how equally your learners learn. You can take steps to make sure that all learners are involved in learning.
Three key principles to ensure you involve all in learning:
- Noticing: try to be observant and notice changes in your learners; when a learner does something well, when they need help and how they relate to others. You may also see changes in your learners because of difficulties in their home or because of other issues. Involving all requires that you notice your learners on a daily basis, paying particular attention to learners who may feel left out or unable to participate.
- Focus on self-esteem: learners who feel good about themselves and know their own strengths and weaknesses, respect themselves and others. As a teacher, you can have a major impact on a young person’s self-esteem and self-confidence; be aware of that power and use it to build the confidence of every learner by not being negative or dismissive.
- Flexibility: if something is not working in your classroom for specific learners, groups or individuals, be prepared to change your plans or stop an activity. Being flexible will enable you to make changes so that you involve all learners more effectively.
Activity 2.10: The three principles of involving all in practiceWatch the video below about a literacy lesson in Grade 1. You watched this teacher using songs in her lesson previously. As you watch her lesson again, make notes in your Teacher Notebook about how the teacher involves all the learners.
Compare your notes with other teachers and add to your notes if they identified ways you might have missed. |
|
Did you notice...
|
5.1. Involving all learners in practice
Activity 2.11: Making the classroom inclusiveRead the example of learner Grace and what her teacher Mariam did to ensure Grace could attend lessons more regularly. As you read, make notes in your Teacher Notebook of the aspects you found important in the reading. Grace is in Grade 4 and has a bone disease which has led to several incidences of broken bones – arm, wrist, leg – since she started school. The seating in her classroom is not ideal for a child with her disability and she has frequently been absent. Mariam, the Grade 4 teacher, realised that Grace needed a different type of chair in order to enable her to comfortably attend school. As Grace is very small for her age, she brought several different chairs from the infant classrooms and found one that was much more comfortable for Grace to sit in for extended periods. Over the past few months, Grace has had a much better attendance record and is more involved in school life. |
|
Did you notice...
|
Classroom Example 2.5: Understanding learnersListen to the audio below or read the transcript about the experience of teacher Betty with her learner Charles. Make notes in your Teacher Notebook:
Audio transcript Betty is a Grade 5 teacher in Kabwe. There are 48 learners in her class, and she does not find it easy to know them all. Charles is a learner in her class. He is noisy and volunteers frequently. Because of this behaviour Betty had assumed that he was one of the brighter children. However, during some group work, she noticed that Charles was not contributing very much. As she was walking around the class observing her learners working in their groups, she asked him some questions and realised that he could not read the sentence written out on a card as part of the task. Betty was careful not to draw attention to him as she realised he did not feel good about this. Over the next few weeks, Betty made more effort to talk to Charles and find out a bit more about him. She realised that he was struggling with the work but did not want his friends to know. He put his hand up a lot to answer short closed questions but avoided the harder questions. He was very anxious to please, but too scared to ask for help. Betty then decided to pair Charles with one of the good readers in the class and purposefully organised pair work activities in the next few weeks where the better reader could help him. Charles soon began to grow in confidence, his reading improved, and he started to participate better in all activities. |
|
Did you notice...
|
5.2. TOP TIPS to involve all learners
Model good behaviour: be an example to your learners by treating them all well, regardless of ethnic group, religion or gender. Talk to them all respectfully, take account of their opinions when appropriate and encourage them to take responsibility for the classroom by giving them tasks that will help everyone.
High expectations: all learners can learn and progress if supported appropriately. If some learners are finding it difficult to understand the work you are doing in class, your role as the teacher is to work out how best to help them learn. If
you have high expectations of everyone in your class, your learners are more likely to assume that they will learn if they keep trying. High expectations should also apply to behaviour. Make sure the expectations are clear and that learners treat
each other with respect.
Have different activities: learners learn in different ways. Some like to write, while others prefer to draw diagrams or pictures to represent their ideas. Some like to work alone, others in groups or pairs. Some learners are good listeners, while some learn best when they get the opportunity to talk about their ideas. You cannot suit all the learners all the time, but you can build variety into your teaching and offer learners some choices.
Relate the learning to everyday life: for some learners, what you are asking them to learn appears to have nothing to do with their everyday lives. Try and relate the learning to something that is relevant to them and draw on examples from their own experience.
Use of language: think carefully about the language you use. Use positive language and praise, and do not ridicule learners. If you make unkind comments to a learner, then the others in the class will think it is appropriate to be unkind to others.
Challenge stereotypes: find and use resources that show girls in non-stereotypical roles or invite female role models to visit the school, such as doctors or business women. Try to be aware of your own gender stereotyping; you may know that girls play sport and that boys are caring, but often we express this differently, mainly because that is the way we are used to talking in society.
Create a safe and welcoming learning environment: all learners need to feel safe and welcome at school. Think about how the school and classroom might appear and feel like to different learners. Think about where they should be asked to sit and make sure that any learners with visual or hearing impairments, or physical disabilities, sit where they can access the lesson. Check that those who are shy or easily distracted are where you can easily include them.
Activity 2.12: ReflectionThink back to your teaching over the past week and try to identify two or three ways in which you managed to include more learners. In your Teacher Notebook, write down what you did and how the learners reacted. It might be through trying out group work and/or pair work or using questioning to engage more learners than usual. Share your reflections with your partner/s and make a note in your Teacher Notebook of anything they have done that you could try. |
6. Embedding different Teaching Approaches
A good lesson will have a number of different activities, which when linked together help the children to meet the learning outcomes.
Classroom Example 2.6: Linking approaches togetherIn Grade 6 learners need to learn about ‘keeping money safe’ (Social Studies syllabus, section 6.3.1). The learning outcomes of a lesson might be: To know some different ways of keeping money safe and saving To understand how borrowing money works and interest rates To be able to explain the advantages and disadvantages of different approaches to saving and borrowing money. Listen to the audio below or read the transcript about the activities teacher Martin used in his Grade 6 lesson. In your Teacher Notebook, make a note of all the teaching approaches used in this lesson.
Audio transcript Martin, a Grade 6 teacher, taught his Grade 6 learners about keeping money safe. His lesson lasted 40 minutes and he planned 4 activities. For the first activity Martin used a full class brainstorm to find out what learners already knew. He followed this with an explanation of different methods of keeping money safe reinforcing those learners had mentioned and adding some additional methods. During this activity he asked a range of different types of questions to elicit some of the advantages of each method. He made a table on the chalkboard with three columns: method, advantages and disadvantages. He filled in the ‘method’ column. After this full class activity, Martin put learners in pairs. He asked them to copy the table and to work together to fill it in, based on the whole class discussion. To ensure all the methods were discussed he asked the pairs in the front half of the class to start working from the top of the list, and the pairs in the back to start from the bottom of the list. As the learners were working, he moved around the pairs and talked to them, asked some individual questions, noticed who was doing well or struggling. There was a little bit of noise, but this was good as Martin could see learners were really interested in the topic. To finish this activity, he returned to the list on the chalkboard and asked some pairs the advantages and disadvantages they had identified for each method, writing these in the table on the chalkboard. He asked learners to listen carefully as they could not repeat anything someone had already said. For the third activity, Martin worked again with the full class and he told a short story about two people who borrow some money to buy something. One uses a bank and one uses a local unofficial person. In the bank the interest rate is fixed, whereas the local person keeps putting up the interest rate. Martin wrote on the board 5 questions related to interest rates. He divided the class in 5 groups and asked each group to discuss the questions for a few minutes. To finish the lesson, Martin returned to the table on the board showing methods of saving money/keeping it safe followed by the 5 questions on interest rates. He asked the learners to add any advantages or disadvantages they had not thought of, to their own table and to work in pairs to answer the questions. As the learners were working in pairs, Martin noticed that although learners had been confident identifying advantages and disadvantages of the different methods, they found it more difficult to answer the interest rates questions. After the lesson Martin decided to talk to the numeracy teacher and ask them to revise percentages in the next numeracy lesson, using real examples involving money. |
Activity 2.13: Using local resourcesWatch the video below about the Grade 1 teacher you have watched previously. As you watch her teaching again, think about how the teacher is using different approaches throughout her lesson. In pairs discuss a follow-up activity that this teacher could do that would reinforce the learning. |
6.1. TOP TIPS for embedding different approaches in your lessons
Using the teaching approaches together will help you to involve all learners in learning.
Here are some ideas you could use.
Questioning: if you invite learners to put their hands up, the same ones usually answer. There are other ways to involve more learners in thinking about the answers and responding to questions. You can direct questions to specific learners or groups of learners. Tell the class, for example, that for this question you will ask learners in Row X or Table B to reply. Give learners ‘thinking time’ and invite contributions from specific people.
Group work and pair work: think carefully about how you divide your class into groups or how to make up pairs, taking account of the goal to include all and encourage learners to value each other. Ensure that all learners have the opportunity to learn from each other and build their confidence in what they know. Some learners will have the confidence to express their ideas and ask questions in a small group, but not in front of the whole class. For some topics it may be more appropriate to put girls and boys in separate groups.
Offering choice: setting different tasks for different groups will help learners start from where they are and move forward. Offering learners a choice of task helps them to feel ownership of their work and to take responsibility for their own learning. Taking account of individual learning needs is difficult, especially in a large class, but by using a variety of tasks and activities you can address the needs of more learners.
Moving around: if you always stand at the front of the class you will focus on the same learners. Try moving around the classroom and position yourself in different places where possible. This way you can see how more of your learners interact and engage.
Don’t get too involved: give your learners time to work out their own ideas. Too much involvement from teachers can limit learners’ creativity.
Activity 2.14: Planning a lessonWorking with a teacher in the same subject or grade, if possible, plan a lesson that you will teach next week which includes at least three different activities. Review your lesson plan with another pair. Teach your lesson and write your reflections on how it went in your Teacher Notebook. If possible, arrange to observe a section of each other’s lessons. |
7. The Zambian Revised School Curriculum
In 2013 the Zambian Ministry of General Education published a revised school curriculum (you may also know this as the ‘syllabus’ for each subject). The new curriculum is designed to prepare children better for life in the 21st Century. As well as having knowledge of the main curriculum subjects, the Government wants children to be creative problem-solvers with a range of skills. If you are not living and working in Zambia, adapt this section for your own school curriculum. It is very likely that you are expected to help learners develop a range of different skills.
For each topic in the new curriculum, they have therefore set out the required knowledge, alongside linked skills and values. Teaching skills and values requires active approaches such as the ones that you have been practising since starting this programme.
Activity 2.15: Skills and valuesAs a group, brainstorm the skills that you would like the learners in your school to have. Appoint a scribe and write all the ideas on a flip chart or on the left-hand side of the chalkboard. When you have run out of ideas, do the same for values. Write your ideas on the right-hand side of the chalkboard or on a new flipchart. Some of the skills and values will overlap or be similar. Working in smaller groups, make a list of ten key skills and ten key values which you think children need to learn and write them in your Teacher Notebook. Choose three skills and three values. For each one, discuss how you could support the development of these skills in your classroom |
Activity 2.16: Skills and values in a science lessonWatch the video below of a Grade 7 science lesson. As you watch write down the skills and values that the children are practising in your Teacher Notebook. After you have watched the video, compare your notes with another teacher and write any additional skills or values they might have noticed. Now compare your list to the lists of ten skills and values you wrote in your Teacher Notebook. Are they the same? Are they new ones you can add to your lists? |
In the video the children had opportunity to develop their practical skills by manipulating apparatus, to work co-operatively and to listen to others. They had to respect each other, share the tasks and help each other.
They also learned how to get clean water from dirty water, and some technical scientific words (like filter, filtrate and residue). With skilful questioning, the teacher could also have helped them develop analytical and evaluative skills.
For example, this is how the teacher can get the children to think, analyse and evaluate:
|
Teacher (talking to two boys): Is the water in the pot completely clean? Joseph (looks in the pot): No, it is still a bit murky – I would not want to drink it! Teacher: Why do you think that is? Joseph: Some of the mud came through the material. Samuel: Joseph poured the dirty water in too fast, so some went over the top of the funnel. Joseph: No I didn’t. Teacher to Samuel: It is difficult to pour slowly, did you try? Like all things, this needs practise. Teacher to both boys: How could you stop the mud coming through? Joseph: Could you use different material? I noticed that in Martha’s group their water was cleaner. We had the white material and they had the red one. Teacher: Well-noticed, boys! Now try holding the two pieces of materials up to the light. What do you see? Samuel: The holes are bigger in the white material! Some of the mud came through. It is better to use the red material. |
If the teacher had just demonstrated the experiment the children would have missed the chance to develop their practical skills. The teachers’ careful questioning encouraged analysis and evaluation – thinking skills.
8. Knowledge, skills and values in practice
Classroom Example 2.7: Thinking about knowledge, skills and valuesListen to the audio below or read the transcript about the classroom activity carried out by teacher Rose in Grade 4 to teach Literacy. As you read/listen, think about the knowledge, skills and values that the children will learn, and make a note of these in your Teacher Notebook.
Audio transcript Rose collected a range of empty grocery packets, boxes and tins. She divided the class into groups of four or five and gave each group one or two items. She wrote the questions on the chalkboard but also read them out for the children who could not read very well. As she read them, each child wrote their own answers. Then she asked them to discuss them in their group and decide on a group answer for each question. Questions about grocery items
While the learners were working in their groups, Rose walked around and helped the children who struggled with reading. After 10-15 minutes, she went around the groups and asked each group for one answer until she covered all the questions. Then she asked them to discuss two more questions:
In the next lesson, they worked in the same groups to design the print and visual information for the packaging of a real or imaginary grocery item. (Adapted from TESSA Literacy, Module 1, Section 1, Case study 2, Activity 2 and Resource 3.) |
Knowledge: this task supports the reading of words in English. It helps children learn how to recognise capital letters, common words and numbers. They might also learn something about nutritional value.
Skills: the task helps them to develop their skills in reading. They will also need to listen to each other, help each other, and respect each other’s opinions. They will have to think independently to answer the last two questions and make critical judgements. The follow-up task will help them to develop their creative skills, writing, drawing and designing.
Values: this activity encourages co-operative working, listening to and supporting each other. It also gives the teacher an opportunity to highlight wider issues around advertising, creating an honest impression of a product and the ethics of promoting products that are unhealthy.
Activity 2.17 QuestioningWorking in pairs, read the summaries above. In your Teacher Notebook write some questions that the teacher could ask as they go around the groups, or to the whole class in order to reinforce these skills and values. |
Activity 2.18: Getting familiar with the Zambian Revised School CurriculumThink about a topic that you will be teaching next week. Working on your own, plan a classroom activity using one or more of the teaching approaches that you have practised so far. Make sure you plan some higher-order questions which will help children to think about what they are doing and why. When you have finished, swap your plan with a partner. Analyse each plan from the perspective of skills and values. What skills will the children be able to develop? What values will be reinforced? Review your plans and see if by changing what you do or the questions you ask, you could increase the emphasis on skills and values. For this next step it will be useful to have access to the Zambian Revised School Curriculum. Now, find the topic that you are teaching in the Zambian Revised School Curriculum. Look at the three columns and check that your activity teaches the knowledge, skills and values required. |
9. Summary: Inclusive Teaching
These resources have provided a basis for three teaching approaches which will help you to support learners in becoming more involved in lessons and help you to think about how to include all learners in your lessons. The purpose of these last activities is to reflect on what you have learned and to complete a short quiz to demonstrate your understanding of the key concepts.
Activity 2.19: Reflecting on your professional developmentOn your own, look back through your Teacher Notebook and make a summary of some of the main things you have learned in this course.
Discuss your reflections with a colleague and set yourselves three targets each for next month. Think about the things that you think you need to improve and what you can do to achieve that improvement. |