Training guide
| Site: | OpenLearn Create |
| Course: | Active teaching and learning for Africa (1): Classroom management for learner-centred teaching |
| Book: | Training guide |
| Printed by: | Guest user |
| Date: | Saturday, 13 June 2026, 7:39 PM |
1. Introduction
During this enhanced SPRINT programme you will be introduced to tools and resources that you can use in your own teaching. There will be audio resources and short films showing examples of classroom activities to support your learning, as well as text for you to read, questions for you to consider and activities for you to complete before, during or after TGMs.
This SBCPD programme is ‘learner-centred’ in its approach (Schweisfurth, 2013). It will:
- build on your existing knowledge, challenging you to learn more
- provide activities aimed at motivating you and your colleagues
- take account of the different starting points you might have
- emphasise the importance of dialogue to support thinking and learning
- draw on examples relevant to your everyday life and to your role as an educator
- promote the learning of a range of skills, including critical thinking, problem-solving and creativity
- make space for personal reflection and responses
- encourage you to work together and discuss the activities.
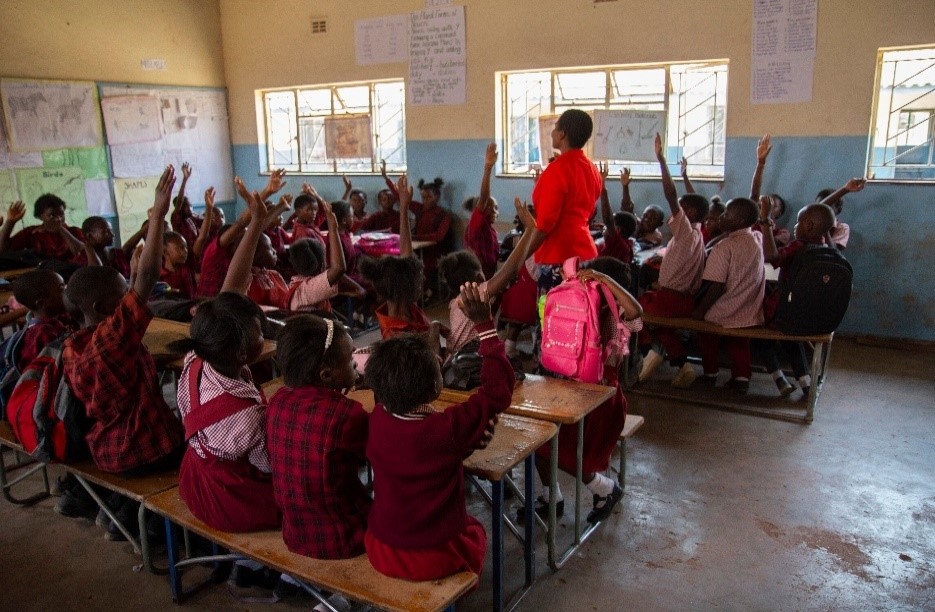
Classroom in school in Zambia
The programme is based on three key principles:
- a good lesson is made up of several different activities
- the activities that make up the lesson should actively engage learners
- it takes time to learn how to organise active learning in the classroom and to build up confidence.
In this course you will learn how to manage classrooms using the principles of learner-centred education.
1.1. Introduction to learner-centred teaching
Learner-centred education (LCE) is a policy aspiration across Africa. But the evidence shows that even though it is consistent with well-established principles about the ‘rights of the child’ and ‘quality’ education it is difficult to implement and is often misunderstood (Schweisfurth, 2013). So, what is LCE?
Activity 1.1: Learner-centred education Quiz |
Read these reflections on LCE after you have completed and discussed the quiz
The common misconceptions that usually emerge from the quiz are that a learner-centred approach means that the children are in charge, that if group work is taking place the lesson is learner-centred, and that LCE is not possible in large classes.
In a lesson, the teacher is always in charge! However, that does not mean that the learners are not actively involved, taking responsibility for their own learning by asking questions, seeking help and contributing ideas.
Group work can be learner-centred if it is well-organised: with a clear task, at an appropriate level, with children organised in groups that will support learning. Badly organised or poorly planned group work, with an inappropriate task, is unlikely to support learning and is therefore not learner-centred.
LCE is certainly challenging if you have a large class, as it is difficult to get to know them all. But it is not impossible. Using the teaching approaches in these resources will help you to get to know your learners better.
1.2. Learner-centred teaching
LCE is not just a set of teaching approaches. Research and practice over recent years (Schweisfurth, 2013; O’Sullivan, 2004; Vavrus, 2009, 2011) has shown that it is better conceptualised as a set of attitudes and values towards classroom relationships, learning and teaching.
But attitudes and values are never clear-cut. One way to think about learner-centredness is as being between two extremes.

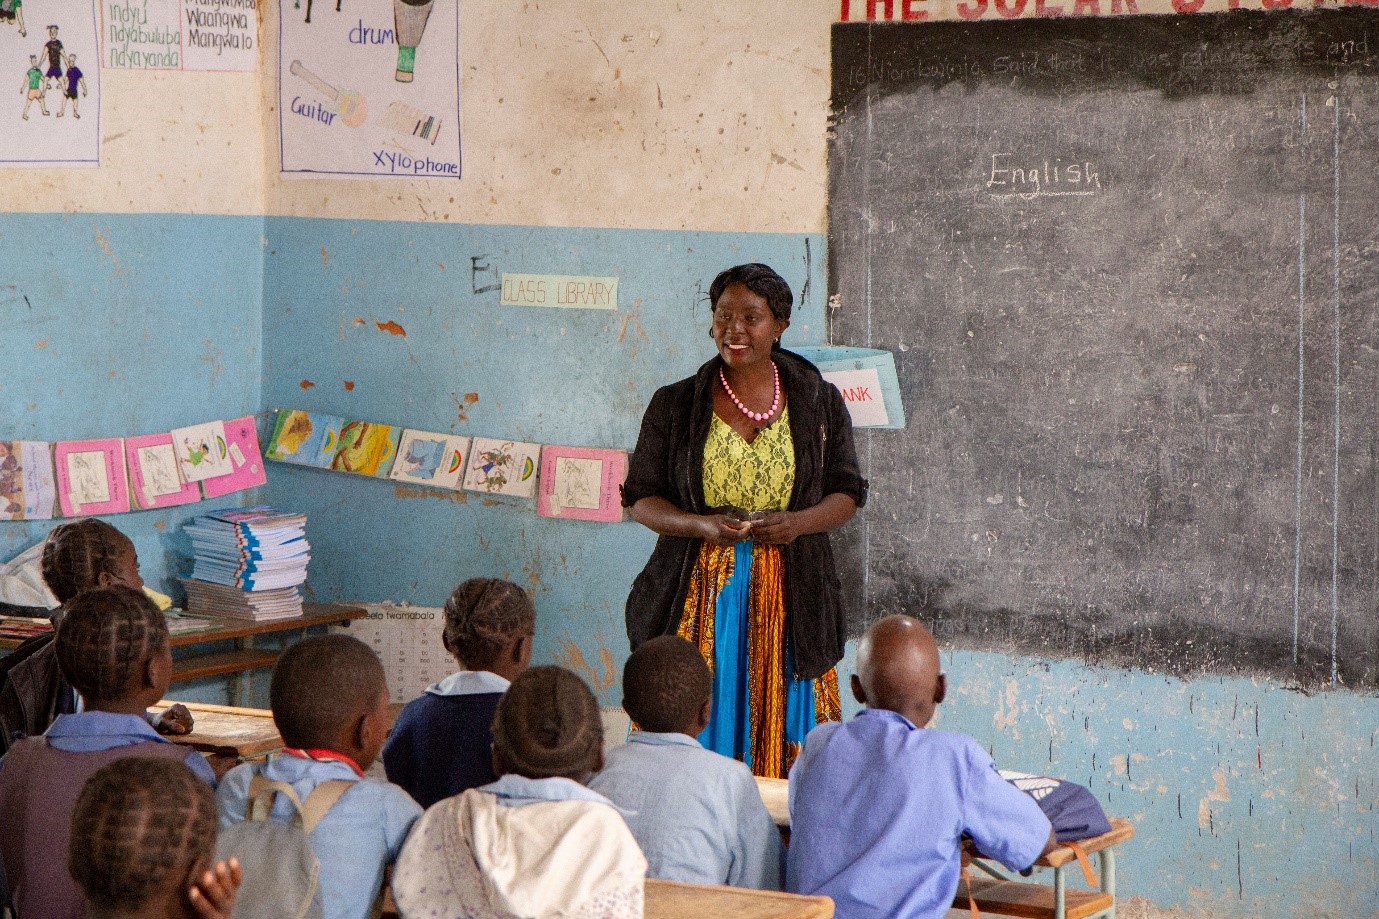
Teacher in classroom in Zambia
Activity 1.2: How learner-centred are you? (Part 1)Being learner-centred is about moving further towards the right in the graphic below. Classroom relationships (Authoritarian: a teacher who does not listen to learners, makes a plan and does not adapt it to what their learners need. Democratic: a teacher who includes all learners in the lesson.) LearningIntelligence is fixed at birth  All learners can learn with the right support All learners can learn with the right supportTeaching Think about your own classroom. Where do you place yourself on the line for
classroom relationships, learning and teaching? What would you need to do to
move further to the right? |

A ‘democratic’ teacher listens to their learners and takes account of their interests, opinions and experience. They are likely to negotiate appropriate ways to behave by, for example, getting the class to agree a set of classroom rules.
In order to help all learners to learn, teachers need to know their learners as well as they can. In a large class this is challenging, but by using the approaches in these training resources, over time you will come to know your learners better – even in a large class. Teachers in Zambia told us that when they used more pair work and thought more carefully about their questioning, the ‘shy’ and ‘slow’ learners often surprised them.
A teacher who acts as a facilitator of learning recognises that the learners will bring talents and experiences of their own to the classroom. The teacher knows the curriculum but can also learn a great deal from their students.
A learner-centred teacher:
- takes account of the needs of all learners
- takes account of what learners already know
- believes that all learners can learn given the right support
- plans lessons carefully but is flexible when required
- plans engaging activities which support learning
- encourages learners to talk about their ideas
- relates learning to everyday life
- adopts a variety of teaching approaches
- provides the opportunity to learn knowledge, skills and values.
The sort of activities being advocated in these resources will help you to understand how these attitudes and values can make classrooms more engaging and learning more effective.
Activity 1.3: How learner centred is this teacher?Watch the video below. To what extent does the teacher meet the criteria above? Is there anything he could have done better? Think about a lesson you taught last week. To what extent did it meet the criteria above. Be honest. It does not matter if you feel you could have done better – the purpose of this enhanced SPRINT programme is to help you become more learner centred. If you think you have met all or most of the criteria this means that you realise the importance of putting your learners at the centre of your teaching, but do continue to read on as you will find ideas in these resources that will help you try out new activities or approaches in your lessons. |
1.3. My record of using the teaching approaches
In Getting started you were encouraged to create a table to record your progress. The table below will help you to record the date each approach is introduced in a TGM, the dates you have planned and used them in your own lessons, and finally, the date when you feel confident using each approach and you are planning and using it regularly in your lessons.
You should copy it in your Teacher Notebook to ensure you record your use of the different teaching approaches and demonstrate how you become more confident and effective at using them. You do not need to have completed the first row before you move to the next one, as you might use pair-work activities at the same time as questioning or using local resources.
|
Developing learner-centred teaching |
||||||
|
Teaching approaches |
Date the approach introduced
|
Date of 1st attempt
|
Date of 2nd attempt
|
Date of 3rd attempt
|
Date of 4th attempt
|
Confident using this approach |
|
1 - Questioning |
|
|
|
|
|
|
|
2 - Pair work |
|
|
|
|
|
|
|
3 - Local resources |
|
|
|
|
|
|
|
4 - Group work |
|
|
|
|
|
|
|
5 - Storytelling, songs, games and role-play |
|
|
|
|
|
|
|
6 -Involving all learners |
|
|
|
|
|
|
|
7 - Monitoring and giving feedback |
|
|
|
|
|
|
|
8 - Eliciting prior knowledge |
|
|
|
|
|
|
|
9 - Assessing learning |
|
|
|
|
|
|
1.4. Classroom management for learner-centred teaching
The current training resources introduce three key teaching approaches which will help you plan classroom activities that actively engage learners, and help you teach the knowledge, skills and values set out in the Zambian Revised School Curriculum. They are:
- questioning to promote thinking
- pair work
- using local resources.
As a result of using these approaches and developing your teaching skills, your lessons will become more learner-centred. As you practise using these approaches, you will be able to link them together to plan whole lessons.
2. Questioning to promote thinking
All teachers ask lots of questions! The most effective teachers think carefully about the questions they ask. They ask different types of questions and have a range of strategies for responding to learners’ responses.
But effective questioning is a skill which requires practice and takes time to learn.
Activity 1.4Listen to the audio or read the text below which explains the different types of questions that you can ask. As you listen, make notes in your Teacher Notebook. Discuss your notes with colleagues at the TGM to ensure you understand the different types of questions and how they can help in your teaching. When you feel comfortable with the concept of lower order and higher order questions, do Activity 1.5.
Audio transcript Teachers question their learners all the time. Good questioning helps you to find out what learners know; and is important in assessing their progress. Questions can be divided into two broad categories: The first is lower-order questions. These involve the recall of facts and knowledge previously taught. They often involve closed questions (that is questions requiring a short yes or no answer, or a single word). For example:
All these questions only require short answers and it’s easy as a teacher to find out if your students have understood the content. Higher order questions: these are generally open ended and encourage learners to think beyond yes or no answers and elicit different responses from learners. These help the teachers to assess the learners’ understanding of content. Some examples of higher order questions are:
As you can see these are all questions that require longer answers and they will vary from student to student. |
Activity 1.5: Planning for effective questioningDecide on the topic you are focusing on in the lesson you are planning. Write three lower-order or ‘closed’ questions (yes/no or single word responses) and three higher-order or ‘open’ questions in your Teacher Notebook. Share with your partner/s. Which questions tell you more about what your learners understand? |
2.1. Encouraging learners to respond
Effective questioning is not just about the questions you ask. How you respond is also very important. Listen to the audio or read the text below which explains some of the different ways in which teachers can use learners’ responses to support learning. If it is helpful, make notes in your Teacher Notebook as you listen.
|
Audio transcript Many teachers don’t give enough time for learners to answer a question and end up answering it themselves. Try and give your learners time to think. By waiting after asking a question, there is an increase in:
If one learner has the wrong idea you can be sure that many more have as well, and there are many ways to correct wrong answers and misconceptions. Try and encourage your learners to try again by using the following techniques:
For example, you can respond to an incorrect answer in a supportive way. As in…’yes you were correct about evaporation forming clouds, but I think we need to explore a bit more what you said about rain. Can anybody else offer some ideas?’ By responding in this way, you do not discourage the initial student, but you encourage others to participate.
This helps you to understand the way your learners are thinking and gives them a chance to correct any misunderstandings they may have without feeling threatened.
It’s important that you, the teacher, listen carefully. If you ask for further explanation for answers, whether they are right or wrong, learners will often correct their answers themselves. You don’t want your learners to feel afraid of giving the wrong answer. |
2.2. Improving the quality of responses
The following skills will help learners achieve more:
- Prompting to help learners develop and improve their answers. You might first choose to say what is right in the answer and then ask further questions and give other clues. For example, ‘so what would happen if you added a weight to the end of your paper aeroplane?’.
- Probing to find out more, helping learners to clarify what they are trying to say to improve an answer that is partly right. For example, ‘so what more can you tell me about how this fits together?’.
- Refocusing to build on correct answers and linking learners’ knowledge to what they have previously learnt. For example, ‘what you have said is correct, but how does it link with what we were looking at last week in our local environment topic?’.
- Sequencing questions in an order designed to extend thinking. Prepare questions that stretch learners, but do not challenge them so far that they lose the meaning of the questions. For example, ‘explain how you overcame your earlier problem. What difference did that make? What do you think you need to tackle next?’.
- Listening helps you to not just look for the answer you are expecting, but to alert you to unusual or innovative answers that you may not have expected. It also shows that you value the learners’ thinking and therefore they are more likely to give thoughtful responses.
- Rewarding correct answers with follow-up questions that extend the knowledge and provide learners with an opportunity to engage with the teacher. You can do this by asking for:
- a how or a why
- another way to answer
- a better word
- evidence to back up an answer.
Activity 1.6: Responding to questionsAsk your partner/s your best questions from Activity 1.5. Use the audio and the notes above to practise your questioning skills by using follow up questions based on their response. Try prompting, probing and sequencing by, for example:
Write your examples in your Teacher Notebook. Use your questions in your lessons next week and try some of the ways of responding. |
2.3. Questioning practice
Activity 1.7: Questioning in actionWatch the video below which is made of four short extracts, three from one lesson plus a fourth extract from another lesson. Now consider the following questions:
Plan a set of questions that you could use in your classroom later this week. If it is helpful, use the classroom example below to get some ideas that you could adapt. |
Classroom Example 1.1: Using questioningRead the following classroom example together. James was teaching a class of 90 with Grades 1, 2 and 3 in the same room. In the corner of the classroom he made a ‘shop’. Over a few weeks he and the children had assembled a collection of old food packets, which he arranged on a ‘table’ made from a large cardboard box he got from a shop-keeper in the nearby town. He had put price labels on all the items. In a maths lesson, he wrote three different sets of questions on the chalkboard:
The children worked in pairs in their own grade levels. At the end of the lesson, he asked the Grade 3 students to check the work of the Grade 1 and 2 students and to report back to him how they had done. While they were working, he listened carefully to the conversations. He made a note of those who seemed to need more help, so that he could support them in the future. By using skilful and carefully-targeted questioning, James was able to use the same resource to make sure that all the children had the opportunity to learn. |
|
Did you notice...
|
2.4. Good habits to form when using questions in your lessons
Try to do the following:
- give learners time to think about their answer
- ask different types of questions
- sequence the questions
- listen to learners’ responses and give follow-up questions
- ask other learners to correct wrong answers
- plan some good questions in advance. If you don’t you are more likely to limit yourself to closed, low level questions.
Things to avoid:
- asking a question and answering it yourself
- asking a difficult question too early
- giving learners no time to think
- ignoring answers
- asking the same learners in every lesson
- ignoring the efforts of slower/shy learners.
Activity 1.8: Reflecting on teachingAfter you have used different questions in three or four lessons, reflect on your experience with one or two of your colleagues – the ‘good habits’ and ‘things to avoid’. Did you manage to establish some good habits? Did you manage to avoid the pitfalls? Make notes in your Teacher Notebook. Effective questioning can be combined with all the classroom approaches that will follow. Try to establish the habit of planning your questions – particularly open-ended ones – and keep practising the different ways of responding to learners. |
3. Pair work

Pupils
working in pairs in Zambian classroom
Pair work is one of the easiest approaches to use. Patricia is a primary school teacher in Zambia. Read what she has to say about pair work:
Classroom Example 1.2: Pair Work'I have 125 students in my class so I always thought that active teaching approaches could not work, but I started using pair work and I have learnt that that is not the case. I often set two or three open questions which I ask students to discuss in pairs. While they are talking, I walk around and listen. This can be quite difficult as the room is very full! But we manage and the children like the fact that I move around more. After five minutes, I ask for some responses. I can’t possibly get feedback from every pair, but during a week, I try to make sure that most people have been the ones to feed back at least once. Working in this way has also helped me to notice the children more. I did not realise that although Charlie is noisy, he struggles with open-ended questions and that, although Grace is really quiet, she thinks deeply and has really good ideas.' |
Listen to the audio or read the text below which explains some of the main features of pair work.
|
Audio transcript In everyday situations people work alongside, speak and listen to others and see what they do and how they do it. This is how people learn. As we talk to others, we discover new ideas and information. In classrooms, if everything is centred on the teacher, then most learners do not get enough time to try out or demonstrate their learning or to ask questions. Some learners may only give short answers; and some may say nothing at all. In large classes, the situation is even worse, with only a small proportion of learners having the chance to say anything at all. But if you use pair work, this gives learners the chance to think and try out ideas and new language. It can provide a comfortable way for learners to work through new skills and concepts; and works well in large classes. Pair work is suitable for all ages and subjects and it is especially useful in multilingual and multi-grade classes, because pairs can be arranged to help each other. Once routines for pair work are set up, you will find that learners enjoy learning this way. |
3.1. Examples of pair work tasks
‘Think – pair – share’: Learners think about a problem or issue themselves. Then they work in pairs to work out possible answers before sharing them with other learners. This could be used for spelling, working through calculations, putting things in categories or in order, giving different viewpoints, pretending to be characters from a story and so on.
Sharing information: Half the class are given information on one aspect of a topic; the other half are given information on a different aspect of the topic. They then work in pairs to share their information in order to solve a problem or come to a decision.
Practising skills such as listening: One learner could read a story and the other ask questions; one learner could read a passage in English, while the other tries to write it down; one learner could describe a picture or diagram while the other learner tries to draw it based on the description.
Following instructions: One learner could read instructions for the other learner to complete a task.
Storytelling or role play: Learners could work in pairs to create a story or a piece of dialogue in a language that they are learning.
Activity 1.9: Organising pair workWorking with two or three colleagues, use the video and audio on pair work and the notes above to write down three ‘top tips’ about using pair work. Share this with others in the TGM and create a poster of 10 top tips. You can put it up in your school to remind you all of the benefits if using pair work. |
Organising successful pair work is linked to clear instructions and good time management, as well as concise summarising – this all takes practice.
Remember, you don’t need to get every pair to report back – that would take too much time – but select learners who you know from your observations will help others to learn.
Listen to the audio or read the text below which explains how to manage pairs in order to make the most of pair work.
|
Audio transcript Pair work is about involving everyone and can be done successfully with a large class. But pairs need to be managed so that everyone knows what they have to do, what they are learning and what your expectations as the teacher are. To establish pair work routines in your classroom, you should do the following:
During pair work:
Most learners enjoy the atmosphere of everyone talking and working. As you move around the classroom observing and listening, make notes of who is working well together, be alert to anyone who is not involved, and note any common errors, good ideas or summary points for you to share with the class. |
3.2. Pair work in action
Activity 1.10: Pair work in action
|
Classroom examples on pair work
Pair work can be used for many different purposes. These examples show different ways of supporting all learners.
Classroom Example 1.3: Differentiation by taskRita teaches Grade 6 English. She chose some words which were causing problems for learners and wrote the words and definitions on separate pieces of paper. She asked the learners to form pairs with the person next to them. This meant that they worked with a friend, and often higher attainers were together and lower attainers were together. She gave each pair ten words and ten definitions and asked them to match them up. When they had finished and she had checked them, they swapped their words and definitions with another pair. Some pairs completed it very quickly but some found it difficult and needed a great deal of help, so it was difficult to organise. She discussed the experience with her friend, who taught Grade 4. She decided to keep the pairs how they were but gave them different sets of words. The high attainers had longer, more complex words – including some they had never met before and had to guess the meaning of – and the low attainers had shorter, more common words. She found it worked well. The low-attainers gained confidence and learned some common words which would help them in the future, and the high-attainers were challenged to try and read and understand new words. |
Classroom Example 1.4: Peer supportChangu teaches Grade 2 and her learners are beginning to read short sentences. In a literacy lesson, she wrote out some short sentences on pieces of paper. She put her children in pairs, and they practised reading the sentences aloud to each other. She had many different sentences but with similar, simple words. She was not very pleased with how it went as some of the pairs found it very difficult and some found it very easy. In the next lesson, she tried again with different sentences, but this time, she deliberately put the children in mixed-ability pairs. This worked much better as the good readers were able to help those who found it more difficult. She found that some of the slower readers gained confidence and could read the sentences, and the good readers enjoyed helping them to sound out the words. |
|
Did you notice...
|
3.3. Reflecting on pair work
Pair work activities can last just five or ten minutes or take up most of the lesson. Think about the pair work activities that you have tried.
Activity 1.11: Planning a pair work activityThink Pair Share Finally |
4. Using local resources
One of the misconceptions around LCE is that it is only possible if you have access to plenty of resources. There is no doubt that it is easier with resources, but it is perfectly possible to draw on things that are locally available to help you, especially if you work with your colleagues to develop and share resources. One issue is how to store the things you make and develop, so think about this at an early stage. Some schools develop a ‘resources room’. Teachers can borrow resources as they need them. Alternatively, you could keep a set of boxes in the staff room.
Listen to the audio or read the text below which introduces you to the idea of local resources.
|
Audio transcript The outside environment can be seen as a place to collect resources; but it can also be an extension of your inside classroom. Here are some ideas about how to use the local environment to support, resource and extend your classroom teaching. Wherever your school is, there will be many living things that you can collect and bring into the classroom for short periods for your learners to investigate and observe. Either you could do the collecting, or you could take your class out to help you. Bringing in leaves, for example, will enable learners to study these more closely. Some insects can be kept in suitable containers or conditions for a short period of time. But do ensure that learners stay away from dangerous insects or animals such as snakes or wasps. Be clear what your learners are going to learn and give them time to observe the creatures safely, so the students are not frightened, and also that they do not frighten the animals. Make sure that they respect the animals and plants; and understand how important these are to the community. Remember, they can also use their own bodies to do things like investigating the effect of exercise on heart rate; or understanding how muscles work together. There are many things that you might be able to collect from the local environment – whether you are in a rural or urban setting. These can help you in the classroom. These include:
All of these and many other materials can be gathered over time, so that when you want to do modelling with your class you have a stock of resources. Or when you want to do posters you have some card for each group to write on. Always ask if you can have the materials you see. And get your students to help you gather the materials in advance of your lessons. For example, on one of the TESSA activities, children make models of animals out of ‘rubbish’. This can help younger children learn the words for different parts of an animal, or for older children to learn about specific adaptations. |
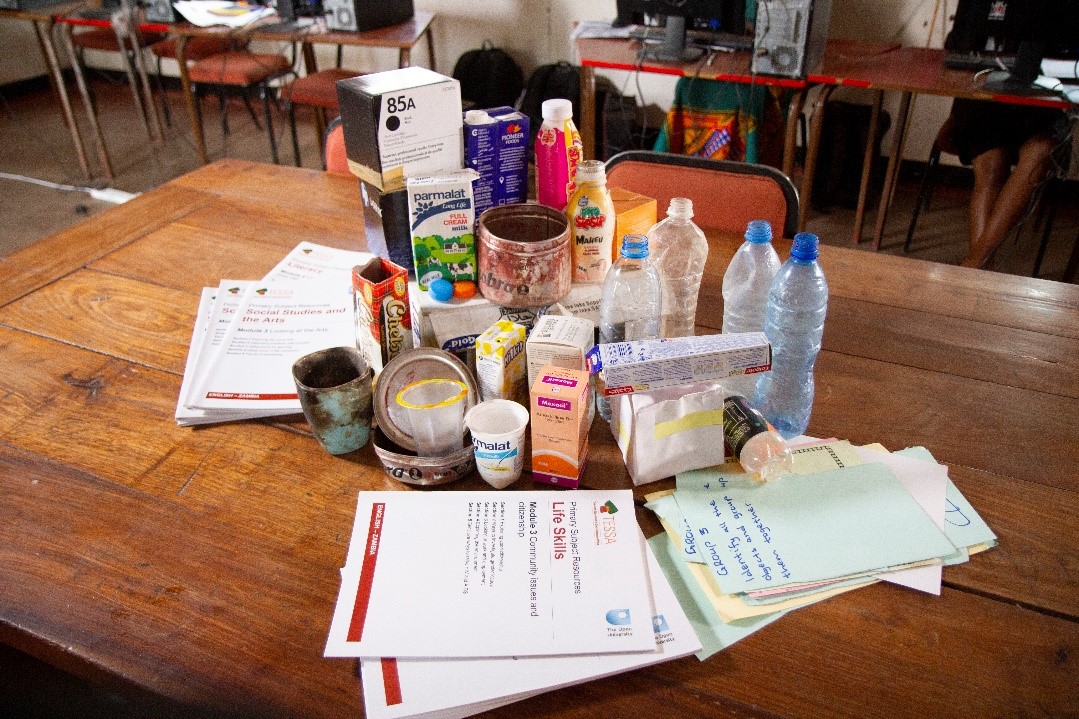
Collection of local resources
Activity 1.12: Ideas for using local resourcesWatch the video about how the teacher is using local resources in their lesson. In your Teacher Notebook make notes about what resources the teacher used.
Share your notes with a colleague. Did you notice the same things? Did you notice something your colleague did not? |
4.1. Storing and sharing local resources
Local resources can be used to support teaching and learning in all subjects and at all levels. For this reason, it is important to share how you use local resources in your lessons with other colleagues. Doing this will be much easier if you can find a space in your school to store all the resources.
Watch the video below where the teacher explains how she uses commonly available items in her teaching.
Activity 1.13: Storing and sharing local resourcesHere is a list of items that are readily available in your homes and in the community. For each one, think of a way of using it to support teaching. Old food packets Make a table like this in your Teacher Notebook to record your responses.
|
4.2. Using local experts
Your local community includes people who may come in to tell stories or describe their jobs to learners: a chief, a farmer, a nurse or doctor, a parson, a hunter, a policeman, a tour guide, a story teller, a market trader or small business owner.
Maybe you are doing some work on money in mathematics or you are doing pattern in your art lessons. How could you introduce these topics to your learners in a way that will capture their interest? One way would be to invite in a local shopkeeper to talk about how they use money in their work or a local dressmaker who uses traditional patterned fabrics. If you choose to bring in a visitor, you need to be clear what you would like your learners to gain and learn from the experience and then follow the steps below to prepare.
Before the visit
- decide who you want to invite and why that person is appropriate for what you want your learners to gain from the visit
- ask your head teacher to send an invitation to the visitor
- ask your learners to write the invitation
- plan with your learners the questions they want to ask
- discuss how you will sit when the visitor comes – in rows or in a horseshoe shape so that everyone can see
- ask the visitor to bring some things to show the class.
On the day of the visit
Meet the visitor at the head teacher’s office and bring them to the class. Introduce the visitor to the class and allow them to talk for a short time to the class about what they do (10–15 minutes), showing what they have brought if appropriate. Encourage your learners to ask questions. When the visit is finished, ask one of your class to thank the visitor for coming.
After the visit
Think how you will use what your learners have seen and heard. You could ask them to share their ideas in groups and make lists or posters of the key things they learned. You could plan more lessons using the ideas and information as the context for them to learn more about the topic. They could research more about the topic. They could share their ideas with other classes or their parents during family pack meetings or the school open day.
Classroom Example 1.5: Organising a visitRead Peter’s experience of organising a visit. ‘I teach social studies to Grade 3. We were covering the section ‘learning about money’. I decided that the local bank manager would be a good person to come and talk to the class. In the syllabus it says: Knowledge about: Income and Expenditure; Items people ‘need’ – food, water and shelter, and ‘want’ – toys, games and sweets in life; Saving up for things you need or want in the future; Having money, losing money stolen, wanting things you cannot afford. Mr Malet arrived at school five mins before the lesson, and I was getting quite worried about whether he would turn up. I had not met him before – we had talked on the phone and communicated by text message. He came into class and after I had introduced him, he talked to the class for over half an hour. I could tell they were getting restless, but he was such a fierce looking man, they kept quiet. He talked about how to set up a bank account and then gave a lecture on the perils of spending more than you earn. At the end, I asked the children if they had any questions. They didn’t so I thanked Mr Malet and he left.’ In your groups discuss how Peter could have made the visit more successful and productive for the children. |
You might have mentioned aspects such as:
- Peter should have met Mr Malet at the bank
- he could have started by exploring whether Mr Malet wanted to come, or whether he had someone who might have been less fierce and more suitable
- he should have shared the syllabus and learning outcomes for the visit and rehearsed with Mr Malet what sorts of things he could talk about
- he could have also given him some questions he would have liked Mr Malet to address
- before the visit, Peter could have talked to the class about the visit and given them a chance to work in pairs to think of questions they would like to ask of a bank manager
- he could have prepared one or two children to ask their questions.
Activity 1.14: Local expertsAs you plan, think of how you can incorporate a local expert or visitor into a part of a lesson. What do you want the learners to gain from the visit? What activities would you ask your learners to do in order to get the most from this? Discuss with your colleagues which subject in the coming week or two would most benefit from this. Write notes in your Teacher Notebook. |
5. Summary: Classroom management for learner-centred teaching
These enhanced SPRINT training resources have provided a basis for three teaching approaches which will help you to support learners in becoming more involved in lessons and get to know them better. The purpose of the last activities is to reflect on what you have learned and to complete a short quiz to demonstrate your understanding of the key concepts.
Activity 1.15: Reflecting on your professional developmentOn your own, look back through your Teacher Notebook and make a summary of some of the main things you have learned in this course. What has helped you to learn? Are there any critical incidents that made a big impact on you? Think back to last term – write down any ways in which your lessons are different now. Discuss your reflections with a colleague and set yourselves three targets each for next month. Think about the things that you think you need to improve and what you can do to achieve that improvement. |
Classroom in Zambia
References
Korthagen, F. (2017). Inconvenient truths about teacher learning: Towards professional development 3.0. Teachers and Teaching: Theory and Practice, 23(4), 387–405.
O’Sullivan, M. (2004). The re-conceptualisation of learner-centred approaches: A Namibian case study. International Journal of Educational Development, 24(6), 585–602. https://doi.org/10.1016/S0738-0593(03)00018-X
Schweisfurth, M. (2013). Learner-centred Education in International Perspective: Whose pedagogy for whose development? Abingdon: Routledge.
Vavrus, F. (2009). The cultural politics of constructivist pedagogy: Teacher education reforms in the Republic of Tanzania. International Journal of Educational Development, 29, 303–311.
Vavrus, F. (2011). Ensuring quality by attending to inquiry: Learner-centred practices in sub-Saharan Africa (No. 4). Retrieved from UNESCO IICBA website: http://unesdoc.unesco.org/images/0021/002160/216063e.pdf