Training guide
| Site: | OpenLearn Create |
| Course: | Active teaching and learning for Africa (4): Managing and supporting learner-centred classrooms |
| Book: | Training guide |
| Printed by: | Visiteur anonyme |
| Date: | Saturday, 13 June 2026, 3:54 PM |
1. Introduction
Welcome back to the enhanced SPRINT school-based continuing professional development (SBCPD) programme. This is designed to support active teaching and learning in line with the Zambian Revised School Curriculum. It is also relevant to others hoping to develop more active learning and improve their classroom teaching. It is suggested that the programme will take six terms (two school years) and will be the focus of your Teacher Group Meetings (TGMs).
You will probably have already completed Year 1 and covered nine teaching approaches in the three terms. If you have not studied these yet, course 4, 5 and 6 will still be helpful to you, but you may wish to return to 1–3 at some point in the future.
- Course 1: Classroom management for learner-centred teaching
- Course 2: Inclusive teaching
- Course 3: Assessment for Learning
In Year 2 you will be looking at the following topics:
- Course 4: Managing and supporting learner-centred classrooms
- Course 5: Literacy across the curriculum
- Course 6: Being a reflective practitioner
Over the past three courses the focus has been on managing the classroom so that your teaching can be more learner-centred and include all the learners. You have done this by, for example, organising pair and group learning tasks, using different forms of questioning to find out what exactly your students understand, monitoring progress and activity for all students, and using local resources in a meaningful and creative way in your lessons.
In this course, you will be building on these skills. You will continue to develop learner-centred ways of working both in the classroom and with colleagues in your TGMs. You will also spend time looking at how to use the classroom resources provided for you in the TESSA materials.

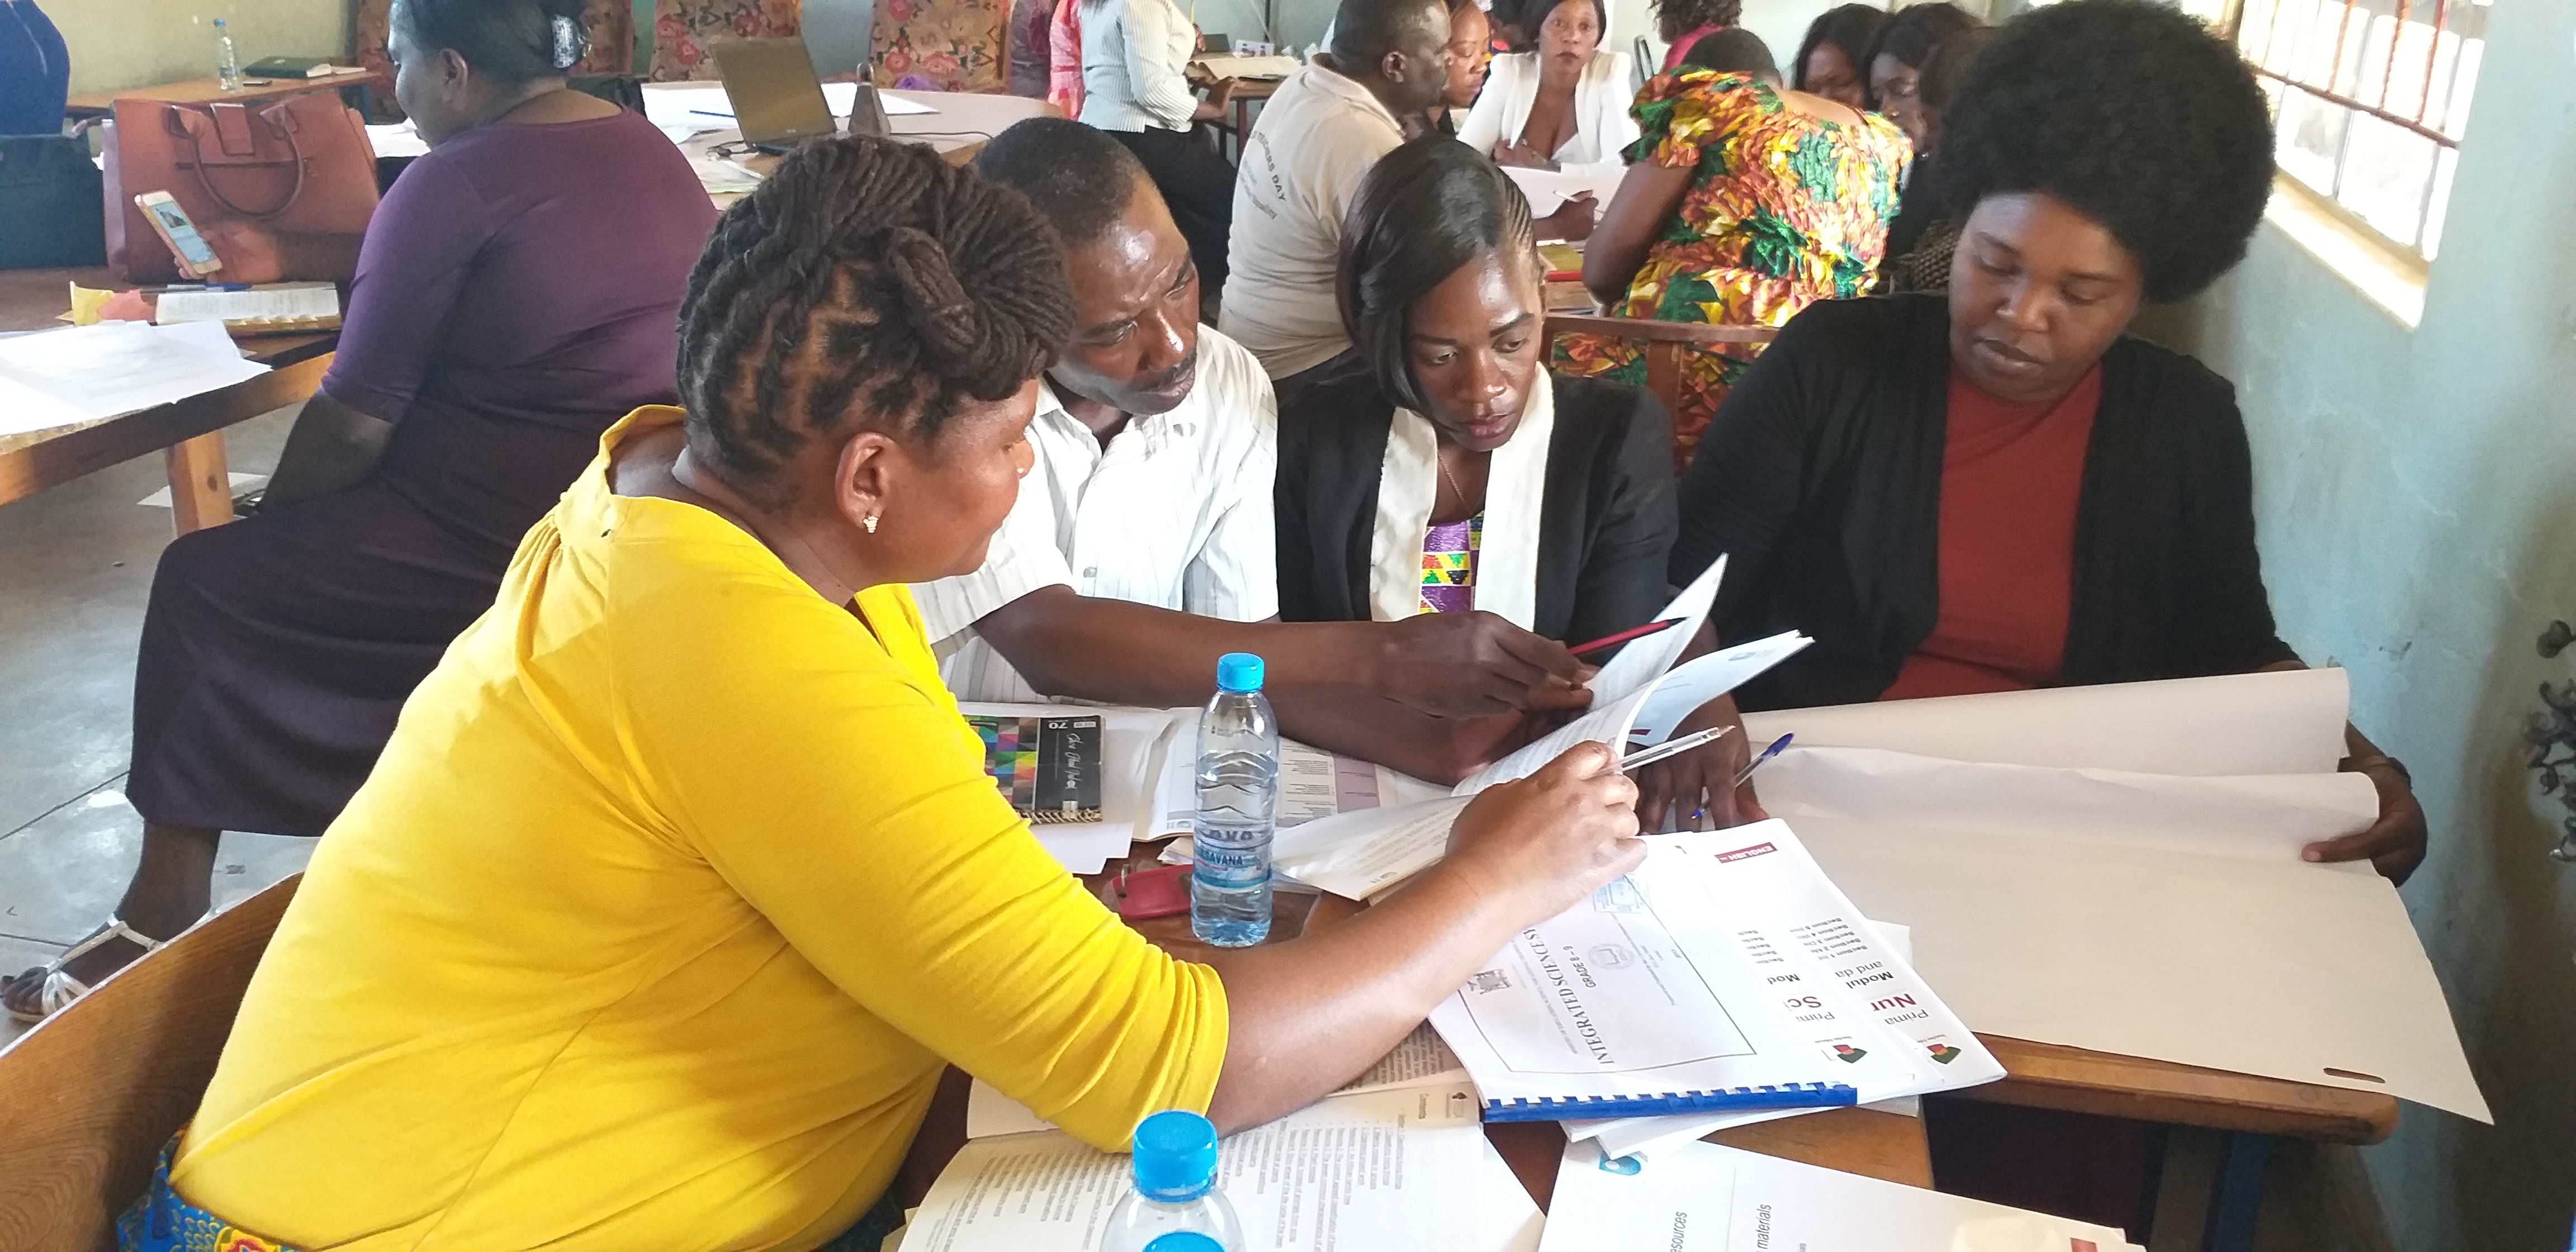
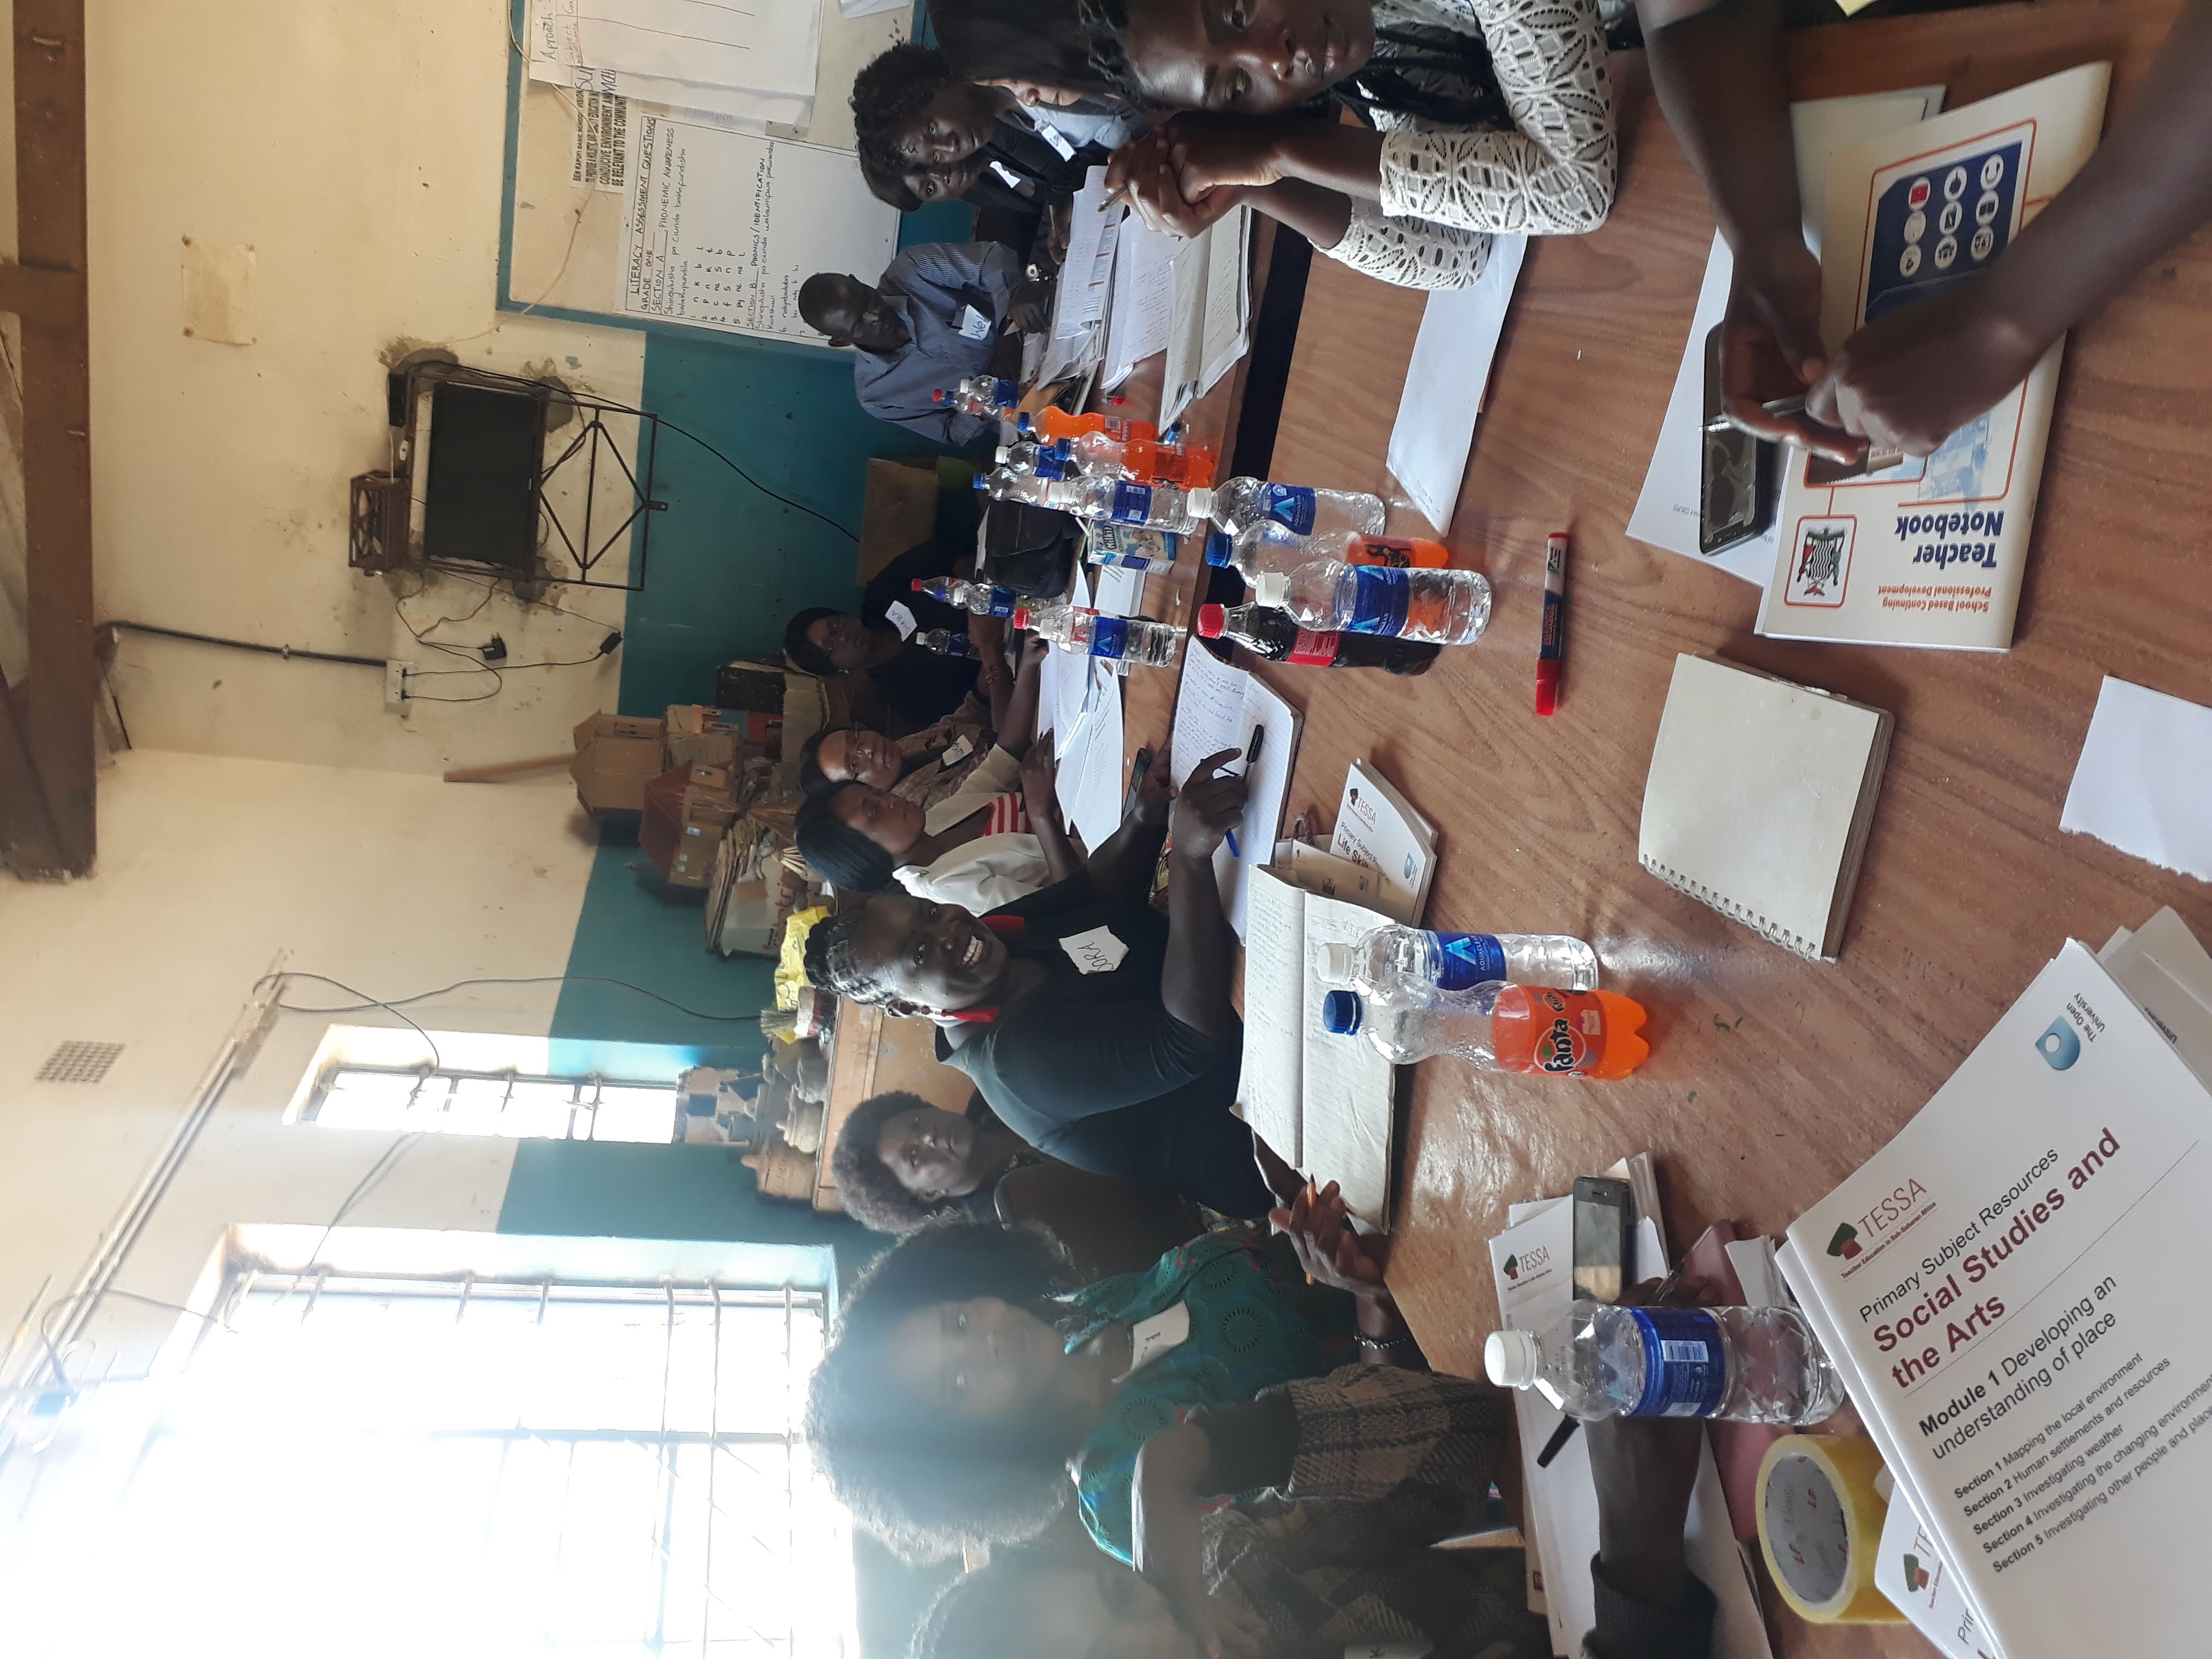
Teachers from Kabwe District working together
1.1. Collaborating with fellow teachers
Collaborating with your fellow teachers is a key element of the SPRINT approach. Over the past few courses you should have developed ways of working together that have helped you both in your TGMs and in your classroom practice.
Activity 4.1: Learning from collaborating with othersIn your Teacher Notebook note down four or five ways in which collaboration has helped you as a teacher over the past three terms. Answer the following questions:
|
Activity 4.2: Impact of collaboration on teachersWatch the video which shows a head teacher, an Assistant DRCC and a DESO talking about the benefits of collaborative working for teachers, and therefore for learners. As you watch, make notes on how the speakers see collaboration helping teachers in Kabwe and Chisamba. When you have watched, compare your notes with your partner. When you agree on all the benefits, share your ideas with another pair. Finally, as a group, compile a list of the benefits of working collaboratively. |
2. Developing participatory TGMs
Initially in this course, you are going to look at how to be active in your TGMs to make them as participatory as possible.
TGMs are a great opportunity to help you and your fellow teachers develop as reflective practitioners. Just like your students, you will learn most if you are actively involved and not just expected to sit and listen to presentations. A good meeting involves all teachers reflecting on and sharing experiences and ideas. This helps you develop different ways of working and understandings of effective teaching and learning.
Activity 4.3: Reflecting on past TGMsAt the beginning of this SBCPD programme you looked at things you would like to see in an effective and productive meeting. Revisit the list below and reflect on how many of these actions have regularly occurred in your TGMs over the past few terms:
Highlight those actions that have taken place, and those which have not taken place. In your Teacher Notebook make a note of how you can improve on the TGMs in your school, building on the things you do well, and developing aspects that could improve. |
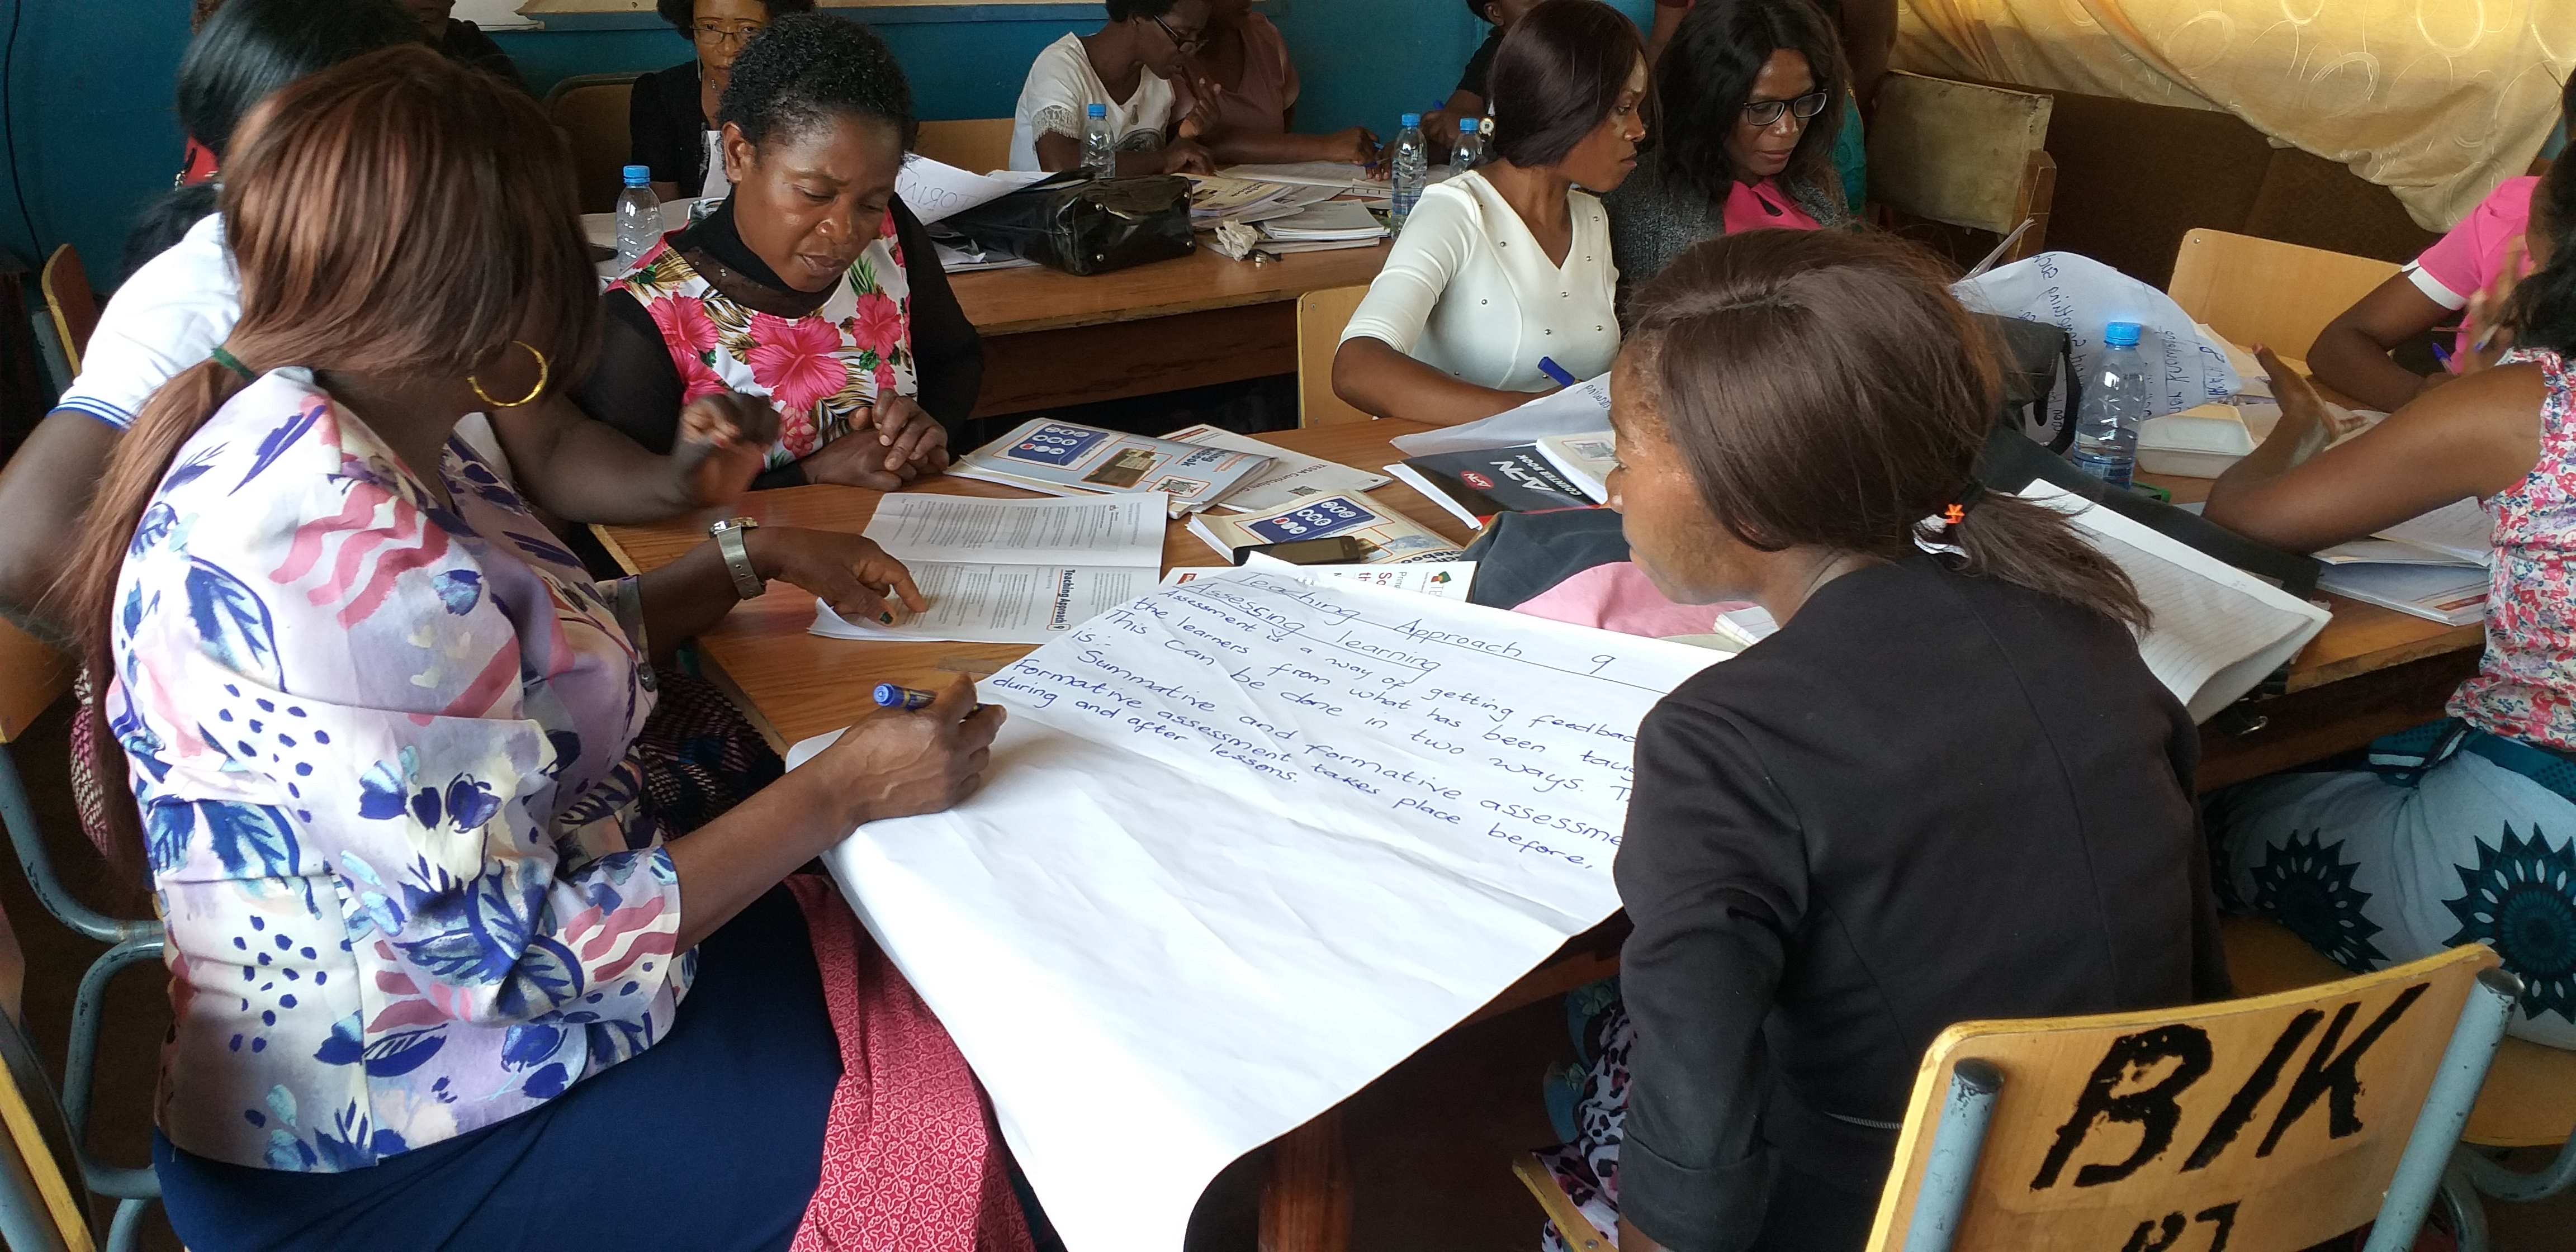
Teachers working collaboratively
2.1. Planning TGMs
Careful planning is key for successful meetings, as it is when planning a lesson. You need to think about the objectives that you want to achieve in the meeting and the kinds of activities you will use to meet your objectives. The training resources have activities for you to do together in your meetings. Facilitators need to plan the details of the meetings, and teachers need to prepare themselves by reading the training resources in advance. The activities suggested are relevant to your classroom practice and offer opportunities to discuss and try out ideas that can then be used in your lessons. It is not enough to simply know the theory about learner-centred teaching and learning; what is most important is to develop confidence in trying out these approaches in your own classrooms.
Example 4.1: Thinking about TGMsSIC James ran the first TGM of the term. He planned the meeting very carefully – reading the materials he would use and trying the activities for himself before the meeting. He found some of the teachers reluctant to share their ideas but realised this was probably because they were usually just asked to sit and listen. For the second meeting, he asked for volunteers to facilitate and Joyce volunteered. James was a little concerned because he knew that Joyce was extremely busy. She was also very confident and enjoyed leading TGMs as it provided an opportunity for her to explain her approach to teaching. However, James did not want her to give a lecture! So a few days before the meeting, he made sure that he had a cup of tea with Joyce and asked how she was getting on with planning the meeting. She seemed surprised that he had asked and reminded him that she was very experienced at running TGMs. James explained he just wanted to make her aware of the resources she had access to, to assist her in planning the TGM. He logged on to the Raspberry Pi, in the staffroom and showed her the outline for the TGM about role-play and story-telling. He also drew her attention to the facilitator guide and asked her to make a plan and share it with him the next day. He also explained that the aim was to make the TGMs more participatory than they used to be and to actively involve all the teachers. If they were expected to do this in their own classrooms then they needed to experience some of the approaches for themselves! The next day James noticed Joyce talking to a group of teachers, reminding them to look at the Training Materials in advance of the meeting. On the day of the meeting, she introduced the topic, but allowed the teachers plenty of time to talk in groups. By the end of the meeting, they had done two activities and everyone had a plan for an activity in their classroom. She allocated teachers to groups and when James asked her afterwards how she chose the groups, she said she had purposely mixed up the subjects because literacy and social studies teachers were generally more confident in role play and she wanted them to help the numeracy and science teachers. James was impressed. He also noticed that teachers were more willing to participate than in the previous meeting. Afterwards several teachers said how much they had enjoyed the meeting. That week, James also noticed lots of enthusiasm amongst learners as they talked about some of the activities they had done after the lesson. |
Activity 4.4: Reflecting on Example 4.1After you have read the example above, make a few notes in your Teacher Notebook in response to the questions below to discuss at the TGM
|
2.2. Reflecting and learning in TGMs
During this term, it is important that the TGMs focus on building the strong professional relationships created last year and developing your skills in planning and delivering lessons that combine different teaching approaches. This will mean that as you progress, your lessons will naturally contain a mix of learner-centred activities, supported by active monitoring and on-going formative assessment.
A participatory TGM involves teachers working actively towards a particular objective: to learn something that will be useful for everyone. Taking part in discussion and in collaborative activities enables you to explore a specific topic at the same time as allowing you to reflect on issues and on your own experiences. In all TGMs everyone needs to contribute and share experiences.
After each TGM take some time to reflect on the meeting to ensure the discussions, shared experiences and learning in them is most useful to you.
Activity 4.5: Reflecting and learning from TGMsYou may find it helpful to write your reflections on each TGM. This will help you see how the work you do in these meetings with other teachers can benefit you and your learners. In your Teacher Notebook write a paragraph on each TGM. You can include a description of the activity/activities you carried out, the resources you used, the usefulness of the activity and finally how you could use it as part of your classroom practice. This record will help you transfer the learning from the TGM into your teaching. Finally, think about your own contribution to the TGMs you have attended recently and write down two or three targets for this term. You might want to volunteer to be a facilitator, or you might resolve to try and contribute more, or to listen more if you are in the habit of talking a lot! |
3. Developing as a learner-centred teacher
The nine teaching approaches that you covered in the last three courses are:
Classroom management
- Using questioning to promote thinking
- Using pair work
- Using the local community/environment as a resource
The inclusive classroom
- Using group work in your classroom
- Storytelling, songs, games and role-play
- Involving all learners
Assessment for learning
- Monitoring and giving feedback
- Eliciting prior knowledge
- Assessing learning
By using and combining these approaches as part of your teaching you become more thoughtful and reflective practitioners. In the next one or two TGMs you will be supported in exploring classroom resources that will provide you with ideas for planning lessons which actively involve learners.
These resources are free. They are available on the internet (www.tessafrica.net) and can be downloaded to a computer, tablet or phone for use offline, for no cost.
|
TESSA is a network of teachers and teacher educators, working towards improving learning and teaching in sub-Saharan Africa. As part of TESSA, there is a set of free and adaptable resources, linked to the primary syllabus and secondary science, which provide activities and case studies for teachers to try in the classroom. You can use them to get ideas for classroom activities which link to the teaching approaches. |

TESSA resources in use in Chisamba
4. Using TESSA resources
TESSA provides resources for teachers to use in their own classroom to support active learning. TESSA materials have been written by teachers and teacher educators from different countries in sub-Saharan Africa and are designed to help teachers by:
- developing teachers’ understanding of teaching and learning
- encouraging teachers to think about their role in helping pupils to learn
- developing teachers’ understanding of how pupils learn
- exploring different ways of organising and working in the classroom.
The TESSA materials are open educational resources (OER). This means they are free to be used by anyone either online or downloaded and used offline or printed. They can be adapted, modified or integrated with other materials in any form. The TESSA materials have been adapted for Zambia by a team from the University of Zambia. They are approved by the Zambian Government.
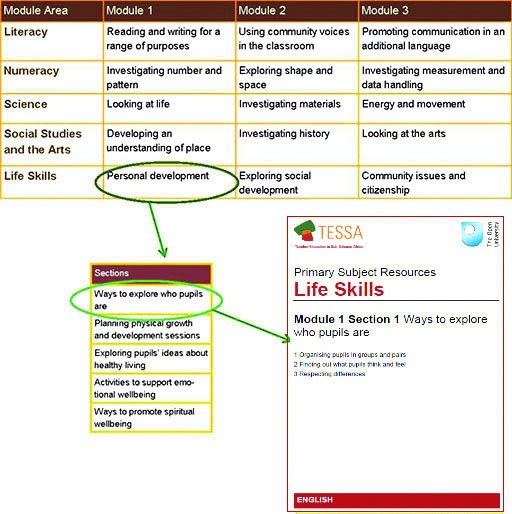
The TESSA materials are organised into five curriculum areas (as shown in Table 1 below): Literacy, Numeracy, Science, Life Skills and Social Studies and the Arts. Each curriculum area has three modules and each module has five sections or units. Each section has activities for teachers to do in their classrooms to help them develop their teaching skills.
For example, Module 1 of Life Skills (Personal development) has 5 sections, and each section follows the same pattern. Table 1 highlights the first section in the Personal Development module: Ways to explore who pupils are.
Table 1: The five TESSA curriculum areas
There is a total of 15 modules in the TESSA library and, if you print them out or view them as pdfs, each module is one book. When you read the subject resources you will see that there is not an exact match with the Zambian Revised School Curriculum. So for example if you are teaching Creative and Technology Studies you will find resources that can help you in TESSA modules from Life Skills, Science and Social Studies.
4.1. Explaining a TESSA section
All 75 TESSA sections follow the same pattern as shown by Table 2 below. Each section is designed to develop teachers’ practice through engagement with activities in their classroom. Each activity is expected to take one or two lessons at the most (unless it specifies longer).
Table 2: Content of a TESSA section
|
Key Focus Question |
This is addressed to the teacher and summarises the area to be studied in the section. |
|
Learning Outcomes |
Each section has up to three learning outcomes for the teacher. These focus on the development of classroom skills in the context of the curriculum of that module area. |
|
Introduction |
The introduction sets the scene. It outlines the classroom skills to be developed by the teacher and the curriculum content area for the section. |
|
Narrative |
The narrative provides a rationale for the case studies and activities and highlights the purpose of each. |
|
Case Studies |
A section has three case studies, each linked to a particular activity. The case studies illustrate ideas and concepts by describing how one teacher has approached the linked activity or similar activity in their classroom. They often focus on one particular aspect of the activity or on a particular classroom situation. |
|
Activities |
The three activities are for the teacher to undertake in their classroom with learners or in the wider school and community. The activities build towards the final activity, known as the key activity. The activities are learner centred and engaging for learners. Some activities are very short, whereas others are projects taking several weeks. Most take one lesson to complete. |
|
Resources |
Each section has up to six supporting resources. These take a variety of forms including web links, articles, images, stories, posters, examples of learners’ work, detailed lesson plans, poems and worksheets and template documents. They aim to enrich the teachers’ learning and support the activities. They also support the development of different dimensions of a teacher’s knowledge base, including:
A few of the resources are intended for use with learners. Icons are used to show the core purpose of a resource. These are:
|
Activity 4.6: Getting familiar with TESSAThe purpose of this meeting is for you to work together to become familiar with the TESSA resources. Once you understand the format and the layout, you will able to find many examples of classroom activities that can be adapted for your age group and subject. Watch the short video which explains the TESSA Resources. Choose one TESSA subject. There are three modules for each subject. Working in a group of three, choose one of the modules and look through Section 1 in detail. You will notice that each section has three activities, three case studies and six resources. Each of you should read one activity, one case study and two resources. Write down all the teaching approaches that are used. Now compare the list you have made of teaching approaches with your colleagues in your group. Write down at least one idea that you could use or adapt to use with your class. If there is time, look at Section 2. |
4.2. The TESSA Curriculum Guide
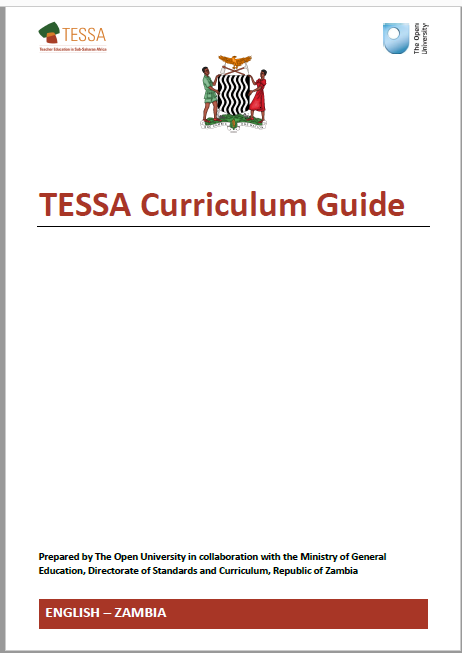
The TESSA Curriculum Guide (left) will help you make links between the Zambian Revised School Curriculum and the TESSA modules. It was prepared by a team led by The Open University UK, which included officials from CDC, working with teachers and College Tutors. The pages are colour coded according to subject (e.g. yellow for Literacy).
In the picture below you can see one page of the curriculum guide. There is one page per TESSA module, so there are a total of 15 pages.
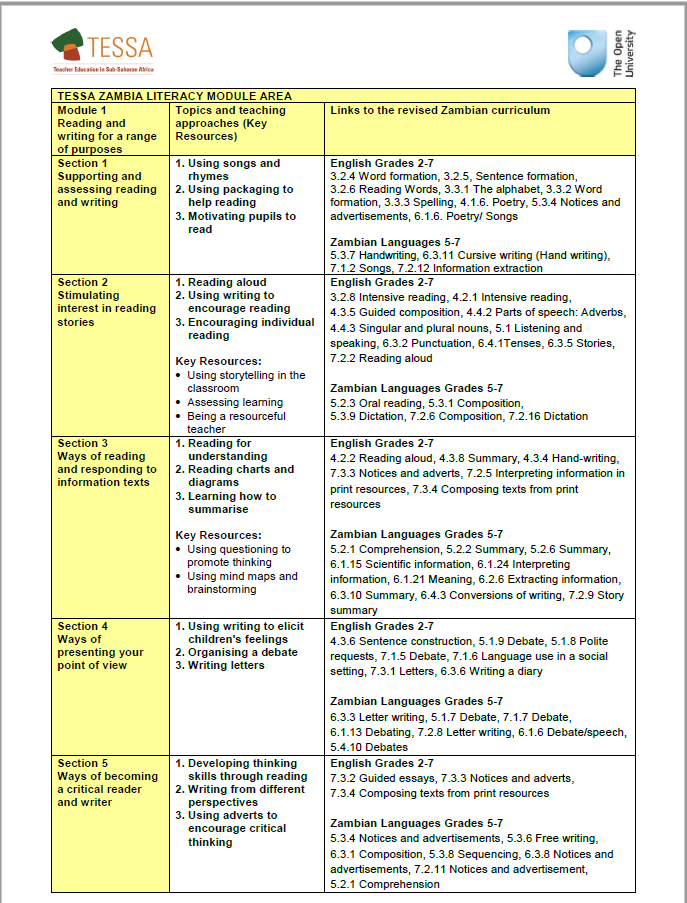
- Yellow indicates Literacy.
- What colour are the other subjects?
- Each page represents one TESSA module (or pdf).
- This page for example is TESSA Module 1: Reading and writing for a range of purposes
- Each row summarises one section of the TESSA module. There are 5 section in each module (first column of the left)
- For example Section 1 is ‘Supporting and assessing reading and writing’
- The middle column (Topics and teaching approaches), summarise the content of each section
- What is section 4 ‘Ways of presenting your point of view’ about?
- The last column on the right shows the ‘Links to the revised Zambian curriculum’. The first number tells you the grade, the second number the topic and the third number the section within that topic.
- For example in TESSA section 1, teachers from grades 3, 4, 5 and 6 can find ideas to support the curriculum for English language. And teachers in grades 5, 6 and 7 can find suggestions for teaching Zambian languages.
Example 4.2: Using the TESSA Curriculum GuideFlorence is a Grade 4 Literacy teacher. Next week she will focus on Topic 2: Reading. She looks for references to the Zambian Revised School Curriculum (column 3 on the right-hand side) which start with the number ‘4’. She found that Sections, 1, 2, 3 and 4 from Literacy Module 1 might be helpful, but that Section 2 and Section 3 have specific reference to ‘4.2’. Section 2 mentions ‘4.2.1 intensive reading’ and Section 3 mentions ‘4.2.2 Reading aloud’:
This means that if she looks at Sections 2 and 3 of Literacy Module 1, she will find something that will help her to actively involve her learners in her lessons next week. She also noticed that Section 5 is mainly suitable for Grade 7 but she had a look as she thought she might find something to help with informal writing. |
Activity 4.7: Using the TESSA Curriculum GuideFred is a social studies teacher. Next week he is teaching Grade 5. They will be doing Topic ‘5.1 Living in the community’. Which TESSA sections would be helpful for him? Martha is a science teacher. Next week she will be teaching Grade 3. They will be doing Topic ‘3.4 Plants and animals’. Which TESSA sections would be helpful for her? Remember, as well as looking at the main subject, it is always worth looking at the Life Skills Modules, especially for younger children as they have lots of ideas about how to teach skills and values. |
 In the next few weeks, use the TESSA Resources
to help you plan lessons which link the teaching approaches together to make a lesson which actively engages learners.
In the next few weeks, use the TESSA Resources
to help you plan lessons which link the teaching approaches together to make a lesson which actively engages learners.
Chewe spent some time in the staff room using the Raspberry Pi to look at TESSA Resources on her phone. She made some notes in her Teacher Notebook, and downloaded the relevant TESSA Sections on to her phone. Notice how she is planning ahead by making a note to collect resources that she will need.
4.3. Using TESSA resources to support my teaching
Activity 4.8: Getting ideas from TESSAThe TESSA activities are not lesson plans, nor are they grade specific. Follow these steps to help you find what you need:
|
Example 4.3: ScienceScience Module 2, Section 3 (Looking at liquids) describes a brainstorming activity to elicit prior knowledge about water and where drinking water comes from. A Grade 5 teacher could adapt the activity by changing the topic of the brainstorm to water borne diseases in order to find out what learners already know about them. A Grade 3 teacher could adapt the activity by changing the topic of the brainstorm to the three states of matter and build up a picture of a range of different substances that learners are familiar with, before classifying them and discussing their properties. |
Example 4.4: NumeracyNumeracy Module 1, Section 1 (Learning through games) has a bingo game, to help children recognise numbers 1-50. A Grade 1 or Grade 2 teacher could adapt the activity to include numbers 1-100 |
Example 4.5: LiteracyLiteracy Module 1 Reading and writing for a range of purposes has many ideas that can be adapted for different grades. For example, Section 2 has a case study and activity on reading aloud. For a Grade 1 or 2 teacher, this would provide ideas for you to make reading aloud more interactive and more engaging. A Grade 6 or 7 teacher, might encourage learners to read aloud to each other, or work with a lower grade teacher and encourage older learners to read to younger ones. There are also ideas about how to encourage learners to write stories themselves, which could be easily adapted for different levels. |
Example 4.6: Social studies or ArtsSocial Studies and the Arts Module 1, Section 4 (Investigating the changing environment) describes how the teacher asks her class to investigate the plants in their local environment and takes them on a field trip. A Grade 6 teacher, could adapt this activity; instead of organising a field trip they could ask their class to critically review their local environment as they walk to and from school. They could gather the information together and discuss the role of different community groups in making improvements. A literacy teacher would be interested in this work as learners could be asked to write a newspaper article, reporting on their local environment, or some campaign literature, highlighting the importance of disposing of rubbish properly. |
Kabwe teachers planning lessons with TESSA resources
5. Reflection
In the course 1 training materials you will remember there is a section on the importance of reflection in teaching. As a teacher, when you are planning your lesson you think about what you want your learners to learn and how to achieve this. Taking some time later to reflect on your practice enables you to learn from your experiences and improves your teaching.
Recording progress
An important part of reflection is ensuring you keep a record of your thoughts on the activities you have done in TGMs or lessons you have taught. In course 1 of this enhanced SPRINT programme, you were encouraged to keep a record of when you tried each approach. As you were introduced to and practiced different approaches you were asked to fill in a table like the one below.
|
Developing learner-centred teaching |
||||||
|
Teaching approaches |
Date the approach introduced
|
Date of 1st attempt
|
Date of 2nd attempt
|
Date of 3rd attempt
|
Date of 4th attempt
|
Confident using this approach |
|
1 - Questioning |
|
|
|
|
|
|
|
2 - Pair work |
|
|
|
|
|
|
|
3 - Local resources |
|
|
|
|
|
|
|
4 - Group work |
|
|
|
|
|
|
|
5 - Storytelling, songs, games and role-play |
|
|
|
|
|
|
|
6 - Involving all learners |
|
|
|
|
|
|
|
7 - Monitoring and giving feedback |
|
|
|
|
|
|
|
8 - Eliciting prior knowledge |
|
|
|
|
|
|
|
9 - Assessing learning |
|
|
|
|
|
|
Having followed this programme for a year, and covered nine teaching approaches, you should ideally have completed this table! But don’t worry if you haven’t, you can still do the next activity. Undoubtedly there will be some approaches that you feel much more confident in using with your learners – that’s just natural.
Activity 4.9: Focusing on your own personal developmentGo through all nine approaches and identify the three that you find most challenging to use in your teaching. Now reflect on each of those three approaches and, in your Teacher Notebook, write a short paragraph on why these approaches are difficult for you. Share this paragraph with a colleague who specialises in the same subject as yourself or teaches the same Grade, and together come up with a plan to help you overcome the difficulties you have encountered. Compare your list with someone who teaches a different subject or grade. Try and identify someone who might be able to help you. For example, Numeracy teachers are often less confident about role play than Literacy teachers; Science teachers are often very good at using local resources. |
5.1. Reflecting on teaching
It’s useful to keep a record of when you tried each approach. The next step in becoming a reflective teacher is to think about what worked well or what did not in your classrooms. Do you remember the questions from course 1 that can help you build your own skills in reflection? Here’s a quick recap:
- Which activities worked well in my lesson? Why?
- Which activities did not work as well as I planned? Why? What can I do to improve this next time?
- Did I have all the materials I needed? What else would have been useful?
- Which learners worked/participated well in the lesson? Why?
- Which learners found the activities difficult? What can I do to help them?
- What do I need to remember next time when I am planning a similar lesson?
Do you notice how questions 1, 2 & 4 are all followed by one word: ‘Why?’ and that some of the questions focus on the learners? Noticing how learners are reacting to the lesson is an important part of being reflective.
When you are reflecting on a lesson or series of lessons it is important to move on from describing what you have done to analysing why it was successful or not.
Admitting that something did not go as well as you hoped, is not a sign of weakness. Rather it is a strength, because it is through being analytical and honest that you will improve as a teacher.
Activity 4.10: Reflecting on teachingTake a look at these two examples of teachers’ reflections. Which do you think is the better reflection? Why? Example 1 We had a pair work review in the TGM and each teacher discussed something on pair work on the successes and challenges faced during pair work activities. It was discovered that nearly every teacher appreciated the approach and it worked well because every learner was involved, but it can be time-consuming. Example 2 In my English lesson on things that are found in the classroom, I divided students into pairs to practise ‘what is this’ and ‘this is a…’ and the words for objects in the room. I faced challenges because I forgot to demonstrate in the first place how the practical work should be done. I realised some learners did not know what to do. I gave some instructions desk-by-desk, but those I did not get to became restless. I think it would have worked well if I gave clearer instructions and perhaps encouraged pairs to help each other. What do you see in Example 2 that is not in Example 1? What would you want to ask the teacher who wrote the reflections in Example 1? |
|
Did you notice...
|
Here is an example reflection from a teacher’s notebook in the Central Province.

Look at how the teacher divides the reflection into different sections:
- Title
- Strengths
- Weaknesses
- Way forward
When you are writing your reflections on a particular lesson or part of a lesson in your Notebook, think about following a similar structure. Writing down the strengths and weaknesses of a lesson/activity will help you come up with a plan to move forward, as this teacher has.
5.2. Developing an action plan
Hopefully, by now your own Teacher Notebook is full of notes. Maybe you also have photos on your phone showing a range of information such as a display you prepared or some learners’ work. Below is another example of reflection from a Teacher Notebook.
|
Example 4.7: Developing an action plan Last Tuesday, Monica wrote in her Teacher Notebook, reflecting on the lesson she had just delivered. Tuesday 7/9/2020 Grade 2 Social Studies Topic Neighbourhood I planned a lesson using pair work and questioning where students had to first describe to each other where they lived and their neighbours. I started with some questions to draw out important features of the neighbourhood: How many close neighbours do you have? How many shops are there nearby? Where can you catch a bus? Then I put them in pairs. While one was talking, the other had to make notes. Then they each had to write five sentences or draw a picture comparing their neighbourhood with their partners’ and read it to the class. The successes were:
But there were also
problems:
Way forward From this I learned that:
My
action plan is as follows:
|
|
Activity 4.11: Developing an action plan Like Monica, focus on an element of your recent teaching that you find challenging. You could focus on one or several of the teaching approaches. Write an action plan like the one in Example 4.7 to help you. Share your plan with a colleague. Keep a clear record of your lessons and action plan so that you can revisit them. It’s important to write clear notes in your Teacher Notebook; hopefully it will have details of your successes (so you can try them again), your challenges (so that you can learn from them) and ideas you have got from your colleagues. |
6. Peer observation
What is peer observation?
Peer observation is the observation of teachers by teachers. It is often done on a reciprocal basis ie Teacher A observes Teacher B and then Teacher B observes Teacher A.
The objective of peer observation as part of the SPRINT process is to provide opportunities for you to reflect on your teaching in a calm and supportive environment. It has already been a very useful aid to teachers in schools in Zambia.
|
Activity 4.12 Watch this Head Teacher as he talks about peer observation As you listen note down in your Teacher Notebook:
|
|
Did you notice...
|
By using peer observation teachers have an opportunity to learn from each other. Where there is trust between the participants, teachers can share ideas and suggestions in a way that helps both.
An important aspect of peer observation is that it should not disrupt the teacher being observed or the learners in the class. This can be more easily achieved if classroom activities are the focus of the observation, rather than a full lesson. Observing sections of a lesson, rather than full lessons, provide teachers with more opportunities to observe, to be observed, to have time to give or receive feedback and to act on specific achievable improvements for the next time they use that approach or activity.
6.1. Organising peer observations
When you are organising a peer observation, take the following steps:
- Choose your partner
Wherever possible, choose your own partner. The outcome is likely to be more useful for both participants if you trust each other!
- Agree the format of the observations
Agree on a focus for the observation in advance. As was suggested above, you can focus on an approach which you are finding difficult and where input from a colleague will be helpful.
- Share some background
Tell your colleague in advance about the students in the class, the content of the lesson, and how it fits into the overall structure of the course. Perhaps suggest some specific students to observe
- The observation
Your colleague will keep notes on the observation to refer to during feedback.
- Follow-up
You should both meet soon after the observation. The focus should be on identifying the strengths of the teaching observed as well as the sharing of practical ideas as to how the teaching might be improved. Concentrate only on the areas agreed in advance and don’t get distracted by other things.
|
Example 4.8: Peer observation Remember Monica from example 4.7? Before Monica teaches her next social studies lesson with Grade 2, she asks her colleague, Thomas, if he will observe a pair-work activity she has set up. She shares her action plan with him. My action plan is as follows: My focus is on how I manage the pairs and my time management skills.
Before Thomas observes Monica’s activity, they agree that as he observes it, he will focus on how Monica organises a role-playing activity in pairs so that all the students are involved, and how she deals with her time management. She also asks him to comment on her questioning. |
|
Activity 4.13: Organising peer observation In pairs plan a peer observation based on the checklist above, where you both visit each other’s class.
Remember, the purpose for the observation is to analyse learning and what the learners are doing. Each decide on the focus of your observation and write down two or three objectives for your colleague to focus on when observing you. Then have a feedback session like in the next section and make notes in your Teachers' Notebook. |
6.2. Feedback sessions

Teachers discussing a lesson after a peer-observation
Analysing teaching together is one of the most powerful forms of professional development. The first question asked by an observer should always be: ‘How do you think the activity went?’ (even in a monitoring observation, as it encourages the teacher to reflect on their own teaching). Encourage the teacher to focus on the positives first.
|
Activity 4.14: Reflecting on observations Read the text below about Monica and Thomas as they discuss the peer observation. After you have done this write down the key outcomes of the observation. Take notice of the tone of the conversation – is it judgemental or supportive? Thomas: How to do you think the activity went? Monica: I liked how all the learners were engaged in the pair work activity – there was a lot of talking! Thomas: Why do you think that was? Monica: I think it was because I mixed up the higher and lower achievers? Thomas: How else could you have divided them up? Monica: Sometimes I will let them choose who they work with. I noticed today that Florence hid her work from her partner! Thomas: Why do you think that was? Monica: Maybe she was shy? They’re not particular friends. If you think about it though, in the past they were shouted at for copying! Perhaps I need to explain the point of working in pairs more clearly? Monica: I was pleased with the way I managed the time – by giving them warnings of when to switch roles, start writing etc they mainly stayed on task! Thomas: Yes – and most of them finished writing the paragraph. But about 15 didn’t. Monica: They’re the ones who have problems writing – they’re much slower than the rest of the group. Perhaps I could have emphasised the fact they could draw a picture instead a bit more. Thomas: I thought you resolved that really well by ending the class with the paragraph writing. Monica: Yes, because by tomorrow they will have all finished it as homework and that will give the weaker students more confidence? Thomas: That is a good idea…….I’m going to do that too |
|
Did you notice...
|
Many teachers involved in SBCPD in Central Province, Zambia have found peer observation to be a very helpful tool and hopefully you will too!
|
Activity 4.15: Drafting my personal peer-observation plan Draft a personal plan for peer observation for the full year and make it an ongoing part of your professional development. Remember to:
|
7. Summary: Managing and supporting learner-centred classrooms
The resources in this course have continued to help you develop learner-centred ways of working both in the classroom and with colleagues in your TGMs. The purpose of these final activities is to reflect on what you have learned and to complete a short quiz to demonstrate your understanding of the key concepts.
|
Activity 4.16: Reflecting on your professional development Look back through your Teacher Notebook and make a summary of some of the main things you have learned in this course. What has helped you to learn? Are there any critical incidents that made a big impact on you? Think back to last term – write down any ways in which your lessons are different now. Discuss your reflections with a colleague and set yourselves three targets each for next month. Think about the things that you think you need to improve and what you can do to achieve that improvement. |
Teachers working together collaboratively