Training guide
| Site: | OpenLearn Create |
| Course: | Active teaching and learning for Africa (3): Assessment for learning |
| Book: | Training guide |
| Printed by: | Guest user |
| Date: | Wednesday, 22 April 2026, 10:07 PM |
1. Introduction
Welcome back to this SPRINT school-based continuing professional development (SBCPD) programme designed to support active teaching and learning in line with the revised Zambian school syllabus. The programme will take six terms (two school years) and will be the focus of your Teacher Group Meetings (TGM). The topics for each course will be:
- Course 1: Classroom management for learner-centred teaching
- Course 2: Inclusive teaching
- Course 3: Assessment for Learning
Year 2
- Course 4: Managing and supporting learner-centred classrooms
- Course 5: Literacy across the curriculum
- Course 6: Being a reflective practitioner
Over the past two courses you have looked in detail at classroom management for learner-centred teaching and inclusive teaching, using and improving your skills in developing pair and groupwork activities, storytelling and songs, and using appropriate questioning.
In this course you will be looking in more detail at how to decide what you want to teach and how you will know that your learners have learnt it – the use of formative assessment in your classrooms. This will involve how you monitor learning in your class and offer effective feedback to your learners, how you find out what they already know and how to assess their learning both during and following your lessons.
You should now be in the habit of recording your thoughts and ideas in your Teacher Notebook. If you haven’t yet started using your Teacher Notebook on a regular basis, you are strongly encouraged to start doing so now as this will help you to plan activities or lessons, record your response to the different activities in these resources and important aspects to note from your lessons, and reflect on how your teaching has gone and how to improve it next time. As indicated in Part 1 of this SBCPD programme, in your Teacher Notebook you can include:
- ideas that may come to you when you are either studying or in the workplace, or at any other time
- your responses to activities
- notes about the audio you listen to, or the videos you watch as you go along
- notes about discussions you have had with others
- questions that occur to you while you are studying and planning your lessons
- reflections on what you think or feel about your learning.
1.1. Teacher Collaboration
In the TGMs, and between TGMs, you will have also discussed the different approaches and how to use them effectively in your classrooms with other teachers. A key element of the whole SPRINT approach is collaboration, so you all develop your skills as a teacher.
Watch and listen to an assistant DRCC and a head teacher talking about the teacher collaboration that they have observed and how it has helped teachers and learners.
Activity 3.1: Collaborating with othersWatch the video with the head teacher from Kabwe talking about the impact of teacher collaboration in her school. As you listen, make notes in your Teacher Notebook about the activities this head teacher has seen in relation to:
Now watch the video with the Assistant DRCC from Chisamba talking on a similar topic and make further notes. Have you had similar experiences in your TGMs with colleagues? Make a note in your Teacher Notebook of ways in which you could use collaboration with other teachers to help your practice and your personal CPD. In your Teacher Notebook write down three resolutions to improve your teaching and your collaboration with other teachers for this term. For example, ‘I will have tea break with… every Friday and we will discuss…’. |
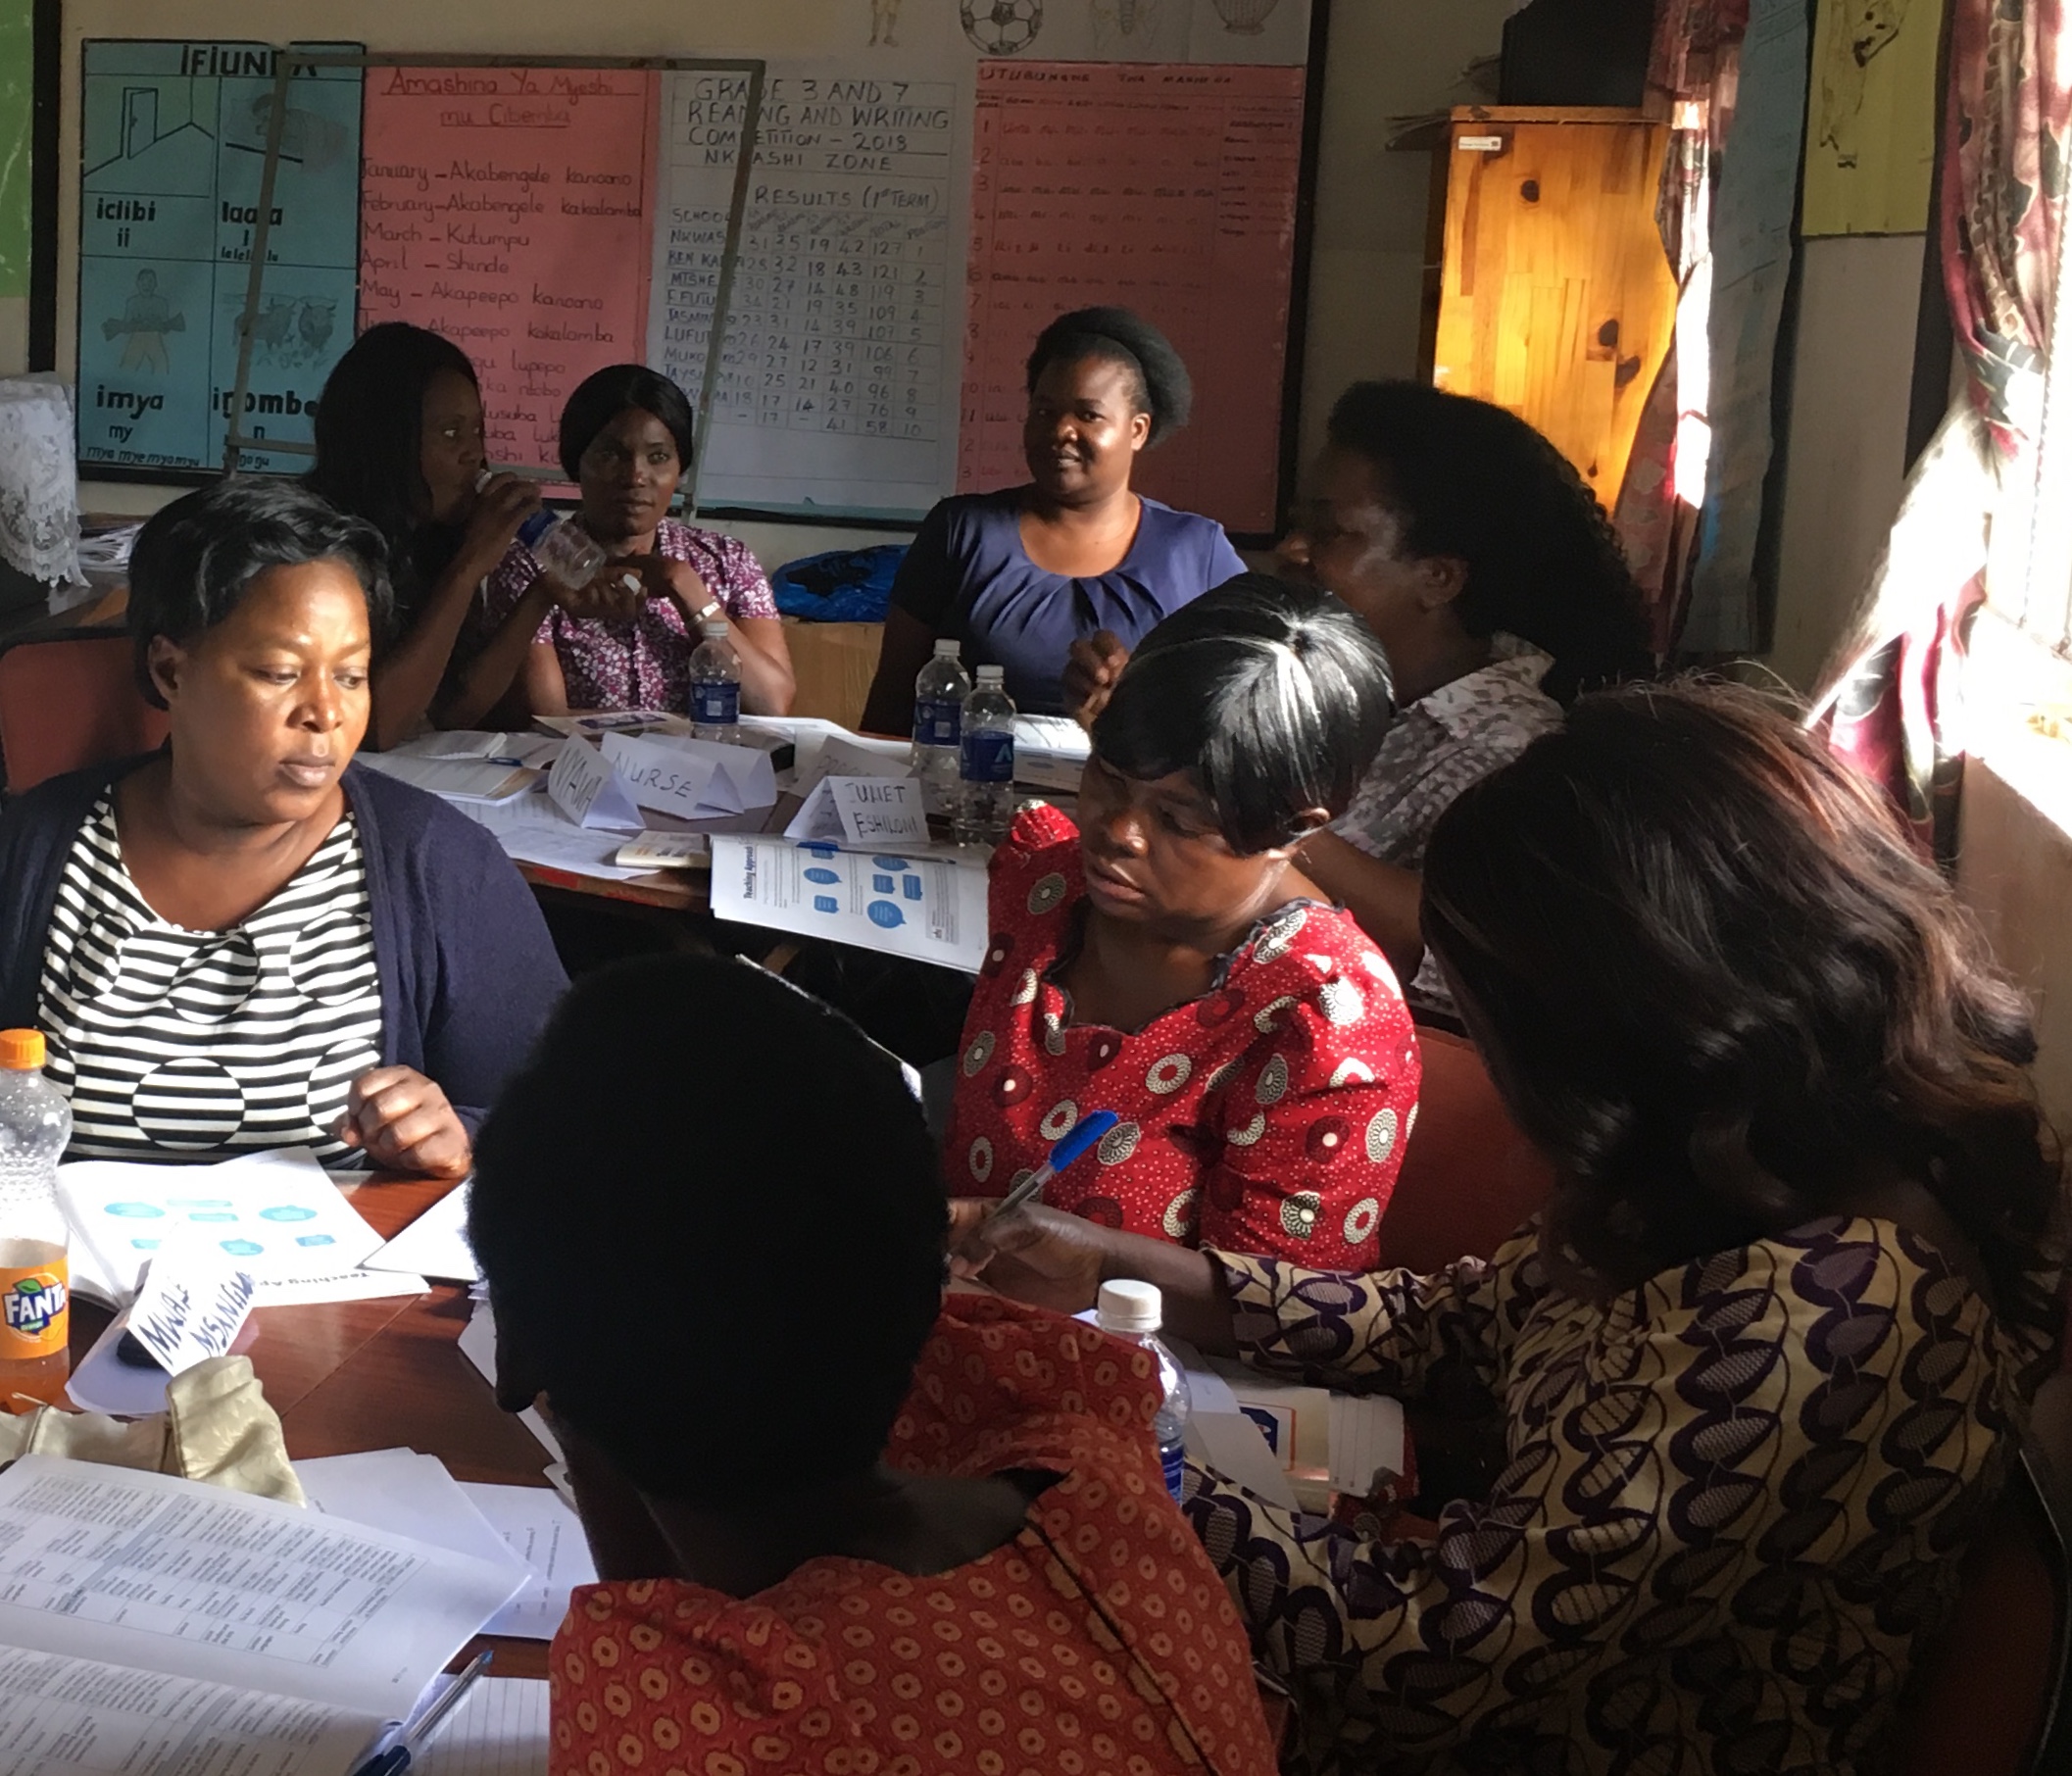
Picture: Teachers collaborating with others
In this course, the emphasis is on assessment for learning. This means finding out what learners know and understand before you set a formal test, and using the information to plan effective lessons. You will consider how to elicit prior knowledge from your students, how to monitor learning and give appropriate and useful feedback as well as a range of ways to undertake formative assessment, in your classrooms. There will be classroom examples which you can use or adapt.
2. What is assessment for learning?
At the end of a topic, teachers will usually set a test. This is ‘summative assessment’ and tells you what learners know about that topic. Often, teachers are dismayed by how learners perform in the test, feeling disappointed that learners do not seem to know very much.
An effective teacher will have strategies that will help them to find out what learners know and understand at the start of a topic (elicit prior knowledge) and to monitor learning as they go along so they can adjust their plans if necessary (formative assessment). In this way, there will be no surprises when it comes to the test! This is called assessment for learning and is different from formal testing (assessment of learning).
Assessment of learning scores are often used to rate teachers’ or schools’ ability to move student achievement based on the results of single, point-in-time tests. In the Zambian primary education context, the end of year exams and the national exams at Grade 7 are Assessment of Learning.
Assessment of learning scores can also be used formatively. When teachers return a test to children, they can design follow-up activities for children to work on either independently or together, to explore what went well and why, but also what went wrong and why, and how they might improve their answers.
Assessment for learning (AFL) takes place constantly in every classroom. It helps you to track learning and support learners as you go along. Learners will become more involved in the learning process and be aware of what they are expected to learn and to what standard. In this course the focus is assessment for learning.
Activity 3.2Take a look at this video of a Grade 7 science class. Would you describe this as Assessment of or for Learning? In your Teacher Notebook make individual notes about your reasons for identifying it as Assessment of or for learning. Now share your thinking with one or two colleagues. Did you arrive to the same conclusion? |
2.1. Assessment for Learning (1)
Assessment for Learning helps learners to:
- understand what they are expected to learn
- be aware of where they are now with that learning
- understand how they can make progress (that is, what to study and how to study).
As a teacher, you will get the best out of your learners if you aim to use the three points above, which makes assessment as much a responsibility for the pupil as it is for the teacher. How does this work?
1. Learners understand what they are expected to learn
When you decide the learning outcomes for a topic or a lesson activity you should share what it is you are expecting them to LEARN. For example, ‘Today we are going to learn about the air. By the end of the lesson you will be able to demonstrate that it exists and describe its uses’.
To check they have understood, ask a question. For example:
- ‘Who can explain in their own words what we have to do and what we aim to learn?’
- ‘So what is it we are going to do today?’
Their answers will enable you to know if they understand what they have to learn before they start. If there is confusion, you can explain again in a different way.
2. Being aware of where they are now in their learning process
In order to help learners improve, you and they need to understand and be aware of what they already know about that specific topic. Watch and listen as they work and talk to learners about what they know and understand. Make sure that they find your feedback both useful and constructive. Do this by:
- highlighting learners’ strengths and suggesting how they might further improve them
- being clear about weaknesses and positive about how they might be tackled, checking that learners understand and are positive about your advice
- checking with learners for examples of your feedback that they found useful. Assessment for learning is a two-way process.
3. Understanding how they can make progress.
You will need to provide opportunities for learners to improve their work.
Give learners opportunities to talk about their work amongst themselves and explain what they are finding difficult. This helps them to become aware of their own learning.
How can you help students consolidate and improve their learning?
- plan open-ended tasks – all students work on the same task but find their own attainment level
- provide students with choices about which task to do. Encourage them to choose one which will challenge them
- group students according to needs, give differentiated tasks.
2.2. Assessment for Learning (2)
Classroom Example 3.1: Getting to know your school environment and communityListen to the audio or read the example below about how Elisa taught Social Studies to her Grade 5 class. As you read, make notes in your Teacher Notebook, considering the following:
Audio transcript Elisa is a teacher in Grade 5 and she is exploring the local community and environment around their school in a village in Zambia. As part of the social studies syllabus, Grade 5 learners need to study aspects relating to transport and communication in the district. Elisa hopes to develop her pupils’ abilities in observing and respecting the environment surrounding their village. She hopes this will help them to understand their roles and responsibilities with respect to local resources and their community. At the end of one day, Elisa explains to the learners what they will be doing the next day and what she hopes they will learn. As homework she asks them to note down all the modes of transport they see on their way home that day and to bring their list to school the following day. The next day, she writes on the centre of a large piece of paper: ‘What modes of transport do we have in our own environment?’ Elisa asks for volunteers to come and add the names of the modes of transport learners have noted in their homework, for example: bicycle, car, minibus. As they add the modes of transport, Elisa asks them what is good and not so good about different modes of transport for the local environment, and for those living in it. Elisa then draws a circle around all these modes of transport and asks learners to add any other modes of transport they know about but are not present in their own community. She also asks them about the benefits and the issues of each transport. During this activity Elisa has to explain a number of modes of transport that some learners are not familiar with. To do this, she first asks her learners if any of them knows what it is, and then she adds some information herself. For the next activity, Elisa draws a table on the chalkboard with three columns: mode of transport, benefits and issues. She puts learners into groups of six and gives each group a mode of transport from their community, and one that is not present within their community. She asks them to copy the table on the paper she has given them and write what is good and not so good about both modes of transport. As she walks around the different groups, Elisa finds that all learners are very engaged with this activity and are contributing very good suggestions. For her next lesson, Elisa plans to ask each group to explain the benefits and the issues of each mode of transport, asking learners to make notes of all these in their notebooks. Elisa has also thought about how she can assess each learner’s understanding and knowledge in a few weeks’ time. |
Activity 3.3: Assessing learners’ learningAfter listening to or reading Classroom Example 3.1, reflect about how you have assessed learning during a lesson you recently taught. Identify a lesson that you taught last week.
Make notes in your Teacher Notebook to share with colleagues in the next TGM or next time you discuss your teaching with a colleague. When discussing your experience with a colleague, make notes about any different ways they have used to assess learners’ understanding or learning as they might be useful for you to use in a future lesson. |

Picture: Teacher assessing learning
3. Eliciting prior knowledge
Children are not empty vessels. They come to school with knowledge and experiences that will be relevant to their learning. It is important to find out what your learners know before starting a new topic, or what they remember from the previous lesson. This will ensure that the lesson is not too easy or too hard. There are various techniques you can use to elicit, or find out, what learners know. Don’t assume that because you taught something last week, they know all about it!
3.1. Brainstorming
You can get your learners to do a brainstorming activity as a whole class or in groups. To set up a good brainstorm, it is essential to have a word, question or problem that the group is likely to respond to. For example, in a lesson on transport you could ask, ‘Who has been to Lusaka?’ and ‘How did you get there?’ Choose a learner to capture the responses on the board – bus, car, train – then extend to other forms of transport. How do you get to school – bicycle, motorbike, truck etc. This technique can be applied to any topic.
Think about how to use the results of the brainstorm. The information gathered from learners through a brainstorm can be used in many subject areas. You could display it and re-visit when you have finished the topic or ask children to organise the ideas into a mind map.
In very large classes, questions used for a brainstorm activity can be different for different groups. Groups should be as varied as possible in terms of gender and ability. Each group (of between six and eight learners) needs to have a large sheet of paper that all can see. The ideas of the group need to be recorded as the session progresses so that everyone knows what has been said and can build on or add to earlier ideas. Every idea must be written down, however unusual. Before the session begins, the following rules are made clear:
- everyone in the group must be involved (remember to assign roles to different group members)
- no one criticises anyone else’s ideas or suggestions
- unusual and innovative ideas are welcomed
- lots of different ideas are needed
- everyone needs to work quickly. Brainstorming is a fast and furious activity.
Activity 3.4: Stages in learning processNellie has begun teaching her Grade 4 class about forces (Topic 4.5 in the science curriculum) and wants to get them to think about the concepts of ‘pull’, ‘push’ and ‘twist or turn’. Listen to the audio or read classroom example 3.2 as she explains how she helps her students do this. As you do so, write down the various steps or stages in the process in your Teacher Notebook. |
Classroom Example 3.2: Brainstorming force action words to elicit knowledgeAudio transcript: Over the past two weeks, I have been collecting pictures and objects that illustrate different types of force action, drawing resources from around my home and school environment. For example, I have a screwdriver to demonstrate how to ‘screw’, and a sheet of ripped paper to visually show the meaning of ‘tear’ and ‘rip’. I begin the class by demonstrating and eliciting the three key verbs (pull, push, twist). Most of the learners are familiar with these words although a few are not sure of ‘twist’. Once I have demonstrated and asked them to show me physically what it means, I write the three words on the board. We then do a brainstorm activity where I ask my learners to call out all the action words they can think of. I make three ‘word spiders’ on the board - one for each of the three verbs (push, pull and twist). We begin by using words in their home language and then move onto English. I find using mime to demonstrate meaning is really helpful, and I check with them whether each suggestion they offer is a push, pull or twist verb to check their understanding. Finally, I put all the pictures and objects I have collected on a table and ask the learners to label them with an appropriate verb and put them into three groups – one for push, one for pull and one for twist types of force. |
|
Did you notice...
|
3.2. Using visuals
Another way of eliciting prior knowledge is through the use of visuals.
A picture or a drawing on the board can help prompt learners to give information. For example, a drawing of the life cycle of the frog can begin with a drawing of a tadpole; encourage learners to tell you what comes before the tadpole and what comes after.
A clock, either on the wall or a drawing on the board, can help in eliciting language. For example, when practicing the present simple and daily routines, show 7am/10am/4pm/8pm and ask, ‘What does she do at this time?’ to elicit appropriate language.
Remember that visuals, whether pictures/posters or drawings, must be clear and large enough for all learners to see wherever they are sitting in the classroom. Alternatively you could use smaller visuals with groups or pairs of learners.
3.3. Local resources
Remember that there are a lot of resources in your local environment, and your learners can also contribute visual resources to support their learning and your teaching. Food packaging or local plants can be used to find out what learners know about issues in science and social sciences.
Activity 3.5: Using local resources to elicit knowledgeBennita uses local packaging to find out what her Grade 5 students already know about the difference between objects and shapes. Watch the video as she shows the resources she has accumulated. In your Teacher Notebook make a note of what other items you could usefully collect to help with your classroom practice, and what topics you could use them for.
|
Activity 3.6: Eliciting prior knowledgeDecide on a lesson that you are going to teach in the next few days. Choose a technique from the three suggestions you have just read about to elicit your learners’ prior knowledge: brainstorming, using visuals and local resources. Use the ‘top tips’ below to help you. In your Teacher Notebook, write:
Write in your Teacher Notebook how you will elicit information from your learners and discuss your ideas with your partner. You can practise brainstorming with your colleagues or explain how you will use a visual or local resources in your lesson. |
3.4. TOP TIPS for successful eliciting
- Eliciting prior learning is a basic technique to find out what learners already know. It should be used regularly, not only at the beginning of a lesson but whenever it is necessary and appropriate.
- Use open-ended questions to elicit prior knowledge – the answers will tell you about the extent of their knowledge.
- A long silence or incorrect answers tell you that learners don’t know the answer. Don’t wait too long if learners are silent! You can ask questions to assist and guide learners towards the type of information you are looking for.
- Don't ask learners to repeat incorrect answers but do ask them to repeat a good answer to ensure that everyone has heard.
- Acknowledge or give feedback to each answer with gestures or short comments.
- Learners can elicit from each other, particularly during brainstorming activities. This helps to build confidence and a sense of community as well as shifting the focus away from the teacher.
Successful eliciting depends on the attitudes of teachers and learners. It encourages an exchange of information and interaction; it helps to break down traditional teacher-centredness, and to make it clear that you value the knowledge and experience learners bring to the classroom. It is also important for learning through tasks and self-discovery, and a simple and effective way of getting learners to show what they already know, so that you can plan appropriately.
4. Monitoring
Effective monitoring involves noticing. During a lesson, you will have many opportunities to collect evidence of learning, or of learners having difficulties.
You can monitor your learners by:
- listening to their discussions in pair or group work
- observing them using resources
- observing the body language of groups as they work
- listening carefully to their responses to your questions.
It’s difficult to monitor your learners if you always stand at the front of the classroom. If your circumstances and your classroom allow, you need to move to different parts of the classroom in order to be more aware of all your learners.
As learners work, move around the classroom and make brief notes on what you observe. You can use a class list to record which learners need more help. With a large class, you may select a different group of learners to monitor each week, or even each day so that during a month you have a note on each learner. You can use these observations and notes to give feedback to the whole class or encourage groups or individuals.
As you notice things, you can give learners feedback on their work. This will help them to know what is expected of them so they can improve.

Picture: Teacher monitoring learning
4.1. Monitoring reading skills
Activity 3.7: Monitoring reading skillsListen to the audio or read the transcript where you can hear Wilson talking about how he has started monitoring the reading skills of his Grade 6 class. Audio transcript I am the teacher of a large Grade 6 class and I had become more and more concerned that I just didn’t have time to check the reading ability of all my students during normal lesson time. A few of my students are great readers and I know I tend to use them a lot when I want a learner to read aloud from the textbook because it saves time. I needed a better way of monitoring the skills of the whole class, as there are some students I had not heard read aloud for quite some time. So, for a month, every time I listened to a learner read, I made a note of it and how they did in my mark book. I deliberately created opportunities for less confident readers to read to me individually, rather than to the whole class. It took a few weeks, but now I have listened to all the learners in my class and I have now been able to group them into reading sets which I believe will help them improve and practise their skills. Thanks to this information, I also sometimes use learners from the top reading groups to help learners who find reading more difficult. In order to do this, Wilson made a chart with each student’s name, the date and a space for comments. Over the period of a month he found time to listen to each learner in his class and to complete a table like the one you can see below:
This model of monitoring can be used in all subjects. After listening to Wilson (or reading his thoughts) and looking at his table, reflect on and discuss with colleagues how this would work in your own subject.
Using a mark book, or your Teacher Notebook, make a plan for monitoring learners’ in your subject for the next month. Think about the key knowledge, skills and values that you want them to learn, and devise a way of recording their progress. You could use a table like this:
|
5. Giving feedback
When you give learners feedback, you tell them how they have performed in relation to a stated goal or expected outcome. Good feedback from their teacher has a positive tone and tells the learner:
- what they can do
- what they cannot do yet
- how they can improve.
It is important to give clear feedback that is:
- focused on the task being undertaken and the learning that the learner needs to do
- clear and honest, telling the learner and praising what is good about their learning as well as what requires improvement
- practical, telling the learner to do something that they are able to do
- given in a language that the learner can understand
- encouraging, so you build their confidence and self-esteem
- positive, with clear guidance.
Using praise and positive language
When we are praised and encouraged, we generally feel a great deal better than when we are criticised or corrected. Remember that praise must be specific and targeted on the work done rather than about the learner themselves, otherwise it will not help the learner progress. ‘Well done’ is non-specific. Read the following examples of feedback.
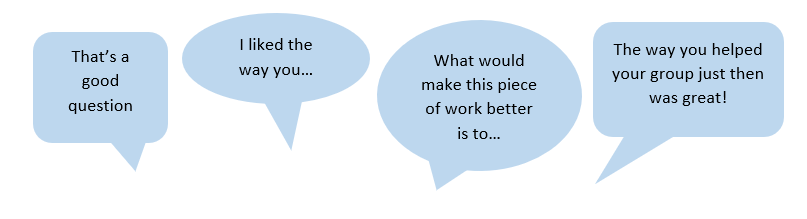
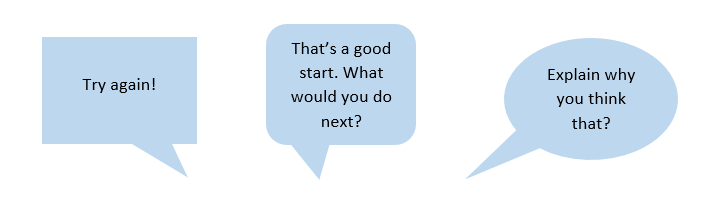
Using prompting as well as correction
If you give learners a hint or ask them a further question, you can help them to think more deeply and encourage them to find answers and take responsibility for their own learning (remember the work you did on questioning). For example, you can encourage a better answer or prompt a different angle on a problem by saying things such as:
5.1. Teachers giving feedback
Activity 3.8: Using positive language to provide feedbackIn your Teacher Notebook set up a list of sentences you can use to give positive feedback to learners when praising or correcting their work. Draw a table with two columns:
In the ‘praising’ column, copy the sentences provided above and add a few others you use regularly. In the ‘correcting and prompting’ column, copy the sentences above and add others you regularly use. Share your examples with colleagues and add their ideas to increase your own lists. When you give feedback to learners, in their written work or in other activities make sure you use different sentences to praise and correct their work. |
Activity 3.9Watch the video of Mary teaching Grade 4. As you watch make a note of the different kinds of feedback and prompts that she gives to her learners.
Now compare your notes with a partner. How do you think you compare with Mary in terms of praising your learners and following up on their responses? Do you think you can improve? The next time you have a peer observation, ask your colleague to focus on your feedback to the students and your movement around the class. |

Picture: Teacher providing feedback to learners
5.2. Building self-esteem
Activity 3.10: Building self-esteemRead the following scenarios and discuss with a partner how you might respond with appropriate feedback. Try and imagine what it would feel like to be the child receiving the feedback. Scenario 1: Michael is in Grade 4. You have set some Maths problems. Michael is the first to finish, but when you look at his work you realise that in his rush to finish, he has made a lot of mistakes. Scenario 2: The school has received some reading books. You invite your class to choose one to read to themselves in quiet reading time. You notice that Martha chooses one which has very few words on each page. You know that she is quite a good reader and you would like her to challenge herself more. Scenario 3: You asked your class to answer some questions in English about a story you read to them. David wrote some very good detailed answers, but he made many mistakes with his spelling. |
Praising students when they give good responses in your class helps to build their self-esteem from an early age. Another way to improve learners’ self-esteem is to help them recognise their own skills. Plan an opportunity to do this next week. Here are some techniques you could use:
- ask your learners to describe different kinds of things they enjoy doing, both at home and in school
- ask them to think about which activities they are particularly good at
- organise them into groups. Then ask each pupil to identify three special skills they have and share these with the group
- ask them individually to write about these skills and draw pictures of themselves doing each activity. Display them on the wall.
6. Assessing learning
Formative assessment is about noticing learning and involving students in the assessment process. If you do this carefully, then you can plan your lessons to provide support and challenge where necessary. You will also help students take responsibility for their own learning, meaning that they are more aware of what it is you want them to learn, and will ask more questions.
So far you have thought about:
- making learners aware of what you want them to learn by sharing lesson objectives
- the importance of moving around the room to listen and watch learners at work
- different ways of eliciting prior knowledge
- how to give feedback which is helpful and encouraging.
Activity 3.11: Formative assessmentOn the next three pages are three classroom examples, all of which show teachers undertaking formative assessment in different ways. As you listen or read the different examples, in your Teacher Notebook:
Compare your analysis with a colleague, and together compile a list of ‘top tips’ for formative assessment. Display this on the wall of the staff room. Think about a topic that you will be teaching soon, or have just taught. How would you adapt one of the classroom examples for your classroom? |
6.1. Examples of formative assessment (1)
Classroom Example 3.3: Monitoring learning, peer assessment – past tenses and writing
Audio transcript Lucy is teaching Grade 4 learners about awareness and use of the past tense to write short stories. They have done many activities in her lessons over the past week, but she is not sure if all her learners have fully understood and remember the main irregular verbs. In order to assess their learning, she asked them to write a story titled Janice’s visit to the market last week. For this she gave learners a list of 10 verbs, both regular and irregular, which they had to include in their story. While she is correcting the stories, Lucy realises that most learners have clearly understood that all verb forms are the same for the different persons in the past tense. However, she noticed that some learners are still finding it difficult to use the correct forms for common irregular verbs such as go, make and buy for example. In her class list she made notes about how well the different learners had completed the activity. The next day, she sets up an activity where learners had to change sentences which included both regular and irregular verbs in the present to the past tense. Before the activity, using the notes that she had made on her class list, she put learners in groups ensuring that in each group there was at least one learner who had demonstrated good use of past tenses in the writing. As the groups worked, she walked around the classroom paying attention to all learners and ensuring those who had completed the writing correctly were assisting others rather than just giving the correct answer. At the end of the activity, Lucy brought the full class together again. In order to reinforce their learning, she asked learners who had made mistakes in their writing to provide the correct sentences from their group. A few weeks later, Lucy revisited past tenses as part of another topic they were working on. As she walked around the class while they were doing a pair activity, she used her notebook to remind herself of the learners who had struggled in the writing activity, and she was pleased to see that many of the learners who had made errors in their writing were now using more verbs correctly. It took Lucy a lot of time to mark all the work and set up the groups, but when reflecting about this activity, she realised that all learners were now much more confident in using the past tense in their writing. The additional time she had spent in this series of activities to reinforce irregular past tenses had benefitted all learners. |
|
Did you notice:
|
6.2. Examples of formative assessment (2)
Classroom Example 3.4: Brainstorm to elicit prior knowledge and poster design
Audio transcript Charles, who teaches social studies and expressive arts at a small school in Mumbwa, wants to reinforce his Grade 6 learners’ knowledge of important events in history. In order to do this, he plans a lesson where his pupils need to develop a timeline which would represent key events that have occured in the history of Zambia, Central Province and Mumbwa District. Charles has already spent a number of days on this topic, so he is keen to know how much learners remember about the topic and how to help them to summarise their knowledge. He divides the class into six groups of four to six learners and gives them each a big piece of paper. On each he has written Zambia, Central Province or Mumbwa. He gives two groups a paper with 'Zambia' written in the centre; two groups a paper with 'Central Province' written in the centre; and two groups a paper with 'Mumbwa' written in the centre. Each paper has a table divided into two columns: Date/Year and Event. He asks the groups to write all the events they remember that have occurred within their allocated jurisdiction, adding the date or year it occurred. If they can’t remember the date, they can leave that blank as just naming the event already demonstrates they know that a key event took place. After 10 minutes, he asks the two groups who have worked on the same jurisdiction (Zambia, Central Province or Mumbwa) to exchange the pieces of paper and:
As Charles is not planning on asking each group to share their work at this stage, he walks around the groups paying special attention to their writing to ensure that the information is correct. After 10 minutes, he asks the groups to return their paper to the original group. After each group has received their paper back, Charles asks all learners to look at the board where he has drawn a timeline of the history of Zambia. To help pupils understand the concept of periods, he has divided the history of Zambia into the pre-colonial, the colonial and the independence periods. To give a sense of how long each of these periods is, he draws each period to scale. Charles asks each group to identify one event and asks for a volunteer to come to the board to place the event in the timeline. When all six groups have added their event, Charles explains that he would now like them to draw a timeline and present the events they have identified in the best possible way for others to learn from it. |
|
Did you notice
|
6.3. Examples of formative assessment (3)
Classroom Example 3.5: Formative assessment for understanding fractions
Audio transcript Geoffrey is working on proper fractions with his Grade 3 class. He wants to ensure that they all understand proper fractions and can explain their understanding of the topic. Geoffrey begins the lesson by taking a banana out of his bag. He tells the students that he wants to give an equal part of the banana to five of his friends and asks them to tell him how he can do that. Several students put their hands up and Geoffrey elicits the response that they will cut the banana to make five equal parts. Each one is a fifth. He writes 1/5 on the chalkboard. Geoffrey tells the students they are going to work in pairs and asks them all to point to their partner. He then gives them four tasks to do around dividing bananas into equal parts or fractions. He asks them to divide an imaginary banana into 4, 6, 8 and 9 parts. For each one he asks them to write down the fraction. As the students are working through the tasks, Geoffrey circulates around the classroom monitoring the students and asks them to explain how they reached their answers. He avoids telling them the answer but waits for them to find it and encourages pairs to help each other. In this way he is able to identify where there are problems of understanding. When all the learners have completed the tasks, Geoffrey asks for volunteers to write each answer on the chalkboard. He then writes up two more fractions: 1/3 and 1/10. He asks them to say which one represents the smallest piece of a banana; which one represents the largest; and how they know. At the end, he helps them to deduce that the larger the number on the bottom of the fraction, the smaller the piece of banana. |
|
Did you notice:
|
7. Summary: Assessment for learning
This course has provided a basis for three classroom approaches which will help you to support learners in your classrooms and help all your students’ progress in their learning. The purpose of the final activities is to reflect on what you have learned and to complete a short quiz to demonstrate your understanding of the key concepts.
Activity 3.12: Reflecting on your learningLook back through your Teacher Notebook and make a summary of some of the main things you have learned in this course.
Think back to last term – write down any ways in which your lessons are different now. Discuss your reflections with a colleague and set yourselves three targets each for next term. Think about the things that you think you need to improve and what you can do to achieve that improvement. |
Activity 3.13: Reviewing your resolutionsAt the beginning of this course you were asked to write down three resolutions to improve your teaching and your collaboration with other teachers for this term. For example, ‘I will have tea break with… every Friday and we will discuss…’ Go back to these resolutions in your Teacher Notebook.
As you plan ahead for next school year, think of them and reflect on what you other resolutions you can make to build on all you achieved this year improving your teaching. |

Activity 3.14: Reviewing your learning QuizNow look at the quiz and complete it individually before sharing answers with colleagues. |