Quick-start guide
| Site: | OpenLearn Create |
| Course: | CREATE Toolkit |
| Book: | Quick-start guide |
| Printed by: | Guest user |
| Date: | Tuesday, 7 July 2026, 10:11 PM |
Description
This quick-start guide takes you through the simplest route to build a course on OpenLearn Create and features a series of checklists of what you need to include. There are also links to the platform's more complex features.
Table of contents
- 1. Introduction to the quick-start guide
- 2. Planning your course
- 3. Setting up your course
- 4. Adding your course image
- 5. Adding your welcome text
- 6. Adding the first section
- 7. Setting up a Moodle book
- 8. Adding a resource
- 9. Adding a quiz
- 10. Adding questions to your quiz
- 11. Adding a statement of participation
- 12. Adding references and acknowledgements
- 13. The final checklist
1. Introduction to the quick-start guide
What is a course?
There's no easy answer. A course could be a piece of workplace training that lasts half an hour or a degree that's completed over several years.
However long it is, an engaging course draws a learner in and keeps them interested, challenged and enthusiastic about what they're learning.
If it's a well-integrated course, the learning outcomes – a list of what your learners are going to learn – will be met by the activities and learning material in the course itself. Your learners will then be able to demonstrate what they've learnt in the course in an assessment.
The purpose of this quick-start guide is to give you a simple pathway for creating a course on OpenLearn Create.
If you follow this guide, you will:
- plan and build a course
- create a quiz (and a statement of participation for when your learners pass it)
- know what you need to check before it can go live
- submit your course to the OpenLearn Create team for publication.
At the bottom of most of the pages in this guide you'll see the following boxes:
Before you move on
- This box will be a checklist of things that you have to do.
- It might be a setting that you need to check has been set or something about your course content.
- On the page about adding images, for instance, there'll be a reminder about accessibility asking you to make sure you've added text to describe any of the figures that you've added.
- If you make sure you've done everything listed here, it'll also help to speed up the QA process to get your course live!
In depth
- This box will be a checklist of things that you might like to do.
- The quick-start guide is only a small part of the larger guide for building a course.
- It won't cover everything, but it may inspire you to take a deeper dive into what you can do on your course.
- This box will offer some extra options that you can consider.
2. Planning your course
What is it that you want your course to teach? What will your learners be able to do at the end of it that they couldn't do before?
Before you write your course it'll helpful to first consider a couple of things:
- A short course title (we recommend 50 characters or fewer) that describes what the course is about.
- A course summary that describes in one sentence what you want the course to be about.
- What do you want to teach your learners? You'll need to create some learning outcomes: a sentence that starts 'By the end of this course you should be able to ...', and then a list of bullet points. Generally, three to five bullet points is a good guide to follow.
- If you have fewer than three, is your list too broad and general? Is there still enough learning to turn it into a course?
- If you have more than five, are some of the learning outcomes closely related, and could they be grouped together? Or perhaps you've got enough material for more than one course?
Once you've thought about these and made some notes, keep them close by – you'll need them when you set up your course.
Think of a course as a story with a beginning, middle and end, where everything ties together neatly.
- Is there anything that your learners need to know before they start your course?
- Look again at the list of learning outcomes you made. Could they be put into a logical order? Once you have a coherent list of four learning outcomes, for example, you could turn those into four sections of your course. (Here, we'll call them sections – but you could think of them as weeks, or topics, or something else. However you prefer to refer to them, make sure that you refer to them the same way throughout your course.)
- What do your learners need to know in order to meet each one of those learning outcomes? Each section should be of roughly equal length both in terms of course content and how long it takes the learner to get through it.
- Will you be referring to other people's ideas? If so, you'll need to keep a note of these the sources you are using in the text for your list of references.
- Will you be referring to figures or videos that someone else created? If so, you'll need to keep a note of these for your list of acknowledgements.
- Your course needs to be accessible so that all learners are able to use it.
- In this quick-start guide we'll be building a course where the learners need to get a certain grade in a quiz to pass. At the start of your course you need to tell your learners what tasks they need to do in order to pass your course.
- At the end of the course it's a good idea to give your learners the chance to demonstrate what they've learnt and earn recognition for it. The quiz we set up in this quick-start guide will have five multiple choice questions. What questions should you ask? Or to put it another way (and to tie it back neatly to the start of the course): what questions would your learners need to answer correctly to meet the course's learning outcomes?
Before you move on
- Check the order of your learning outcomes. What do you need to teach your learners first? What could you then teach them once they know that? You might need to edit your learning outcomes to put them into a logical order.
- If one of your sections is vastly longer than the others, have you gone into too much detail on a subject?
In depth
- The CREATE Toolkit has more details on learning design.
- This quick-start guide will advise you on the basics of the accessibility you need for your course, but if you need anything more you might want to look at fuller accessibility guidance.
- Is your course going to be available to the public, or only to a very specific group of people? If it's the latter, you may want to set up what's called a closed cohort.
- The OU Learning Design team's blog looks at learning design in more detail and includes resources that you might find useful.
3. Setting up your course
If you want to create a course, you'll need to sign in to OpenLearn Create.
If you're not already signed in as you read this – you can scroll to the top of this page to check – then go to the OpenLearn Create homepage and click on the Sign up/Sign in button on the banner at the top of the page. From there you can sign in (if you've already got an account) or sign up by clicking on Create account.
Click on Create a course at the top of the page and then click on the Create button.
This will open a Resource metadata form with a list of boxes and options.
We'll go through the options you need to fill in. The other options are optional if you want to go into more detail of designing your course.
- Keep the Type of resource as a course, which is the default setting.
- Add the name of your course in Course full name. Ideally, it should be fairly short: we recommend 50 characters or fewer.
- You can fill in the Course summary with the sentence you came up with to describe your course. A sentence is all you need – we recommend a limit of 30 words in this box.
- Choose something from the Primary subject drop-down that best describes the subject area of your course. (You can add options from the Other subjects, Primary skill and Other skills lists, but these are optional.)
- If you're not associated with any of the organisations in the drop-down list you don't need to choose a Provider.
- Unless your course is equivalent to undergraduate or postgraduate study you can keep the Education level at the Level 0 default.
- Unless you have a firm idea of how long the course will take to study you can type '1' in the Duration (hours) box. (You can always amend this later.)
- If you didn't choose a Provider (see above) you don't need to choose anything from the Course collection list.
- Click on the reCAPTCHA box to confirm that you're not a robot and then click on the Save changes button.
Before you move on
- Have you responded to all the options that are required (as denoted by the exclamation mark icon)?
In depth
- If the primary language of your course is Spanish, select 'Spanish' from the Language drop-down list. If you are teaching a language (e.g. German) but the primary language used for explaining and teaching is a different language (e.g. English), then select the primary teaching language (English) rather than the language you are teaching (German). If you want to translate the menus and front-end display then you will need to apply a language pack – for more information, see ‘Language: Can I change the language of my course navigation menus to the language of my choice?’ in the FAQs.
- Regarding Copyright, if you're building your course on behalf of a UK public sector organisation, you should choose the open government licence. Alternatively, you can choose 'All rights reserved', where the copyright is held by you, or you might prefer to consider one of the various Creative Commons options.
4. Adding your course image
Having filled in the Resource metadata form, you're now in the back-end of your course's homepage.
You just need to make a few more adjustments before you start to add course content.
Go to the Administration block on the left-hand side of the screen and click on Settings.
This will take you to the Edit course settings screen, which includes many of the features that you added in the resource metadata form. All you need to add are two versions of the same image:
- The image you upload in Course image appears as a 'thumbnail' when your course appears in the free course listing. The image you upload here should be 670 pixels wide and 500 pixels high.
- The image in Course banner is what appears on the course homepage. You should upload an image that is 785 pixels wide and 350 pixels high.
In both fields you can add images in either of two ways:
- You can drag an image saved on your computer into the area indicated. After that:
- click on the image and update the Author details – these default to your name, which might not be correct
- select the correct licence in the Licence chooser field
- click on Update to confirm.
- You can click on the Add... button at the top of the box. After that:
- click on the Choose File button and navigate to where the image you want to use is saved on your computer
- update the Author details, if necessary
- select the correct licence in the Choose licence field
- click on Upload this file to confirm.
If you change your mind about your course image you can return to Edit course settings, click on the images, click the Delete button and replace them with the images you'd prefer to use.
You don't need to add anything else in this form other than in the Tags drop-down area – adding tags will improve your course's SEO.
Before you move on
- Make sure your course image and banner image are the correct dimensions.
- Have you added tags?
In depth
- Full details of your course settings can be found in the CREATE Toolkit's guidance on setting up a course.
5. Adding your welcome text
Now it's time to add content to your course.
First, delete the section of text with the heading 'Getting started'. Click on the three dots in the top right-hand corner of the box and select the Delete option. Now you have a blank space to start building your course.
Just above where the Getting started box was you should see three dots on the right-hand side of the screen. Click on the three dots to reveal a box with three options: View, Edit settings and Permalink.

Click on Edit settings.
This will take you to a new page, Edit section settings.
The text you add here will be the first piece of text in your course that your learners will see. It will appear at the start of course's homepage, just below the course image.
Your course will need an introduction, so it's a good idea to add it here.
- In Section name, add a suitable heading: it could be 'Welcome to the course' or 'Hello!'.
- In Description, add some text that goes into a little more detail about what the course covers. Perhaps you could add some background about the topic. It should be longer than the course summary you previously created when you set up your course.
Then click on Save changes.
You don't need to repeat the learning outcomes here – they'll also appear on the course's homepage, taken from when you added them in the course's settings.
Before you move on
- Have you deleted the Getting started box? If you don't it will appear at the start of your course.
- Make sure you've added something suitable to the Section name and Description fields.
In depth
- There are various buttons above the text field similar to what's available in a word processor to change the font size, make the text bold or italic, change margin alignment, add lists, etc.
6. Adding the first section
Click on the + Add a section button.
This will create a new section for you to add content to:

You've already added an introduction; now you can dive into the learning material.
Look again at your learning outcomes. The first learning outcome can be explored in the first section.
Click on the pencil icon next to the 'New section' heading and change it to something more appropriate. You could start with 'Section 1:', followed by the topic that's addressed in the first learning outcome.
This is a heading, not a sentence – there's no need to write the learning outcome in full as the title.
Press the Enter key to confirm the heading you want to use.
Now you're ready to add some content.
Before you move on
- Whenever you add a new section, make sure that you change the 'New section' heading.
7. Setting up a Moodle book
Directly underneath the new heading you've just added is a button labelled + Add an activity or resource button. Click on it.
This will give you a screen full of options. Click on the Book icon on the top row.
A book is a useful resource for presenting lengthy information in a multi-page format, with each new page being a new chapter. (Ignore the Subchapter option, which you can use if you need to go into detail about a topic. Here we'll just be looking at chapters.)
How should you structure a book? It will depend on what your course is about and what you want each section of your course to cover, but to get you started you may want to use (or adapt) the structure below:
- Chapter 1: An introduction to what your learners will find out in this section. You may even want to add specific learning outcomes.
- Chapter 2: Some background knowledge on the topic that this section is about.
- Chapter 3: Some learning material relevant to this course. What do your learners need to know?
- Chapter 4: A task for the learners. These could be a set of questions that they need to answer correctly; alternatively, you may prefer to ask something more open for your learners to reflect on: 'What is your experience of this?', 'Have you ever encountered this?', etc.
- Chapter 5: Feedback on the task. If there are correct answers to your questions in the previous chapter you could give them here. If you have asked learners to reflect on the subject you could give some other examples of other reflections here – your own, or from relevant articles or books, perhaps.
- Chapter 6: A conclusion where you sum up what's been learnt in this section, with a note about how this leads on to the next section.
Clicking on the Book icon opens a new page, New Book:
- Add the name of your book in Name. This should be different to what you put in the heading for this section.
- The Description is optional: what is this content going to be about?
- Then click on Save and display.
This opens a new page, Add new chapter, which is where you can start adding some text.
Before you move on
- It's a good time to check the structure of your learning material before you start adding it to the course. It doesn't have to follow the structure set out above, but is it easy to follow?
- Have you given your book a Name?
In depth
- If you have a series of related chapters, could you use subchapters?
- You may also want to add other features to your homepage: these are classified as resources and activities.
7.1. Adding text to your Moodle book
Having set up a Moodle book you are presented with a new page: Add new chapter.
On this page, add a Chapter title. (Since this is the start of the book you could type 'Introduction' here.)
Then add text to the Content field. The editor includes icons for various formatting functions. You can click on the Reveal or hide additional toolbar items icon (three dots at the end of the first row) to reveal a second row of functions.

- Top row: Source code Pro, Undo, Redo, Align left, Align centre, Align right, Justify, Reveal or hide additional toolbar items.
- Middle row: Bold, Italic, Font colour, Background colour, Font size, Ordered list, HTML Transcript.
- Bottom row: Image, Multimedia, Insert H5P content, Image description, Link, Unlink, Embed media, No glossary auto-link, Preview, Import Word file, Left to right, Right to left, Decrease indent, Increase indent, Bulleted list, Numbered list.
When you've finished click on Save changes.
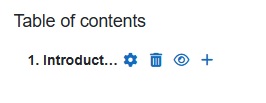
This generates a Table of contents at the top of the left-hand side of the screen. The title of the first chapter will appear here and the content will appear in the main area of the screen.
To add another chapter, click on the + (add or plus) symbol alongside the chapter you've just created in the Table of contents.
This will take you back to the Add a chapter page.
Again, fill in the Chapter title and Content fields, and click on Save changes.

As you add more chapters you can:
- change the order of the chapters by clicking on the arrow icon
- edit a chapter by clicking on the cog icon
- delete a chapter by clicking on the dustbin/trashcan icon
- hide or reveal a chapter by clicking on the eye icon
- add a new chapter by clicking on the plus icon.
You will also see forward and back arrows at the top of each chapter to move through your book.
We've focused here on adding text to your course content. Now you're going to look at adding links to the text.
Before you move on
- Try to avoid excessively long pages. Some of your content may need to be split over more than one chapter.
- Later on you'll want to test your learners in a quiz. As you add course content think about what you'll want to test your learners on.
- If you refer to other people's ideas, make a note of where you got them from – you'll need them for your references list.
In depth
- The book above automatically includes chapter numbering. If you don't want numbering or want to look at what other options are available, click on Appearance.
- If an individual chapter is too long you may want to use subchapters. If you look at this book's table of contents you'll notice that this subchapter, Adding text to your Moodle book, is part of the chapter Setting up a Moodle book.
- If you are co-authoring the course, you'll need to be able to invite another author to collaborate on the course content.
7.2. Adding links in the text of your Moodle book
You may want to add links to your course that direct your learners to a particular website for them to research, or to a specific article that they might find interesting.
Links should always be hidden behind text rather than spelt out in full. Some of your learners may rely on a screen reader, meaning that the text in links needs to be meaningful.
- Best practice: If you wanted to link to the BBC website, for instance, you would add a link over the words 'the BBC website'.
- Bad practice: Don't use sentences like 'Click here to go to the BBC website', with the link hidden behind 'Click here'. Anyone using a screen reader has the links highlighted separately; if all the links say 'Click here' they won't know where the links go.
- Bad practice: Don't reproduce links in full in the text. Often they can be very long, and anyone using a screen reader would have it read out in full ('Aitch tee tee pee ess colon slash slash ...').
Say you wanted to add a link to the BBC's website in the following sentence:
Now explore the BBC website.
You would need to highlight the text 'the BBC website' and click on the Link icon above.
This takes you to a Create link pop-up window.
- The text that you highlight appears in the Text to display field.
- Type (or paste) the link into the Enter a URL field.
- You can tick Open in new window or leave it unticked, if you prefer.
- Click on the Create link button.
The text should now read:
Now explore the BBC website.
So far we've focused on adding text to your course content. Now you're going to look at adding images and videos.
Before you move on
- Don't hide links behind text like 'Click here' – use meaningful, useful text that describes where the link is going.
- Make a note of any links you use – you'll need them for your references list.
7.3. Adding an image to your Moodle book
So far we've looked at adding text to the course. At some point you'll probably want to add an image.
There are two types of images that you can add: figures and decorative images.
Figures
A figure is an image that contains information. It could be a graph or a chart that illustrates, reinforces or develops what's said in the text.

Figure 1 Survey responses.
It could also be a photo, for example if you direct your learners to look at one.
As noted when you looked at adding links, some of your learners may rely on a screen reader. If you're adding a figure, you'll need to add some descriptive text (known as alt text) so that your learners don't miss out on the information that it contains.
How much detail you go into depends on what your learners need to know. If you're showing them a graph to show how a trend increases steadily over time, you only need to say that. If it's important that your learners know a percentage for each year, for example, then you need to include that detail.
The alt text for the figure above is as follows:
A pie chart showing survey responses: 55% 'Yes', 35% 'No' and 10% 'Don't know'.
Decorative images
If your course's subject matter doesn't naturally have much imagery as part of the learning – some areas may not lend themselves well to this – then it may be beneficial to add decorative images to break up the text and improve the visual appeal of your course.
Decorative images are photos that complement the text but must not overwhelm it, so they are best used sparingly. They can reflect what's in the text or you may prefer something tangential: if the text is about growing a business you could use a photo of nature, for example.

A decorative image isn't intended to teach your learners anything specific in the same way that a figure does, so you don't need to add alt text to it.
A decorative image could be something from your own camera roll but should not include holiday snaps. You can also download royalty-free stock images from sites like Unsplash or Pexels. Alternatively, if you use AI to generate images, you must record any prompts you use – these will need to be listed in the acknowledgements for the course. (Note that the OU recommends that you only use one AI platform to generate content for your course.)
How to add an image
To add an image place the cursor at the point in the course content where you want to add an image and click on the Image icon.
This will open a new pop-up window with the heading Insert image.
- Click on the Browse repositories button.
- Click on the Choose File button and navigate to the image you want to add.
- Add the name of whoever created or owns the image in the Author box and select the appropriate licence in Choose licence. If the image is yours, is a logo or belongs to a company or organisation, choose All rights reserved. If it's an image from a photo stock website, select whichever Creative Commons licence is attached to the image.
- Click on Upload this file.
- If it's a figure, describe the image in the Describe this image for someone who cannot see it box. There's a limit of 125 characters.
- If it's a decorative image, tick the box next to This image is decorative only.
- Click on Save image.
If the image you're adding is a figure you should also add a figure number and a caption underneath it, as in the example above.
Having added images you may also want to embed a video.
Before you move on
- Make sure that your figures have alt text added.
- Remember: anyone who relies on a screen reader shouldn't miss out on what you want your learners to learn from a figure, so your alt text needs to be accurate.
- Whether you're adding figures or decorative images, keep a note of where the images come from – even if you created them. You will need to add these details in the acknowledgements.
7.4. Adding a video and transcript to your Moodle book
A good way of enhancing your course content is to add a video.
For storage reasons, rather than uploading videos into your Moodle book you need to embed them from the site that they're on. In order to embed a video you'll need to copy its embed code from where it's hosted.
On a video platform like YouTube or TED the embed code can be found as one of the options when you click on the Share button on the video's page. The embed code is a string of HTML code that you can copy from the video platform.
Then you need to paste it into your Moodle book.
To embed a video, place the cursor at the point in the course content where you want to add a video and click on the Embed media icon.
This will open a new pop-up window with the heading Content properties.
Copy and paste the URL of a video into the Enter URL: field.
Assuming the URL is valid, if you click on another field in this form it should automatically populate with the title of the video in the Describe this content (optional): field and dimensions will appear in the Size fields. You can adjust this information as preferred.
Click on Save content.
Your video may already have subtitles. If any of your learners are unable to listen to the video it's best practice to add a transcript of what is said.
To add a transcript, click on the Source code Pro icon and scroll down to where you embedded the video. Hit the Enter key on your keyboard to create a blank line in the code.
Copy the following code and paste it onto the blank line:
<details>
<summary><strong>Transcript</strong></summary>
<br>
<p>This is the first paragraph of the transcript.</p>
<p>This is the second paragraph of the transcript.</p>
<p>This is the third paragraph of the transcript.</p>
<hr>
</details>
Then you'll need to add the transcript itself.
As you can see, we've added three paragraphs with placeholder text at the end of the code. This is where your transcript will go.
- If you have a transcript and it's already arranged into paragraphs you just need to add '<p>' and '</p>' to the beginning and end of each paragraph and paste them over the placeholder text.
- If you're relying on an automatically generated transcript (from YouTube, for example), note that you will probably need to carefully edit it to make sure that the text is accurate and makes sense. It needs to be easy to read: several lines from an automatically generated transcript should be combined into one paragraph and you will need to make sure that the timing codes are removed.
Once you're happy that your video and transcript are in place, click on the Save changes button and confirm that they've been added to the course correctly.
So you've completed your Moodle book. Now let's move on to adding resources to your course.
Before you move on
- Keep a note of where the videos come from – you will need to add these details in your acknowledgements.
In depth
- The CREATE Toolkit's pages on Moodle books includes guidance on adding other features, such as a box, table, click-to-reveal activity or interactive asset.
8. Adding a resource
Depending on what your course is about you may need to add some additional resources that wouldn't conveniently fit into the Moodle book format that you've just looked at. For example:
- an article or book chapter that would be too long to include in a Moodle book could be supplied as a PDF
- if you've included a video of a lecture with a slide presentation you may want to include the slides separately as a PowerPoint file
- you could provide a Word template that your learners may find useful or could complete as part of a task.
Go to the homepage and click on the + Add an activity or resource button.
This will give you a screen full of options. Click on the File icon.

This opens up a new page called New File.
Whatever you call the resource in the Name field will be what it's called onscreen. The name should be reasonably short but if you think the resource needs a bit more explanation, add something in Description and tick the Display description on main page tickbox.
In Select files, you can add a resource in either of two ways:
- You can drag a file saved on your computer into the area indicated. Once you've done that you should:
- click on the image and update the Author details – these default to your name, which might not be correct
- select the correct licence in the Licence chooser field
- click on Update to confirm.
- You can click on the Add... button at the top of the box. After that you should:
- click on the Choose File button and navigate to where the file you want to use is saved on your computer
- update the Author details, if necessary
- select the correct licence in the Choose licence field
- click on Upload this file to confirm.
Then click on Save and return to course.
If you want to delete a resource click on the three dots to the right of the resource and select the Delete option.
Now that you've added all the content it's time to add a quiz.
Before you move on
- Keep a note of where the resource come from – even if you created it. You will need to add these details in your references and acknowledgements sections.
In depth
- Once you've added a resource to the website, you could add a link to it from your course content.
9. Adding a quiz
Now that you've added the course content it's a good idea to test your learners on what they've learnt.
You're going to make a simple quiz with five multiple choice questions. If your learners answer four of them correctly they'll get a statement of participation (which you'll create later).
You need to set up the quiz and then add some questions to it. But before you do that you need to ensure that your learners’ progress is tracked.
Go to the Administration block on the left-hand side of the screen and click on Settings.
This will take you to the Edit course settings screen, which includes many of the features that you added in the resource metadata form.
Under Completion tracking, make sure that Enable completion tracking is set to ‘Yes’.
Click on Save and display.
Now you can set up the quiz.
On the course homepage, go to the last section of your course and click on the + Add an activity or resource button. At the option screen, click on the Quiz icon.
This opens up a new page called New Quiz.
There are many options that you could choose but for now you only need to do the following:
- Your quiz needs a Name. For now, call it 'Final quiz'.
- Under the Grade heading in the Grade to pass field, type '8.00'. This is equivalent to an 80% pass rate, or four out of five questions.
- Click on Overall feedback.
- Go to the first Feedback text box (where the Grade boundary is 100%) and write a message of congratulations to a learner for passing the quiz.
- In the empty Grade boundary field below that Feedback text box, type '79.9%' (a score just below the 80% pass mark).
- Go to the second Feedback text box and write a message telling a learner that they have not passed the quiz and will need to try it again.
- Click on Completion conditions and select Add requirements.
- In the list of options that appears select Receive a grade.
- In the next list of options that appears select Passing grade.
- Then click on Save and display.
Now you've set up a quiz you can add some questions to it.
Before you move on
- Have you given your quiz a name?
- Have you added the passing grade?
In depth
- The Completion conditions setting you adjusted above means that your learners will receive a statement of participation (which we'll come to later) when they pass the quiz. Quizzes aren't the only thing that have these conditions, and you may want to add them to other parts of your course – asking your learners to manually mark a book as complete, for example. If you do this, you need to make it clear at the start of the course what the learners need to do to pass.
- You might want to add more than one quiz – perhaps one for each section?
- Depending on the kind of quiz you set your learners, you may want to adjust the Question behaviour, Review options and Overall feedback settings.
10. Adding questions to your quiz
Having clicked on Save and display you should now see the front page of your quiz a screen with the title you gave it:
Final quiz
Grading method: Highest grade
Grade to pass: 8.00 out of 10.00
There'll also be an Add question button and a note that no questions have been added yet.
Go to the Administration block on the left-hand side of the screen and click on Question bank, and then Questions.
On the new screen, Question bank, click on the Create a new question ... button. This opens a pop-up box, Choose a question type to add.
There are different types of questions to choose from, but for now, you're going to use just one: a multiple choice question where only one option is correct. You'll need to think of five questions that suit this format.
Scroll down to Multiple (single) choice and click on it to select it. Then click on the Add button.
This will take you to a new screen, Adding a Multiple (single) choice question.
- Don't change the Category but make a note of what it says – you'll need this later.
- The Question name isn't the question itself – it's a reference to which question it is. If you were to have more than one quiz on your course, it would be bad practice to type 'Question 1' here, because you wouldn't know which quiz it was Question 1 for. Assuming you've given this quiz the title 'Final quiz', type 'Final quiz question 1' here.
- Add the question in Question text. (You don't need to include a question number – that will appear automatically.)
- Scroll down to Answers to add the choices.
- It's best practice (and easier) to always make the first choice the correct answer. (You may have seen that a Shuffle the choices? option is selected by default.)
- Type the correct option into the first text box in Choice 1 and use the arrows to change the Grade from 'None' to '100%'.
- Type three incorrect options into the first text boxes in Choice 2, Choice 3 and Choice 4, without changing the 'None' under Grade.
- Scroll down and click on Save changes.
This will take you back to the Question bank. You'll be able to see your question in a table; if you called it 'Final quiz question 1' under Question name, that'll appear in the third column.
You now need to create four more questions. To do this:
- EITHER: Click on the Create a new question ... button and repeat the process above, making sure that you give each new question a different name in the Question name field. Every time you save a question it will appear in the Question bank.
- OR: In the table that's appeared in the Question bank click on Edit in the fourth column and then click on Duplicate in the pop-up box. The question you just created will appear in a new screen with '(copy)' added after the text you added in the Question name field. Make sure you amend the text from the previous question in the Question name, Question text, Choice 1, Choice 2, Choice 3 and Choice 4 fields.
After adding five questions go to the Administration block on the left-hand side of the screen and click on Questions under Question bank.
On the new page, titled Questions, click on Add and select + from question bank.
On the pop-up menu that appears, called Add from the question bank at the end, you'll see the five questions in a table at the bottom. Just above them is a small square that reads Select questions for bulk actions if you hover over it. Tick this and then click on the Add selected questions to the quiz button at the bottom.
Your quiz is now ready! Now it's time to give your learners something when they pass it.
Before you move on
- Does each question have a unique Question name?
- Have you changed the Grade for the correct first option to '100%'?
In depth
- You could try adding feedback for each choice.
- You could try adding hints for multiple tries.
- You may want to feature different kinds of questions: there are many question types to choose from.
11. Adding a statement of participation
Once your learners have read your course content, worked through your activities and passed your quiz, it's a good idea to give them something for completing the course.
When you set up your quiz, you specified your Completion conditions that your learners needed to achieve a Passing grade.
There should now be a new option in the Administration block on the left-hand side of the screen: Edit completion settings. Click on this.
- In General keep the Completion requirements set as Course is complete when ALL conditions are met.
- Click on the Condition: Activity completion drop-down list.
- The quiz you created should appear under this heading with an unticked tickbox next to it. If you called it 'Final quiz', it should say 'Quiz - Final quiz'. Tick the tickbox.
- Click on the Save changes button.
Now you can add a statement of participation.
- Go to Add a block on the left-hand side of the screen under the Administration block.
- Click on the Add... drop-down list and select Achievements.
The Achievements block should now be available on the left-hand side of the screen.
Click on the Actions menu drop-down list in the Achievements block and select Configure Achievements block. This will take you to a new pop-up screen.
- When your learners complete your course they'll be sent a statement of participation via email. Edit the text in the Email text box to the message that you want to send them.
- You'll need to add the Provider name – usually this is the name of the organisation that you're building your course on behalf of.
- We recommend that you add a Provider logo to also appear on the statement of participation – the logo of the organisation that is in the Provider name field. Adding an image here works in the same way as adding a course image.
- Then click on Save changes.
Now it's time to give your course a final check before sending it to us to set live.
Before you move on
- You may want to keep 'Dear %%username%%,' in the Email text box but you should replace the rest of the text.
- Have you added a Provider name and Provider logo?
In depth
- Your course could also offer a course badge.
- You may prefer to a more personalised certificate to your course.
12. Adding references and acknowledgements
Ever since planning your course you should have kept notes on where you got other people's ideas from and who created any figures or videos that you are using.
Other people's ideas get collated into a reference list, and figures or videos get collated into an acknowledgements list.
Your references and acknowledgements pages should appear on the homepage of your course, after the last piece of course content. If you have long lists of references and acknowledgements to add, they can be separate pages Add a Moodle book with the Name 'References and acknowledgements'. The Chapter title can also be 'References and acknowledgements' or, if they're going to be separate pages, a first Chapter title 'References' and a second Chapter title 'Acknowledgements'.
The references and acknowledgements go in the Content field. References are listed in alphabetical order and acknowledgements are listed in the order that the assets they refer to appear in in your course.
References
The Open University uses Harvard referencing and we recommend that you so the same.
As well as adding a reference list at the end, this will mean going back through your course and adding in-text citations to the reference list whenever you refer to some else's ideas.
You should follow the guidance in the OU's quick guide to Harvard referencing for more details on how to do this.
Acknowledgements
Before you complete your course you need to:
- confirm that you have the necessary permission to use any third-party content or assets used in your course
- make sure that they're acknowledged appropriately.
When we say 'third-party', that means anyone apart from you. So if all the text, images and information in your course were created by you, you don't need to acknowledge them.
If your course includes figures (such as graphs or pie charts), are they your own work? Even if you created the figure, is the data that you used to create it your own?
If you're producing the course for your place of work or for an organisation that you're a member of, you must check whether you're allowed to use their content in your course – and if you are, what wording should be used to acknowledge it?
If your course has decorative images, are they all your own work? Royalty-free stock image sites like Unsplash or Pexels state that you are not required to acknowledge the creators of any images you download and use, but that it is appreciated.
If you have used AI to generate images you should have recorded any prompts you used so that you can list them in the acknowledgements.
Any content that has a Creative Commons licence is free to re-use but you must acknowledge the content creator. The Creative Commons website features a list of rules about re-using Creative Commons material, depending on which licence the material has. If you acknowledge any material like this you should include the wording 'reproduced under the xx Creative Commons licence', replacing 'xx' with the name of the licence.
Before you move on
- Have you used Harvard referencing correctly?
- Have you checked the licences for any third-party figures that your course uses?
- Review every page of your course to ensure that you haven't missed anything.
13. The final checklist
Congratulations – you’ve now finished building your course!
If you've followed the instructions in this quick-start guide, make sure you can answer ‘Yes’ to the following questions.
Course settings
Go to the Administration block on the left-hand side of the screen and click on Settings to check the following:
- Is your Course full name the recommended 50 characters or fewer?
- Duration (hours): Will your learners be able to complete the course in the time you’ve set?
- Have your set your course's Educational level?
- Have you set the Primary subject for your course?
- It's not mandatory, but it may be useful to choose something in Other subjects, Primary skill and Other skills – have you done this?
- Is your Course summary sentence describing the course 30 words or fewer?
- Have you added a list of Learning outcomes?
- Have you added a Course image and Course banner?
- Is Completion tracking set to 'Yes'?
- Have you added any Tags?
Course homepage
- Have you deleted the Getting started box?
- Have you added welcome text?
- Have you divided your course content into sections on the course homepage?
Course content
- Have you added your course content into a Moodle book?
- Is the Moodle book structured into chapters rather than one long page?
- If you've added links, are they hidden behind the text rather than written out in full?
- If you've added figures, do they include descriptive text for someone who wouldn't be able to see it?
- ... And do the figures have a figure number and a caption?
- If you've added videos, do they include a transcript?
- In your quiz, have you set the Grade to pass and Completion conditions, and have you added Overall feedback?
- Have you added all your quiz questions?
- Have you set up a statement of participation?
- Have you added an acknowledgements page to the end of your course?
If you've considered any of the further options in the In depth boxes, make sure that none of the additional changes you've made stop you from answering 'Yes' to any of the questions above.
Once you've checked everything listed above go back to the Administration block and click on Settings.
Scroll down to the Declarations section and open it.
Tick I agree to moderate learner contributions in collaborative forums and I agree to comply with The Open University website accessibility statement.
Change the Status from Draft to Published.
Clicking on either Save and return or Save and display will automatically send our team an email to let us know that your course is ready for us to check. We'll get in touch with you at the email address you used to set up your OpenLearn Create account.