Adding resources
| Site: | OpenLearn Create |
| Course: | CREATE Toolkit |
| Book: | Adding resources |
| Printed by: | Guest user |
| Date: | Tuesday, 7 July 2026, 11:11 PM |
Description
The various resources available mean that almost any kind of web content can be added to the course.
Book
A book enables you to create a multi-page resource for learners in a book-like format, with chapters and subchapters. Books can contain media files as well as text and are useful for displaying lengthy passages of information that can be broken down into sections – for example, to display reading material for individual units of study, or as a training handbook or course guide.
Adding a book
To add a book, switch editing on, go to your course’s homepage and click on the + Add an activity or resource button.
This will give you a screen full of options. Click on the Book icon to open the New Book page.
Add the title of your new book in the Name field. Adding a summary of the book in the Description field is optional.
If you click on the Appearance arrow, there are further options in the Chapter formatting drop-down for you to choose how the link is displayed. We recommend that you use Open as the preferred display option.
- None: Chapter and subchapter titles have no formatting.
- Numbers: The default option, where chapters and subchapter titles are numbered 1, 1.1, 1.2, 2, etc.
- Bullets: Subchapters are indented and displayed with bullets in the table of contents.
- Indented: Subchapters are indented in the table of contents.
Usually the chapter title is displayed both in the table of contents on the left-hand side of the screen and as a heading above the content in the main area of the screen. You tick the Custom titles tickbox, the chapter title appears in the table of contents but is not displayed as a heading above the content: you can add a different title (perhaps one that is longer than the chapter title) as part of the content.
Click on the Save and display button to open the Add new chapter page.
Add the chapter’s title in the Chapter title field and type the main text of the chapter (or copy and paste it from elsewhere) into the Content field.
Click on the Save changes button.
This generates a Table of contents at the top of the left-hand side of the screen. The title of the first chapter will appear here and the content will appear in the main area of the screen.
To add another chapter, click on the + (add or plus) symbol alongside the chapter you’ve just created in the Table of contents.
This will take you back to the Add a chapter page.
Again, fill in the Chapter title and Content fields, and click on Save changes.
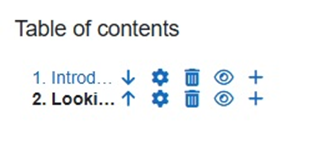
As you add more chapters you can:
- change the order of the chapters by clicking on the arrow icon
- edit a chapter by clicking on the cog icon
- delete a chapter by clicking on the dustbin/trashcan icon
- hide or reveal a chapter by clicking on the eye icon
- add a new chapter by clicking on the plus icon.
Formatting a Moodle book page
Formatting text in Moodle books in courses built on OpenLearn Create is done with the TinyMCE editor.
The editor includes icons for various formatting functions. You can click on the Reveal or hide additional toolbar items icon (three dots at the end of the first row) to reveal a second and third row of functions.

- Top row: Source code Pro, Undo, Redo, Align left, Align centre, Align right, Justify, Reveal or hide additional toolbar items.
- Middle row: Bold, Italic, Font colour, Background colour, Font size, Ordered list, HTML Transcript.
- Bottom row: Image, Multimedia, Insert H5P content, Image description, Link, Unlink, Embed media, No glossary auto-link, Preview, Import Word file, Left to right, Right to left, Decrease indent, Increase indent, Bulleted list, Numbered list.
These functions, as well as many others, are also available in the options at the top of the editing window: Edit, View, Insert, Format, Tools, Table and Help.
The size of the editing screen can be lengthened by dragging the Resize function at the bottom right of the editing window.
You can also expand the editing window to match your screen's dimensions, which you may find useful over the following pages when you are adding images or videos. To do this, go to View and then Fullscreen. Repeat this to return to the default size editing window.
Adding a box around text
You might want to highlight some text by adding a box around it.
To add a box around text, while you are editing your book go to Tools/Source code Pro in the text editor’s menu or click on the Source code Pro icon.
Go to the point on the page where you want to add the box and copy in one of the lines of HTML code below:
<div style="width: 200px; border: 1px solid black; border-radius: 5px; padding: 10px; margin: 10px;"><p> This is a basic box with a black border and some text inside it.</p></div>
<div style="width: 200px; border: 2px solid black; border-style: dotted; padding: 10px; margin: 10px;"><p> This is a basic box with a black dotted border and some text inside it.</p></div>
<div style="width: 200px; border: thick red; border-style: dashed; padding: 10px; margin: 10px;"><p> This is a basic box with a red dashed border and some text inside it.</p></div>
<div style=" width: 200px; border: 5px double black; padding: 10px; margin: background-color: lavender"><p> This is a basic box with a double black border and some text inside it.</p></div>
<p style="border-left: 5px solid blue"> This is a blue left border and some text.</p>
Then click on the Save button.
These are just some examples of the many available style options for boxes. If you are familiar with HTML you can use your own styles, or you can adjust the width, border size, border colour, padding, margin, border corners, background colour and border type in these examples using standard inline CSS.
(If you’re new to the subject, W3Schools’ CSS tutorial is a good starting point.)
Adding a table
You can add a table into a book’s page. Creating a table is preferable to adding an image of a table, which would not be accessible.
Click in the Text field in the position where you want the table to appear. Go to Table/Table in the text editor’s menu and ‘draw’ the number of rows and columns you want the table to have.
When you are adding text to the table’s cells an additional functions menu appears: Table properties, Delete table, Insert row before, Insert row after, Delete row, Insert column before, Insert column after and Delete column. These functions (and others) are also available if you go to Table in the text editor’s menu.
For accessibility we recommend that you either add a caption above the table, or briefly describe the contents of the table in the paragraph before it (e.g. ‘The following table shows ,,,’).
Adding an image
You may need to add images into book pages.
To add an image, click in the Content field in the position where you want the image to appear. Go to Insert/Image in the text editor’s menu or click on the Image icon.
This will open a new pop-up window with the heading Image.
Click on the Browse repositories button.
Click on the Upload a file link, click on the Choose File button and navigate to the image you want to add. Ideally, the image should be no wider than 600 pixels.
Add the name of whoever created or owns the image in the Author box and select the appropriate licence in Choose licence. If the image is yours, is a logo or belongs to a company or organisation, choose All rights reserved. If it’s an image from a photo stock website, select whichever Creative Commons licence is attached to the image.
Click on Upload this file to open the Image details window.
If it’s a figure, describe the image in the How would you describe this image to someone who can’t see it? box. There’s a limit of 750 characters.
If it’s a decorative image, tick the box next to This image is decorative only.
Click on Save.
The image will appear in the text and media area along with any text already there.
If the image you’re adding is a figure you should also add a figure number and a caption underneath it.
Click on Save and return to course.
If you want to update the image, click on the icon of three vertical dots next to the text and media area and click on Edit settings from the drop-down menu. If you click on the image in the Text field and then click on the Image icon, the Image details window will appear.
You may find that 750 characters is not enough to fully describe an image that you have added and to make the image truly accessible for any of your learners that rely on a screen reader. If you need to add more text to whatever you wrote in the How would you describe this image to someone who can’t see it? box, you will need to go into HTML view to edit your text. While you are editing your book click go to Tools/Source code Pro in the text editor’s menu or click on the Source code Pro icon.
Embedding a video
For storage reasons, videos should be embedded from a host site such as YouTube or Vimeo rather than directly uploaded to your course’s homepage.
Embedding a video from YouTube requires a slightly different process.
Embedding a video from anywhere other than YouTube
Place the cursor at the point in the course content where you want to add a video and click on the Embed media icon.
This will open a new pop-up window with the heading Content properties.
Copy and paste the URL of a video into the Enter URL: field.
Assuming the URL is valid, the form should automatically populate the title of the video and the video's dimensions in the Describe this content (optional): and Size fields.
- Amend the description as preferred.
- By default the video's dimensions will appear as 200 pixels wide, which is quite small. If you keep the Auto size tickbox ticked and change '200' to '600', the height will adjust automatically.
Click on Save content.
If you want to replace a video you can do so by double-clicking on it while you are editing your book.
Embedding a video from YouTube
Find the video that you want to embed on YouTube and click on the Share button underneath it.
This opens a pop-up window showing a variety of sharing options. Click on Embed.
Make sure that the Enable privacy-enhanced mode tickbox is ticked. In the embed code 'www.youtube.com' should now read 'www.youtube-nocookie.com'. Click on Copy to copy the embed code.
Go to the page in your Moodle book where you want to add the video and click on the Source code Pro button.
Place the cursor at the point in the course content where you want to add a video and paste the embed code.
Click on Save to return to the editing view and click on Save changes.
Adding an audio file
To add an audio file, place the cursor at the point in the course content where you want to add a video and click on the Multimedia icon.
This will open a new pop-up window with the heading Insert media.
Add the audio file by dragging and dropping it into the area shown or by clicking on the Choose File button and navigating to it.
Edit the title of the audio in the Media title field and tick the relevant tickboxes to choose whether you want the audio to play automatically, be muted or play in a loop. (We recommend that you don’t untick Show controls.)
Click on Save.
Note that audio podcast episodes can be added using the same method as embedding a video described above by entering the URL of the RSS feed into the Enter URL: field.
Adding a transcript
It is good accessibility practice to provide a transcript of video and audio material in your course. Many learners find transcripts helpful, even if the audio or video file is fully accessible to them.
There are two ways of adding a transcript.
Method 1
Click on the Source code Pro icon and scroll down to where you embedded the video. Hit the Enter key on your keyboard to create a blank line in the code.
Copy the following code and paste it onto the blank line:
<details>
<summary><strong>Transcript</strong></summary>
<br>
<p>This is the first paragraph of the transcript.</p>
<p>This is the second paragraph of the transcript.</p>
<p>This is the third paragraph of the transcript.</p>
<hr>
</details>
Here's how the code above works onscreen:
Transcript
This is the first paragraph of the transcript.
This is the second paragraph of the transcript.
This is the third paragraph of the transcript.
Then you’ll need to add the transcript itself.
As you can see, we’ve added three paragraphs with placeholder text at the end of the code. This is where your transcript will go.
- If you have a transcript and it’s already arranged into paragraphs you just need to add ‘<p>’ and ‘</p>’ to the beginning and end of each paragraph and paste them over the placeholder text.
- If you’re relying on an automatically generated transcript (from YouTube, for example), note that you will probably need to carefully edit it to make sure that the text is accurate and makes sense. It needs to be easy to read: several lines from an automatically generated transcript should be combined into one paragraph and you will need to make sure that the timing codes are removed.
Once you’re happy that your video and transcript are in place, click on the Save button and confirm that they’ve been added to the course correctly.
Method 2
Place the cursor at the point in the course content where you want to add it (e.g. under a video or audio file) and click on the HTML Transcript icon.
Give your transcript a Title, which you have the option of showing or hiding.
Add the transcript text in the Content field.
Click on Save.
Adding a click-to-reveal activity
You can combine and adapt the code for adding a transcript (Method 1) and a box around text to create an activity that has a click-to-reveal answer.
Click on the Source code Pro icon and scroll down to the point where you want to add an activity. Hit the Enter key on your keyboard to create a blank line in the code.
Copy the following code and paste it onto the blank line:
<div style="width: 600px; border: 1px solid black; border-radius: 5px; padding: 10px; margin: 10px;">
<h5>Activity</h5>
<p>In which UK city is The Open University headquartered?</p>
<details>
<summary><strong>Reveal answer</strong></summary>
<br>
<p>The answer is Milton Keynes.</p>
<hr>
</details>
</div>
Here's how the code above works onscreen:
Activity
In which UK city is The Open University headquartered?
Reveal answer
The answer is Milton Keynes.
Change the text in the code to suit the text of your own activity.
Adding an interactive asset
‘H5P’ is an abbreviation for ‘HTML5 package’ – interactive content such as presentations, videos and other multimedia, questions, quizzes, games and more. This feature allows HTML5 assets to be added to a course.
Any question attempts in the H5P are marked automatically and the grade is recorded in the gradebook.
This feature allows you to upload an existing H5P file that you have created on the H5P website. To add an H5P activity to a page in your Moodle book, place the cursor at the point in the course content where you want to add it and click on the Insert H5P content icon.
This will open a new pop-up window with the heading Insert H5P content.
If your H5P activity has a URL, copy and paste it into the H5P URL or file upload field.
If your H5P activity is a file, click on the Browse repositories button.
In the new pop-up window with the heading File picker, click on the Choose File button and navigate to the file you want to add. Add the name of whoever created or owns the file in the Author box and select the appropriate licence in Choose licence. Then click on the Upload this file button.
Returning to the Insert H5P content pop-up window, there are two drop-down lists with further options. Under H5P options you can choose whether you want to allow the H5P activity to be downloaded, or to include embed or copyright buttons; under Display options you can choose whether you want to allow the H5P activity to play automatically in the mobile app.
Click on Insert H5P content.
Importing text from a Microsoft Word document
Importing from Microsoft Word is another way to add content to your Moodle book. Moodle book automatically tags up your Word doc into HTML: new chapters are created based on text styled as ‘Heading 1’ and sub-chapters can be created based on text styled as ‘Heading 2’.
This means that you need to ensure that the Word document you want to upload uses styles consistently; otherwise you might get content in the book on the wrong pages.
You should also make sure that the Word document does not have Track Changes enabled. If it does, the text in the file will not import correctly.
To import a Microsoft Word document while you are editing a book, go to the Administration block on the left-hand side of the screen and click on Book administration and then Import from Microsoft Word.
On the new screen you can check the tickbox Create subchapters based on subheadings if the Microsoft Word document has content with the ‘Heading 2’ style.
Add the Microsoft Word file by dragging and dropping it into the area shown or by clicking on the Choose a file… button and navigating to it.
Click on the Import button for the importing screen to appear. Click on the Continue button.
Your Word file will be added as a new chapter to the end of your book.
File
The file resource enables you to provide a file as a course resource for your learners. Where possible, the file will be displayed in the course interface; otherwise your learners will be prompted to download it. The file may include supporting files, so for example an HTML page may have embedded images.
Note that your learners will need to have the appropriate software to open the file.
A file may be used to share presentations given in class, or course handouts, learning journals, templates of forms, further reading, etc. You could provide draft files of certain software programs for your learners to edit and submit for assessment.
To add a file, switch editing on, go to your course’s homepage and click on the + Add an activity or resource button.
This will give you a screen full of options. Click on the File icon to open the New File page.
Add the title of your file in the Name field. You can choose to add a summary of the new file in the Description box and display this on your course’s homepage by ticking the Display description on main page tickbox.
Click on the Select files box to open a new pop-up window with the heading File picker.
Click on the Choose File button to find the file you want to upload.
Check that the author and licence information are correct in the Author field and the Choose licence drop-down list. and the licence.
Click on Upload this file to return to the New File screen.
If you click on the Appearance arrow, there are further options in the Display drop-down for you to choose how the link is displayed.
- Automatic: The best display option for the file type is selected by default.
- Embed: The file will appear in a small scrolling area on your course’s homepage.
- Force download: When they click on the file, your learners will be given a prompt to download it.
- Open: The file opens directly in your learner’s browser in the same window, which means that unless they use the browser’s Back button they will be navigating away from your course. (An intermediate page may display in some cases). It is therefore a good idea to put some help text in the Description field suggesting that they hold down the Ctrl key while clicking on the file, which will open it in a new tab in their browser.
- In pop-up (do not use): The file opens in a new browser window. In general, pop-up windows are considered user-hostile because they don’t always work well with accessibility software.
If you want to share the file’s size and format, and confirm when it was uploaded to your course homepage, you can do so by ticking the Show size, Show type and Show upload/modified date tickboxes.
You can choose to display the file size, such as ‘3.1 MB’, beside links to the file. If there are multiple files in this resource, the total size of all files is displayed.
You can also show the type of the file, such as ‘Word document’, beside links to the file. If there are multiple files in this resource (i.e. if you have uploaded a whole folder of files), the start file type is displayed. If the file type is not known to the system, it will not display.
Will your learners need to visit this page in order to complete your course? Make sure that the Completion conditions are correct.
Click on Save and return to course.
Heading
A heading enables text and optional icons to be inserted among the activity links on your course’s homepage.
To add a heading, switch editing on, go to your course’s homepage and click on the + Add an activity or resource button.
This will give you a screen full of options. Click on the Heading icon to open the New Heading page.
Add the name of the heading in the Enter heading name field.
A heading is not essential for passing a course, so the Completion conditions should be set to None.
Click on Save and return to course.
If you want to update the heading, click on the icon of three vertical dots next to the text and media area and click on Edit settings from the drop-down menu.
Page
Adding a page enables you to create a web page resource using the text editor. It can display text, images, video, audio, web links and embedded code, such as Google Maps. Advantages of adding a page rather than a file include it being more accessible (for example for learners using mobile devices) and that it’s easier to edit or update a page than re-uploading a revised file.
For large amounts of content, we recommend that you use a book rather than a page.
To add a page, switch editing on, go to your course’s homepage and click on the + Add an activity or resource button.
This will give you a screen full of options. Click on the Page icon to open the New Page page.
Add the title of your new page in the Name field, and add the text for the page in the Page content field.
You can choose to add a summary of the new page in the Description box and display this on your course’s homepage by ticking the Display description on main page tickbox.
Will your learners need to visit this page in order to complete your course? Make sure that the Completion conditions are correct.
Click on Save and return to course.
If you want to update the text, click on the icon of three vertical dots next to the page and click on Edit settings from the drop-down menu.
Adding links between pages
Unlike the navigation between pages in a Moodle book, a page does not have automatic navigational links to the next or previous page on your course homepage. If this is what you need, you will need to manually add links between pages if this is what you need.
You can do this either by setting up a text or button link to the next or previous page.
Say you have two pages; let’s call them Page 1 and Page 2. If you want a link from Page 1 to Page 2, you would click on the title of Page 2 and copy Page 2’s URL from the browser.
Click on the icon of three vertical dots next to Page 1 and click on Edit settings from the drop-down menu.
Scroll down to the Page content box and decide where you want your link to the next page to appear. The simplest navigational choice for your learners would be to have it on a new line at the bottom of the page.
The usual convention for a link to the next page is to write ‘Next: [page title]’. So a link at the bottom of Page 1 to get to Page 2 would be ‘Next: Page 2’.
Highlight the text you have typed in for the next page link. Go to Insert/Link in the text editor’s menu or click on the Link icon.
This will open a new pop-up window with the heading Create link.
The text you highlighted will appear in the Text to display field.
Paste the URL that you copied from Page 2 into the Enter a URL field and click on Create link. The Page content box will now show that the link to the next page is a hyperlink.
Click on Save and return to course.
Now if you go to Page 1 you’ll see the link to the next page. You can use the same method for adding links to previous pages.
Text and media area
The text and media resource enables text and multimedia to be inserted into the course page in between links to other resources and activities. These labels are versatile and can improve the appearance of a course if used thoughtfully. A text and media area can be used to:
- split up a long list of activities with a subheading or an image
- display an embedded sound file or video directly on your course’s homepage
- add a short description to a course section.
Note that a text and media area cannot be added to course completion tracking, so it should not be used for course content.
Adding text
To add a text and media area, switch editing on, go to your course’s homepage and click on the + Add an activity or resource button.
This will give you a screen full of options. Click on the Text and media area icon to open the New Text and media area page.
Add some text in the Text field.
Usually text like this is not essential for passing a course, so the Completion conditions would be set to None.
Click on Save and return to course.
If you want to update the text, click on the icon of three vertical dots next to the text and media area and click on Edit settings from the drop-down menu.
Adding an image
You can add images to the Text field.
Click in the Text field in the position where you want the image to appear. Go to Insert/Image in the text editor’s menu or click on the Image icon.
This will open a new pop-up window with the heading Image.
Click on the Browse repositories button.
Click on the Upload a file link, click on the Choose File button and navigate to the image you want to add. Ideally, the image should be no wider than 600 pixels.
Add the name of whoever created or owns the image in the Author box and select the appropriate licence in Choose licence. If the image is yours, is a logo or belongs to a company or organisation, choose All rights reserved. If it’s an image from a photo stock website, select whichever Creative Commons licence is attached to the image.
Click on Upload this file to open the Image details window.
If it’s a figure, describe the image in the How would you describe this image to someone who can’t see it? box. There’s a limit of 750 characters.
If it’s a decorative image, tick the box next to This image is decorative only.
Click on Save.
The image will appear in the text and media area along with any text already there.
Click on Save and return to course.
If you want to update the image, click on the icon of three vertical dots next to the text and media area and click on Edit settings from the drop-down menu. If you click on the image in the Text field and then click on the Image icon, the Image details window will appear.
Adding multimedia
You can embed a video or piece of audio in the Text field. Note that you embed the link to multimedia and do not upload the file; the file needs to be hosted on another platform, such as YouTube for videos.
Click in the Text field in the position where you want the multimedia to appear. Go to Insert/Multimedia in the text editor’s menu.
This will open a new pop-up window with the heading Insert media.
Depending on whether you want to add video or audio, go to the respective Video and Audio tabs.
Add the URL of the multimedia you want to share in the Video source URL/Audio source URL field.
You can add more details in the Display options, Advanced settings and Subtitles and captions drop-down menus, and briefly summarise its content in the Describe this content (optional): field. You can also adjust the size and alignment of the video.
Click on Insert media. The video will appear in the Text field.
Will your learners need to watch this video in order to complete your course? Make sure that the Completion conditions are correct.
Click on Save and return to course.
If you want to update the video, click on the icon of three vertical dots next to the text and media area and click on Edit settings from the drop-down menu. If you click on the video in the Text field and then click on the Embed media icon, the Content properties window will appear.
URL
The URL module allows you to add a web link to anything that is freely available online as a course resource. You can copy and paste the URL of a particular web page, or you can use the file picker to choose a link from a repository such as Flickr, YouTube or Wikimedia (depending on which repositories are enabled for the site).
To add a URL, switch editing on, go to your course’s homepage and click on the + Add an activity or resource button.
This will give you a screen full of options. Click on the URL icon to open the New URL page.
Enter the name for the URL and a short description of it in the Name and Description fields, and then paste the URL in the External URL field. If you click on the Appearance arrow, there are further options in the Display drop-down for you to choose how the link is displayed. We recommend that you use Open as the preferred display option.
- Automatic: When learners click on the link, an intermediate page appears. They can then click through to the actual link.
- Embed: The linked site will appear in a small scrolling area on your course’s homepage. This means that your learner won’t be navigating away from your course and will also be able to see the content of the other website.
- Open: The link opens directly in your learner’s browser in the same window, which means that unless they use the browser’s Back button they will be navigating away from your course. (An intermediate page may display in some cases). It is therefore a good idea to put some help text in the Description field suggesting that they hold down the Ctrl key while clicking on the link, which will open the link in a new tab in their browser.
- In pop-up (do not use): The link opens in a new browser window. In general, pop-up windows are considered user-hostile because they don’t always work well with accessibility software. It is only appropriate to use a pop-up window if the page you are linking to is specially designed to be used as a pop-up tool and has no navigation of its own except a Close this window button.
Will your learners need to visit this this URL in order to complete your course? Make sure that the Completion conditions are correct.
Click on Save and display to see your URL in its own page.