
How to identify community owned solutions
3. Activity 2 - Community history
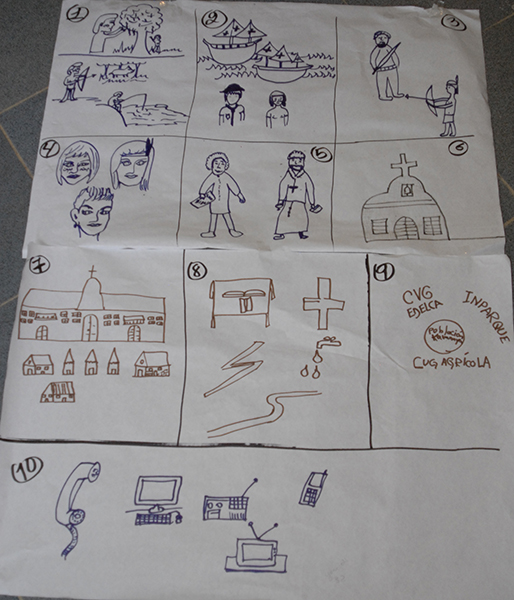
Activity 2 familiarises the community team with the range of participatory and visual methods that can be used to identify community owned solutions. This is done through an investigation of the community’s history such as when and how the community was founded and how it has developed through time. This can be organised at a meeting of the community team or online if a meeting is not possible.
Objectives
To demonstrate and practice the key principles of Participatory Drawing and storyboarding: to express ideas and tell a story through drawings; to illustrate the importance of sharing material with others.
Duration
2-3 hours
Who should be involved?
The community team selected in Activity 1Process
Step 1
Introduce the concept of storyboarding by giving the community team examples from Unit 2.Step 2
Introduce participants to the story they are going to tell. The objective is to get the community team to understand and tell the history of the community.
Step 3
Discuss ideas. If you have enough people, divide the community team into two groups, of 4 or 5 depending on numbers, and ask them to interview each other within the group to explore the history of the community.
Step 4
Draw storyboard boxes. Ask the groups to draw boxes on a piece of paper or online (it can be 4-6 boxes to start with). Note: instead of drawing 4-6 boxes, steps of the story can also be drawn on individual pieces of paper or sticky notes and stuck on a wall as well as in chat boxes using online meeting software. This method gives a bit more flexibility to integrate changes and make the story evolve.
Step 5
Draw community history in boxes. Ask each group “How would you start the story of your community?” and ask them to draw that first idea in the first box. Ask them about what would be the next step of the story, and ask them to draw it in the second box. Continue until each group has completed their story of the history of the community.
Step 6
Group presentations. Ask the groups to explain their storyboard to another group.
Step 7
Storyboard changes. If the groups want, make changes to the storyboard to integrate suggestions or changes.
Step 8
Introduce participatory video. If you are meeting face-to-face or online then this can be done at the end of the session or as a separate session.
Step 9
Introduce how to use the video mode on mobiles or tablets that was demonstrated in Unit 2. Begin training of the community team in how to take video clips.
Step 10
Filming of community history. Ask the community team to film their community history to demonstrate their storyboard. This activity can be as long or as short as the time available but is just a chance for the community team to become familiar with using the equipment demonstrated in Unit 2.
Step 11
Edit the film. Introduce how and ask the community team to edit their videos of their community history.
Step 12
Discussion with the community team. Give the community team the chance to feedback on what went well and what didn’t go well with recording their community history.