Use 'Print preview' to check the number of pages and printer settings.
Print functionality varies between browsers.
Printable page generated Thursday, 9 July 2026, 7:57 PM
Module 1: Personal development – how self-esteem impacts on learning
Section 1: Ways to explore who pupils are
Key Focus Question: How can you help pupils explore who they are in ways that are sensitive and stimulating?
Keywords: class management; questioning; group work; thinking; data gathering; respect; sensitivity
Learning outcomes
By the end of this section, you will have:
- developed your skills in organising the class in ways that will help pupils show respect for each other;
- developed your skills in asking questions to encourage thinking;
- used different ways to gather data to help pupils discuss who they are.
Introduction
We all learn best when we feel comfortable and safe. As a teacher, one of your key roles is to develop a supportive classroom environment where everyone is able to participate fully and feels they are respected and their ideas are listened to.
This section explores how to do this by looking at different ways of organising the class. You will help pupils learn how to treat each other with respect by:
- helping them understand their similarities and differences;
- asking them to share opinions and feelings;
- giving them tasks where they can ask each other questions and listen to the answers.
1. Organising pupils in groups and pairs
Young children often find it easier to identify difference rather than similarity. In this part, we show two ways to organise your pupils that will help them to explore differences and similarities.
They will:
- learn how to share information and contribute to discussions;
- learn about themselves and each other;
- have better self-esteem as they realise their ideas are as valued as much as those of others.
As a teacher, it is important for you to encourage this – if your pupils all understand their similarities and celebrate their differences, they will treat each other better. You should act as a role model, treating your pupils fairly and equally.
Before starting, it is a good idea to reflect on this and think about whether you treat your pupils respectfully. Do you ever have a ‘bad day’ when you shout at them for no good reason? Do you have favourites who you treat more kindly than others? If you can answer these questions honestly, you can take steps to make sure that all your pupils are treated fairly and respectfully.
To work in this way, you need to ask yourself questions to help you plan these activities, including: What questions will the pupils ask each other? What information will they need to find out? Will they work in groups? In pairs? How will you organise this? How will you give them instructions to do the activities? See what the teacher does in Case Study 1 before trying Activity 1 with your class.
Case Study 1: Working in groups to explore similarities
Chanda teaches at a rural primary school in Mwenda, Zambia. He is working with his pupils to develop a positive classroom environment. He is looking at the pupils’ similarities and differences and asks them to think about the ways in which they are all the same.
First, the whole class practises making sentences, e.g.: ‘We all like food’; ‘We all go to school’. Next, he puts them in groups of five to think of five sentences beginning: ‘We all …’ with one pupil in each group writing the sentences on a piece of paper.
After ten minutes, each group reads out one sentence. If the class agrees with the sentence, Chanda writes it on the board.
Using the sentences, he shows the class the different ways in which we are the same:
- e.g. physically – ‘We all have skin’;
- e.g. how we experience the same kind of feelings – ‘We all feel happy’;
- e.g. situation – ‘We all are school pupils’.
Chanda is pleased with the ideas from his class and plans to use this as a starting point to look at differences.
Activity 1: ‘Are we the same?’
Read Resource 1: Similarities and differences, before you carry out this activity.
- To introduce the idea of ‘the same’, start by asking easy questions. Hold up two pencils and ask: ‘Are they the same? Why?’
- Hold up a pen and a pencil. Ask: ‘Are they the same? Why?’
- Repeat this, using different objects.
- Ask two children to step forward. Ask: ‘Are they the same?’
- Be careful. If they are girls, the pupils might say ‘Yes!’ If it is a boy and a girl, they might say ‘No!’ But they might give other answers e.g. the children might be the same height or have the same name.
- Split the class into pairs. Ask them to look at each other’s features including such things as height, foot size and possibly hair, eyes etc. and list how they are similar.
- Share their ideas, one group giving one idea at a time.
Did they listen to each other? Did they accept the idea of being the same but different? What evidence do you have for your answer?
2. Finding out what pupils think and feel
Understanding differences in people’s opinions and feelings is important in developing good relationships. This is essential when dealing with a class of young people, from many different contexts, (backgrounds and settings), with different opinions and feelings. Your pupils need to understand this to help them communicate effectively and sensitively with each other.
However, before we can learn to understand different opinions and feelings, we first need to recognise them.
You can compare people’s opinions by organising a survey. You need to plan how to:
- organise the survey;
- explain it to the pupils;
- check that they have understood.
Case Study 2 and Activity 2 show ways of doing this, and Resource 2: Asking questions about feelings offers some ideas to help your planning.
Case Study 2: Using groups to discuss opinions and feelings
One week Mr Obeng used the ‘Do you like...?’ survey with his primary 5 class (see Activity 2). He recorded their answers and stuck them on the wall. He often found pupils reading them and talking together.
The next week, Mr Obeng asked again about likes and dislikes, but this time, he drew two faces on the board:
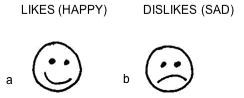
For each question, they counted the number of ‘likes’ in the class and wrote the number under face a. They wrote the number of ‘dislikes’ under face b.
To introduce the idea of feelings, he wrote ‘HAPPY’ above face a, and ‘SAD’ above face b. In groups of four or five, the pupils named things that made them feel happy or sad. Working in small groups helped involve the quieter pupils.
He repeated the exercise, this time using:
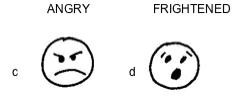
In their groups, the pupils named things that made them feel angry or frightened. They shared the main ideas together as a class. They looked at whether some things occurred in more than one list and discussed why this might be. Mr Obeng was pleased with how thoughtful they were.
Activity 2: The ‘Do you like…?’ survey
Read Resource 3: How to conduct a class survey, and prepare for this activity.
- Perhaps start by asking your class easy questions about what they like and dislike, e.g. ‘Do you all like hiplife?’ or ‘Do you like homework?’
- In pairs, the pupils think of their own questions about what they like and dislike and record these.
- Draw the chart from Resource 3 on the board. Ask your pupils to copy it and choose three of their own questions. With older classes you could put in more questions.
- Explain that they will all ask five pupils the questions and write down ‘Y’ or ‘N’ for the answer under their names.
- Ask the pairs to compare their answers. Ask some pupils to read out their questions and answers so that the whole class can hear the different responses. Discuss what they have found out from the survey.
Think about what the pupils learned from the activity and how you know this.
3. Respecting differences
Appreciating the similarities and differences among your pupils will help you become a more effective teacher. You will be able to plan better to match their needs. If your pupils also understand themselves and others, they will become more confident about participating in class.
As the pupils realise the ways in which they are different from other people, it is important that they should not start to feel isolated or left out. Part of your role is to help them understand that agreeing with people on one thing and disagreeing on others is acceptable and not a reason for conflict.
When a child is seen to be different because of how they look or behave, other children may bully or tease them. Bullying can make children very unhappy. It damages their schoolwork and stops them from making friends.
Children need to learn how to interact with each other. Your role as teacher is crucial for helping them understand the difference between right and wrong.
How can you encourage this? Read Resource 4: Observing your pupils for an initial suggestion. Below are some other ideas you can use. Try them out. Are they successful? Did you have any problems?
Case Study 3: Helping pupils to respect each other’s differences
Mrs Ojo has a boy in her class who is an albino. One day, she had seen some girls laughing at him and calling him names. This made her upset, but she allowed herself to calm down and after school, she asked them: ‘Why were you behaving like that?’ She asked how they would feel if somebody teased them, and how they thought it made him feel. With questions like this, she helped them think about their behaviour. Thinking about this afterwards, she decided to help all her pupils respect each other’s differences.
The next day, in class, she used a story about a child with polio to start a discussion about how her pupils would feel if they had polio. She also used the words and ideas for talking about likes, dislikes and feelings when she needed to talk to the pupils about their behaviour.
When two boys were fighting, Mrs Ojo talked with them, one at a time, to find out why they were angry with each other and helped them resolve their conflict. When one child was sitting alone, she asked others to find out why and make friends with him. This way, her pupils began to look after each other. Mrs Ojo was pleased.
Key Activity: Role play about differences
Read the Key Resource: Using role play/dialogue/drama in the classroom.
- Organise your pupils into groups of five.
- Ask each group to imagine two brothers or sisters whose likes and dislikes are opposite. Ask them to imagine a conflict between them.
- Ask them to role-play the conflict. Two members of the group will be the brothers or sisters. The others could be the mother, father and grandparent.
- First, they should role-play the conflict, and then discuss the conflict all together. Next they should role-play the resolution, which should be a peaceful one.
- Next, the group should discuss their ideas about the causes of the conflict and the resolution.
- Finally, ask each group to act out their role plays to the class, and explain the lesson that they learned. Collect each of these lessons together and display them on the wall to remind everyone.
- If you have time, at the end of each role play, allow the rest of the class to ask questions to the group or give further ideas as to how the conflict could be resolved.
Resource 1: Similarities and differences
![]() Background information / subject knowledge for teacher
Background information / subject knowledge for teacher
There are many ways in which people are the same, from physical features to personality. There are also many ways in which we are different. However, for young pupils, it is often more important for them to feel the same as others and be part of the group.
By understanding ways in which we are all the same, we make the first steps towards understanding ourselves. We also begin to see ways in which we are part of a group or a community. Helping pupils understand that they and their classmates are all equal and should treat each other fairly is an important part of a teacher’s role.
Similarities and differences in appearance
The most obvious way in which people are different is in their appearance. Some are tall, some are short. Some are fat, some are thin. If you are working with your pupils to explain similarities and differences between people, then looking at physical features is an easy place to start. For example, what are the physical similarities and differences between Michael Essien and Kofi Annan?
 |  |
Original source: http://212.95.232.145/ fapl/ html_gb/ players/ player_1055.htm (Accessed 2008)
Original source:http://www.undp.org (Accessed 2008)
You must also be careful: like adults, children can be sensitive about their appearance, so you should try not to draw attention to something that a pupil might be embarrassed about. Instead, focus on similarities such as ‘We all wear clothes’. You will need to be especially careful if you have children with physical disabilities in your class.
In addition, children sometimes tease or bully other children, and drawing attention to differences in appearance might encourage them to behave like this outside of the class. So, as well as helping pupils identify their differences in appearance, you should also emphasise how many similarities there are. If pupils can see the connections between themselves and others, they are more likely to treat others with respect.
Similarities and differences in personality
While it is easier to see the similarities and differences between people’s appearances – the way we look – it is probably more important for pupils to understand the similarities and differences between people’s personalities – the ways we think, feel and behave.
Our opinions and feelings influence the way we behave with other people. They can be summarised as follows:
- ‘Opinions’ cover what people think about things – whether they like or dislike something, or whether they agree or disagree with something. Differences in opinion can sometimes cause arguments and fights, whether with children or adults. Opinions can be based on clear factual knowledge or hearsay which is not always accurate.
- ‘Feelings’ cover people’s emotions – whether something makes them feel happy, sad, angry or frightened etc. Feelings can sometimes be hard to explain, and if someone has different feelings about something to you, it can be difficult for you to understand it.
As children grow up, it is important for them to be able to understand their feelings and emotions, interact with other people, and recognise the needs of others. It is important for children to learn that not everybody thinks and feels the same way that they do. Each person’s ideas, feelings and opinions will have been influenced by their home environment, experiences and carers. This diversity (variety) should not be seen as a problem – except where it goes against legally accepted behaviour. The activities in this module will help pupils begin to appreciate such diversity as a basis for friendship and working together.
As a teacher, you need to understand the feelings of your pupils and make sure that you consider their feelings and differences as you plan their learning. You must be considerate of the fact that some children will enjoy certain activities – e.g. talking in front of the class – and others will not.
However, you must also be fair and equal with your pupils. If you treat each of your pupils differently in class, the children will see this and begin doing the same, both inside and outside of school.
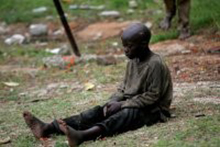
Which feelings are expressed in the photos below? How do you know?
 Original source: Rod Waddington via https://www.flickr.com | 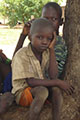 Original source: 'hdptcar' via https://www.flickr.com | 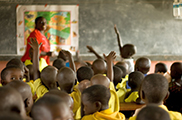 Original source: Matt Lucht via https://www.flickr.com |
Resource 2: Asking questions about feelings
![]() Background information / subject knowledge for teacher
Background information / subject knowledge for teacher
You need to be sensitive when asking questions about feelings. Children might not always want to talk about their feelings in public. You need to ask the kinds of questions that allow children to give answers they feel comfortable with.
One way to do this is to ask questions to the whole class instead of to individuals. Ask questions such as: ‘Who likes …’ and ‘Who doesn’t like …’ with pupils putting up their hands. If they see that they are part of a group, the children will feel less embarrassed about revealing their feelings.
You can do the same by brainstorming different questions (see Key Resource: Using mind maps and brainstorming to explore ideas). For example, ask: ‘What makes you scared?’ and then write all the pupils’ ideas down on the board very quickly. This way, you won’t make the individuals feel too exposed.
If you want them to talk more intimately about their feelings, organise them into pairs or groups to do similar exercises. They will probably find it easier to speak in a small group.
You can also use stories to explore sensitive ideas – this helps pupils to talk more freely as they do not feel they are talking about their own experiences.
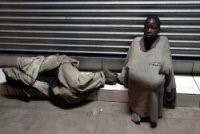
You can make up your own stories to share with your pupils. Or you could use the story of Ghanaian street children below to stimulate discussion. Either copy the sheet – one for each group – or read from your copy to the whole class.
After they have heard the story taken from Street Children News, ask them how they feel about the children’s lives. Are they similar or different to their own lives? How would they feel about living like that? What would they like and dislike about this kind of life?
Street Children News: Ghanaian street children
‘Street’ children have been given this anonymous label because the ‘street’ is where they live their lives out: hustling, sleeping, working, eating. The street is their home and this is where their daily struggle is endured.
Currently in Africa there are a few national governments addressing the very real needs of these marginalised citizens; but there simply is not enough money to go around. It is up to grass-roots organisations and NGOs (non-governmental organisations) to reach out to these children and offer them a helping hand.

It gets cold at night in the winter and so street children sniff glue as a guard against the cold and to escape from their struggle to survive for a few short hours.
Quotes from the street
In 2003, Wendy Jones asked street children in Accra some simple questions and recorded what they said. Their lives may seem very different from our lives but by reading their replies we can see that they are people just like us, often with the same dreams and aspirations.
‘If you could go anywhere in the world, where would you go?’
‘My home town.’
‘If you had three wishes, what would you wish for?’
‘Shoes. One Shirt. Sneakers.’
‘What makes you happy?’
‘Clapping games.’
‘What makes you cry?’
:'When I am hungry.’
‘If you had three wishes, what would you wish for?’
‘A dress. Sandals. Eggs.’
‘What do you think about last thing at night before you go to sleep?’
‘I think about the next day. Because I think that evening has passed so I have to think about the next day. As for the night I have no place to go and I just sleep.’
‘What would you have if you could have anything?’
‘A necklace, a watch, a bed I can sleep in, a TV, a video tape – any tape, a chair.’
‘Tell me about your mother.’
‘She wants me to be somebody. Yet I am on the streets.’
‘What would you like to do in your future?’
‘In the future, if I'm rich – I know I will be rich – yes, I hope, I hope I will be rich, I will care for street children. Children with broken legs who can't work...’
‘What do you regret?’
‘I will say I regret being a street girl and I regret picking a boyfriend. And I regret having bad friends – those that don't give good advice and wish for your downfall.’
‘What’s your favourite thing?’
'I have a long black dress. I used to wear it and go anywhere. If I go to an exhibition or to visit some people I can wear it. I love my long dress. It's fitted with sleeves. It's black'
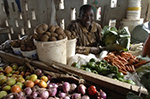
 |  |
Adapted from:http://streetchildafrica.org.uk (Accessed 2008)
Resource 3: How to conduct a class survey
![]() Background information / subject knowledge for teacher
Background information / subject knowledge for teacher
Conducting a survey is a very useful way for your pupils to practise many different skills. These include:
- asking questions;
- recording different types of information;
- comparing answers;
- practising speaking and writing;
- finding out more about each other.
However, you need to think and plan very carefully to organise a survey in your class, and also how you will explain it to your pupils.
1. What is a survey?
A survey is a way of gathering information from many different people on a particular topic. It can explore a range of opinions in a group, and help to find out more about individuals.
To gather the information, a survey usually uses a chart to record the responses. The chart below is one example where the answers could be recorded easily and quickly by using a Y for a yes and and N for a no in each box:
| Name: | ……Faith…… | ………… | …………. | …………. | ……….. |
|---|---|---|---|---|---|
| 1. Do you like yams? | |||||
| 2. Do you like…? | |||||
| 3. Do you like…? |
A survey is an interesting way for pupils to practise finding out information for themselves.
Because a survey has many different stages, it can take a whole lesson to complete – or longer, if pupils have to ask people outside school. Providing time for the data collection to happen is especially important so that everyone is involved and able to see the process in action.
2. Choosing your topic
When deciding to do a survey with your class, you need to think carefully about what the survey will be about – what information will you find out? Clearly, the survey should be linked in some way to the topic in class. For example, if teaching about similarities and differences, a survey about the different foods people like might be an idea. The pupils will be more involved if they suggest ideas themselves.
It is important at this stage to think about the skills that your pupils need to develop and practise. Design a survey that matches your learning objectives.
3. Writing the questions
In any survey, it is good for the pupils to think of and write their own questions – each pupil or group of pupils should come up with their own ideas. But you need to think about how you will organise the pupils to do this. Pair or group work is good if it is the first time that they have done this, as then they can check each other’s work.
To help pupils do a survey you may need to decide (by yourself or with the pupils):
- how they are to work e.g. individually, in pairs, or in groups;
- how many questions they should write (3–5 is usually enough);
- what types of questions they should ask (provide some examples yourself and ask them for some more examples to check that they understand);
- how much time they will have to write the questions – 10–15 minutes should be enough for 3–5 questions.
It is important to do all the above with the whole class together before they start working. As they work, go round and monitor their work to check that they really have understood the task.
The type of question they will write depends on the kind of information that they want to find out. For example, if the idea of the survey is to gather information about the numbers of pupils who think/like/do something, then they might write ‘Yes/No’ questions: e.g. ‘Do you like football?’
However, if the idea of the survey is to gather information about the range of interests in the class, then they might write ‘open-ended’ questions: e.g. ‘What sports do you like?’ They will have to think of ways to record the answers.
4. Asking the questions
Every pupil should practise asking and answering questions on a one-to-one basis. Think carefully about how you would organise this. Here are a few suggestions:
- Pupils do not need to speak to everybody in the class. This would take too much time and also be very repetitive. A sample of five pupils may be enough, and maybe no more than ten pupils – depending on the size of your class.
- If they wrote their questions in pairs or groups, they shouldn’t ask each other the questions. Instead, suggest they ask others in the class or school.
Organising pupils into groups to do the survey can be useful if you have a large class. You also need to ensure that all pupils are involved in writing and asking the questions. (See Key Resource: Using group work in your classroom.)
5. Recording the answers
The pupils need to be clear about the responses they are recording and keep these as short as possible.
For example, if they are asking open-ended questions, they can write down one-word answers: Q: What sports do you like? A: football/running/jumping.
If they are asking Yes/No questions, they can write Y or N as an answer.
If they are gathering information on numbers, they could just keep a tally, with one mark representing one person: e.g.
| Favourite sports: | Football | Running | Jumping | Catch |
|---|---|---|---|---|
| Numbers: | IIIII | IIIIII | III | IIII |
Again, plan this carefully, and explain it to the pupils before they gather their data. To check they understand, you could ask them to explain it to you, too.
6. Comparing answers
After the pupils have asked questions and recorded the information, it is good for them to talk in pairs or groups about their data and compare answers. This data can be used to discuss people’s likes and dislikes and they could draw graphs of the results to make it easy to see the differences and discuss what they mean.
Displaying their findings or asking them to write about their findings will help you understand their thinking and give them the opportunity to think more deeply about the data.
Resource 4: Observing your pupils
![]() Background information / subject knowledge for teacher
Background information / subject knowledge for teacher
Observing or watching your pupils at work in the classroom or playing in the playground is a very good way to build up a picture of them as people. It tells you who they mix with and whether any pupils are isolated. Such information can help you plan activities that better match their needs.
Are they more talkative in groups?” If so, use group work to help them to explore their ideas and therefore learn more. You can observe at two levels by looking at:
- the social groups in your class and how they do or do not interact. What kinds of conflicts are there, if any? How can you use this knowledge to plan group work?
- individuals and their social skills, interests etc. (Finding out and acknowledging what pupils are interested in outside and inside school can be a very powerful way of motivating them to learn.)
Some aspects you could look out for as you watch your pupils are in the table below. But remember to keep an open mind and readjust your picture as you get to know your pupils better.
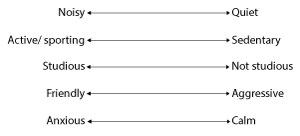
Below is an example of how to record pupil observation. A version of this was used in the Literacy Development Across the Curriculum programme in Nigeria.
Tick the appropriate column in terms of the pupil you are observing.
0 = not at all; 1=poor; 2 = fair; 3= good
Not at all (0) | Poor (1) | Fair (2) | Good (3) | |
|---|---|---|---|---|
| (a) Pupil participates actively in the lesson | ||||
| (b) Pupil produces something creative | ||||
| (c) Pupil works well in groups or pairs | ||||
| (d) Pupil shares ideas/information | ||||
| (e) Pupil shows evidence of understanding lesson | ||||
| (f) Pupil is not afraid to ask questions | ||||
| (g) Pupil shows respect for the ideas of members of the class. |
Acknowledgements
Grateful acknowledgement is made to the following sources:
Photographs and images
Michael Essien:http://212.95.232.145/ fapl/ html_gb/ players/ player_1055.htm (Accessed 2008)
Kofi Annan http://www.undp.org (Accessed 2008)
Street boys at night:: www.streetchildafrica.org.uk (Accessed 2008)
Street boys in the market: www.streetchildafrica.org.uk (Accessed 2008)
Boy sitting: www.streetchildafrica.org.uk (Accessed 2008)
Children smiling: www.streetchildafrica.org.uk (Accessed 2008)
Other
Pupil observation record: http://info.worldbank.org/ (Accessed 2008)
Every effort has been made to contact copyright holders. If any have been inadvertently overlooked the publishers will be pleased to make the necessary arrangements at the first opportunity.
Section 2: Planning physical growth and development sessions
Key Focus Question: How can you plan lessons to develop self-esteem?
Keywords: lesson preparation; games; problem solving; whole-school activities; planning; self-esteem
Learning Outcomes
By the end of this section, you will have:
- planned lessons that are focused on clear learning outcomes to investigate growth and development;
- explored ways to include games and exercises into your lessons;
- used problem solving in whole-school activities.
Introduction
This section focuses on your planning and preparation of lessons. It is important to do this well if your pupils are to achieve what you want them to achieve.
One of your roles is to help your pupils understand the concepts of physical growth and development. These include both the physical changes that will take place as they get older, and also the different things they need to think about and do in order to stay healthy.
As you plan practical activities about physical growth and development, you need to use pupils’ existing knowledge as a base from which to plan and extend their understanding. This section suggests different ways to work in and outside the classroom, which you could also plan to use elsewhere in your teaching.
1. Focus on planning
It is important to prepare yourself for lessons by checking your own subject knowledge. Read Resource 1: Introduction to physical development to refresh your understanding.
You need to think carefully about how you will introduce this topic. Just reading out information and hoping that the pupils understand is not the best way for most pupils to learn. You need to plan your lesson carefully, thinking about what will happen at each stage of the lesson and finding out what they already know and think. See Key Resource: Planning and preparing your lessons for further information.
Each lesson should have a particular learning outcome (intention). In this case, you want the pupils to be able to identify the four basic things that contribute to improved physical development.
For each stage of the lesson, you need to answer three questions:
- How does this activity contribute to the learning outcome?
- What will the pupils be doing to help them learn?
- What will I be doing to support them?
Look at the games and activities you could use. Which ones will support your learning outcomes?
Case Study 1: Considering physical development when organising your classroom
Biduga teaches in a small school in a rural area of Tanzania. This term, her colleague Mary is on maternity leave, so she is teaching a large, multigrade class of 85 pupils from Grades 3–6. This means that she has to deal with a large number of children at different stages of physical development. Biduga knows she needs to consider this when organising her classroom.
She has noticed that the older children often take responsibility for some of the younger children. So, she organises the class into groups, each with a group name and a Grade 6 ‘leader’. The leader checks that each child is present, and gets their group settled and ready for study.
She also finds that the younger children enjoy having many different activities in a lesson. She plans lessons with two strands of activities: one for Grades 5–6 and one for Grades 3–4:
- First, she gives Grades 5–6 some group work or longer exercises.
- Then, she spends time with Grades 3–4, using shorter activities, including simple games.
This means preparing lessons with more stages for Grades 3–4. See Key Resource: Working with large classes and Key Resource: Working with multigrade classes.
In this way, Biduga has recognised the differences in her pupils’ physical development and is using it to help plan her teaching.
Activity 1: Planning a lesson on physical development
Resource 1 covers the four principles that contribute to physical development. Write a lesson plan to introduce these four principles to your pupils.
Identify the activities and resources you will use. You could adapt the ‘same or different’ activity from Section 1 of this module but look at similarities and differences in physical growth e.g. height, shoe size, hand and arm length.
Plan your lesson like this:
- Introduction to the lesson and intended learning outcomes.
- Introduce the ideas in Resource 1, using pupils’ previous knowledge.
- In groups or pairs, the pupils do a ‘same and different’ activity or your own activity.
- The pupils do another similar activity so you can check their understanding.
Resource 2: Planning ways to introduce the four principles of physical development gives you more guidance on organising the lesson and gathering resources to support your teaching.
After the lesson, make some notes for yourself about how it went:
- Was it successful? What did your pupils learn?
- Did any part not work so well? If so, why was this?
- What would you do differently next time?
2. Using games in your teaching
In the first part of this section, you considered ways to plan teaching your pupils about physical development. We are now going to look at one element of this: the physical exercise pupils may get while at school or at home.
First, read Resource 3: Using games and physical exercise for ideas.
When planning to use games in your teaching, you need to think about:
- the content of the game, so that it helps the pupils reach the learning objectives you have set for the lesson;
- the organisation of the game:
- How do you play the game?
- How will you give instructions to the pupils?
- How will you check they understand how to play?
- Will they play in pairs, groups or as a class?
- Where will they play – inside or outside?
- How long will they play for?
Case Study 2: Using pupils’ favourite games
Mr Oyugi, a teacher in the township of Kiambu, wanted to use pupils’ games in his lessons. So he planned a lesson where they would:
- identify their favourite games;
- describe how to play them;
- use the games to learn about different ideas and topics such as sharing and numbers.
To start the lesson, he used the ‘likes and dislikes’ survey to find out what games his pupils knew. To save time, he planned to:
- conduct the survey with the whole class at once;
- record the information on the board himself.
Next, he wanted the pupils to do something themselves. He decided that, in groups, they would write a description of their favourite game, but they would have to include answers to some key questions that he would provide about how to play the game. He included questions such as: Where do you play it? How many people could play? What equipment is needed? What are the rules?
Finally, he built in time for each group to explain their game to the class. They would vote and play one game each week.
Read Resource 4: How Mr Oyugi taught his lesson for more information on what he did.
Activity 2: A simple number game
Try this game with your class. It practises adding the numbers 1 to 10 and gives your pupils physical exercise.
- The pupils form a circle. You stand in the middle and give them a simple sum, e.g. 2 + 3.
- The pupils jump to form groups whose number answers the sum: e.g. 2 + 3 = 5; they jump into groups of 5.
- A new person stands in the middle, makes up a sum and the game continues.
If your class is large, make more than one circle or play outside to have more room.
If you have a multigrade class, make circles for each standard. Younger pupils can practise adding and subtracting. Classes in higher standards can practise multiplication and division.
How did your pupils react to this game?
What did they learn?
How can you adapt this game to a lesson plan for science or English? What changes would you make in organising it but still keep the physical activity?
3. Teaching about healthy living
In the first part of this section, we identified key factors needed for healthy physical development. Now we investigate how your school can promote these ideas with the pupils and local community.
Having discussed using exercise and games in your lessons, you now need to promote the importance of a) good food, b) protection from illnesses, and c) clean surroundings, but this will have to be done sensitively.
This can be done by making the school a health-promoting environment.
This will involve discussion with the school staff, about:
- setting the school up as a good example for pupils and the community. To resource this, you may need to plan to involve the community and other people to work together, such as local health clinics and NGOs;
- encouraging healthy living practices in your school by having health promotion activities as part of the regular routine;
- having inputs from experts such as HIV/AIDS coordinators and health clinics. Who will be involved, and when?
Case Study 3: Holding a Sports Day to promote healthy development
Having used games in his lessons, Mr Oyugi thought about other ways he could promote healthy development at school.
He decided to hold a school and community Games and Sports Day. Once a term, the whole school could compete at games and sports. This would involve sports like football and running, but also some of the learning games such as one about the points of the compass that he had been using in lessons.
To plan this, he listed the people he should speak to, such as the head teacher, other teachers, the Parents-Teachers’ Association (PTA) and the pupils.
Having gained the support of the head teacher, he planned the competitions with the staff and the PTA. First, they decided the time – it would start at 09.30 and finish at 12.30. Then they chose the different activities. They organised the games and races according to classes, and wrote a schedule of activities for the day.
Then they planned who would help on the day: the PTA, the Board of Governors (BOG), the teachers and some older children. They decided who would make announcements, record the results, give the prizes and so on.
This way, they developed a full plan for the first Sports Day. They planned it over two to three weeks, which meant that it was well organised and a huge success.
Read Resource 5: Mr Oyugi’s other ideas for health promotion for more ideas.
Key Activity: Problem solving for a healthier school environment
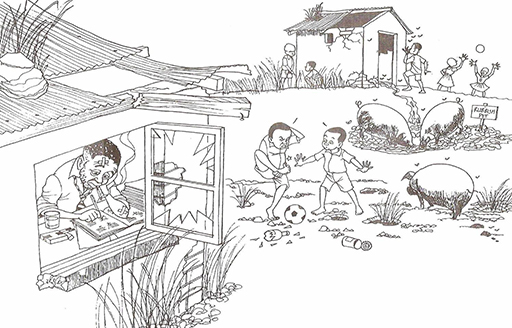
First, discuss the picture in Resource 6: Picture of an unhealthy school environment with your pupils and ask them to identify the problems in this school environment.
Organise your pupils to carry out a survey of your school environment to see if it is health promoting or health demoting. Send the children around the school in pairs or threes to note down anything in the school environment that fits into these categories.
Next, each pair/group presents their findings to the whole class. You make a list of their findings and put them on two posters on the wall – one for health promoting, one for health demoting. Discuss what needs to be done to make changes for a healthier school environment. Remember to celebrate the positive aspects of your school environment.
Ask your head teacher if you can present your findings to the whole school in assembly. Invite everyone in the school to form teams to tackle all the tasks that need changing to make your school environment fully health promoting.
You may need to ask parents or other community members for help. You will also have to encourage the children to be creative and think of ways to improve the school without spending a lot of money.
Resource 1: Introduction to physical development
![]() Background information / subject knowledge for teacher
Background information / subject knowledge for teacher
We are all growing all the time. We are growing physically, but are also extending our ideas and understanding, and often these are happening alongside each other.
During the years that children are at school, they go through many physical changes. You can see this by comparing pupils in different classes. The older children are taller and stronger, and they can usually also express themselves better. As part of the natural process, children also develop sexually once they reach their teenage years.
Children cannot develop and grow on their own. Just like a plant needs water, sun and good health to develop, people need certain things to help them. They include:
- good food;
- exercise;
- protection from illnesses;
- clean surroundings.
Each of these things contributes to the physical development of the child.
- If a child does not eat well, they will not grow as quickly as others. Food contributes to other things, too: the amount of energy that children have, how much they are protected from illness etc.
- If children do not exercise, they will not develop their arm and leg muscles and so will not be as strong. Physical exercise also helps develop their bodily coordination when doing exercises like running, jumping and rope skipping. Coordination helps with other skills, like reading and writing. Physical exercise is also good for well-being and physical growth.
- If children are not protected from illnesses, they will become sick more often, which will affect the way in which they grow. If children are ill, they cannot exercise, and so will not develop their muscles. If they are ill, they also find it hard to study, and so will fall behind in their learning.
- If children do not have clean surroundings, they are more likely to catch diseases. Diseases will affect them in the same way as illnesses.
It is important for you to introduce these simple ideas to your pupils at an early stage so that they can get into healthy habits as part of their everyday lives, but you will need to be sensitive to the context of the community in which you work.
Resource 2: Planning ways to introduce the four principles of physical development
![]() Background information / subject knowledge for teacher
Background information / subject knowledge for teacher
Look back at Section 1 of this module. Pupils were comparing ways in which they were the same and different. How could you use this classroom activity to introduce the four principles of physical development?
For example, you could ask them to compare their ages and sizes, and the different foods that they eat.
To cover the four principles of physical development in a lesson plan, think about these questions:
- What is the key thing you want them to learn?
- How will you introduce the topic?
- How will you organise the first activity? What will your instructions be? Will the pupils work in groups or pairs?
- How will you demonstrate the four principles?
- What resources could you use to help explain them? For example, could you use pictures? Could you bring in different kinds of food? Where would you get them?
- How will you check the pupils’ understanding?
- What issues do you need to be sensitive to?
Write down your answers to these questions on a piece of paper. Then use these to plan each stage of your lesson. Remember to always be sensitive to the context in which you are working in so as not to embarrass pupils.
Resource 3: Using games and physical exercise
![]() Background information / subject knowledge for teacher
Background information / subject knowledge for teacher
Physical exercise serves many functions. As we know, it helps children build up their strength and fitness. But it can also help pupils to develop social, creative and leadership skills. It can help pupils make friends and learn new things, and it contributes to their emotional well-being.
Think about the range of different physical games and exercises there are:
- sports e.g. football, wrestling;
- play e.g. skipping, dancing, running games;
- word and number games e.g. singing, rhymes.
Children will automatically invent and play games with each other and you can exploit this as part of your teaching.
The use of physical games and exercises as part of your teaching can encourage pupils to enjoy learning, and so develop a greater interest in coming to school.
By using physical games as part of your teaching, you will also encourage pupils to learn new skills and behaviour patterns.
These can include:
- collaborative learning;
- thinking skills;
- sharing resources and taking turns;
- motivation and involvement in learning.
All of these are attributes you should encourage in the classroom, as they will contribute to more effective learning.
Below you will find some examples of Kenyan games that use physical exercise.
| SHISWECHELI | |
|---|---|
Play instruments: A piece of broken pottery, a ten-cent coin or a shapely stone. A pattern drawn on the ground. Age group: 5 to 6 years and above Players: One to four How to play: The first player throws a piece of pottery, or coin, or stone, into the first segment of the pattern. She jumps on one leg over this compartment into the second compartment as she plays. She then jumps into the other compartments until the last one. At the 4th and 5th compartments, she stands astride with one foot in the 4th compartment and the other in the 5th. The same is repeated at compartments 8 and 9 before she proceeds. At compartment 10, she turns back the same way she came until she reaches the compartments before the piece of pottery. She bends, picks it up, and jumps over this compartment to the outside with the piece. She then throws the piece into the second compartment and continues the game, jumping over the compartment with the piece to the last compartment, and turns back the same way she came, to the outside. This is repeated with the piece being thrown into each successive compartment until the last one has been covered. At this juncture she steps into compartment 10, with both feet still facing the front, and throws the piece over her head without looking back. If the piece falls well into one of the compartments, it becomes her territory. If at any point the player aims at a compartment and misses, she loses, and another player takes over the game. | 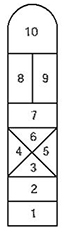 |
| SHIHULUKHU |
|---|
Play instruments: No equipment required Age group: 3 upwards Players: Five or more How to play: One player assumes the position of a lion (Italanyi). He moves/goes ahead of the other players as the others question him: Players: King Lion, what time is it? Lion: Seven o’clock. Players: King Lion, what time is it? Lion: It is noon. Players: King Lion, what time is it? Lion: It is the hour to feed on (eat) sheep! (Here the other players run away as the lion chases after them. The player the lion catches is the next to be the lion. |
| TSIBEA NE KIGUMBA |
|---|
Play instruments: Stones, sticks and a piece of cloth Age group: 4 to 6 years Players: Usually eight children or more How to play: Players stand in pairs facing each other, forming two lines. The pairs are given numbers. An object is placed in the middle of the two lines. The leader calls out the numbers of two players, and the player from each team who has that number has to run and try to pick up the object first. The player who picks up the object earns a point for that player’s group. Adapted from: http://unesdoc.unesco.org/ (Accessed 2008) |
Resource 4: How Mr Oyugi taught his lesson
![]() Background information / subject knowledge for teacher
Background information / subject knowledge for teacher
Here are the stages Mr Oyugi used in his lesson:
- Using the ‘likes and dislikes’ activity covered in Section 1 of this module, everybody wrote down five games they liked most.
- Mr Oyugi asked the pupils to talk, in pairs, about their favourite games and choose one between them. This took ten minutes.
- To do the survey, he stood at the front of the class asking each pair which game they had chosen.
- He wrote the game on the board and put one tick next to it. If it was a game someone else had already mentioned, he just added a tick. The list on the board started to look like this:
Football ✓ ✓ ✓ ✓ ✓ ✓
Skipping ✓ ✓ ✓ ✓ ✓ ✓ ✓
Clapping ✓ ✓ ✓ ✓ ✓ ✓
Catch ✓ ✓ ✓ ✓
Marbles ✓ ✓ ✓
- The survey took 15 minutes to complete. Next, he asked which game was most popular and which least popular.
- He asked the class to get into seven groups of five. He asked each group to choose one game and write a description for the class of how to play it.
- He asked them to read their instructions to the class.
There were too many games to describe in one lesson so he decided to do one new game during the last lesson of each day.
To help with this, he gave each group the name of a day of the week. Now each group knew when they should give their description. At the beginning of each day, he asked whose turn it was today.
These lessons used the following format:
- First, the group gave their description of the game and demonstrated it in front of the whole class. This took about ten minutes.
- Then all the other groups practised playing the game as well. If necessary, Mr Oyugi took them outside. This took 15 minutes.
- Next, he asked them to think about new ways of playing the game so that it helped them remember what they had learned in class that day.
- Each group came up with different ideas for adapting the game. This discussion usually lasted about 15 minutes.
- Finally, they discussed some of the changes and tried them out together until the end of the lesson.
This way, Mr Oyugi started using his pupils’ games to help with teaching different subjects. The best ideas he used again. Also, the pupils started playing the new learning games in their free time.
Resource 5: Mr Oyugi’s other ideas for health promotion
![]() Background information / subject knowledge for teacher
Background information / subject knowledge for teacher
As well as Sports Day, Mr Oyugi came up with some other ideas for health promotion at school, such as:
- Pupils and teachers could clean the playground and classrooms after assembly every morning.
- Using rubbish bins would stop people dropping rubbish just anywhere. (It would also stop dogs and rats coming into the school and reduce the possibility of the children and teachers catching diseases or falling ill.)
- Using the school as a local inoculation centre when the health workers were visiting would ensure that children and teachers would all receive regular inoculations. It would also mean that the children would receive some additional health guidance from doctors and nurses.
- Establishing connections between the school and local and visiting health workers would help the school with health resources.
- Developing a school garden would provide food (such as vegetables to make soup) and exercise, as well as learning about the environment.
- A first aid/rest area or room could be created.
- The school could invite visitors to come and talk about particular problems, e.g. HIV/AIDS, malaria.
- They could run after-school exercise or games clubs.
Resource 6: Picture of an unhealthy school environment
![]() Teacher resource for planning or adapting to use with pupils
Teacher resource for planning or adapting to use with pupils
Acknowledgements
Grateful acknowledgement is made to the following sources:
Photograph and images
TSIBEA NE KIGUMBA adapted from:www.unesdoc.unesco.org/ (Accessed 2008)
Unhealthy school environment :Life Skills for Young Ugandans, Secondary teacher training manual. (UNICEF)
Every effort has been made to contact copyright holders. If any have been inadvertently overlooked the publishers will be pleased to make the necessary arrangements at the first opportunity.
Section 3: Exploring pupils’ ideas about healthy living
Key Focus Question: How can you use prior knowledge and group work to develop understanding of healthy living?
Keywords: group discussion; storytelling; writing; traditional healthy practices; prior knowledge
Learning Outcomes
By the end of this section, you will have:
- used class and group discussion to find out what pupils already know;
- learned how to build on pupils’ prior knowledge;
- used local resource people to motivate pupils to learn.
Introduction
When introducing the study of healthy living into your curriculum, you will need to be sensitive to the setting in which you teach. This section includes investigating your pupils’ prior knowledge – where they get ideas from and what knowledge they bring to the classroom – and using this to develop their thinking about healthy living. By recognising your pupils’ knowledge and how competent they are, you will build up their self-esteem. The activities ask you to use group discussion, practical tasks and local people to explore and deepen your pupils’ knowledge about healthy living.
1. Building on prior knowledge
Your pupils need to know what foods are best for them, but just telling them is not enough. Here, we look at more interactive ways to help them learn and understand.
Importantly, they may already have some ideas about the topic. To find out what these are, you could start your lesson by:
- introducing the topic and asking them ‘What can you tell me about … ’ and noting down their ideas;
- organising them into pairs or small groups to talk about the topic and giving them some open-ended questions to guide their discussion;
- asking them to give their responses, and listing the key ideas you want to take further.
Having found out your pupils’ prior knowledge, your planning – and therefore your teaching – will better match their needs. See Key Resource: Using questioning to promote thinking to help you think of questions to guide their discussions.
Case Study 1: Finding out what pupils know about good nutrition
Mrs Shivute, in TaboraPrimary School in Tanzania, found that her class liked talking about food, so she asked them to list all the foods they liked.
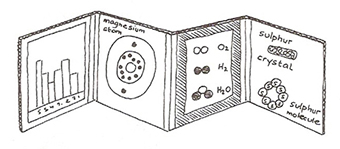
She asked them where the foods came from originally – plants or animals. In groups, they cut pictures of food from old magazines that Mrs Shivute had collected and kept in her classroom and sorted them into different food groups (see Resource 1: Healthy living practices).
They discussed the food types that are good for you and the food types that may taste nice, but are not as good for you.
Mrs Shivute talked of some other foods that they did not mention and asked them to include these in their sorting. She explained about eating a balanced diet if possible and eating more fruit and vegetables and less sugar. The children drew pictures of the different foods.
She asked if they knew why meat and fish are good for them. They had lots of ideas: one boy said meat and fish help children to grow. Mrs Shivute was very pleased and told them about how these foods helped build their muscles.
They talked about the fact that when money is short, they have to eat what their parents can afford and this is not always what they like to eat or what is good for them. They realised that some food was better than no food.
Activity 1: Food group activities
Before you start, you may want to read Resource 1.
- Ask the pupils what they like to eat. They can draw pictures or find pictures in old magazines if you have them.
- Ask the pupils, in small groups, to share their ideas about what types of food are better for them than others.
- Ask each group to share one idea and list these on the board.
- Using their ideas as a starting point, explain the different food groups and how each helps us. See Resource 3: Local foods for pictures of some more localised foods to use in this activity.
- Ask pupils, in their groups, to match pictures to food groups. Ask them to discuss why the different foods are good for them and what they provide.
- Ask each group to write five questions about different food types. Have a class quiz – each group asks their questions in turn and others answer.
- Finally, ask the groups to make food group posters or displays, using their drawings and pictures. You could also use samples or empty food packets. Leave these in the classroom for all to see. (See Resource 2: Ideas for classroom displays.)
2. Organising group discussions
You have introduced your pupils to some ideas about food and nutrition and given them the opportunity to contribute their own ideas during the activities.
However, in talking about healthy living, you also need to encourage them to develop healthy habits, using what they already know. By using discussion you can encourage them to think about their own daily habits and identify ways to improve them.
Possible discussion topics are:
- exercise;
- eating as balanced a diet as possible;
- keeping food safe;
- keeping clean.
Organising a discussion needs careful planning. Where will the groups work? Who will be in which group? You might want groups where there is a good mix of personalities to help discussions and someone to act as leader.
To encourage pupils to participate, set the groups three or four questions. One or two can be easy to answer – e.g. Name three healthy habits – and the others should encourage pupils to explain their ideas – e.g. Which habit do you think is the most important? Why do you say this?
It is important that they respect other ideas and listen carefully to each other.
Case Study 2: Class discussions about healthy living
Mrs Aketch wanted to develop her pupils’ ideas about healthy living. She decided to organise discussions on a different topic, one a week for three weeks.
For each discussion, she introduced the topic using pictures or stories and asked some simple questions to start them thinking. Then she put them into small groups of four or five to discuss a related topic, e.g. Why do we need to keep as clean as possible?
As the pupils were talking, she would go around listening and sometimes joining in and helping to move discussions on.
After five or ten minutes of group discussion, she asked each group to say what they had talked about and explain their ideas.
Finally, with the pupils, she wrote a list of good practices on the board for them to remember and record. The next day, she asked them to look at the list again and suggest which they thought were most important.
Then, Mrs Aketch gave the pupils next week’s topic and asked them to think about their ideas in advance.
Activity 2: Planning and organising a discussion
With your own class of pupils, how would you organise a group discussion on healthy living?
- Choose a topic to discuss or make a list for them to choose from. Plan your introduction.
- Think how they will work – in pairs, groups or as a whole class? Design the task – either discussing the answer to a question or ask your pupils to plan an activity to keep healthy.
- Prepare your instructions. How will you check that they understand the task?
- How long will they talk for? 10–15 minutes or more? What will you do while they are talking?
- At the end of the discussion, ask them for their ideas. Think of questions you might ask to help them. How many people will you ask? Plan how you will summarise their best ideas, perhaps by drawing a mind map. See Key Resource: Using mind maps and brainstorming to explore ideas.
- Discuss with the pupils how they will remember and use these ideas.
Use these questions to plan your lesson on a healthy living topic. After the lesson, ask yourself how well it went and what you would do differently next time to make it more effective.
3. Using local resource people
There are many things for children to know about if they are to remain healthy. Some of these they can learn in school, but many things they can learn at home or in the community.
To encourage them to learn more from the community, you can devise ways to help them find out who they can learn from. This will motivate them to want to learn. One way to encourage this is to give the children homework where they ask their parents or grandparents about something. How would you help the children do this? For example, what information will they gather? What questions will they ask? How will they record the information?
Another way is to invite people from the local community, who know about local healthy practices, into the classroom. This is what one teacher does in Case Study 3. See also Key Resource: Using the local community/environment as a resource.
Case Study 3: Using a local person to learn about local food
Mr Maina asks Mrs Mueni to visit his class to talk about local food. Mrs Mueni is the wife of the local chief and every year she visits schools to help the children learn about how food is cooked and stored.
She takes cassava flour, maize meal, plantain, dried fish and meat to the school and she tells the pupils about cooking these foods and drying them in the sun.
They identify all the foods that are available locally. See Resource 3 for some pictures of Kenyan foods. The pupils are excited about the visit and listen carefully. They enjoy tasting the small sample of fried plantains she cooks for them.
Mrs Mueni talks about the grain harvest and how long the local store will last and the pupils find out how other local food is grown and stored.
Mr Maina saw how the new learning experience motivated his pupils as many of them come in the next day telling him how their parents cook and store some foods.
Key Activity: Using local resource people
This activity is about planning and carrying out a lesson where you invite a local expert into your class. To plan this effectively, you need to think about the following:
Which local resource people could visit your class? What health topic could they cover? For example:
- a farmer to talk about local food;
- a traditional healer to talk about beneficial plants and herbs;
- a housewife to talk about storing and cooking food;
- a nurse who can explain everyday hygienic practices.
You will need to:
- plan an activity to check the pupils’ prior knowledge of the topic;
- discuss with the pupils what questions they will ask the visitor;
- tell the visitor what to talk about and for how long;
- plan a pupils’ activity after the visit to explore ideas further.
In the last activity, you could assess how much the pupils have learned by asking them to write stories or do role plays to share with the class.
Now carry out your lesson as planned above and think about its effectiveness.
You could develop your pupils’ findings into a class presentation for the school assembly.
Resource 1: Healthy living practices
![]() Background information / subject knowledge for teacher
Background information / subject knowledge for teacher
The following information is useful for different topics associated with healthy living. Use this as a resource for designing activities and guiding discussions.
Types of food
It is important to eat and, if possible, to eat a balanced diet. Foods can be grouped in many different ways and here is one that is commonly used in Africa. It lists four basic food groups, and each one helps us in a different way:
- Grains – this includes food like bread, rice, maize and fufu. Eating these gives us the energy to do physical work. Grains, which are carbohydrates give us energy.
- Fruits and vegetables – these are important because they give us the vitamins and minerals we need to be healthy. Eating them helps us stop getting ill.
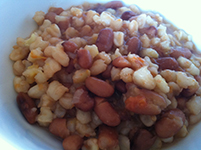
- Meat, chicken, fish, eggs, beans and nuts – all these have protein in them. Protein helps build muscles. You need protein to grow big and strong.
- Dairy foods – this includes milk, cheese, and yogurt. These types of food have a lot of calcium. Calcium is important because it helps build strong bones and teeth.
Eating a mixture of these foods gives us good nutrition. Eating only one of these things every day can cause health problems. However, some food is better than no food.
Many children like to eat sweets and sugar. This is fine in small amounts, as it gives us energy. But too much sugar is bad for the teeth because it can cause tooth decay. Too much sugar can also make us fat.
 Original source: Jon Mountjoy via https://www.flickr.com/ photos/ mountjoy/ 5182202725/ | 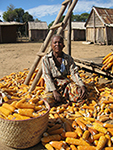 Original source: 'Woodlouse' via https://www.flickr.com/ photos/ woodlouse/ 3964189738/ |
Keeping food safe
To keep food safe, there are a number of things you need to think about.
Firstly, foods can go bad or rot. These include most vegetables, fish and meat, but some take longer to go bad than others. They go rotten when they have been left alone too long. When they rot, they start to smell awful, and if you eat them they can make you sick.
To stop fresh food from rotting, it is good to keep it as cool and dry as possible. Another way to stop fresh food rotting is to preserve it. This involves drying the meat, fish or vegetable either in the hot sun or over a fire.
Secondly, some food, especially food in cans, can go bad if it is kept too long and not stored properly.
Thirdly, some food, especially meat, can make us sick if it is cooked once and then heated up again but not reheated thoroughly. It is best to only cook what you are going to eat on that day. If you do heat up cooked food, make sure it is thoroughly heated through.
Finally, animals including many insects also like food, but if they touch our food they leave germs that can give us diseases and illnesses. Try and keep your food covered up. If you have a box or container to keep it in, this is best.
Why we clean our surroundings
We clean our surroundings to protect us from dirt and diseases. People can get ill from coming into contact with many different things. These include:
- animals and insects;
- rotting food;
- rubbish;
- animal and human faeces;
- chemicals;
- dirty clothes.
For this reason, it is good to clear these things away from where we live, eat or sleep. You can do this easily by cleaning your surroundings every day and collecting the rubbish and dirt in one place away from where you stay.
Good hygiene practices
There are many kinds of good hygiene practices you can do every day. The reasons for these are to keep us clean and to protect us from picking up illnesses.
Some good practices include:
- washing ourselves every day if possible;
- cleaning our teeth every day if possible ;
- washing our hands before eating or cooking;
- washing our hands after going to the toilet;
- keeping our house, clothes and surroundings as clean as possible;
- not going to the toilet near the house or kitchen;
- not leaving food lying around in the open.
The best kinds of exercise
Any regular exercise is a good thing, but it is always good to try and make it a habit.
The sorts of exercise that you can do regularly include:
- walking or running to school;
- playing games, e.g. football;
- swimming;
- working in the field;
- housework.
It is important to try and do some exercise every day, because it helps build up your muscles, your heart, and your overall fitness. If you don’t exercise regularly, you will find it more difficult when you try to. You will feel weak and short of breath.
Resource 2: Ideas for classroom displays
![]() Teacher resource for planning or adapting to use with pupils
Teacher resource for planning or adapting to use with pupils
Cardboard box display
| 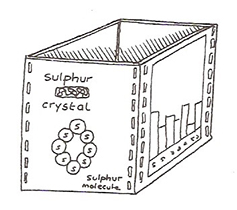 |
 | |
Display beams and hooks
| |
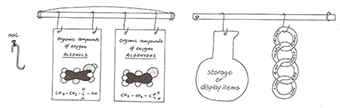 | |
Display charts
| 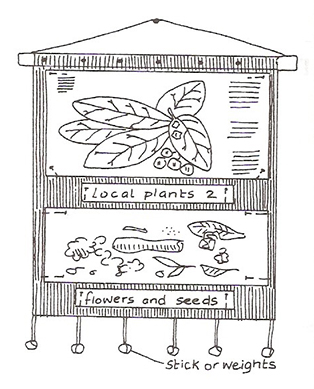 |
Adapted from: Byers, Childs & Laine, The Science Teacher’s Handbook published by VSO/Heinemann
Resource 3: Local foods
![]() Teacher resource for planning or adapting to use with pupils
Teacher resource for planning or adapting to use with pupils
The four photographs show some of the common fruits and vegetables that are available in many parts of Nigeria and also how some of these are prepared ready for eating.
These pictures can be used as a stimulus for discussion when exploring what pupils like to eat in Activity 1 and again in the Key Activity about healthy living if you have no access to magazines.
Your pupils could discuss why these foods are particularly good for them, which they like and how they cook them or eat them.
 Various foods Original source: http://www.destination-connect.com (Accessed 2008) | 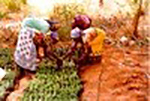 Women harvesting Original source: http://africa.oneworld.net (Accessed 2008) |
 Food market in Kenya Original source: http://www.climatechoices.org.uk | 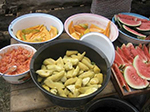 Some prepared foods Original source: http://stephenleahy.wordpress.com (Accessed 2008) |
Acknowledgements
Grateful acknowledgement is made to the following sources:
Photographs and images
Ideas for classroom displays adapted from: Byers, Childs & Laine, The Science Teacher’s handbook published by VSO/Heinemann
Various foods: original source: http://www.destination-connect.com (Accessed 2008)
Women harvesting: original source: http://africa.oneworld.net (Accessed 2008)
Food market in Kenya: Original source: http://www.climatechoices.org.uk (Accessed 2008)
Some prepared foods: original source: http://stephenleahy.wordpress.com (Accessed 2008)
Every effort has been made to contact copyright holders. If any have been inadvertently overlooked the publishers will be pleased to make the necessary arrangements at the first opportunity.
Section 4: Activities to support emotional well-being
Key Focus Question: How can you set up activities to support pupils’ emotional well-being?
Keywords: active learning; building self-esteem; reflective practice; emotional well-being
Learning Outcomes
By the end of this section, you will have:
- organised different activities to develop and support emotional well-being in your classroom;
- worked in a positive and affirmative manner;
- reflected on your own behaviour in developing your pupils’ emotional well-being.
Introduction
Learning is easier and much more fun if we feel secure and confident in ourselves. By respecting and supporting your pupils in the classroom and planning activities that make them feel included you will support their emotional wellbeing.
1. Teaching children to share
Games are practical activities that pupils can participate in, for fun and for learning. They can also teach pupils how to interact with each other to share ideas and objects. Sharing is important at school because:
- many schools have few resources, and pupils need to use resources in groups;
- pupils have different skills, and sharing encourages them to help each other;
- encouraging sharing and group work means that everyone is learning even if you can’t speak to all of your pupils individually;
- sharing is part of life and we all need to cooperate every day;
- by sharing, people learn how to give support to others and ask for it in return;
- sharing is one way people make friends with each other and it encourages good social interaction.
Here, we are going to look at ideas for sharing activities and how you can encourage sharing as part of your everyday teaching.
Case Study 1: Ways of sharing
Kembabasi is a teacher in a Grade 4 class at a primary school in northern Uganda. She has many children in her class and very few textbooks, exercise books and pencils. So for each reading or writing activity, she organises the pupils into groups to share the resources together.
She plans the activities like this:
- Each group has one textbook or storybook, one exercise book and one pen.
- In the group, one pupil has the textbook and reads it to the others, or they take it in turns and read a bit each.
- One pupil has the exercise book and writes down the answers.
- The other pupils all discuss the questions and answers.
- They all check what has been written down.
- They swap resources after every different kind of activity.
Before the class starts a reading and writing activity, Kembabasi asks each group who is reading and who is writing. This way, she checks that each pupil practises their reading, writing and discussion skills every day, if possible.
The pupils learn how to listen to each other and share ideas. They gain knowledge from each other and learn how to be friends.
Kembabasi changes the groups regularly, so pupils develop new skills and make new friends.
You can find further ideas in Key Resource: Being a resourceful teacher in challenging circumstances.
Activity 1: A sharing game
This is a game that practises language and sharing.
- Organise your class into three groups.
- Give each person in Group 1 a piece of card with a pronoun written on it (i.e. I, you, he, she, we, they).
- Give each person in Group 2 a piece of card with a verb written on it (e.g. like/likes, go/goes, eat/eats etc.).
- Give each person in Group 3 a piece of card with a noun written on it (e.g. football, home, mango etc.).
- Tell each pupil that they must make a sentence by finding other pupils and sharing their words (e.g. ‘She likes football’).
- Then ask the groups to check if each other’s sentences are correct.
How can you adapt this exercise to teach other topics and subjects, e.g. maths or science?
This flexible, sharing approach can be used with many different topics.
2. Building self-esteem
As a teacher, one of your most important roles is to encourage and support your pupils as learners and people.
An educational psychologist called Abraham Maslow has identified some emotional needs that are important in order to learn well. These include feelings of:
- safety and security;
- love and belonging;
- self-esteem.
Every pupil has the desire for high achievement, which can be measured by self-esteem. Pupils show this in the classroom by being keen to answer questions. If they feel stupid, it damages their self-esteem and discourages them.
However, if you show them their answers might be right or are interesting, it boosts pupils’ self-esteem and encourages participation and high achievement.
You can encourage this in the classroom by being a positive and affirmative teacher. This means:
- being positive and respectful so pupils feel confident enough to contribute;
- making sure that nobody is made to feel stupid or embarrassed when contributing their ideas;
- making sure that everybody understands the lesson’s most important focus.
To do this, you need to develop teaching strategies that do not reject any answer that is given, but you use the pupils’ responses to guide them to think more deeply. By doing this, you will be building pupils’ self-esteem.
Case Study 2: Being a positive and affirmative teacher
William had been able to encourage pupils in his Grade 5 class to contribute to most lessons through the sharing activities he uses as part of his everyday lessons. The pupils began by making contributions in small groups, and soon were confident enough to start making contributions in front of the whole class.
To make sure he didn’t damage the pupils’ self-esteem, he planned how he would handle their contributions.
- He would ask the class a question. If pupils wanted to answer, they put their hands up and he would choose someone.
- If they gave the correct answer straight away, he would praise them with phrases like: ‘Well done!’, ‘Very good!’, ‘Excellent!’
- If the pupil gave an answer that wasn’t quite right, he was careful not to say ‘No’ or ‘Wrong’. Instead, he would say something neutral like: ‘Almost’, ‘Nearly’, or ‘Not quite’. He might ask the pupil to ‘Try again’ and give them a clue or prompt to help them think a little harder.
- If the pupil was stuck, William moved on quickly, saying: ‘Can anyone else help us?’
Over time he noticed how much more confident they became.
Activity 2: Building self-esteem
One way to build self-esteem is to help your pupils recognise their own skills.
- Ask your pupils to describe different kinds of things they enjoy doing, both at home and in school.
- Now ask them to think about which activities they are particularly good at.
- Organise them into groups. Then ask each pupil to identify three special skills they have and share these with the group.
- Ask them individually to write about these skills and draw pictures of themselves doing each activity. Display them on the wall.
- In the next lesson, extend this by asking your pupils to discuss what they would like to be or do when they grow up.
3. Creating a caring environment
We have talked about how to help pupils identify and explain their feelings. As emotions are strong reflections of who we are as individuals, they can also make us react in ways that we can’t always control.
Our feelings and behaviour are linked to two things:
- the particular situations we are in;
- our emotional reactions to situations, and our understanding of what is the socially acceptable way to show our feelings.
For example, one of your pupils might be over-excited. Your immediate reaction may be to feel annoyed. But to show this might spoil the good classroom atmosphere. So, to diffuse the situation, you ask her to sit down quietly, or give her a task like giving out books to distract her.
Younger pupils take time to fully understand their emotions and the social rules that say how we should behave. When young, we often experience emotional situations for the first time and don’t know how to react. As we grow older, we learn to understand our emotions better, and to control how we react in different situations.
Here, we are going to look at ways you can encourage this in your classroom.
Case Study 3: Helping each other
Mrs Kwei started to work with her Grade 2 pupils to help them understand more about their feelings and behaviour – what made them happy, sad, angry and frightened.
After this, she planned work with her pupils to develop a list of things they could all do to make each other happy and not sad, angry or frightened.
Using group and whole class discussions, they made a chart of rules for interacting with each other at school. They included things like: ‘We will all say good morning to each other every day’ and ‘We will not call each other bad names’. They linked each rule with a feeling by drawing a happy or sad face next to it.
With this chart, every time there was some problem of behaviour in the class, Mrs Kwei could refer to the rules of behaviour. She always linked the behaviour with the different feelings it produced.
This way, her pupils could see the link between their behaviour and people’s feelings. They became more caring of each other as a result.
Key Activity: Reflecting on your own behaviour
In this activity, you are asked to think about your own behaviour and plan how to make it more affirmative and supportive in the classroom.
- First, ask yourself the questions listed in Resource 1: Reflecting on your behaviour.
- Write down your answers.
- Look at the case studies we have featured in this section. Choose one piece of good practice from each, which you can apply to your own teaching situation.
- Write a description of how you will apply it in your own classroom.
- Finally, write a plan for ‘affirmative action’. Write five sentences stating what positive behaviour you will use each day; e.g. ‘I will say good morning to all my pupils when I see them in the playground’.
- Extend this to your interaction with colleagues. Perhaps talk to them about your ideas and plan to do these actions together.
See Resource 2: Mrs Chosane’s reflections on her approach to see the approach one teacher took in her classroom.
Resource 1:Reflecting on your behaviour
![]() Background information / subject knowledge for teacher
Background information / subject knowledge for teacher
Using the questions below, think about your own behaviour as a teacher. Be honest in your answers. Are there examples from your classroom activities that support your ideas?
- Are you a positive or a negative teacher in the way you treat your pupils? How could you be more positive?
- Do you try to encourage them or discourage them? How? How can you encourage them more?
- Do you make them happy when they are learning? How?
- Do you ever make them sad, angry or scared? How?
- What aspect of your teaching behaviour do you want to change? How can you do this?
- What aspect of your pupils’ social behaviour would you like to change? How could you help them achieve this?
Resource 2: Mrs Chosane’s reflections on her approach
![]() Background information / subject knowledge for teacher
Background information / subject knowledge for teacher
Mrs Chosane was on an in-service course on developing positive self-esteem in her classroom with teachers from the local district. As part of the course, they had been asked to keep a diary for two days in the next week and record as often as was possible all the times they praised their pupils and times when they told them off or ignored their behaviour.
They used a chart like that in the table below and put a tick in for each time they did one of these things. Sometimes it was not possible to fill it in during the lesson as it was so busy, but Mrs Chosanekept the chart in the book of her lesson plans so she could do it when she had a moment, or as soon as the lesson finished.
| Lesson | Praise 1 pupil | Praise several pupils | Ignored 1 pupil | Ignored several pupils | Told off 1 pupil | Told off several pupils | |
|---|---|---|---|---|---|---|---|
| Maths | ✓ | ✓ | |||||
| English | ✓ | ||||||
| DAY 1 | Science | ✓ | ✓ | ✓ | |||
| Social Studies | ✓ | ||||||
| Art | ✓ | ✓ | |||||
| Physical Education | ✓ | ✓ |
| Lesson | Praise 1 pupil | Praise several pupils | Ignored 1 pupil | Ignored several pupils | Told off 1 pupil | Told off several pupils | |
|---|---|---|---|---|---|---|---|
| Maths | ✓ | ||||||
| English | ✓ | ✓ | |||||
| DAY 2 | Science | ✓ | ✓ | ||||
| Social Studies | ✓ | ||||||
| Art | ✓ | ✓ | |||||
| Physical Education | ✓ |
When they went to the next course session, they were asked to examine the data and identify which they did most. Did they do more telling off in classes? If so, could they think why?
Through group discussion, the tutor, Mrs Mbatha, asked them to think what they could do to increase the positive atmosphere in their classes. Each group had to list six things they could do to develop the positive classroom atmosphere.
Mrs Chosanesaw from her data that she was more negative with her pupils in science lessons than in other lessons, and wondered why. Maybe it was because she felt less confident of her own knowledge and had not liked science herself. She often felt less organised and more nervous in case the pupils asked her questions.
She made a list of things she could do to help her class and her own interaction with her pupils:
- 1 Have well-prepared lessons.
- 2 Check my own subject knowledge.
- 3 Think about what questions to ask the pupils and what answers to expect.
- 4 Think of ways to accept their answers, for example:
- (a) ‘That’s an interesting idea, but can you think a little more about…’ and then ask the first question again in a different way.
- (b) ‘I hadn’t thought of that idea – how could we link it to my first question?’
- With each of these, the pupil is encouraged to think more and participate more and is not told that they are stupid or wrong.
- 5 Give my pupils the chance to raise their own questions about a topic if they don’t understand. Allow other pupils to give answers to these rather than just me.
Gradually, over the next few weeks, she became more confident and found that because she was better prepared, she didn’t get as anxious and therefore she shouted less. Her pupils began to enjoy their science lessons more and more.
Section 5: Ways to promote spiritual well-being
Key Focus Question: How can you promote spiritual well-being in your classroom?
Keywords: positive attitudes; storytelling; whole-school activities; spiritual well-being
Learning Outcomes
By the end of this section, you will have:
- explored ways to promote positive attitudes in the classroom;
- used storytelling and discussion to help pupils feel safe and secure;
- identified individual behaviour to support pupils’ learning;
- planned activities to help celebrate life with the whole class and school.
Introduction
Developing spiritual well-being in your pupils means that they are happy and content in their daily lives, and are at peace with themselves and others. Spiritual well-being covers all aspects of the pupils’ individual lives, including physical and emotional aspects.
In this section, we look at some factors related to spiritual well-being and how to plan activities that will enhance this. You need to be aware of what upsets or reassures your pupils, and address these in your lessons. We suggest storytelling and whole-school activities for building spiritual well-being.
1. Helping pupils feel safe
Your behaviour in school can have a big impact, both positive and negative, on pupils’ behaviour and motivation to learn. So, too, can the ways pupils interact with each other. We have already discussed some ways you can encourage your pupils to consider each other’s feelings. Here, we talk more about helping them feel safe and more secure, because when they do, they will learn better.
Everyone strives to be safe and secure. In many places, people build houses with strong walls, windows and doors so that they feel safe inside their property. Other people put guards on their houses and cars. And others even walk around with weapons for security purposes.
But these things only protect us physically. As we have seen, people feel emotionally safe when they are surrounded by people they trust. The best way to do this is to develop a supportive network of friends and partners.
At school, when pupils feel unsafe, insecure or worried, they cannot learn effectively.
Case Study 1: Walking to school safely
One day, Thuku, a Standard III teacher in Tanzania, found a worried little boy sitting among the other pupils and crying. The pupils were comforting him and asking what was the matter, using the kind of language they had learned for discussing feelings.
After some time, the boy explained that he was walking to school when three older boys with sticks had run after him shouting that they were going to beat him and take his bag and shoes. He ran away to hide in the school.
With the help of the other pupils, Thuku calmed the boy down by explaining how he was safe now. They told him that he was at school now, and the boys would not come into the school. Also, his teacher was with him, and the teacher would stop any boys from troubling him. He was surrounded by his friends, and they would protect him.
After school, his friends walked home with him and talked with his family and neighbours about what had happened.
The next day, Thuku decided to have another session with his pupils to discuss feelings of safety and security and how to support each other.
Activity 1: Feeling safe – a discussion
Organise a discussion on feeling safe and secure. Start by telling a story about the boy in the case study.
- Ask the pupils, in small groups, to describe situations at home and at school when they feel a) safe and secure, and b) unsafe.
- With the whole class, identify some general points about when we feel safe and when we don’t. List these on the board.
- Ask the groups to discuss what they could do to make everyone feel safe and secure in the classroom and the playground.
- Finally, draw up a list of behaviours that make people feel safe in the classroom and the playground and display it on the wall.
2. Ensuring spiritual well-being
What we like and dislike can affect how we learn. Activities that we like and interest us provide motivation, whereas activities we dislike can prevent learning.
Pupils’ feelings and personalities have a big effect on how they respond to different activities. Some children are very shy and will not speak in front of others, whereas some love performing. Some pupils like working alone, others are better in a group. Some like to learn by reading, others by talking.
You need to find out what types of activities your pupils like and dislike to help you plan your lessons better. This will fulfil their spiritual well-being, which in turn will help them to learn better.
Case Study 2: Planning to promote spiritual well
Having discussed feeling safe with his pupils, Mr Adamptey wrote down some different approaches to incorporate into his lessons:
- Most children enjoyed playing with each other. Therefore, group games should appear in lessons regularly.
- Some children liked quiet periods. Therefore, he decided to make time for solitary activities such as reading, writing and drawing.
- All children liked singing and music. Therefore, he decided he could use songs to motivate them and make them happy.
- No child liked to feel scared. Therefore, he should be careful about being angry with them in class. He must also watch out for over-assertive or possibly bullying behaviour from the stronger personalities in the class.
Mr Adamptey thought about the individual pupils in his class and watched them carefully as they worked. He noticed how each reacted to different activities.
He used this information to plan lessons that included both solitary and sharing activities. He organised groups so that:
- nobody was isolated;
- there was no conflict of personalities;
- everybody was able to contribute;
- everybody enjoyed working with each other.
Activity 2: Identifying your pupils’ personalities
Think about the different personalities of pupils in your class and how they respond to the way you teach. Ask yourself:
- Which pupils always answer questions?
- Which pupils don’t speak in class?
- How would you describe their personalities?
- Which pupils work well in a group?
- Who works well on their own?
- Which pupils behave badly when in a group?
- Who has difficulties working on their own?
- Now think about the activities you use:
- Which are the most popular activities?
- Which are the least popular activities?
- Which activities help the children learn best?
Match the pupils to the types of activities that best suit them.
How could you organise the different activities so each pupil would benefit?
Plan a lesson using these ideas. Carry out this lesson and then think:
- Were your ideas correct?
- How did the pupils respond to the lesson?
- What would you change next time?
3. Celebrating success
Read Resource 1: Celebrations.
When you provide positive support to your pupils, you help them celebrate their achievements. This can include:
- recognition of their success and achievements;
- recognition of their skills and talents.
Pupils respond well to positive support. When you celebrate their achievements you provide them with:
- encouragement;
- motivation to achieve more;
- improved self-esteem and confidence.
A celebration does not have to be a big event. Just saying ‘Well done!’ to a pupil is a small celebration and provides the positive support described above.
You can also celebrate as a class or school.
This part looks at ways to help celebrate skills and talents. These might not be academic skills and talents but things that the pupils are very good at or enjoy doing outside of school.
In celebrating these, you are showing that the school:
- recognises the range of abilities that your pupils have;
- supports the pupils in other aspects of their lives.
This will encourage your pupils to feel that school is a place where they are admired and respected in many different ways.
Case Study 3: Planning a performance for assembly
Mrs Quartey had noticed that, during break time, many of the children played games that involved singing and dancing. She thought she could use this in her teaching. She asked the headteacher if her class could prepare a performance for assembly. The pupils were very excited. To plan, she used the following steps:
- She discussed with the class what they wanted the performance to be about.
- In groups, they discussed what different things they would include in the performance in the 15 minutes allocated.
- As a class, they chose to do an assembly about sharing and prepared a presentation, a short play and a song and dance. It was important to choose things that involved as many pupils as possible.
- Some children did not want to perform but Mrs Quartey was able to involve them in making costumes or acting as prompts.
- As they prepared their activities, Mrs Quartey checked that everybody was clear about their part. Individuals didn’t have to speak in public unless they wanted to.
They performed to the whole school. It was very colourful and everybody liked it. The head teacher decided to make this a regular event, with classes taking turns to perform for the school or demonstrate what they had learned. It was a good way to develop pupils’ confidence and self-esteem.
See Key Resource: Using role play/dialogue/drama in the classroom for more ideas.
Key Activity: Planning a celebration
To help your pupils plan a celebration you need to explore various aspects with them first.
- Ask them, in groups, to name the different occasions they celebrate. Ask them to list different celebration activities. See Resource 2: Ghanaian celebrations for some ideas or to discuss further how they celebrate these events.
- Together with the pupils, identify an occasion to celebrate at school.
- Ask them to plan for the occasion – activities, plays, songs etc. Make sure everyone is involved in some way, even if they are not actually performing. Help them to rehearse.
- When the class is ready, perform the celebration for another class or the whole school. You could invite parents and the local community.
- The next day, ask the pupils to write a description of everything they did to prepare for the celebration. Ask them to identify what new skills they learned. Ask them what they would like to celebrate next.
Was it successful?
How do you know this?
How did the pupils respond?
Resource 1: Celebrations
![]() Background information / subject knowledge for teacher
Background information / subject knowledge for teacher
Spiritual well-being means being happy with your everyday life. This covers a wide range of things, including:
- having good health;
- being emotionally supported;
- having good relations with those around you;
- being able to enjoy your daily activities, including study, work and play.
One way to help develop this is to identify and celebrate those events in life that make us happy, for example, special occasions like religious festivals, birthdays and special holidays.
Part of the idea behind these celebrations is to spend time with family and friends. During these celebrations, we enjoy their company and feel secure and happy. Celebrations often have particular foods, music, games and gifts that link to the celebration.
It is possible to celebrate life in a similar way at school. The school is like a community, and has many things that everybody enjoys doing together. Special days at school could tie in with, for example:
- Religious festivals like Eid and Christmas;
- National Independence Day;
- World Environment Day;
- World Literacy Day;
- Children’s Day;
- Open Day;
- Speech and Prize Giving Day;
- Workers’ Day;
- World Communication Day;
- World AIDS Day.
What sorts of activities could you plan to help celebrate?
Resource 2: Ghanaian celebrations
![]() Teacher resource for planning or adapting to use with pupils
Teacher resource for planning or adapting to use with pupils
 Original source: http://newsimg.bbc.co.uk (Accessed 2008) |  http://news.bbc.co.uk (Accessed 2008) | ||
 Celebrating a wedding in Ghana Original source: Barima via https://www.flickr.com/ photos/ barima_on/ 16971809039/ | |||
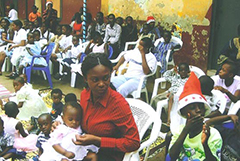 Celebrating Christmas in Ghana http://www.diasporaafricanforum.org/ (Accessed 2008) |  Celebrating Eid in Ghana http://farm1.static.flickr.com/ (Accessed 2008) | ||
Acknowledgements
Grateful acknowledgement is made to the following sources:
Photographs and images
Ghanian celebrations: original source:http://newsimg.bbc.co.uk (Accessed 2008)
Drummers: http://news.bbc.co.uk (Accessed 2008)
Celebrating Christmas: http://www.diasporaafricanforum.org/ (Accessed 2008)
Celebrating Eid: http://farm1.static.flickr.com/ (Accessed 2008)
Every effort has been made to contact copyright holders. If any have been inadvertently overlooked the publishers will be pleased to make the necessary arrangements at the first opportunity.