Use 'Print preview' to check the number of pages and printer settings.
Print functionality varies between browsers.
Printable page generated Wednesday, 17 June 2026, 4:43 AM
School Experience Toolkit: Supporting School Experience Supervisors
Welcome to the School Experience Toolkit
School Experience Co-ordinators or lecturers visiting student teachers during their school experience are the primary audience for this Toolkit.
It contains resources that are beneficial to the experience of student teachers and aims to support you in using TESSA materials, which can encourage the use of active learning approaches.
Please note: this Toolkit is not intended to be a module, a procedural document or a book which you read and work through from cover to cover.
It is intended as a collection of tools to use to tackle the challenges of school experience supervision.
Throughout this resource, you will find activities which you can complete individually or in a group of supervisors. You are encouraged to assess your own needs and identify the resources in the Toolkit which can best address them. It is suggested that first you skim through the items, selecting relevant tools where necessary.
It is suggested you use a notebook to engage with the activities in this resource.
The Toolkit can also be used as a resource material when you are working with student teachers, preparing them for school experience. In addition, it can be used as part of training for mentors, school inspectors, head teachers and other educationalists.
This version was written with a group of educators from Zambian Colleges of Education, the Ministry of General Education and The Open University (UK) at workshops in Kabwe during 2018–19. All Government colleges of education, including Chalimbana University, participated in the development of this Toolkit.
Our goal
Our goal is to introduce all those involved in school experience (e.g. the student teacher, School Experience Co-ordinator, visiting lecturer and cooperating school) to the active pedagogy exemplified in the TESSA materials and to support effective school experience preparation, supervision and execution using this active pedagogy.
Toolkit objectives
- to serve as a guide for lecturers visiting students during school experience supervision and mentoring of the student teacher
- to make the school experience interesting, collaborative and successful for the student teacher, visiting lecturer and cooperating school
- to move the school experience monitoring role towards mentoring, supporting and assisting the student teacher (a more learner-centred approach), rather than merely assessment
- to support standardised high-quality supervision
- to provide a set of tools (published under an open licence) to support the above, which can be adapted and used in different environments and contexts.
Other useful resources
At the end of this Toolkit is a list of further reading and resources on the topic. It is not essential reading but may help you to enhance your understanding of your role and active learning pedagogy.
Tool 1: The School Experience Supervisor
The role of the School Experience Supervisor has many dimensions, which are fulfilled through the different tasks they carry out before and during a visit to a student teacher in school experience.
After using this Tool you will be able to:
- identify the role and tasks associated with the School Experience Supervisor
- identify the qualities needed to be an effective School Experience Supervisor
- reflect on your own practice as a Supervisor
1.1 The role and tasks of the School Experience Supervisor
School Experience Supervisors might be known to you by a different name, for example School Experience Monitor. The terms we use have a profound impact on how people, including student teachers, think of the role and themselves. For example, School Experience Monitor suggests a more remote, ‘watching’ role than School Experience Tutor, which suggests a teacher as well as an assessor. It is important to be aware of the hidden messages in such terms and reflect on whether the labels we use reflect the role. The term ‘supervisor’ is used in this Toolkit to convey the different aspects of the role.
There are several aspects to a School Experience Supervisor’s role including advisor, counsellor, assessor, teacher, tutor and monitor. A key aspect is to develop the skills and competencies in the student teacher that will enable them to work effectively in the classroom.
An effective School Experience Supervisor carries out the following core tasks:
- prepare student teachers for school experience e.g. through classes in college
- observe student teachers teaching during school experience and provide constructive feedback
- help student teachers develop lessons that use an active learning approach
- help student teachers evaluate and reflect on their teaching
- advise and support student teachers through teaching-related difficulties
- assess student teachers’ performance based on agreed teacher criteria
- analyse the wider evidence such as the student teachers’ logbooks/diaries
- identify what student teachers need to do in order to improve
- discuss with student teachers their progress in teaching skills and competence
Activity 1.1: Core tasks of the School Experience Supervisor
This activity focuses on how you carry out the School Experience Supervisor’s main tasks.
Using the core tasks of a School Experience Supervisor provided above, think about your own practice as a School Experience Supervisor.
- which of these tasks do you spend most time on? Why?
- which do you think is most important? Why?
- which tasks do you think are most important to the student teacher?
- which task do you enjoy most? Why?
- which task do you feel most confident about undertaking? Why?
- which tasks do you feel least confident about undertaking? Why?
Note down your answers in your notebook so that you can refer to them as you work through the Toolkit.
You might find it useful to compare your answers with other School Experience Supervisors.
As a School Experience Supervisor, you are required among other things to be:
- a role model in all areas, for example in your conduct and teaching
- able to use methods and strategies that put the student teachers and their learners at the centre of learning
- knowledgeable in your subject matter and adaptable in the facilitation of learning
- a good manager of time and resources
- able to plan and design programmes that will facilitate effective school experience
- able to use appropriate resources to stimulate and facilitate the development and assessment of student teachers during school experience
- able to observe and assess student teachers objectively.
1.2 Qualities of an effective School Experience Supervisor
Once the role and tasks of the School Experience Supervisor are clear, consideration can be given to the qualities required.
Activity 1.2: Qualities of an effective School Experience Supervisor
Part 1
Read through the roles and tasks of the School Experience Supervisors and make a list of the qualities you think are needed to fulfil them effectively.
Think about what knowledge and skills they need as well as the beliefs and personal characteristics required.
Part 2
Compare your list with the list below, written by a group of School Experience Supervisors at a workshop.
Is there anything they have missed that you consider important?
School Experience Supervisors should be:
- respectful of the student teacher and understand them
- a facilitator and mediator of learning
- knowledgeable and understanding of how adults learn
- able to use creative and problem-solving approaches to learning that stimulate themselves and the student
- a good communicator and role model
- able to take account of what student teachers already know and can do
- able to build on student teachers’ interests
- able to see the value of developing links with the school and community
- good subject knowledge
- aware of the need to continue to develop an understanding and practice of teaching and learning
- someone who carries out professional roles conscientiously.
- honest and accountable, reflecting as much as possible, the students’ achievements with fairness.
Activity 1.3: Thinking about practice
Read through the three case studies on the next page. Consider the following:
- what qualities are demonstrated by the School Experience Supervisor
- what professional knowledge do these supervisors have and use as they carry out their role?
- how can supervisors develop the knowledge that they need to support practice effectively?
Case Study 1.1: Preparing for school experience
Billy Sitali is a lecturer in primary education specialising in mathematics. He teaches large groups of students. The third-year students were getting ready for school experience and he had been allocated ten students to visit in school. He had only taught them as part of a large group in a lecture theatre, so he did not know them as individuals. In the week in College dedicated to getting ready for school experience, he arranged to meet them as a group and introduced himself to them. He was keen to learn more about the students and how they were approaching school experience. First, he asked them to chat in pairs and share three things they were excited about and three things they were worried about. Then he asked them to work in groups to discuss the things they were worried about and to work together in order to think about how they might address the challenges. By the end of the session, he knew their names and they had formed a WhatsApp group to keep in touch.
Case Study 1.2: A second visit
Chewe is a School Experience Supervisor in a College of education in Zambia. She was due to visit a student, Malcolm, in school. This was the second time Malcolm had been visited, but the first visit was made by a different lecturer. Chewe read the report from the first visit and contacted the lecturer, Boniface. She wanted to find out more about Malcolm’s progress with teaching. Boniface remembered Malcolm because he had been very nervous. Boniface suggested that he planned the key questions he would ask in class, and they had discussed different strategies for responding to the learners’ answers.
Chewe was pleased to see Malcolm had planned a mixture of closed and open questions when she observed a social studies lesson. Afterwards, she asked Malcolm how he felt about teaching. He said that he felt much more confident because writing out the questions meant he could concentrate on other aspects of classroom management. They had a useful discussion about higher order questions. Chewe used her phone to show him the TESSA key resource on questioning and the Social Studies OER.
Case Study 1.3: Using TESSA to provide practical help
Christine’s specialist subject is literacy and she has been a School Experience Supervisor for many years. This year she had been allocated students from different subject areas, including Matilda who was learning to be a science teacher. Christine went to visit and observe Matilda, who was teaching a Grade 5 about plants. She started the lesson with some very simple questions which covered aspects of the topic that the children probably knew in Grade 1. She then introduced the structure of a flower, drawing a diagram from the textbook onto the board and asked the students to copy it into their books. She then dictated notes on the various parts of the flower, including a great deal of new vocabulary. Christine was struck by how undemanding the first half of the lesson had been and how difficult and boring the children had found the second half of the lesson. While she was observing, she opened TESSA Science module 1, section 2 ‘A closer look at plants’ on her phone. After the lesson she shared the module with Matilda and together they planned some questions that would help to find out with what the children already knew and make them think. With Christine’s help, Matilda adapted activity 2 and planned the next lesson. She would bring in some flowers and ask the children to relate the actual flowers to the diagram they had copied.
Tool 2: Introducing TESSA
The TESSA (Teacher Education in Sub-Saharan Africa) project materials have been developed for pre-service and in-service teachers in several countries.
After using this Tool you will be:
- more familiar with the TESSA materials so you can introduce them to students and use them in your own practice.
2.1 Getting to know the TESSA materials
TESSA provides resources for teachers to use in their own classroom to support active learning and improvements in learning. These materials have been written by teacher educators from different countries in sub-Saharan Africa and are designed to help teachers by:
- developing their understanding of teaching and learning
- encouraging them to think about their role in helping learners to learn
- developing their understanding of how learners learn
- exploring different ways of organising and working in the classroom.
The TESSA materials are Open Educational Resources (OER). This means they are free to be used by anyone either online, or downloaded and used offline/printed. They can be adapted, modified or integrated with other resources in any form.
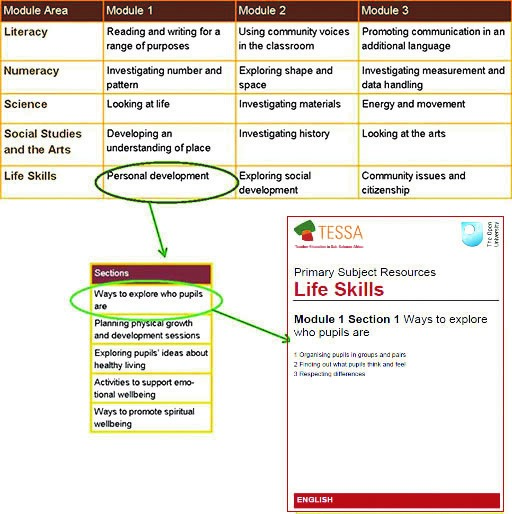
The TESSA materials are organised into five curriculum areas (as shown in Table 1 below): Literacy, Numeracy, Science, Life Skills and Social Studies and the Arts. These have been linked to the revised Zambian school curriculum. Each curriculum area has three modules and each module has five sections or units. So altogether there are 75 sections.
There are five sections in Module 1 of Life Skills, and each section follows the same pattern. Table 1 shows the first section in the Personal Development module. The focus in all sections is on developing teachers’ understanding of teaching and learning and improving their classroom practice.
In the TESSA materials there are activities for teachers to do in their classrooms to help them develop their teaching skills. These activities can be used by student teachers during school experience in order to learn about teaching, or by lecturers to provide examples of classroom teaching. School-based activities link theory and practice and encourage teachers to think critically about what is happening in their classrooms.
The resources have been adapted to match local needs, culture and surroundings in a range of national contexts across sub-Saharan Africa and are available in four different languages (Arabic, English, French and Kiswahili).
Table 1: The five TESSA curriculum areas
Further details of the 75 sections are in the Summary Curriculum Framework on the TESSA website.
Key resources: Supporting all the TESSA sections is a series of Key Resources, these provide support on cross-curricular issues such as ‘Working with large classes’ or ‘Using group work in your classroom’ and are referred to across all the module areas. The resources can be easily located on the TESSA website and are a very good starting point for your student teachers to engage with the project. We suggest you print out the Key Resources to take with you on your school visits. They are also very useful as a material for your seminars.
Audio resources: ‘Story Story’ short dramas: Enriching the TESSA text materials is a collection of audio resources. These can be found on the TESSA homepage under the audio resources button. The dramas show scenes in and around a local school involving teachers, learners, parents and other members of the community. For each drama, there are questions for the student teachers to consider and discuss –these are ideal for use in your seminars.
2.2 Explaining a TESSA section
All 75 TESSA sections follow the same pattern as shown by Table 2 below. Each section is designed to develop teachers’ practice through engagement with activities in their classroom. Each activity is expected to take one or two lessons at the most (unless it specifies longer).
| Key Focus Question | This is addressed to the teacher and summarises the area to be studied in the section. |
| Learning Outcomes | Each section has up to three learning outcomes for the teacher. These focus on the development of classroom skills in the context of the curriculum of that module area. |
| Introduction | Sets the scene and outlines the classroom skills to be developed by the teacher and the curriculum content area for the section. |
| Narrative | The narrative provides a rationale for the case studies and activities and highlights the purpose of each. |
| Case Studies | Each section has three case studies, each linked to a particular activity. The case studies illustrate ideas and concepts by describing how one teacher has approached the linked activity or similar activity in their classroom. They often focus on one aspect of the activity or on a particular classroom situation. |
| Activities | The three activities are for the teacher to undertake in their classroom with learners or in the wider school and community. The activities build towards the final activity, known as the key activity. The activities are learner centred and engaging. Some activities are very short, whereas others are projects taking several weeks. Most take one lesson to complete. |
| Resources | Each section has up to six supporting resources. These take a variety of forms including:
They aim to enrich the teachers’ learning and support the activities. They also support the development of different dimensions of a teacher’s knowledge base, including:
A few of the resources are intended for use with learners. Icons are used to show the core purpose of a resource. These are:
|
Activity 2.1: Becoming familiar with TESSA
This activity will help you to understand how a TESSA section has been structured and the function of each part of the section.
Part 1
Print or download the TESSA section ‘Ways to explore who pupils are’.
Click on download button to download on to your device or laptop. You can download it as a word document or as a pdf. Print the whole section or read it on your screen.
Consider the following:
- As you read Table 2 below, annotate the section (or make notes in your notebook) to identify its different parts.
Look carefully at the section ‘Ways to explore who pupils are’, and for each part of the section identify:
- the key point
- how the case study provides an illustration of the point
- how the connected activity enables the teacher to practise the point.
Example:
Around Activity 1 and Case study 1:
Key point: How to organise learners to help them to explore differences and similarities so that they treat each other better.
Case study 1: Describes how a teacher organises his class in groups to draw out a list of similarities collaboratively. This is illustrated by describing a precise activity that helps put the idea in the key point into practice in the classroom.
Activity 1: Sets the teacher a similar task, giving support on how to do it. The task ends with questions that invite the teacher to reflect on what happened in the classroom.
Resources: No additional resource for this part.
Part 2
Now repeat the exercise for Activity/Case study 2 and Activity/Case study 3.
Tool 3: Active learning
There has been a great deal written about active learning, but what does it look like in practice?
After using this Tool you will be able to:
- consolidate your understanding of active learning
- identify active learning strategies in TESSA materials
3.1 What is active learning?
The pedagogy at the heart of the TESSA materials is active learning. Children and adults learn through being actively engaged. This can involve a physical activity such as role play, experimenting and making models or simply thinking about something in a new way. This thinking might be based on some initial reading or a lecture and is developed through discussion or writing. Importantly, activity is not copying or listening to a lecture from the teacher. Through active learning, learners:
- connect new information to what they already know
- fill in missing gaps in their knowledge by identifying information that will help them to interpret and understand new ideas
- recognise new and contradictory ideas that their existing knowledge cannot explain.
TESSA materials challenge teachers who are using a ‘teacher-centred’ lecture-style approach and encourage them to:
- listen to learners
- encourage learners to ask questions
- develop competency with different learning strategies
- work collaboratively.
In this style of teaching, the teacher is engaged in cooperative activity with their learners and facilitates their learning. This is what teachers are being asked to do in the Revised Zambian School Curriculum, so teacher educators need to do it as well!
Activity 3.1: Active pedagogy
This activity will help you to find out how the TESSA materials offer more effective ways of teaching that replace the more conventional, teacher-centred approach.
Look again at the TESSA section you were studying in Activity 2.1.
- How do the activities and case studies show ‘active’ learning?
- How is this different to the way teachers usually teach this topic?
Example
A teacher-centred approach might be the teacher asking closed questions to the whole class and only confident learners answering. The teacher judges what he considers to be right or wrong answers and would write it on the board.
In the case study, a learner-centred approach sees learners placed in groups and all are asked to share their ideas. The ideas shared with the class come from the group rather than from individuals, which protects the shy, unconfident learners. The class then makes the decision as to what is right or not. In the last phase, the teacher uses the learners’ ideas, which gives them value.
3.2 Active teaching and learning methods
Table 3 shows some important active teaching and learning methods and some of the skills that teachers, student teachers and teacher educators need to develop – these are all covered in the TESSA materials.
| Active teaching strategy | Skills the teacher needs |
|---|---|
| Whole class interactive teaching |
|
| Group work and pair work |
|
| Demonstration |
|
| Building models |
|
| Problem solving |
|
| Project work |
|
| Storytelling, songs, role play and drama |
|
| Using local resources |
|
| Practical work |
|
| Assessment for learning |
|
| Giving feedback |
|
Activity 3.2: Identifying active teaching methods
This activity shows how the link between the description of active teaching methods and actual examples.
You could use this activity with student teachers in a seminar on active learning and teaching. You will need a copy of the TESSA section you downloaded for Activity 2.1 in Tool 2, or another TESSA section of your choice.
Part 1
Read the case studies and use to Table 3 to identify which active teaching and learning method(s) each one illustrates.
For example, Case study 1 illustrates method 3 (collaborative activities) and method 10 (group work)
Part 2
Look at the photos below. For each one, identify the active teaching and learning method(s) illustrated.

Tool 12 provides an audit that you can use to evaluate your own practice and that of your students and plan for including more active learning methods in teaching.
Tool 4: Using TESSA materials with student teachers
There are many factors which influence how student teachers develop their practice. The TESSA materials help teachers try the TESSA activities in their classrooms or during school experience. By doing this they learn skills and gain understanding about teaching. However, just giving student teachers the copies of these resources is not going to be sufficient. You need to prepare the student teachers for practical classroom use of the materials and help them to reflect on their experiences.
After using this Tool you will be able to:
- provide strategies for introducing and using the TESSA materials with student teachers.
4.1 Introducing student teachers to the TESSA materials
The first step is to become familiar with the TESSA materials and TESSA pedagogy yourself as a lecturer and School Experience Supervisor. If you are not familiar, work through Tool 2 ‘Getting to know the TESSA materials' and Tool 3 ‘Active learning’.
When you are familiar with the resources you can introduce them to your student teachers. Student teachers should be using activities and case studies from the materials during their school experience. TESSA preparation should always involve student teachers experiencing the TESSA activities in a practical way before trying them out in classrooms with learners. This should include:
- discussion
- modelling/demonstration (video clips can be useful)
- micro-teaching.
TESSA audio materials are ideal for stimulating discussion at seminars if the equipment (including speakers) is available. Each audio clip has a number of questions at the end for teachers to discuss. You can also download the scripts to use with your trainees – they could role play one or two of the scenes.
Encouraging your student teachers to use TESSA materials takes time and discussion of the strategies on repeated occasions. Students need time to explore the materials a small chunk at a time and time to discuss the strategies in the TESSA materials with you, the school staff and / with other students in a small group.
Activity 4.1: Active teaching methods – supporting student teachers
This activity suggests one way that you can introduce TESSA to your student teachers:
- Ask each student teacher to choose a lesson topic. This might be one they have already taught or one they may teach in the future.
- ask them to go to the TESSA website, find and study the materials that are relevant for the lesson topic. (Note: TESSA is not a guide to the whole curriculum, so your student teachers might not immediately find the topic in the TESSA materials. They may need to think about what comes before or after the topic or the teaching strategies they are using.)
- let each student present their findings on how to integrate these materials into the lesson planning to other students
- if possible, let the students put their ideas into practice through microteaching or in school
- ask questions to help them reflect on the outcomes (for this last step you might find it helpful to look at some of the ideas about reflection in Tool 12: Being a reflective practitioner)
Case Study 1 and Case Study 2 show other School Experience Supervisors approached this introduction and followed it up to provide support to the student teachers (Case study 1) and help to develop a high level of competence within a learning and teaching strategy (Case study 2).
The TESSA website hosts all the TESSA materials. However, for many student teachers access to the internet is difficult. The TESSA OER can be downloaded on to a Smart phone. Consider allowing your students to use the college WiFi (if you have it) to do this. There are other ways in which you can help teachers to have access to them:
Offline:
- through the use of CDs. Increasingly teachers can find a computer, laptop or notebook with a CD-ROM drive
- through use of memory sticks or flash drives. Again, the TESSA materials can be downloaded to these for distribution to student teachers.
In print:
- TESSA materials can be printed (use the PDF version) from the TESSA website. You can print either individual sections or whole modules for distribution to student teachers.
Case study 4.1: Supporting integration of ideas into the classroom teaching
In one TESSA project, student teachers and supervisors were introduced to the materials at a one-day workshop at a Study Centre, before using them in their classrooms. A senior teacher educator led this orientation workshop. First, the supervisors were briefed on the TESSA materials and the expected outcomes of the workshop. Then the student teachers were introduced to the TESSA materials, schedule of activities and the expected outcomes of the workshop. Key elements were sample lessons using the new classroom activities, extensive discussion time, choosing the TESSA sections to use, and agreeing when to use the activities.
Some of the mathematics and science teachers were anxious to know how to use stories and games in teaching. The audio drama piece ‘the Maths Game’ from the TESSA materials was used as an example to demonstrate how games can be used in teaching mathematics, and the teachers read Numeracy Module 1 Section 1 and Science Module 2 Section 1 materials and their supporting resources. They discussed in groups how they would use them in their classrooms. They each selected the approach that was the closest to the contents of their future lessons and promised to incorporate a game in the lesson and to report back at the next seminar where their experience would be discussed with their peers and their School Experience Supervisors.
Case study 4.2: Student teachers using the materials to develop one competence
During a seminar, School Experience Supervisor Jonas set an activity for his group of student teachers. While the group was carrying out the activity, he withdrew student teachers from the group in pairs to discuss which strategy they were going to develop over the next 3–4 weeks. He thought that students working in pairs might support one another while trying new strategies. He asked the students to develop using the new techniques in a curriculum area they were comfortable with to maximise the chance of success. He paired Aisha with Grace, who had both chosen literacy, because he thought their knowledge of their mother tongue and English was strong. Jonas had the 3.2 Active teaching and learning methods table ready on his laptop. He scanned it quickly to determine which teaching strategies Aisha and Grace could use. The students both agreed to select the use of songs, poems and storytelling. Jonas asked them to do some research in the TESSA materials on these methods so that at the next seminar, they could firm up their plans.
During the following week, Aisha and Grace had both read the Key Resource ‘Using storytelling in the classroom’. After a brief discussion, they agreed that their learners had difficulties in pronouncing some English sounds and that they would use the activity in Literacy Module 1 Section 1 ‘Supporting and assessing reading and writing on using songs and rhymes’ to make the link between written and spoken phonemes. Aisha also liked the idea of the big print copy of songs and volunteered to make a few for her class, which she would use at the end of the lesson for relaxation (as suggested by the Key Resource), but also to reinforce sound patterns. She thought she might try this three times during the week and share her experiences with Grace by SMS or calling her. It was also agreed she would report back to the whole group at the following seminar and then decide on her next action.
In the next seminar, Aisha reported that the big print copy was a great success with the whole class. The learners had enjoyed it and made some progress in the recognition and pronunciation of the selected sounds. Grace and Aisha decided to produce a big book each, Aisha in Science and Grace in Mathematics, which they would swap after using them with their learners.
You can use the TESSA materials in a range of different contexts and for a variety of purposes. They are flexible materials from which you can pick and choose or mix and match depending on your student teachers’ needs and those of the learners in the coordinating school.
Activity 4.2: Possible uses of the TESSA materials
In this activity you are going to collect ideas on how TESSA materials are used in different settings and prepare for using TESSA materials yourself.
Part 1
Consider Case Studies 1 and 2 which show how different School Experience Supervisors in different settings have used the TESSA materials to enhance their work and that of their student teachers.
Part 2
Make a list of the different ways of using the TESSA materials as shown in the Case Studies.
Part 3
Select one way of using the TESSA materials you are going to try.
- which use of the materials have you selected?
- why are you going to use it?
- how will you use it?
- what results are you expecting?
- how will you know if you are successful?
Case study 4.3: Teaching Practice Supervisor for distance learning programme with in-service teachers
Mr Simoonga is a supervisor for a distance education teacher training programme and wants his teachers to see that learning does not always involve the teacher talking at the front of the classroom, but that different ways of doing things are better. He had been introduced to the TESSA materials at a workshop and thought the case studies provided lively scenes of different ideas for classroom organisation and different learning and teaching methods. He reflected on how best to enable his teachers to gain some familiarity with these different methods and decided on a focused approach. At one of the regular seminars for the upgrading programme, he told his teachers that in preparing for a seminar in two weeks’ time, he expected them to have done some research using the TESSA website on how using real items in the classroom could make learning more meaningful. To support his teachers, he gave them a copy of the instructions on how to access the website, copied from this Toolkit and a copy of the Key Resource ‘Using Local Materials’.
At the next seminar, he structured the discussion around what they had discovered, how they could implement the ideas in their own teaching, the sort of support they would need to seek from their colleagues at school, and what they would need to do to try one of the activities they had read about. The teachers decided they would all try one of the ideas in the next fortnight and report back and discuss their experience with their peers and their supervisor at the following fortnightly seminar. The discussion at that seminar was lively, the teachers shared their difficulties and their successes, the supervisor made sure he held back a little, listening carefully and interjecting with questions that forced teachers to explore the reasons for success (or otherwise) and that invited them to reflect on what they might do to improve on and increase their experience.
Mr Simoonga decided that he would try to lead the workshops using active pedagogy methods to model good practice to his student teachers. He also decided it would be useful to see how TESSA supported teachers in developing and scaffolding discussion. He looked up the Key Resources on Group Work and emulated the advice in his seminar.
Case study 4.4: College lecturer working on a pre-service teacher course
Miss Siame is a mathematics education lecturer at a College of Education. She really enjoys teaching theory to her students but has realised they find her lectures dull and do not always relate her lectures to what happens in the classroom. She looked for ideas to make her course more practical and came across TESSA materials which she used to investigate further. She read and annotated the materials for herself and worked out how she could use them. The case studies looked useful to illustrate the points she wanted to make in her lectures, so she decided to use some of them as appropriate examples and noticed how the interest of her students increased. Miss Siame also thought she might benefit if students approached the theories of learning in new ways by experiencing different ways of learning themselves. While reading the TESSA Numeracy Module 1 Section 1, she felt Activity 2 could easily be adapted to invite her students to reflect on how games could enhance certain aspects of mathematics learning. She therefore adapted the activity slightly and after the students played the games, she led a discussion on the value of games in learning. She had prepared the structure of the discussion so that she could make sure students would ‘discover’ the points she usually made in her lecture. This was a great success; the lecture had become a workshop where all were involved. All students left the room very happy, discussing how other games they knew would support different mathematical points. Weeks after the experience the students still mentioned it and referred to some of the learning theories that had been explored through the games. Miss Siame decided she would use more of the active methods related in the TESSA materials to involve students in their learning.
While reading through the materials, when she came to Numeracy Module 3 Section 1 Resource 4 on ‘Units of measurement’, Miss Siame thought of Edith, one of her students who found it really difficult to remember the relationships between measurement units. She printed the sheet for her and made a poster of how some of the resources linked with specific subject knowledge development. She pinned this poster on the wall of her lecture room and drew students’ attention to it. She also placed a few posters on how to access the TESSA materials in the college computer room.
Miss Siame is pleased with the way that the materials are enabling her to support her students in so many different ways in her area of specialisation. They also enable her to link theory and practice in a school-integrated way and to support the development of her students’ subject knowledge.
The TESSA materials can therefore be used in many different ways to suit the students’ needs, their level of development or the purpose of the activity considered. This requires planning on your part.
Activity 4.3: Planning to use TESSA with your student teachers
This activity invites you to plan how you will use the TESSA resources when working with your student teachers.
Read the TESSA section you downloaded again. As you read, identify the parts of the section you think would be most useful to student teachers.
- what support do you think they would need to carry out the activities successfully?
- how could you provide this support? Could the cooperating teacher or the head teacher give this support?
- can you recall circumstances when you could have used this section of TESSA while working with one of your student teachers during a school visit?
Share your ideas with another School Experience Supervisor.
Mrs Kasonso I am broadly in agreement with the statements in Table 2, but for me the case studies are really important and I use them extensively. They are like a story of a real activity in the classroom, showing how the key point can be enacted in practice. They speak to the teacher. I use the case studies a lot, selecting appropriate ones for my seminars. When I can remember one that fits the situation, I use them as examples for discussions with individual student teachers when I visit during school experience. I am also writing my own case studies.
4.2 Using the TESSA handbooks
TESSA handbook ‘Working with Pupils’ has been created to support student teachers and ‘Working with Teachers’ has been created for teacher educators and Teaching Practice Supervisors to provide support in the use of the TESSA materials. Both handbooks can be accessed from the ‘Handbooks and Toolkits for teachers and teacher educators’ page on your country homepage on the TESSA website.
‘Working with Teachers’ guides you, the Teaching Practice Supervisor, in the use of TESSA. In the handbook, look at the diagram on page 3 and the table of contents on page 4 to direct you to the sections that are of immediate relevance to the task you want to carry out. ‘Working with Pupils’ is a useful tool for you and your student teachers. You can give a copy to student teachers for them to have and refer to or you can take loose sections with you to school or fortnightly seminars to give your student teachers as appropriate.
Activity 4.4: Using the TESSA handbook Working with Pupils as support
This activity will help you to identify ways of adapting the use of the TESSA handbook ‘Working with Pupils’ to different scenarios.
Imagine the following situations at a face-to-face seminar. How could you use ‘Working with Pupils’ to support you and your student teachers?
Part 1
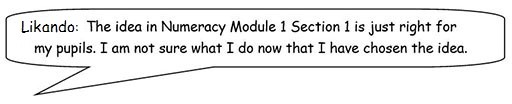
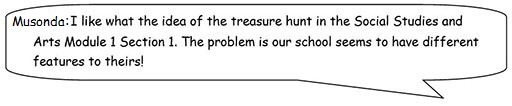
You asked your student teachers to look for TESSA materials with the idea of incorporating a new strategy into one of their next lessons. The following week, they have done this task and two of them, Likando and Musonda ask you the questions below.
- which sections of ‘Working with Pupils’ are you going to direct them to in order to help them?
- what advice would you give them?
Part 2
Another week, you want to hold a discussion on the quality of learning.
- do you have all the questions that you need to ask students to guide the discussion?
- is there a page or a section of ‘Working with Pupils’ which you could give students to help them to remember the discussion?
The answers to the situations in Activity 4.4 may be obvious. The advice to Likando is to consult ‘Working with Pupils’ Section 4 ‘How you can teach using the TESSA materials’ and Musonda should refer to Section 3 ‘How can you adapt TESSA materials to use in your lesson plans?’. For your session on the quality of learning, Section 6 ‘What do you think you learnt from teaching with TESSA materials?’ will provide support.
Make sure you familiarise yourself with both ‘Working with Teachers’ and ‘Working with Pupils’ to avail yourself of these extra training resources. These can be accessed from the TESSA website.
Tool 5: Recognising effective teachers
What do we mean by a ‘good’ teacher? Is this different to an ‘effective’ teacher? How do we recognise such teachers and how can Supervisors support student teachers in becoming good, effective teachers?
After using this Tool you will be able to:
- identify and reflect on the characteristics and attributes of effective teachers
- consider how the School Experience Supervisor can promote these qualities and attributes to student teachers
5.1 What makes a ‘good’ teacher?
Part of the School Experience Supervisor’s role is to help their student teachers to become good educators. It is important to be clear about the characteristics you want your student teachers to demonstrate. They will naturally show some of these characteristics, but you may have to help them to develop others.
People have different views about what characterises a ‘good teacher’. Some people say that a good teacher is one whose learners get the best results. Some say that a good teacher is one who helps learners believe that they can do things for themselves. Others say that a good teacher is someone who can manage to make learners work quietly and behave well. There are many qualities and characteristics that distinguish good teachers, but the way we define a good teacher depends on our experience of education and what we value. Different people will emphasise different characteristics over others.
Activity 5.1: What are the attributes of a good teacher?
This activity invites you to think about the attributes of good teachers.
What do you think are the attributes of a good teacher?
- first, write your own list.
- then, read what other educationalists at a TESSA meeting suggested about good teachers given below.
- do you want to alter your list?
- How?
- Why?
- Is there anything you disagree with?
- If so, why?
- Is there anything missing?
At a TESSA meeting the following general points were suggested as the attributes associated with what people call a ‘good teacher’:
- a facilitator / mediator of learning
- knowledgeable and understanding of how young children learn
- able to use a child-centred approach to teaching and learning
- about to use problem-solving approaches to teaching and learning that stimulate both themselves and the children
- a good role model
- a good communicator
- knowledgeable in their subject area(s)
- able to plan and design programmes to meet learners needs
- well prepared to meet learners’ needs
- able to take account of what learners already know and can do
- able to build on their learners’ interests
- able to assess the learners’ understandings, stage and needs
- able to use appropriate resources to stimulate interest and facilitate learning
- aware and supportive of learners’ wider needs
- sees the value of and develops links with parents and the community
- aware of the need to continue to develop their own professional understanding and practice of teaching and learning
- aware of and carries out their professional roles and responsibilities conscientiously.
What we mean by the term ‘good teacher’ could be open to interpretation. What is meant by the term ‘an effective teacher’ is more specific. Effective teachers are those who help their learners to maximise their potential. With an effective teacher, learners are motivated, make good progress and become independent learners.
5.2 What research says about effective teachers
Research evidence provides a more objective insight into the qualities and attributes of effective teachers. Many studies have researched the attributes of effective teachers. Below is a summary list of some of the attributes that have been found to be important.
Effective teachers:
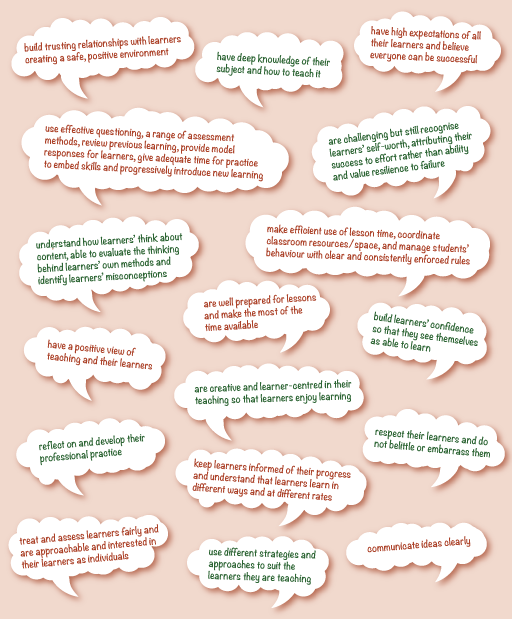
Activity 5.2: Categorising and reflecting on the attributes of effective teachers
This activity invites you to think further about the attributes of good teachers and reflect on your own attributes as a teacher.
Use the list of the attributes of effective teachers given above to complete a table like the one below. Use as many rows as you need
| Attributes of effective teachers | |||
|---|---|---|---|
| Pedagogical content knowledge | Teaching Skills | Personal and professional qualities and values | Views and beliefs |
| Active learning pedagogy | Can communicate clearly | Reflective | That all learners can achieve |
- which attributes can be taught to student teachers in college or university?
- which attributes are more likely to be acquired over time in school?
- which of the attributes do you think are your strengths as a teacher educator and which require some development?
5.3 Supporting student teachers’ understanding of effective teachers
Part of the supervisor role is to help student teachers to become more aware of the attributes of effective teachers. By using the TESSA teacher materials and reflecting on how they are used, student teachers become more critical of their own teaching and learn more about themselves and how to teach.
Activity 5.3: Supporting student teachers’ understanding of effective teachers
This activity invites you to think about to help students acquire the attributes of good teachers.
In what ways can teacher educators help student teachers understand and develop the attributes of good teachers?
- go to the TESSA website and download 3 modules, each from a different collection (Life Skills, Literacy, Numeracy, Social science and the arts, Science and Secondary science)
- which of the attributes of a good teacher are exemplified in each module?
As well as analysing examples of teachers’ practice, you can help your student teachers to develop these attributes by:
- Being a role model through demonstrating the knowledge, skills and qualities of a good teacher through your own teaching.
- Showing respect for your student teachers’ knowledge, skills and values. Do not see yourself as the holder of all knowledge.
- Talking about the attributes of effective teachers. This does not mean lecturing student teachers about it. When you notice a student teacher demonstrating one of these characteristics, compliment them by naming what they are doing. For example, if you observe a student teacher walking round the room during the lesson, listening and encouraging learner talk, praise this behaviour: “I liked how you were showing respect to learners by listening to their idea”.
- Sowing the seeds of possibility and hope in your student teachers. They need to have the faith and imagination to see that it is possible to do things differently. For example, tell them about other examples of student teachers trying out more active learning methods, and use them yourself in your teaching sessions at college.
Tool 6: Recognising a good lesson
An effective teacher will plan and teach good lessons. As a Teaching Practice Supervisor, one of your key roles is to identify the features of a good lesson and what needs to be improved.
After using this Tool you will be able to:
- identify the features of a good lesson
- provide strategies for working with students to help them understand what makes a good lesson
6.1 Features of a good lesson
A good lesson is one in which the learners make good progress. It is important for student teachers to understand the features of a good lesson so that they can plan for success. Teacher educators play an important role in developing student teachers’ understanding, both in theory and in practice by demonstrating the features of good lessons in their own teaching.
Activity 6.1: What are the features of a good lesson?
This activity invites you to think about the features of a good lesson.
What do you think are the features of a good lesson?
- first, write your own list
- next, read through the lists of the attributes of an effective teacher given in Tool 5: Recognising effective teachers to inform and add to your list.
- do you want to alter your list?
- how? Why?
- is there anything you disagree with?
- if so, why?
- is there anything missing?
The following list of questions will help you to check the main characteristics of what makes a good lesson.
Recognising a good lesson
- Is it appropriate to the age and grade of the learners?
- Does the lesson stimulate and interest the learners?
- Does the student teacher have a good knowledge of the subject matter?
- Is the lesson plan and presentation flexible?
- Are there opportunities for active learning? E.g. questions and answers, debates, role play, discussion, song and dance, experimentation etc.
- Is there a dialogue between the learners and the student teacher (not just closed questions with ‘right’ answers)? Does the student teacher listen and respond to the learners’ ideas?
- Are instructional materials appropriate? If so, are they used well?
- Is a range of learning styles used in the lesson (e.g. visual, kinaesthetic, oral – to engage different learners)?
- Are all learners involved in the lesson? Or are some learners left out?
- Is the class organised effectively? How well is the class managed?
- Does the student teacher have clear strategies for evaluating the achievement of objectives? E.g. practice, demonstrative, tests, questions and answers etc.
6.2 Supporting student teachers’ understanding of good lessons
Learning what makes good lessons is an important part of learning to teach. Although the school experience provides an opportunity for student teachers to consolidate their understanding, they can learn a great deal about this in the college or university.
Activity 6.2: Features of good lessons
This activity focuses on supporting student teachers in developing active teaching approaches in their lessons.
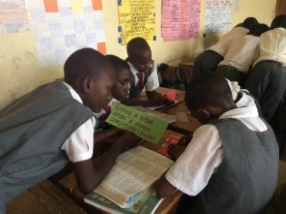
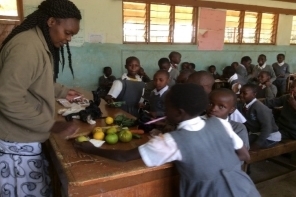
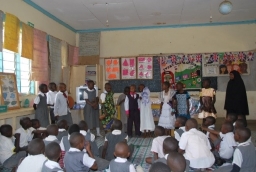
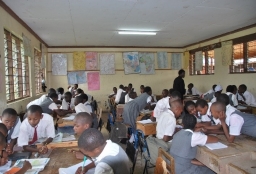
Look at the pictures provided and write down all the evidence there is that students are actively involved and engaged.
- which aspects of ‘recognising a good lesson’ do you see in these photographs?
- what questions would you like to ask the teacher in the picture about their planning?
You can do this activity with student teachers. It will help them to think about what ‘active teaching’ looks like in a classroom.
 |  |
|---|---|
 |  |
Tool 7: Conducting the school visit
This tool provides an overview of the key elements of the Supervisor’s visit to the student teacher during their school experience. You will consider and reflect on your own practice during the visits.
After using this Tool you will be able to:
- identify the tasks associated with the School Experience visit
- plan an effective school visit
7.1 Reflecting on current visit practice
To make a school visit most successful, you need to do some activities before you visit the student teacher in school:
- inform the student teacher and school when you will be visiting
- review documents such as assessment documents
- familiarise yourself with the student teacher’s progress on the course, and read their previous reports.
This preparation sets good foundations for the visit and contributes to its success. What happens during a school visit will depend on various factors, but what a school experience prioritises in the time available will depend on what they think is important.
Activity 7.1: Reflecting on school visits
In this activity you will review your own practice during the school experience visit and consider how you could maximise your support to the student teacher.
Part 1
Think about how you spend your time during a school visit. Write a list of the things you do during a school visit and how long you usually spend on each one.
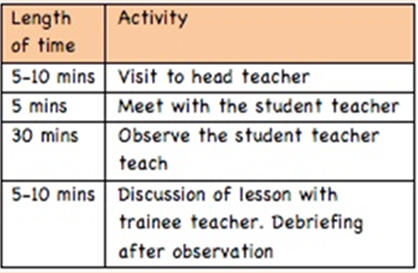
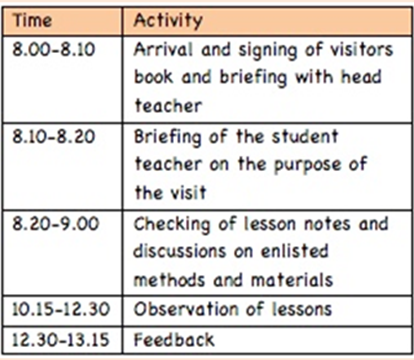
Now, look at the examples of school visit diaries below.
- how do their experiences and views match yours?
- is there anything that surprises you?
- is there anything they do that you would like to try?
- would you want to alter the length of time that you spend on different activities?
Part 2
Now consider the advice might you give to these supervisors to support student teachers’ classroom practices more effectively.
- which of the three visits is likely to be most helpful for the student concerned?
- what are the implications of your decisions for the distribution of time during your school visits?
- keep a diary yourself on your next three visits. Could you change the balance of your time more effectively to support the student teacher? You might find it helpful to compare your answers with other supervisors.
School visit diaries
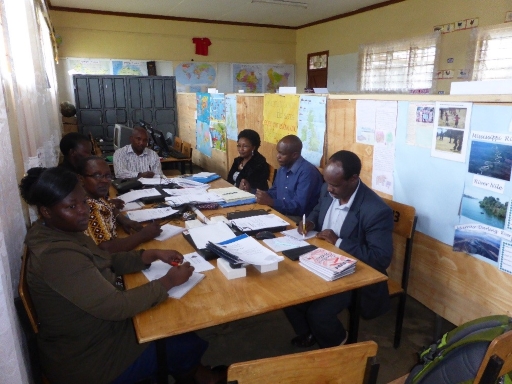
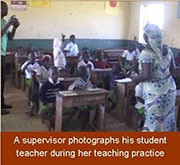
Mrs Sakala
 | “The supervision of school experience is very important. It allows you to see if the teacher is prepared for the lesson, can introduce it well, has the instructional materials together and the various methods they use in teaching. I can see if they are giving the children a chance to participate in the lesson rather getting them to copy or just listen. During the school experience period I make sure I have plenty of time to spend on the visit. At that time, I will dedicate myself to it. I spend time briefing the head teacher and the student teacher on the purpose of the visit. I observe a student teacher from the beginning to the end of the lesson and then I take time to provide feedback.” |
|---|
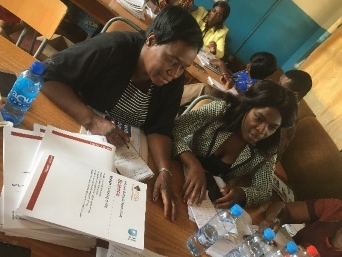
Mr Mulenga
“I feel much valued during the teaching practice, in the sense that after my mentoring there is always improvement in the subsequent lesson delivery, and a lot of cooperation between the head teachers, student teachers and their colleagues. I feel honoured to be able to help student teachers to impact positively on learners in their classrooms. I will always spend time with the head teacher and cooperating teachers when I sign the visitors’ book and check the attendance register. I ask for their feedback and tell them what the student teacher is expected to do for next time.” | 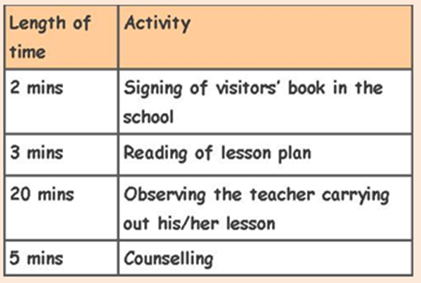 |
Mrs Sinyangwe
 | “I like to spend time on the visits and see more than one lesson if I can, but sometimes this is not possible. I talk to the student teacher to find out what the lesson is about, but I don’t criticise their plan because that would affect their confidence in the lesson. After observing, it is important that I spend time helping the student teacher reflect on their teaching and identify what they need to improve. I invite the cooperating teacher to join the discussion so they feel valued and can learn about different teaching methods.” |
|---|
7.2 Key aspects of the school experience visit
As well as observing the student teacher, the supervisor plays a key role in supporting the cooperating teacher and the head teacher to ensure that the student teacher develops high standards in teaching skills.
The school experience visit is likely to include five different activities:
- contact with cooperating school staff
- meeting with the student teacher prior to observing the lesson
- observing the student teacher’s lesson
- discussing the lesson with the student teacher
- assessing the student teacher, which might be informal or formal assessment.
These activities are not as simple as they may appear, and skill is required to achieve the desired outcomes. It is therefore worthwhile having a closer look at what each involves.
1. Contact with the cooperating school staff
It is important to create a good rapport with the school staff and to gather evidence of the student teacher’s progress from them. This can be achieved by the following suggestions.

Civilities
Greet the head teacher and introduce yourself. Explain the purpose of your visit, which is to support, assist and guide the student teacher. Ask for an update on the student teacher’s progress and thank them for the support being given to the student teacher.
Keeping school staff informed
Share with them that the student teacher is being encouraged to use active learning during their teaching practice. You can do this by sensitising the head teacher towards TESSA, introducing them to the purpose of of the OER materials. Emphasise that these are useful resources for teachers too. This sensitisation meeting is particularly important if you have not been able to meet the head teacher before the teaching practice visit as detailed above.
Involving the cooperating teacher
The cooperating teacher is the teacher who would normally be teaching the class. In a primary school, they will be the mentor as well. In a secondary school, the student will be working with several cooperating teachers, one of whom will be the overall mentor. Valuing the cooperating teacher helps to secure good support of the student teacher. Part of valuing their contribution is asking for feedback on their observations of the student teacher. Make sure you ask them about the progress the student has made in using active-learning and teaching methods.
A more delicate matter is finding out if the cooperating teacher is fulfilling their role as defined in the relevant handbooks (observing, inducting, guiding, mentoring and assisting the student teacher). You can gain this feedback from the cooperating teacher and the student teacher. This provides an opportunity to advise the mentor. If they are not fulfilling this role, you should report this to the head teacher to decide the best way forward.
2. Meeting with the student teacher prior to observing the lesson
One aim of meeting the student teacher prior to observing the lesson is to put them at ease before you observe the lesson. You may want to find out how they are getting on in the school and what they are finding challenging. You should also look the plan, ask them what the purpose of the lesson is and what they know about the class. However, you should not criticise the student at this point or suggest improvements to their plan. It is too late for them to change it and suggesting improvements will only undermine their confidence.
3. Observing the student teacher’s lesson
During your visit, you will observe the student teacher to assess their teaching skills. If you have been able to use the TESSA materials with student teachers in the college or university, you should be able to observe your student teachers trying out different active-learning strategies in their lessons. Remind them that trying out new strategies may be difficult and that it may be easier to start with areas of the curriculum they are most familiar with. Encourage them to take small steps and make small changes. Organising pair work is easier than organising group work, for example.
You can capture your observations by making notes and taking photographs or videos with your mobile phone. These can then be reviewed with the student teacher during feedback. In your notes, record the questions you want to ask the student about the decisions they made. Remember to ask permission from the head teacher before using any recording equipment in the classroom.
You might find it useful to record your classroom observation on a 7.3 Lesson Observation Form, an example of which is provided at the end of this section. An agreed form that everyone in the college uses helps to ensure that the same type of information is collected and that key aspects of student teachers’ performance are not overlooked.
4. Discussing the lesson with the student teacher
The School Experience Supervisor plays a crucial role in encouraging student teachers to use active-learning strategies and the school in supporting the student teacher in using them. You can do this by involving the cooperating teacher in the discussion after the lesson if this is possible.
You could suggest that the student teacher completes a diary to submit to you on your next visit to school. This can then be used to reflect with the student teacher on the next visit and in seminars as well as in a follow-up session once the teaching practice period is complete.
Tool 8 of this Toolkit is dedicated to giving constructive feedback.
The post lesson observation discussion is the opportunity for you and the student to co-construct knowledge about teaching in this context. Your aim should not be to tell the student what they did wrong, but rather, through questioning and listening, help them to work out for themselves how they could have improved the lesson.
Start by asking the student to evaluate the lesson themselves.
- what went well?
- what were the pleased with?
- what did they find difficult?
- what would they do differently next time?
Listen carefully to their responses and ask follow-up questions. The student will want to know what you thought, but you will have more impact on the student if, when you get to that stage, they have already worked it out for themselves.
5. Assessment
Tool 9 ‘Assessment of student teachers’ focuses on assessment in more detail. For the formal assessment of the student teacher you should be using the college criteria and form.
Before leaving the school, you should have a brief session with the head teacher and cooperating teacher to highlight your findings and suggestions.
During the school experience you may conduct a follow-up visit that will help the student teacher to develop more teaching skills. If a different lecturer is making the next visit, make sure you talk to them about the student so that they can build on the advice you have given. When your student teachers are coming to the end of their school experience period, you could write a letter to the cooperating teacher to thank them for any assistance that they have given the student teacher.
7.3 Lesson Observation Form
An agreed template can aid observation and the collection of evidence on the student teacher’s performance. Writing notes about what happens during the lesson can help the student teacher look back at the lesson and reflect on what they did. For example, you might point out which learners were engaged or note those who were not. In this way you can present evidence of what happened in the lesson that the student may not have noticed.
Activity 7.2: Observation form
In this activity you will consider the components of a lesson observation form.
- make a list of the information you would want to record on a lesson information form
- next, examine the example lesson observation form given on the next two pages. What amendments would you want to make if any?
- how does the form support good feedback practice?
School Experience Lesson Observation Form
| Student name | |||
|---|---|---|---|
| Class details | |||
| Subject /topic | |||
| Observation Notes: | |||
| Lesson plan: | [e.g. sufficiently detailed, active learning, timings, structure of lesson] | ||
| Lesson objectives | [e.g. clear, appropriate] | ||
| Time | What happens in the lesson | Comments / suggestions | |
| HighlightedSummary: | HighlightedWhat worked well | HighlightedWhat needs improving |
|---|---|---|
| HighlightedLearners’ learning and motivation / interest in the lesson | ||
| HighlightedTeacher’s subject knowledge | ||
| HighlightedTeaching methods /active learning | ||
| HighlightedResources | ||
| HighlightedAssessment of learners | ||
| HighlightedProfessional behaviour (voice, appearance, preparedness) | ||
Priorities for improvement: | ||
| 1. | ||
| 2. | ||
| 3. | ||
Tool 8: Giving constructive feedback
Giving feedback is an important part of your role, but if student teachers are to benefit it requires thought and skill on the part of the Supervisor.
After using this Tool you will be able to:
- reflect on your own practice when giving feedback
- use ‘best practice’ practical strategies when working with student teachers.
8.1 Reflecting on current feedback practice
The discussion with the student teacher after the lesson observation has two important purposes. Firstly, it helps them improve their teaching and secondly, it helps them learn to evaluate and reflect on their practice, which sows the seed for continuous professional development. However, not all feedback discussions achieve these two key purposes. Student teachers may reject the feedback or feel overwhelmed and unable to act on it. How the discussion and feedback is conducted is crucial to achieving the aims.
Activity 8.1: Giving feedback to my student teacher
This activity helps you to reflect on your current feedback practice.
Before you read this section, think about the last time you gave feedback to a student teacher.
- how much of the time did you spend talking?
- how much of the time did the student teacher talk?
- how many questions did you ask the student teacher?
- how many questions did the student teacher ask?
- how many suggestions on possible improvements did you make?
- how many suggestions on possible improvements did the student teacher make?
- how many suggestions on possible alternative strategies did you make?
- how many suggestions on possible alternative strategies did the student teacher make?
Return to these questions on your own experiences once you have read this section on good practice. Are there any changes you might make?
Research has provided valuable insights into conducting feedback so that it supports learning. Before considering this, consider the experience of the student teacher.
Activity 8.2: In the student teacher’s shoes
This activity will help you to reflect on the experience of student teachers.
Read through Danny’s account of a visit and answer the questions posed before proceeding with the next part of the story. If possible, work with colleagues to discuss your responses to the questions.
Danny’s perspective
Danny is expecting a visit from his supervisor, Christine, and he is very nervous.
Part 1
“Teaching is much harder than I thought it was going to be. I’m expected to be using these active teaching and learning methods – the ones I learned about in college. I am trying to use these methods and I have had some successes, but it doesn’t always go well and the other teachers don’t really do it. My Supervisor has just arrived and is meeting the head teacher. My palms are sweating!”
- what does Danny need from his Supervisor at this stage of the visit?
- what would be helpful to him?
- what would not be helpful?
Part 2
“I taught the lesson. My Supervisor sat at the back of the class making notes. I wondered what she was writing. I was so nervous at first, but then I stopped noticing her. Then I saw that she was not in her seat! I saw that she was talking to learners and looking at their exercise books. I was wondering what they were telling her!”
- why do you think Christine was talking to learners and looking at their books?
- what could Christine have done to prevent Danny from becoming anxious?
Part 3
“When the lesson finished, I was relieved. My head was in a spin – I was buzzing! It had gone well. I had stuck to my plan and the learners had lots of notes in their books. I had used some pair work and a demonstration to please my tutor. I thought my Supervisor would be happy.”
Danny is feeling quite pleased with the lesson, but Christine has some concerns. The lesson was too teacher-centred and relied on note taking from the board. The pair work was brief and not managed well. Similarly, the demonstration Danny had done did not involve the learners. Many could not see what he was doing and just messed about at the back.
- if you were Christine, what would you do next and want to find out?
- how could Christine help Danny see the problems with the lesson?
- what might happen if she simply starts by telling him that the lesson was not good and what he needs to improve?
Part 4
“The feedback was not as good as I was expecting. There was so much that she said was not good. I felt very bad by the end. I feel I am far away from being a good teacher. There just seems so much to do and put right. I understand what she was saying but I don’t know what to do next time.”
Christine provided detailed feedback, but Danny is left feeling overwhelmed and hopeless.
- what could Christine have done differently to ensure that Danny was challenged, but not left feeling so negative?
8.2 Good practice in giving feedback
Developing effective feedback practice takes time and is not learned from books alone. However, what we know about good practice can help us to reflect and change what we do over time.
Feedback is an interaction between two people and like people, all interactions are different. What a supervisor does in one instance will take account of the student’s position and characteristics. Different strategies can be deployed to meet different student needs. For example, an expert Supervisor would take very different approach to a nervous student who underestimates their capabilities than to an overconfident student who is overestimating their capabilities.
Effective feedback depends on building trust between the Supervisor and the student teacher and starts when they first meet. Developing trust can be hard if you do not know the student or see them infrequently. Trust can be developed if you approach the observation and feedback in the spirit of supporting the student rather than simply judging them. What does this look like in practice though?
Here are some good practice points to consider for an effective feedback and discussion.
- Before the lesson
- A friendly face and reassurance from the outset of the visit are important in establishing a positive relationship.
- Show interest in the student by asking what he/she is trying to improve and what s/he would like feedback back on.
- Explain what you will do in the lesson (take notes, talk to learners etc) and why so that the student is not taken by surprise.
- During the lesson
- Be as inconspicuous as possible and do not intervene in the lesson unless the situation is dangerous.
- Gather evidence from learners by asking questions (e.g. “are you enjoying the lesson? What are you doing? What are you learning?”), looking at learners’ exercise books and asking questions that will check their understanding.
- After the lesson
- Find a quiet private place for feedback so the student teacher is relaxed.
- Give student teachers the chance to reflect on their own performance first. Let them say what they saw as the positive points of the lesson and what they felt needed improving.
- Use this as a basis for discussion. The student will have an agenda and if it is not acknowledged they may not be able to take in anything you say.
- Allow sufficient time for the discussion – 5 minutes is not enough!
- A key focus is what the learners learned and whether they made progress. Use questions and objective evidence from the observation to challenge the student’s evaluation when it is overly positive, rather than simply telling them they are wrong. This prevents the feedback from being confrontational and personal. By jointly considering the evidence, (e.g. what is in the learners’ books, what learners were doing, what they thought about the lesson, and assessment evidence of their understanding) the student is more likely to accept that they need to change what they do.
- Be specific in your feedback – avoid general comments such as “your classroom management was good.” For the student to learn they need to know why you thought it was good. Provide concrete examples, e.g.“It was particularly effective when you used this material, it really gained the learners’ interest as they were able to see the process you had explained in action”.
- Avoid providing very detailed negative feedback. It might be tempting to give detailed feedback on every aspect of the lesson, but this will not help the student teacher. Receiving a lot of detailed feedback is overwhelming and can be dispiriting. More useful feedback is focused on the two or three priorities for improvements that will have the most impact on learners’ learning if they are improved.
- Write down and agree together two or three issues that the student teacher will work on for the next lesson. It is tempting to have a long list of things, but two or three is the maximum that can be effectively dealt with at a time. If you are not going to see the student teacher after the next session, you might want to agree a way in which they can give feedback to you, through WhatsApp or by phone.
- Ask the student teacher what they have learned from teaching the lesson and how they will incorporate it into their practice over the next few days. The student may need help in acting on feedback. The TESSA materials can provide additional support.
- Conclude the feedback by revisiting the positive points of the lesson. Be encouraging. In particularly comment on the improvements that have been made, for example ‘It was great to see you put into practice the group work idea we discussed last time…’.
- Be prepared to leave your notes for the student teacher, or encourage them to write their own, so they can reflect on them later.
Activity 8.3: Preparing to assess the student teacher
This activity helps you to consider the points of good practice.
Part 1
Go back to your responses to Activity 8.2.
- how do your responses compare to the good practice points given previously?
- would you change your answers to any now?
Part 2
Use the good practice points to outline how you would approach a visit to a student who is very nervous, finds it hard to see the good aspects of their teaching and who underestimates their performance.
Looking back at Activity 8.2, you can now see that Christine should have started by asking questions that brought out some of the issues. Gradually, Danny would have begun to realise for himself that the lesson was not very good. Then she should have picked out two or three things for him to concentrate on, for example planning some questions in advance that will require students to think about the demonstration, positioning students so they can see the demonstration and moving around the room during pair work.
As a School Experience Supervisor, you need to help your student teachers to focus on teaching in ways that help learners to learn. You can support your student teachers by encouraging them to discuss other ways in which the strategies could be used in their teaching, both in other topics and in other subjects. The TESSA OER will help you in this. The materials have very clear learning outcomes for teachers within each section and provide a good framework for feedback if these have been used. However, there are many other aspects of the lesson that you might want to discuss.
Tool 9: Assessment of student teachers
Many teachers, teacher educators, learners and parents think of assessment as judging only what learners have learnt at the end of a week, term or year. This summative assessment is important. However, assessment for learning or formative assessment is very important in helping student teachers know how to improve.
After using this Tool you will be able to:
- plan your assessment strategy
- ensure that standards are consistent across the college
- write a report which provides the data needed by the college, but is also helpful to the student
9.1 Assessing student teachers on school experience
On your visits to your student teachers, you might complete an assessment form. The grading can differ from one institution to another, but the following list provides suggestions that you may want to consider in your assessment.
Student Teacher’s Attributes
- professional (e.g. appearance, time keeping, commitment, organisation)
- attitudes (e.g. enthusiasm, respectful of all learners)
- self-awareness and ability to evaluate
- self presentation? ie. Dress code – doesn’t need to be in elegant or expensive clothing
Lesson Preparation and Planning
- detail in the lesson plan
- accuracy, adequacy and sequencing of subject content
- objectives appropriate to the class
- coherent lesson design involving appropriate active learning strategies that help learners to achieve the learning objectives and outcomes
- preparation and selection of appropriate materials and resources
Lesson Presentation and Classroom Management (See Tool 6: Recognising a good lesson section in the Toolkit)
- relevant, interesting and motivational introduction
- logical and sequential development of lesson
- stimulates / interests the learners
- knowledge of subject and pedagogy
- implementation of lesson plan (flexibility)
- knowledge of the learners and their individual differences
- competency at using resources e.g. the chalkboard
- responses to learners’ behaviour
- use of voice
- learner participation in the lesson e.g. by asking questions, debating and discussion
- classroom management and control
- command of language (accurate, fluent and to the point)
- questioning (good quality, well distributed among the learners)
- learner-centred approach (lots of relevant activities)
- use of instructional materials
- learning consolidation through summary and conclusion
Evaluation
- evaluation of learners’ learning
- Analysis of lesson delivery against lesson objectives
Tools 5 and 6 examine the features of an effective teacher and good lessons. It would be unrealistic to expect student teachers to demonstrate this level of expertise – they are novices and at the beginning of learning to teach. It is therefore important to have realistic expectations of student teachers and identify minimum standards required in the different areas.
Activity 9.1: Grade and reports
This activity helps you to consider how reports reflect grades.
Part 1
With a group of colleagues, review your college’s assessment requirements. If you are expected to grade students, work together to write a brief description of what you might expect a student working at each grade to know and be able to do.
Part 2
Review some reports from previous years. You could do this by each contributing some you have written, or you could select a few examples and remove all the names. Look at each report from the perspective of the student and consider the following questions:
- Does the report make it clear to the student why they have been awarded that grade?
- Does the report help the student understand how to improve?
- How could the report be improved to make it more helpful to the student, whilst still conveying the information needed by the college?
Part 3
If possible, visit a school near to the college and carry out a joint observation. After the lesson, before you talk to the student, discuss the grade you would each award and why.
Tool 10: Improving your own teaching
If student teachers are to understand active learning in practice, they need to experience it. This is why you need to model the sort of teaching approaches that you are asking students to use. This means that in your lectures, seminars and workshops for pre-service or in-service teachers, you need to ensure that the participants are actively engaged. Most of the features of a good lesson listed in Tool 5 can be applied to your work with students.
After using this Tool you will be able to:
- become more effective in modelling active teaching approaches
- consider how the TESSA OER can support your own teaching
- plan for using an active teaching and learning approach in your own teaching
10.1 Planning a teaching session
When you plan a teaching session you need to ask yourself the following questions:
- What is the purpose of the session?
- Who will be attending the session and what is their previous experience?
- What strategies will I use to achieve the chosen purpose(s)?
- How will I engage the participants?
- How will I incorporate opportunities for them to discuss the topic matter?
- What activities will I ask them to do?
- How will I know whether the objectives of the session have been met?
The case study below shows how one lecturer organised group work in her teaching session. Read the case study before doing Activity 10.1.
Case study 10.1 Organising group work
Grace was teaching the Sociology of Education. She had been encouraged by a colleague to use the TESSA OER in her teaching but found nothing on teaching sociology. However, she realised that the Key Resources might be helpful and decided to try using group work.
The syllabus included knowing about the work of five different sociologists. She has a group of 50 students and decided to create ten groups, asking each to research the work of one sociologist using textbooks and the college computers. Some students used their phones to do the research. She provided each group with a set of questions covering the information they needed to collect. While they were working, she explained that they all needed to become experts and checked that they were answering the questions correctly and in the right amount of detail.
In the next session, she re-grouped her students so that each group had one ‘expert’ on each sociologist. Each person was given ten minutes to teach the rest of the group about that sociologist. Again, Grace went around the groups, listening and asking some questions in order to ensure that the main points were covered.
Activity 10.1: TESSA teaching strategies in a seminar
This activity provides a model on how to use TESSA teaching strategies in your face-to-face seminars.
Part 1
Read the Case Study 10.1 and discuss how you might try something similar in your own teaching. In the second session, Grace could have kept four of the groups the same and asked the ‘experts’ on one of the sociologists in the fifth group to act as envoys and visit another group in order to share their information. Each group takes a turn at acting as envoys.
Part 2
Read the vignettes below. They describe how other teacher educators have used TESSA OER in their own teaching.
Part 3
Look at the TESSA Key Resources and download three resources that would be helpful to you. Work together in pairs to plan some activities that you could use in your teaching sessions next week.
 | “I use the case studies in the TESSA module sections extensively. They are like a film of a real activity in the classroom, showing how the key point can be enacted in practice. It really speaks to the teacher. I use the case studies a lot in my seminars. We use them as starting points for discussions or for brainstorming strategies to teach in different ways.” |
“I have used some case studies as the starting point for drama. We have even acted the lesson described in the case study as a starting point for microteaching.” |  |
 | “I find it very important to make sure there is some time available for student teachers to ask any questions they have about anything, and particularly the reflective reports and the plenary discussion. I am also very aware that the environment during the seminar is relaxed so that all can express themselves and ask these questions. I have found quite a few ideas in the Life Skills section of TESSA. The materials help to refresh my memory and give me some practical ideas which are easily adapted to working with my student teachers.” |
Tool 11: Counselling student teachers
Student teachers are likely to meet difficulties that can be divided into two broad categories: micro-level difficulties that are linked with teaching and the level of competence of the student teacher and macro-level difficulties that are linked with the student teacher’s surroundings and his/her work conditions.
After using this Tool you will be able to:
- highlight some of the issues raised by student teachers that you might help them with
- provide some practical strategies to use to support student teachers.
11.1 Dealing with micro-level difficulties
It might appear at first glance that although support can be provided for micro-level difficulties, little can be done to help to resolve macro-level difficulties. This is not necessarily so.
Examples of micro-level difficulties include:
- lack of teaching strategies
- inadequacy to develop locally oriented or culturally friendly teaching materials
- lack of confidence with improvisation of resources
- lack of mastery of subject content
- lack of ICT skills
- learners’ lack of cooperation during activity methods of teaching
- the student teacher’s lack of self-motivation.
Many School Experience Supervisors have had some experience of these situations and have found some solutions which they have shared among themselves to increase their collection of tools to support their students.
 | “My key function as School Experience Supervisor is to improve classroom practice and some of the micro-level difficulties linked with classroom practice, for example the lack of teaching strategies. I have found that the ideas contained in the Toolkit help me to scaffold the student teacher development in using an increasing number of teaching strategies – and I make sure that each of my students works on one teaching strategy at a time.” |
|---|
| “The case studies used in the section of the modules provide guidance and ideas on some of the difficulties met by student teachers. One area we have not explored yet is how to bridge the gaps in students’ subject knowledge. I have found what I would call the supporting resources that provide background information and/or subject knowledge for teachers and that are clearly indicated by a small symbol most helpful. Did you know there are some on verbs and adverbs, electricity, the heart rate? Really all sorts and it is worth looking at these. Each TESSA unit has up to six resources to support the teacher.” |
|---|
| “Some of these provide support for techniques. So, yes, look them up! Also, don’t forget the Key Resources are extremely useful and can really trigger the imagination. For example, the two key resources ‘Being a resourceful teacher in challenging conditions’ and ‘Using the local community/environment as a resource’ can most certainly help student teachers who have difficulties in developing locally oriented or culturally friendly teaching materials, or who lack confidence in improvising with resources. You may want to borrow one of the activities I do during one of my face-to-face seminars on ‘How can you use this in your teaching?’. I bring in all sorts of local and usual items as well as photos of the local environment. We brainstorm ideas and students select a few of these to try in micro-teaching sessions.” |
|---|
 | “Two points we have not mentioned. First how to get the learners to appreciate a different way of working? I would say, just as we introduce our students progressively to new methods, they need to explain to their learners, albeit briefly, that today we are going to try a new way of doing things and introduce things progressively. And the last point, ICT skills; I am self-taught, but I know some of my students are diffident. I have brought my laptop to face-to-face seminars. In pairs, students go and try to access the site and/or resources. If they need help, another student who is computer literate goes and supports them.” |
|---|
Activity 11.1: Responding to your own student teachers’ difficulties
This activity asks you to think about your students’ individual needs and to consider how you might respond to them.
Part 1
Think of each student in your group and list at least one difficulty they have (go up to a maximum of three difficulties per student if you wish).
- group them into issues connected with teaching and their developing skills (micro-level difficulties) and issues connected to the student teachers’ surroundings or working conditions (macro-level difficulties).
Part 2
Pair up with another School Experience Supervisor and share your lists of student teachers’ difficulties, particularly those you felt difficult to respond to on your own
- together, work out some strategies that you could use to respond to the micro-level difficulties. Use the vignettes above, to help you with this.
11.2 Dealing with macro-level difficulties
Activity 11.2 Supporting students with difficulties
The three case studies on the next page describe problems that students faced and how the school experience supervisor was able to provide support.
Discuss each case study.
- Is there anything else the School Experience Supervisor could have done, or alternative advice they could have offered?
- In your group, ask each person to give one example of a problem that one of their student teachers has faced and discuss ways in which you, as supervisors could respond.
There will be times when you as a School Experience Supervisor will not have the answer (nothing wrong with this) and you will need to refer to your study centre because the matter seems to be an ‘official’ one and you need to check the institution’s response to the questions.
At other times, the issue that is revealed is very sensitive and you will feel that other colleagues’ views on the matter will be useful to help you to work out a solution. For example, issues linked to social, cultural and multilingual context, as in the gender issue met by Mrs Foloko in the Case Study below are very delicate indeed, and colleagues’ advice will be welcome.
Case study 11.1: Using the local community for access to ICT facilities
Florence is a teacher trainee doing her teaching practice at Munano Primary School in Chismaba District in Central Province. She teaches Computers in Primary 5. Before her Supervisor’s first visit to the school, he sent a WhatsApp to confirm the arrangements. Florence told him that she was finding it hard to teach Computers because the school had no computer. She had been using pictures to teach it, which the children did not find stimulating. Her supervisor, Mr Sinyangwe suggested he bring his computer to show her class. The lesson went well and the learners were very interested in Mr Sinyangwe’s laptop. After the lesson, they talked about other ways in which she might be able to show them real computers. Mr Sinyangwe suggested that Florence could visit the nearby business centre to request if someone could come and visit the school to demonstrate and explain some of the things they used computers for in different jobs. Florence did this and the learners talked enthusiastically about the visit and wrote about how computers can be used.
Case study 11.2: Being resourceful in finding reading resources
Mrs Buhari Kafweku is a student teacher who is teaching reading to her Primary 6 class. She told her School Experience Supervisor that she felt at a disadvantage because the school did not have any textbooks or materials they could work with. Her supervisor suggested that she ask learners to bring any reading materials they could get, for example newspaper cuttings, waste paper, magazines or even empty food packets. The learners did this, and the class soon had a wide range of different types of reading materials which Mrs Buhari Kafweku could use to teach them reading.
Case study11.3: Gender issues
Nancy is one of in Mrs Foloko’s group of student teachers. Mrs Foloko notices that during the college seminars, Nancy is interested, grasps ideas quickly and enjoys micro-teaching and role-play exercises; she seems to be a very promising teacher. Mrs Foloko is looking forward to seeing Nancy teaching, but when she visits, she finds Nancy is very subdued and has not included any active learning techniques in her lessons. Where is the bright enthusiastic young woman she knows from college?
After the lesson, Mrs Foloko does not ask direct questions about the differences in her attitude between college and school, but she tries to work out the reasons. Nancy just remains silent, looking at her feet. Mrs Foloko asks her to come to a meeting at the study centre that afternoon after school. She makes them both a cup of tea, sits with Nancy and carefully questions her. She discovers that Nancy wanted to use some of the methods she discovered in college, but that the cooperating teacher was not supportive of these methods. As he was an experienced teacher she did not feel she could do anything that might displease him. Mrs Foloko gently questioned her a bit more and discovered that in her education, Nancy had been brought up never to question adults, particularly men. Mrs Foloko decided on three lines of action:
- seek the support of the school’s head teacher so that Nancy would be in a class with a female teacher
- work with her students during a seminar on issues linked to gender issues
- convene a group of school experience supervisors to discuss issues around ‘giving a voice to students’ so that their needs could be heard in their training, be it in schools or at the college.
Tool 12: Being a reflective practitioner
The most effective teachers are those who reflect on their work and are self-critical. Being self-critical does not mean always finding fault with yourself; it means analysing your teaching and thinking about what went well, what did not go so well, and why.
After using this Tool you will be able to:
- provide an audit that will help you become aware of the active learning methods you are using in your teaching and identify how you develop this
- reflect on your own work and the impact of your teaching on your students
- provide strategies to help you support student teachers’ reflection.
12.1 Auditing teaching methods
It can be difficult to know how to begin to reflect on and make changes to your teaching. An audit tool can provide this first step.
Activity 12.1: Active teaching methods audit
This activity provides a tool that you can use to gauge progress with using an active approach to teaching and learning.
Part 1
You can use this audit with your student teachers, but in order to become familiar with it you should do this audit for yourself first.
Use the audit: Self-audit and targets: active teaching and learning methods.
It is in section 12.4 at the back of this Tool.
- fill in the table for yourself. For each of the 24 activities, tick the appropriate statement that applies to you – feel free to annotate the table in the margin
- choose three of the methods that you are not familiar with or less knowledgeable about and explore the TESSA materials which have examples of classroom activities using the method. If you are online, you could use the suggestions in the 3.2 Active teaching and learning methods table for assistance.
- having completed the audit, what are your conclusions?
Part 2
Now that you are familiar with this audit table and the way it works, plan how you might use it with your student teachers to help you and them to review their progression and progress through developing an active approach to teaching and learning.
12.2 Being a reflective teacher educator
Being a reflective practitioner involves asking yourself ‘why’ questions. Before you can help others to become reflective practitioners, you have to be one yourself. In the first instance this means being aware of the impact you are having on students in your classes. If they are finding it difficult to stay awake in your class, think about how you could make the topic more engaging. If a several students submit an assignment that scores low marks, ask yourself how you could have explained the topic better.
Activity 12.2: Reflecting on your own teaching
This activity will help you to reflect on your own teaching.
Part 1
Think about one of the classes that you teach.
- what do your students think about your teaching?
- how could you find out?
- write down some of your ideas and the evidence that you have to support your conclusions.
Part 2
Compare your thoughts with a colleague.
- try to identify why they might have formed that view
- what do you think you need to do less of in your own teaching?
- what do you think you need to do more of?
Being reflective is one of the most effective ways for any professional to improve their practice. Since teachers spend most of the time on their own with their students, it is important that they think about their own practice, because they will not get direct feedback unless someone observes them teach. Once qualified, this is rare. It is also unlikely that you have ever been formally observed working with students.
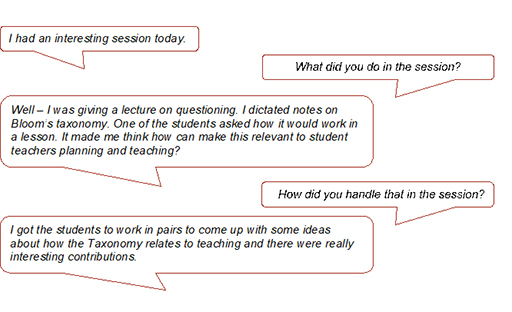
12.3 Supporting student teachers’ reflection
Helping student teachers to become reflective practitioners is an important part of the teacher educator’s role, but how can this be achieved? Student teachers simply selecting the relevant TESSA sections and trying out the activities in their classrooms is not enough to bring about real improvement. Student teachers need further support to help them to understand and reflect fully on their classroom experiences with different sorts of activities. This could be through sharing their experiences:
- in seminars or tutorials
- in discussions with mentor/supervisors/head teachers/inspectors
- through communication with a tutor by email
- through discussions with peers by email, mobile or text messages.
Student teachers can be helped to reflect constructively by sharing both good and bad experiences in a non-threatening way. Describing is a good starting point for reflection, but teachers also need to be encouraged to think about why things happened the way they did, and what they will take from this experience into their lessons next time. The last question in Activity 12.2 gave you a few ideas on how to invite students to reflect. Let’s explore further your role in helping student teachers to develop reflection.
Activity 12.3 Using the TESSA handbook 'Working with Teachers' as support
This activity will help you to identify ways of encouraging reflective practice in your student teachers.
Asking questions at face-to-face seminars or during post-lesson discussion in a school visit is one of the strategies you could use to help students to reflect on their and their learner learning.
- list any other strategies you can think of
- Then, in Working with Teachers, read Section 6: ‘How can you encourage reflective practice with TESSA activities through the kinds of assessment you use?’
- Finally, add to your list and make a few notes of things you want to remember and try when you work with your student teachers.
Remember it is important to scaffold the student teacher’s progress through the process of raising awareness, planning for use, using and reflecting on use of a new learning and teaching strategy. This will lead to the student teacher gaining independence and developing his/her own use of some aspects of the TESSA resources as illustrated in Aisha’s case study below.
Case study 12.1: Aisha develops her own materials
“Using story with big book in science went really well. Is there a section on using big print in a different subject I could try?”
This was the SMS message Mall. Rabiu, Aisha’s Teaching Practice Supervisor received the afternoon after Aisha tried this technique for the fourth time. Her supervisor was pleased she had persisted and succeeded so well: the first attempts had been a little difficult. He looked at the Teaching and Learning Methods table, phoned her back and suggested she tried using stories without the big print and looked at these TESSA sections:
- inviting a local storyteller as in Literacy Module 2 'Ways to collect and perform stories'
- in Literacy Module 2, the sections 'Investigating stories' and 'Using story and poetry'; in Module 3, the section 'Ways towards fluency and accuracy'
- in Social Studies and the Arts Module 3, 'The art of storytelling'
- in Life Skills Module 2, the section 'Investigating self-esteem' and in Module 3, 'Exploring the environment'.
Together they decided on a route through the suggestions that he had made.
Aisha’s confidence went from strength to strength and she gained expertise in this technique that she started inventing her own stories to illustrate some of her lessons in a range of subjects. Other teachers in the school asked her if they could observe her reading stories with the children and also borrow her resources.
Tool 8 focuses on the discussion and feedback that follows observing a student teacher’s lesson on a school experience visit. This is a good opportunity to help them reflect. By asking ‘why’ questions you can prompt them to reflect on the reasons behind their planning and teaching decisions. ‘How could you…’ and ‘What if….’ questions prompt thinking about alternative approaches. Presenting evidence from the lesson, for example the number of learners engaged in a particular activity or assessment evidence, is another way to get students to think critically about their teaching.
Activity 12.4: Supporting student teachers’ post-lesson reflection
This activity will help you to plan for supporting student teachers’ reflection on their teaching.
Part 1
Consider the questions below. These are intended to support teachers’ evaluation and reflection. What other questions would you add for student teachers?
- How did the lesson I planned work in practice?
- Which activities worked well in my lesson? Why?
- Which activities did not work as well as I planned? Why? What can I do to improve this next time?
- Did I have all the materials I needed? What else would have been useful?
- Which learners worked / participated well in the lesson? Why?
- Which learners found the activities difficult? What can I do to help them?
- What do I need to remember next time when I am planning a similar lesson?
Part 2
Imagine that you are visiting a student teacher who is resistant to using active learning methods in their teaching. Write some questions that you could use in a discussion with a student teacher to help them reflect on their teaching approach after observing a lesson they teach.
12.4 Teaching Methods Audit
| Highlighted | HighlightedActive teaching and learning method | HighlightedSome of the teaching skills needed | HighlightedStrength | HighlightedTo develop | HighlightedNever used |
|---|---|---|---|---|---|
| 1. | Building models |
| |||
| 2. | Classification |
| |||
| 3. | Collaborative activities |
| |||
| 4. | Debate |
| |||
| 5. | Demonstration |
| |||
| 6. | Discussion |
| |||
| 7. | Displaying real items (exhibitions) |
| |||
| 8. | Games |
| |||
| 9. | Group work |
| |||
| 10. | Investigation/ inquiry |
| |||
| 11. | Making deductions |
| |||
| 12. | Mind mapping/ brainstorming |
| |||
| 13. | Observation/ identification |
| |||
| 14. | Prediction |
| |||
| 15. | Problem solving |
| |||
| 16. | Project method |
| |||
| 17. | Questioning |
| |||
| 18. | Reporting/oral presentation |
| |||
| 19. | Researching/ exploration |
| |||
| 20. | Role play |
| |||
| 21. | Simulation |
| |||
| 22. | Storytelling/folk tales |
| |||
| 23. | Student field work |
| |||
| 24. | Think–pair–share |
|
| HighlightedI will work on | HighlightedI am to complete by (date) | HighlightedHow I will know I have developed my use of the method sufficiently | HighlightedI will need the following support |
|---|---|---|---|
Other useful resources
OER Africa website for more freely available open educational resources, online: http://www.oerafrica.org/
OER at AVU (African Virtual University) for more freely available open educational resources, online: http://oer.avu.org/
Cain, M. (2012) ‘Beliefs about classroom practice: a study of primary teacher trainees in Trinidad and Tobago, International Journal of Humanities and Social Science, vol. 2, no. 3; Februrary 2012, online: http://www.ijhssnet.com/journals/Vol_2_No_3_February_2012/14.pdf
Table of Toolkit activities
| HighlightedActivity 1.1 | Core tasks of the School Experience Supervisor |
|---|---|
| HighlightedActivity 1.2 | Qualities of an effective School Experience Supervisor |
| HighlightedActivity 1.3 | Thinking about practice |
| HighlightedActivity 2.1 | Becoming familiar with TESSA |
| HighlightedActivity 3.1 | Active pedagogy |
| HighlightedActivity 3.2 | Identifying active teaching methods |
| HighlightedActivity 4.1 | Active teaching methods – supporting student teachers |
| HighlightedActivity 4.2 | Possible uses of the TESSA materials |
| HighlightedActivity 4.3 | Planning to use TESSA with your student teachers |
| HighlightedActivity 4.4 | Using the TESSA handbook ‘Working with Pupils’ as support |
| HighlightedActivity 5.1 | What are the attributes of a good teacher? |
| HighlightedActivity 5.2 | Categorising and reflecting on the attributes of effective teachers |
| HighlightedActivity 5.3 | Supporting student teachers’ understanding of effective teachers |
| HighlightedActivity 6.1 | What are the features of a good lesson? |
| HighlightedActivity 6.2 | Features of good lessons |
| HighlightedActivity 7.1 | Reflecting on school visits |
| HighlightedActivity 7.2 | Observation form |
| HighlightedActivity 8.1 | Giving feedback to my student teacher |
| HighlightedActivity 8.2 | In the student teacher’s shoes |
| HighlightedActivity 8.3 | Preparing to assess the student teacher |
| HighlightedActivity 9.1 | Grade and reports |
| HighlightedActivity 10.1 | TESSA teaching strategies in a seminar |
| HighlightedActivity 11.1 | Responding to your own student teachers’ difficulties |
| HighlightedActivity 11.2 | Supporting students with difficulties |
| HighlightedActivity 12.1 | Active teaching methods audit |
| HighlightedActivity 12.2 | Reflecting on your own teaching |
| HighlightedActivity 12.3 | Using the TESSA handbook ‘Working with Teachers’ as support |
| HighlightedActivity 12.4 | Supporting student teachers’ post-lesson reflection |
Table of Toolkit case studies
| Planning and using TESSA materials with student teachers | |
|---|---|
| HighlightedCase study 1.1 | Preparing for school experience |
| HighlightedCase study 1.2 | A second visit |
| HighlightedCase study 1.3 | Using TESSA to provide practical help |
| HighlightedCase study 4.1 | Supporting integration of ideas into the classroom teaching |
| HighlightedCase study 4.2 | Student teachers using the materials to develop one competence |
| HighlightedCase study 4.3 | Teaching Practice Supervisor for distance learning programme with in-service teachers |
| HighlightedCase study 4.4 | College lecturer working on a pre-service teacher course |
| HighlightedCase study 10.1 | Organising group work |
| HighlightedCase study 11.1 | Using the local community for access to ICT facilities |
| HighlightedCase study 11.2 | Being resourceful in finding reading resources |
| HighlightedCase study 11.3 | Gender issues |
| HighlightedCase study 12.1 | Aisha develops her own materials |
The original toolkit was designed and written by:
Michele Deane, The Open University UK; Afiniki Innocent, NTI Staff School, Nigeria; Professor M.I. Junaid, NCCE, Nigeria; Chief Peter C. Kalu, NTI, Nigeria; Dr Ahmad Muhammad Miftah, Federal College of Education Zaria, Nigeria; Rhiannon Moore, The Open University UK; T. Ayuba Solomon, NTI, Nigeria; Freda Wolfenden, The Open University UK; Dr Dele Yaya, NTI, Nigeria; Dr Abdulkareem Yunusa, NCCE, Nigeria.

This Zambian version of the toolkit was adapted from the original by:
Kris Stutchbury (The Open University, TESSA); Sandra Amos (The Open University, TESSA); Peter Sinyangwe (CSS, TESSA); Mr. Kenneth M. Likando (Senior Education Officer – TESS, Colleges); Mr David Shabukali (Senior Curriculum Specialist – CDC, Teacher Education); representatives from the Colleges of Education: Charles Lwanga, Chipata, David Livingstone, Kasama, Kitwe, Malcom Moffat, Mansa, Mongu, Mufulira, Solwezi, St. Mary’s; the Zambia Institute of Special Education (ZAMISE), and Chalimbana University.
With support from Dr. Grace C. Chilekwa (Director – TESS), Ms. Esvah Chizambe (Assistant Director – Teacher Education) and the Ministry of General Education.
This is an Open Educational Resource (OER). This work was funded by the Alan and Nesta Ferguson Foundation. We welcome feedback from those who read and make use of the Toolkit.
TESSA is a research and development programme engaged in teacher education and was established in 2005 by The Open University UK.
For more information about the TESSA programme see: www.tessafrica.net
Acknowledgements
Except for third party materials and otherwise stated, this content is made available under a Creative Commons Attribution-ShareAlike license. You are free to use, adapt and re-use this material as long as you credit this source appropriately and license under the same terms. For more information visit: https://creativecommons.org/ licenses/ by-sa/ 4.0/
Every effort has been made to contact copyright holders. If any have been inadvertently overlooked the publishers will be pleased to make the necessary arrangements at the first opportunity.