Use 'Print preview' to check the number of pages and printer settings.
Print functionality varies between browsers.
Printable page generated Monday, 27 July 2026, 11:54 PM
TI-AIE: Using structured resources to develop understanding: place value
What this unit is about
The concept of place value in the decimal number system is a core element of mathematics. It is therefore essential that students develop a deep understanding of the concept.
Structured resources help students develop an image and understanding of place value. They can be very effective to aid the students’ understanding. This unit focuses on using three such resources:
- arrow cards
- base ten blocks
- the number line.
The activities will also help you to plan for teaching with structured resources as well as involving students as active participants in their learning. These activities are particularly suited for younger students, but they are also useful to consolidate learning with older students.
What you can learn in this unit
- How to use structured resources to support students’ understanding of mathematical concepts.
- Some ideas on how to involve all students as active participants in lessons.
- Some suggestions on how to plan lessons with structured resources using case studies from other teachers.
This unit links to the teaching requirements of the NCF (2005) and NCFTE (2009) outlined in. Resource 1.
1 Place value in the decimal number system
According to India’s National Council of Educational Research and Training (2008, p. 35):
- Understanding the concept of place value is an important aspect of number representation and a core requirement of mathematics.
The decimal system of numbering enables any number, small or big, to be written using only the ten digits from 0 to 9. It is based on the following principles:
- The system uses only the following ten digits: 0, 1, 2, 3, 4, 5, 6, 7, 8 and 9.
- The position of a digit within a number determines its value.
- The system uses 10 as a ‘base’ – a digit one place to the left of another is worth ten times its value.
- Zero is used as a placeholder to represent that, for example, in the number 205 there are no tens in the tens place.
Students do not need to know these principles explicitly. However, it is essential that they develop a sound understanding of how to use these principles, because they underpin so much of what follows in their mathematical learning. In particular, place value forms the basis of the methods that students are taught to use for calculations with larger numbers, but a secure understanding of place value is also crucial for ordering numbers, making measurements and handling money.
However, the concept of place value is very abstract. Students need lots of opportunities to develop their understanding through active approaches that make use of concrete and visual representations of the decimal number system. This unit explores the possibilities of several different representations, and also their limitations.
Pause for thought Think back to when you were at school, or perhaps even earlier. Can you remember learning to count, or how to write numbers? This may not be easy because, having learnt to do them when you were very young, they can seem like things that you ‘have always been able to do’. Consequently it is not necessarily easy to support students as they learn about numbers, especially those who encounter difficulties. Now that you are a teacher, have you noticed any student in your class who gets confused about naming numbers where the numerals are reversed (e.g. 64 and 46), or where a number includes a zero? What do you think might be the reason for this? |
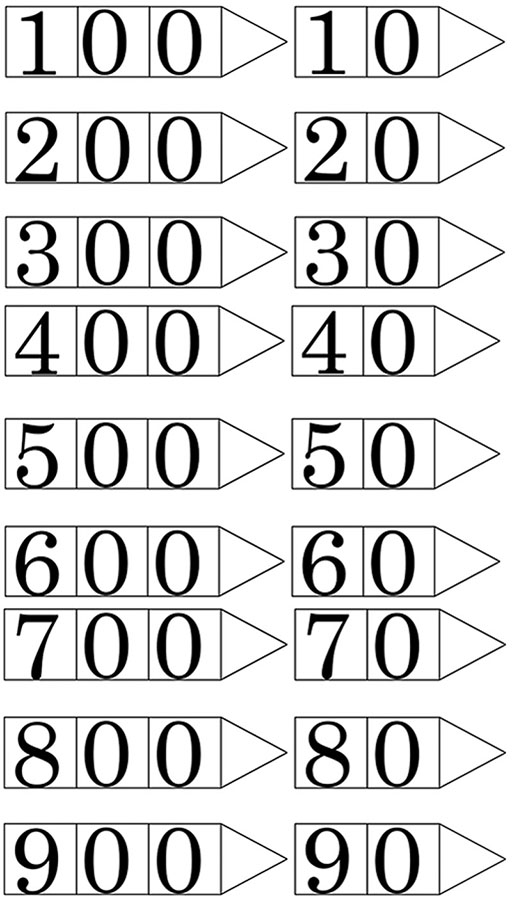
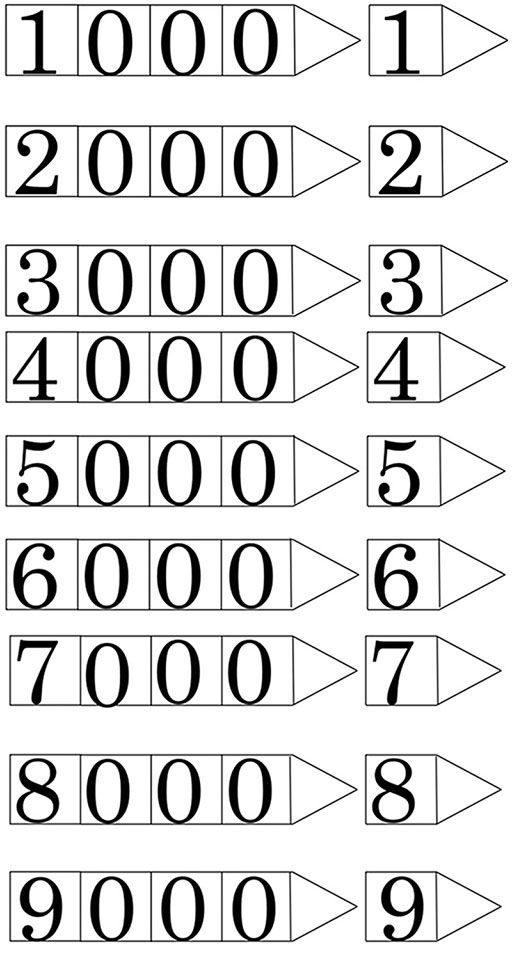
2 Using structured resources: arrow cards
Important features of the place value system can be taught using simple everyday objects such as sticks and bundles of sticks. This unit considers resources that are structured in a specific way to further develop students’ understanding of the decimal number system. They are called structured resources and offer the students a way to develop an image of the number system that can help them understand the magnitude of, and manipulate, numbers (Askew et al., 1996).
Activity 1 focuses on using arrow cards. These are very useful for modelling how numbers are written and represented in hundreds, tens and ones, and for demonstrating the value of each digit.
Before attempting to use the activities in this unit with your students, it would be a good idea to complete all, or at least part, of the activities yourself. It would be even better if you could try them out with a colleague, as that will help you when you reflect on the experience. Trying for yourself will mean you get insights into a learner’s experiences that can in turn influence your teaching and your experiences as a teacher. When you are ready, use the activities with your students and once again, reflect on the way the activity went and the learning that happened. This will help you to develop a more learner-focused teaching environment.
Activity 1: Using arrow cards to teach about place value
Preparation
Plan how you will organise your students into groups. Prepare sufficient sets of arrow cards for your class to work in groups of three or four. Resource 2 provides some templates to copy or print. Once you have made some sets of cards, you will be able to use them again on many occasions.
Look at the list of statements to use with this activity in Resource 3. Select the statements you will want to use in your lesson. Hand out one full set of cards to each group and ask them to lay the cards neatly in front of them. Allow a few minutes for this – it’s valuable experience for the students simply to handle the cards and look at the numbers on them.
The activity
Start by drawing the students’ attention to the arrows on the right ends of the cards. These arrows must always be on top of each other when making a number. Demonstrate making two or three numbers, drawing attention to how the number is made up.
For example, Figure 1 shows how the number 364 is made up of 300 + 60 + 4.

(Source: Wendy Petti, Education World)
Call out the statements that you have selected from Resource 3. Ask each group to prepare their response using the arrow cards and hold it up to show you on a given signal. Many teachers find the phrase ‘3, 2, 1, show!’ works well for this, but you may prefer to use your own signal.
It is important to allow the groups a set amount of time (perhaps 30 seconds or one minute) to prepare their response, and to insist that everyone in the group agrees it is a correct response before holding it up for you to see. This helps to ensure that all of the class remain involved, and also encourages collaborative working and mathematical discussion.
Reflecting on your teaching practice
When you do such an exercise with your class, reflect afterwards on what went well and what went less well. Consider the questions that led to the students being interested and being able to progress, and those you needed to clarify. Such reflection always helps with finding a ‘script’ that helps you engage the students to find mathematics interesting and enjoyable. If they do not understand and cannot do something, they are less likely to become involved. Use this reflective exercise every time you undertake the activities, noting some quite small things that made a difference.
Pause for thought Good questions to trigger such reflection are:
As well as trying out your own ideas to enable all students to participate, you may want to have a look at the key resource ‘Involving all’ for other suggestions. |
3 Using structured resources: base-ten blocks
Although arrow cards are very useful for modelling how numbers are written and represented, they do not in themselves help students develop a sense of the size, or magnitude, of a number.
‘Base-ten’ blocks (also known as Dienes blocks) are a very effective resource for developing this sense of number size, because there is a direct and accurate relationship between the size of each block and its value. For example, in Figure 2, which again represents the number 364, it is clear to see that each 100 block is ten times bigger than each 10 block, and that each 10 block is made up of ten ones.

If you don’t have access to base-ten blocks, then bundles of sticks (or straws, or used matches) can also provide a realistic sense of relative size and can be used in a similar way on a place value board like the one shown in Figure 2. However, they are not as strong visually and are less practical – particularly bundles of 100 sticks!
In Case Study 1 below, Class I Mrs Aparajeeta decided to use base-ten blocks to extend her students’ understanding of the decimal number system.
Case Study 1: Mrs Aparajeeta uses base-ten blocks
For the first part of the lesson, Mrs Aparajeeta wanted the students to work in groups of four with base-ten blocks but she did not have enough blocks for every group. Some of the groups therefore worked with base-ten blocks, and the others worked with some sets she had made out of card (using a template similar to the one in Resource 4). Mrs Aparajeeta also made a large set out of card, which she held up when she was talking to the whole class.
I started by writing 243 on the blackboard and asking ‘How many hundreds are in this number?’ After the correct response was given, I asked two students to come to the front of the class and hold up two of the large cardboard ‘hundred’ blocks. I did the same for the tens and the ones, until the number 243 was represented correctly. To consolidate, I represented the number in three columns on the blackboard as follows:
| Hundreds | Tens | Ones |
|---|---|---|
| 2 | 4 | 3 |
Each group of four was given a large place value board made out of card:
| Hundreds | Tens | Ones |
|---|---|---|
I then asked the students to represent different numbers on their place value board using the base-ten blocks, for example:
- ‘I want you to make the number 324.’
- ‘I want you to make me a number between 240 and 250.’
Altogether I asked the groups to make eight different numbers, so that every student made two each. For each number, I encouraged the other three group members to check that their group’s number had been made correctly.
Because of the limited availability of resources, I did not ask the students to make any numbers greater than 399. This was also helpful because of the limited space, both in the classroom and in the hundreds section on the place value board!
For this lesson, I decided not to include any numbers that included a zero; I would save this for a subsequent lesson.
In the next activity you are asked to try out a similar activity to Mrs Aparajeeta’s using base-ten blocks with your own class.
Video: Involving all |
Activity 2: Using base-ten blocks in class
Preparation
You can organise the activity in a similar way to Mrs Aparajeeta’s lessons as described in Case Study 1. If you don’t have any base-ten blocks, or you do not have enough of them, you will need to make some from card. You will find Resource 4 (a template for base-ten blocks) helpful for this. You will also need to make some place value boards similar to those used by Mrs Aparajeeta.
Before starting the lesson you will need to:
- decide how many students will be in each small group
- think about how you will hand out and collect the resources back in an orderly way; for example, will you set out the base-ten blocks beforehand, or choose one student from each group to collect them from you during the lesson?
- make a list of the numbers you will ask the students to make (including some open instructions, for example ‘a number between 270 and 280’); will you ask the students to make any numbers that include zeros?
- decide how you will ask the groups to share their answers with the rest of the class.
- decide how to introduce the activity. For example, in Case Study 1 Mrs Aparajeeta started by writing a number on the blackboard and getting students to hold large cardboard base-ten blocks to demonstrate how to represent it.
The activity
Now carry out the activity that you planned in part 1.
Pause for thought
|
4 Using a number line to develop understanding of place value
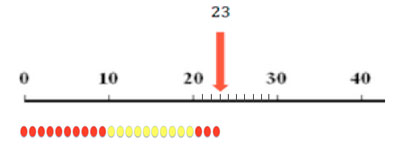
A number line provides a very strong visual image to help develop students’ understanding where any given number is positioned in relation to other numbers of place value. For example, Figure 3 shows the position of the number 23 on the number line, and also its size relative to other numbers, for example 67. The number line also shows that the number 23 is made up of 20 plus 3 (or two lots of ten plus three).

When you are working with your class, you might want to point to various points along a similar number line and ask them to estimate which number you are pointing to. Alternatively, students could work in pairs with their own number lines and challenge each other to estimate numbers and justify their answers.
Another excellent resource to use, either on its own or alongside a number line, is a string of beads. By making up the beads in sets of ten in alternating colours, the number 23, for example, can be illustrated even more clearly than on a number line to consist of two lots of ten plus three (see Figure 4). Making strings of beads is something that many students enjoy, so perhaps you might think about setting up a combined mathematics and craft lesson. This could produce some very useful resources for future lessons on counting and place value.
Figures 5 and 6 below illustrate how the use of number lines to support understanding of place value might be extended for larger numbers as well as for decimals:


These examples are just a few ways that you might be able to use number lines to support students’ understanding of place value in your classroom. No doubt you will be able to think of many more. As well as preparing number lines for specific lessons, or drawing them on the blackboard, it is very useful to have some number lines displayed on the classroom wall more permanently.
Activity 3: Planning a lesson using structured resources
For this activity you will plan a lesson using ideas from this unit. To help with this, you may want to have a look at Resource 5, ‘Planning lessons’.
Start by thinking about the students in your class, and their current level of understanding about place value. Based on this, plan a lesson that aims to build on this understanding and take it forward. You may wish to concentrate on some of the approaches described in this unit, or you may wish to also include some of your own ideas. However, you have to use one of the resources discussed in this unit. Here are just a few important points to consider:
- Be clear about which aspect(s) of place value you want the students to particularly focus on.
- Make sure that all of the students are engaged actively in the lesson.
- Provide opportunities for the students to engage in mathematical discussion with you and with each other.
- There’s no need to stick to just one particular resource in the lesson. Number lines, for example, work effectively alongside all of the other resources you have read about in this unit.
- How will you assess students’ progress through the lesson?
Then carry out your plan in your class.
Once again, after the lesson, set aside some time to reflect on what went well and why, and what you might change the next time you plan a similar lesson. You may find it helpful to use the same questions as before to structure your reflection.
Video: Planning lessons |
Case Study 2: Understanding zeros in a lesson
For Activity 3, Mrs Aparajeeta decided to plan a lesson to help her students understand the concept of zero as a placeholder using base ten blocks. This is the story of how she carried out her plan in her class using activities and resources that the students were familiar with, but with a different focus.
I started by asking three students to each hold up a large base-ten ‘hundred’, and another five students to each hold up a ‘one’.
I asked them ‘How many hundreds do we have?’ The correct response was given, and I chose another student to stand behind the three students and hold up a large card with ‘3’ written on it. I did the same for the ones. I then wrote ‘35’ on the blackboard and said, ‘That doesn’t look quite right to me. What do you all think?’
One of the students, Ram, pointed out ‘You have written 35 but the number should be 305 – you need a zero’. I had also prepared large cards with all of the digits from 0 to 9, and asked Ram to come to the front to stand between the other two groups and to hold up the zero card (Figure 7).

I explained to them why zero was a very important part of the decimal number system. For the number 305 the zero was needed to show that there are no tens. I represented the number on the blackboard to highlight this:
| Hundreds | Tens | Ones |
| 3 | 0 | 5 |
I then repeated the same process to make some more numbers with the students (for example 308, 230 and 200), and recorded them on the place value board. Each time I stressed that ‘we need the zero to show that there are no …’
For the rest of the lesson I repeated the same activities that I used in the base-ten lesson [described in Case Study 2], but this time mainly asked the students to use the base-ten blocks to represent numbers containing a zero, and also included zero cards for the game at the end of the lesson.
I was again very pleased at how enthusiastically the students had taken part in the lesson. I also noticed that doing the same activities again but with a different focus was very successful, because the students were already familiar and confident with what they needed to do.
Pause for thought
|
5 Summary
In this unit you have considered the nature of place value in the decimal number system and learnt about a number of structured resources that can be used to support students’ understanding of place value.
An important point to remember is that although the decimal number system itself is simple in that it only uses ten digits, the concepts that contribute to this simplicity can be abstract and difficult for many students to grasp. It’s therefore important for students to experience as full a range of representations as possible, and to experience these representations regularly alongside reading and writing the numbers.
You have been encouraged to try out some classroom approaches for involving all students as active participants in lessons and for facilitating students to engage in mathematical discussion and to work collaboratively in small groups. Hopefully, you have enjoyed working in this way and seen the benefit in your students’ learning. Remember, these approaches can be used for any area of the mathematics curriculum – not just place value!
Pause for thought Identify three techniques or strategies you have learned in this unit that you might use in your classroom, and two ideas that you want to explore further. |
Resources
Resource 1: NCF/NCFTE teaching requirements
This unit links to the following teaching requirements of the NCF (2005) and NCFTE (2009) and will help you to meet those requirements:
- View students as active participants in their own learning and not as mere recipients of knowledge; how to encourage their capacity to construct knowledge; how to shift learning away from rote methods.
- Let students learn important mathematics and see mathematics is more than formulas and mechanical procedures.
Resource 2: Templates for arrow cards
If possible, prepare the cards in three different colours by printing this resource on coloured paper, or by adding colour to them yourself. This helps to emphasise the concept of place value, and also makes it easier for the students to organise the cards. It is also a good idea to make one larger set for yourself to use when you are demonstrating how to make numbers to the whole class.
Resource 3: ‘Show me …’ suggestions for place value arrow cards
Show me:
- a two-digit number
- a three-digit number
- 26 … 258 … 702 … 79 … 790
- a number between 10 and 99
- a number between 240 and 250
- a two-digit number that doesn’t contain any units
- a three-digit number that doesn’t have any tens
- a three-digit number with all the digits the same.
Start by making 532. Now make:
- a number that is one more
- a number that is one less
- a number that is ten more
- a number that is ten less
- a number that is 50 more
- a number that is 20 less.
Start with the number 6. Now show me:
- a number that is ten times more
- a number that is 100 times more.
Start with the number 700. Now show me:
- a number that is ten times less
- a number that is 100 times less.
How many other questions can you think of?
Resource 4: Template for base-ten blocks
blocks. (Source: Margo Lynn Mancus)
Resource 5: Planning lessons
Why planning and preparing are important
Good lessons have to be planned. Planning helps to make your lessons clear and well-timed, meaning that students can be active and interested. Effective planning also includes some in-built flexibility so that teachers can respond to what they find out about their students’ learning as they teach. Working on a plan for a series of lessons involves knowing the students and their prior learning, what it means to progress through the curriculum, and finding the best resources and activities to help students learn.
Planning is a continual process to help you prepare both individual lessons as well as series of lessons, each one building on the last. The stages of lesson planning are:
- being clear about what your students need in order to make progress
- deciding how you are going to teach in a way that students will understand and how to maintain flexibility to respond to what you find
- looking back on how well the lesson went and what your students have learnt in order to plan for the future.
Planning a series of lessons
When you are following a curriculum, the first part of planning is working out how best to break up subjects and topics in the curriculum into sections or chunks. You need to consider the time available as well as ways for students to make progress and build up skills and knowledge gradually. Your experience or discussions with colleagues may tell you that one topic will take up four lessons, but another topic will only take two. You may be aware that you will want to return to that learning in different ways and at different times in future lessons, when other topics are covered or the subject is extended.
In all lesson plans you will need to be clear about:
- what you want the students to learn
- how you will introduce that learning
- what students will have to do and why.
You will want to make learning active and interesting so that students feel comfortable and curious. Consider what the students will be asked to do across the series of lessons so that you build in variety and interest, but also flexibility. Plan how you can check your students’ understanding as they progress through the series of lessons. Be prepared to be flexible if some areas take longer or are grasped quickly.
Preparing individual lessons
After you have planned the series of lessons, each individual lesson will have to be planned based on the progress that students have made up to that point. You know what the students should have learnt or should be able to do at the end of the series of lessons, but you may have needed to re-cap something unexpected or move on more quickly. Therefore each individual lesson must be planned so that all your students make progress and feel successful and included.
Within the lesson plan you should make sure that there is enough time for each of the activities and that any resources are ready, such as those for practical work or active groupwork. As part of planning materials for large classes you may need to plan different questions and activities for different groups.
When you are teaching new topics, you may need to make time to practise and talk through the ideas with other teachers so that you are confident.
Think of preparing your lessons in three parts. These parts are discussed below.
1 The introduction
At the start of a lesson, explain to the students what they will learn and do, so that everyone knows what is expected of them. Get the students interested in what they are about to learn by allowing them to share what they know already.
2 The main part of the lesson
Outline the content based on what students already know. You may decide to use local resources, new information or active methods including groupwork or problem solving. Identify the resources to use and the way that you will make use of your classroom space. Using a variety of activities, resources, and timings is an important part of lesson planning. If you use various methods and activities, you will reach more students, because they will learn in different ways.
3 The end of the lesson to check on learning
Always allow time (either during or at the end of the lesson) to find out how much progress has been made. Checking does not always mean a test. Usually it will be quick and on the spot – such as planned questions or observing students presenting what they have learnt – but you must plan to be flexible and to make changes according to what you find out from the students’ responses.
A good way to end the lesson can be to return to the goals at the start and allowing time for the students to tell each other and you about their progress with that learning. Listening to the students will make sure you know what to plan for the next lesson.
Reviewing lessons
Look back over each lesson and keep a record of what you did, what your students learnt, what resources were used and how well it went so that you can make improvements or adjustments to your plans for subsequent lessons. For example, you may decide to:
- change or vary the activities
- prepare a range of open and closed questions
- have a follow-up session with students who need extra support.
Think about what you could have planned or done even better to help students learn.
Your lesson plans will inevitably change as you go through each lesson, because you cannot predict everything that will happen. Good planning will mean that you know what learning you want to happen and therefore you will be ready to respond flexibly to what you find out about your students’ actual learning.
Additional resources
- ‘Teaching place value with number cards’ by Wendi Petty: http://www.educationworld.com/ a_curr/ mathchat/ mathchat024.shtml
- A newly developed maths portal by the Karnataka government: http://karnatakaeducation.org.in/ KOER/ en/ index.php/ Portal:Mathematics
- National Centre for Excellence in the Teaching of Mathematics: https://www.ncetm.org.uk/
- National STEM Centre: http://www.nationalstemcentre.org.uk/
- National Numeracy: http://www.nationalnumeracy.org.uk/ home/ index.html
- BBC Bitesize: http://www.bbc.co.uk/ bitesize/
- Khan Academy’s math section: https://www.khanacademy.org/ math
- NRICH: http://nrich.maths.org/ frontpage
- Art of Problem Solving’s resources page: http://www.artofproblemsolving.com/ Resources/ index.php
- Teachnology: http://www.teach-nology.com/ worksheets/ math/
- Math Playground’s logic games: http://www.mathplayground.com/ logicgames.html
- Maths is Fun: http://www.mathsisfun.com/
- Coolmath4kids.com: http://www.coolmath4kids.com/
- National Council of Educational Research and Training’s textbooks for teaching mathematics and for teacher training of mathematics: http://www.ncert.nic.in/ ncerts/ textbook/ textbook.htm
- AMT-01 Aspects of Teaching Primary School Mathematics, Block 1 (‘Aspects of Teaching Mathematics’), Block 2 (‘Numbers (I)’), Block 3 (‘Numbers (II)’): http://www.ignou4ublog.com/ 2013/ 06/ ignou-amt-01-study-materialbooks.html
- LMT-01 Learning Mathematics, Block 1 (‘Approaches to Learning’) Block 2 (‘Encouraging Learning in the Classroom’), Block 4 (‘On Spatial Learning’), Block 6 (‘Thinking Mathematically’): http://www.ignou4ublog.com/ 2013/ 06/ ignou-lmt-01-study-materialbooks.html
- Manual of Mathematics Teaching Aids for Primary Schools, published by NCERT: http://www.arvindguptatoys.com/ arvindgupta/ pks-primarymanual.pdf
- Learning Curve and At Right Angles, periodicals about mathematics and its teaching: http://azimpremjifoundation.org/ Foundation_Publications
- Textbooks developed by the Eklavya Foundation with activity-based teaching mathematics at the primary level: http://www.eklavya.in/ pdfs/ Catalouge/ Eklavya_Catalogue_2012.pdf
- Central Board of Secondary Education’s books and support material (also including List of Hands-on Activities in Mathematics for Classes III to VIII) – select ‘CBSE publications’, then ‘Books and support material’: http://cbse.nic.in/ welcome.htm
References
Acknowledgements
Except for third party materials and otherwise stated below, this content is made available under a Creative Commons Attribution-ShareAlike licence (http://creativecommons.org/ licenses/ by-sa/ 3.0/). The material acknowledged below is Proprietary and used under licence for this project, and not subject to the Creative Commons Licence. This means that this material may only be used unadapted within the TESS-India project and not in any subsequent OER versions. This includes the use of the TESS-India, OU and UKAID logos.
Grateful acknowledgement is made to the following sources for permission to reproduce the material in this unit:
Figure 1: Wendy Petti, Education World, http://www.educationworld.com/ a_curr/ mathchat/ mathchat024.shtml.
Figure 2: Wendy Petti, Education World, http://www.educationworld.com/ a_curr/ mathchat/ mathchat024.shtml.
Figure R3.1: Margo Lynn Mancus, http://mason.gmu.edu/ ~mmankus/ Handson/ b10blocks.htm.
Every effort has been made to contact copyright owners. If any have been inadvertently overlooked the publishers will be pleased to make the necessary arrangements at the first opportunity.
Video (including video stills): thanks are extended to the teacher educators, headteachers, teachers and students across India who worked with The Open University in the productions.