Use 'Print preview' to check the number of pages and printer settings.
Print functionality varies between browsers.
Printable page generated Monday, 29 June 2026, 12:04 AM
TI-AIE: Alternative conceptions: heat and temperature
What this unit is about
From an early age, children develop ideas and personal theories to explain the world around them and how it works. Children’s ideas form the basis of their predictions and rules for action; for example, they quickly learn that a fire is hot and not to touch it. They learn that stones sink and wood floats. By the time children go to school, they have already formed their own theories about the science phenomena you are teaching them. Quite often, their ideas are different from the accepted scientific understanding.
This unit examines the alternative conceptions (sometimes referred to as misconceptions) associated with the topic of heat and temperature. It goes on to look at how you might help to develop your students’ alternative conceptions to embrace the accepted science ideas through your teaching.
What you can learn in this unit
- How to find out or assess what alternative conceptions your students hold.
- About alternative conceptions that your students might hold in relation to heat and temperature.
- How you can change and develop students’ naïve ideas and alternative conceptions.
- How to design activities to help your students understand the difference between heat and temperature.
Why this approach is important
Being aware of your students’ ideas and knowing how to develop them is important because:
- their ideas can affect how your students learn and the extent to which they can accept the scientific ideas you teach them about
- your teaching will be more successful in supporting meaningful understanding, rather than superficial rote learning
- it enables you to plan experiences that will develop or change their ideas.
Pause for thought
|
1 Your own understanding
As a teacher, you need to have a good understanding of the topic you are teaching. You also need to be aware of what your students might find conceptually difficult and the potential areas of confusion. You can find out what ideas your students hold through various assessment techniques, such as concept mapping (see the unit Observing patterns: shadows and night & day), predict-observe-explain (see the unit Using demonstration: food), drawings and true/false quizzes.
Activity 1: Exploring your own understanding
Resource 1 is a true/false quiz about heat and temperature. Do this quiz yourself, without looking up any of the answers. When you have completed it, use reference material, such as the textbook, to check your answers to any questions you were not sure about.
Resources 2 and 3, ‘Assessing progress and performance’ and ‘Monitoring and giving feedback’, provide useful information about the value of finding out what your students know and challenging their thinking when it is confused. Giving supportive and helpful feedback will encourage your students to question their ideas more and want to explore their ideas further.
Pause for thought
|
At first, these questions seem relatively simple but it is not uncommon to feel unsure of some of the answers. Even though this was called a ‘quiz’ rather than a ‘test’ to make it less threatening, you may still have experienced some anxiety about your understanding being tested. The same feelings would be experienced by your students. Therefore, when you are probing your students’ understanding of any topic, it is important to put them at ease. They need to be reassured that they are not being tested. They need to know that you are interested in their ideas so that you can teach them more effectively.
Video: Assessing progress and performance |
Case Study 1: Finding out about students’ ideas
Mr Mishra used prediction to find out what his Class VII students understood and believed about heat and temperature when liquids were mixed. Here he explains what he did and found out.
I decided to ask the students to predict what would happen when I mixed different volumes of water at different temperatures. I started by asking them what a thermometer does. Most knew it was used to measure the temperature, but a few students thought it measured heat. I just said that was interesting, rather than telling them the answer, because I wanted them to feel comfortable in revealing their ideas.
Next, I took two beakers of water of the same volume and temperature – the water was cold. I asked one student to read the temperature of each beaker to check they were the same. I asked the students to write down their prediction about what would happen to the temperature of the water when both beakers of water were mixed in one container. Would the temperature go down, go up or stay the same? I also asked them to predict the final temperature. Most of the students thought it would be the same, but some thought the temperature would go down because it was a bigger volume of water, which I hadn’t expected.
I followed the same procedure for different volumes and temperatures of water. I used:
- one litre of hot water and one litre of cold water
- half a litre of hot water and one litre of cold water
- one litre of hot water and half a litre of cold water.
It didn’t take long to do this activity, and what the students predicted and the reasons behind their predictions helped me to understand their current thinking. For example, two students thought ‘hot’ was stronger than ‘cold’. Although most predicted correctly whether the temperature would go up or down or stay the same, they were not so confident when predicting the temperature of the mixtures. Some students just subtracted one temperature from the other. Some added them up.
Pause for thought
|
2 Alternative conceptions about heat and temperature
The true/false quiz you did in Activity 1 is based on some of the alternative conceptions (sometimes referred to as misconceptions) about heat and temperature found by researchers. Some of the alternative conceptions held by children are as follows:
- Heat is a substance, like water or air, that flows in and out of objects.
- Hot and cold are separate entities and not part of a continuum.
- Cold is the opposite of heat.
- There are different sorts of heat, identified by the source or properties of the object concerned.
- Heat is hot, but temperature can be cold or hot.
- Temperature and heat are the same.
- Cold objects do not possess heat.
Pause for thought Go back to the list you made earlier about the experiences of heat and temperature that children are likely to have through their lives outside school.
|
This is a science topic that children find difficult. These difficulties are partly due to the way in which the word ‘heat’ is used in everyday language. Millar (2000) pointed out that ‘heat’ is used both as a noun (e.g. the heat in an object) and as a verb (e.g. to heat an object). So the word ‘heat’ is used to describe the energy in a hot object as well as the process of energy transfer between two objects because of a difference in temperature (2000, p. 9). This highlights the need for you, as a teacher, to be careful with your use of language and to provide your students with the opportunity to explore the meanings behind the terms used.
Pause for thought Can you think of any other science topics where the scientific explanation is hard to grasp because it seems contrary to our everyday experience? |
3 The ideas children have about heat and temperature
You are now going to find out what ideas your students hold about heat and temperature.
Activity 2: What ideas do your students hold?
You can either take the same approach as Mr Mishra or use the true/false quiz. Whichever approach you use, you will need to make sure that it is appropriate to the age of your students. For example, it would be inappropriate to find out what very young students know about thermometers.
A true/false quiz needs to have questions that will be understood, and the number of questions should be reduced for younger students. You could put the statements on the chalkboard and get the students to write their responses in their books or allow the students to tell you their ideas.
Before you start, tell the students that:
- you are interested in their ideas
- you don’t want them to work together this time because you want this to be their ideas only
- this is not a test and not to worry about wrong or right answers
- you are going to collect in their answers to help you plan your teaching.
Pause for thought
|
4 Helping students to change alternative conceptions
After you find out what ideas your students hold, what can you as a science teacher do to change their alternative conceptions and help them to construct a more scientific understanding? In the next case study you will find out how one teacher approached her lesson.
Case Study 2: Developing students’ understanding
Mrs Puthir’s students had learned how to use a thermometer and she carried out a true/false quiz. In this case study she talks of what she found out and the lesson she taught to change their ideas.
I teach a large class of 66 Class VI students. I had found out that many of them believed that the temperature of an object depended on what it is made of. I wanted to teach them about temperature and how all objects will be the same temperature as their surroundings. Also, I wanted to get them to understand why temperature changes.
I decided to get the children to measure the temperature of different substances. I had lots of examples, including cloth, fur, a tile, a metal spoon, a fruit, some soil, a wood block with a hole in it for the thermometer, a cup of hot tea, some water at room temperature and some very cold water.
I told the students to work in groups of six. I didn’t have enough equipment to give every group a full set. I was also worried about them knocking over the hot liquid. So I decided to put the substances around the classroom with a thermometer. I told the students that they had to send two from the group to measure the temperature of an object. Both had to take the temperature so they got two readings. This way, students got to practice using the thermometer, as well as confirming they had read it correctly. I drew a table on the blackboard (Table 1) for them to copy and complete.
| Object of substance | Temperature 1 | Temperature 2 |
|---|---|---|
I showed them how to do one reading and reminded them of how to read the scale on the thermometer. Each pair did two or three substances.
When they finished, we went through their results as a class. They had all found the same temperatures for most substances. I asked if any results had surprised them. Some students had thought fur and cloth would have higher temperatures than the tile and the metal spoon, which they said felt colder.
The only difference was with the hot water and cold water. The groups had recorded different temperatures. I asked why this was. Was the thermometer broken? They didn’t think so, and thought it was because the hot water was losing heat and the cold water was warming up. I asked what the temperature of both would be if we left them long enough. Their answers were interesting and diverse. From there, I explained how temperature measures the intensity of the heat in an object and how it is transferred until it is the same temperature as the surroundings.
Pause for thought
|
Once you have tried to develop your students’ ideas, you need to assess their understanding. You might use the same technique that you used to find out about their misconceptions, or give them new situations to which they can apply their new understanding.
5 Developing students’ scientific understanding
Now read Case Study 3 and read Resource 2, ‘Assessing progress and performance’, especially the sections on assessment for learning and knowing where students are in their learning.
Case Study 3: Developing students’ understanding of the difference between heat and temperature
In this case study, Mr Mishra talks about the lesson he did after he had found out about the ideas his students held about heat and temperature, as described in Case Study 1.
The lesson involved students investigating changes in temperature when water at different temperatures is mixed in different volumes. I gave them some volumes to do, but said they could do others as well if they had time. I wrote the instructions on the chalkboard. The students had to complete a table of results. They recorded the volumes of the water and the starting temperature. They had to predict the resulting temperature and then record the actual temperature.
Once they had done this, I did a demonstration to explain what happens. I used a model to aid my explanation. I used a dye to represent heat. The intensity of the colour represented the temperature. I had several clear containers already prepared with different amounts of dye to represent water at different temperatures. I checked the students understood the model by asking them to tell me what order to put the containers in, going from coolest to hottest. Even the ‘cold’ beaker had some dye, although it was very pale. I then mixed different amounts of the different concentrations to show what happens when different volumes of water at different temperatures were mixed. Each time I asked the students for their predictions and gave them time to talk with their neighbour.
The students liked this and enjoyed making the predictions about what would happen to the colour. They seemed to find it easier to predict and didn’t make the same mistakes as they did before.
Once they had seen the demonstration, I asked them to discuss and explain the results from their practical investigation and predict what would happen in other situations I gave them. I could see that this activity had helped them to gain a better understanding of heat and temperature. It had changed their ideas about heat and temperature.
Mr Mishra’s model appeared to help his students understand heat and temperature. He made the abstract concept of temperature more concrete by replacing it with colour intensity. The students could see the resulting ‘temperature’. This helped them to gain a qualitative understanding, before going on to develop a quantitative understanding.
Pause for thought
|
When using analogies and models, you must be alert to the limitations and the possibility of reinforcing alternative conceptions. The dye model used by Mr Mishra might reinforce the idea that heat is a substance that flows. It is also limited by being a static representation. Whereas a hot liquid will cool, this is not shown by the dye model. The best way to deal with these limitations is to ask the students why the model is not a perfect one and what it does show. Also note that Mr Mishra did not add the dye to the water in front of the students, as this would have reinforced the idea that heat is a substance.
Activity 3: Teaching about heat and temperature
You are now going to teach your students in order to develop their understanding of the difference between heat and temperature. You should read Resource 4 before you start your plan as this will help you decide what to do. You need to plan for the activity following these steps, but before you start, read the key resource ‘Planning lessons’, which summarises the key stages in planning and offers insight into the importance of planning. You need to plan for the activity following these steps:
- Identify what you want your students to learn from this activity and what alternative conceptions you will focus on.
- Decide on how you will challenge their alternative conceptions or present the new ideas. For example, you might measure the temperature of iced water, heat the water with a candle and ask where the heat has gone, even though the water is still cold.
- List the apparatus and materials you will need.
- Decide how you will organise the activity. It might be a demonstration or a class practical activity.
- Decide whether you want the students to work in pairs, groups or individually.
- Decide how you will support those who need more help with their learning.
- Plan your explanation. How will you explain the ideas that you want them to learn? Will your explanation use a model or an analogy? For example, you could use the dye model to show that even cold objects have heat energy.
- What will your students do with the new ideas to consolidate them? Will they discuss and apply them to new contexts? Or will they work on other examples? For example, you could give them some true/false questions.
Most of your students will have alternative conceptions, beliefs or theories of their own in many of the science topics you teach. Therefore, you need to become aware of the ideas your students already hold about the science you are teaching by providing opportunities for them to reveal and discuss their ideas. This will reveal the issues for you to address as you plan your lessons.
6 Summary
Through this unit, you have explored the idea of alternative conceptions and examined examples of the ones held about heat and temperature. These alternative conceptions are not only confined to children. You will find many adults hold ideas that are different from the scientifically accepted ones. There are various ways in which you can find out what ideas your students hold, as traditional test questions often do not reveal the conceptual understanding of the students.
Changing your students’ alternative conceptions can be challenging, as they may be hard for the students to give up and change. One approach goes the heart of being a scientist and reflects how scientific knowledge and theories have developed over time. This is through gaining evidence and considering different explanations for observations. Therefore, teaching science in this way supports your students in becoming young scientists, as well as developing their scientific understanding.
Resources
Resource 1: Heat and temperature true/false quiz
Read each statement in Table R1.1 and decide whether you think it is true or false. If you are not sure, tick the ‘Not sure’ box.
| Statement | True | False | Not sure | |
|---|---|---|---|---|
| 1 | Heat is the total amount of energy in an object. | |||
| 2 | All objects contain heat. | |||
| 3 | Thermal energy means the same as heat. | |||
| 4 | Heat is a form of energy. | |||
| 5 | Temperature measures heat. | |||
| 6 | Temperature and heat are the same. | |||
| 7 | An iceberg has more heat than a cup of hot tea. | |||
| 8 | Heat is the energy transferred between objects because of a temperature difference between them. | |||
| 9 | ‘Hot’ and ‘cold’ are words that describe the temperature of an object. | |||
| 10 | ‘Hot’ and ‘cold’ are words that describe the amount of thermal energy an object has. | |||
| 11 | Heat is a substance, like air or water, that flows in and out of objects. | |||
| 12 | ‘Cold’ is the opposite of ‘heat’. | |||
| 13 | Only hot objects have heat. | |||
| 14 | There are different types of heat, such as natural heat and normal heat. | |||
| 15 | Some objects are colder than others because of what they are made from, e.g. such as floor tiles and metal. | |||
| 16 | When two cups of cold water of the same temperature are mixed, the water will be twice as cold. | |||
| 17 | Thermometers are used for measuring heat. | |||
| 18 | The temperature of iced water at 0 °C will go down when more ice is added. | |||
Resource 2: Assessing progress and performance
Assessing students’ learning has two purposes:
- Summative assessment looks back and makes a judgement on what has already been learnt. It is often conducted in the form of tests that are graded, telling students their attainment on the questions in that test. This also helps in reporting outcomes.
- Formative assessment (or assessment for learning) is quite different, being more informal and diagnostic in nature. Teachers use it as part of the learning process, for example questioning to check whether students have understood something. The outcomes of this assessment are then used to change the next learning experience. Monitoring and feedback are part of formative assessment.
Formative assessment enhances learning because in order to learn, most students must:
- understand what they are expected to learn
- know where they are now with that learning
- understand how they can make progress (that is, what to study and how to study)
- know when they have reached the goals and expected outcomes.
As a teacher, you will get the best out of your students if you attend to the four points above in every lesson. Thus assessment can be undertaken before, during and after instruction:
- Before: Assessing before the teaching begins can help you identify what the students know and can do prior to instruction. It determines the baseline and gives you a starting point for planning your teaching. Enhancing your understanding of what your students know reduces the chance of re-teaching the students something they have already mastered or omitting something they possibly should (but do not yet) know or understand.
- During: Assessing during classroom teaching involves checking if students are learning and improving. This will help you make adjustments in your teaching methodology, resources and activities. It will help you understand how the student is progressing towards the desired objective and how successful your teaching is.
- After: Assessment that occurs after teaching confirms what students have learnt and shows you who has learnt and who still needs support. This will allow you to assess the effectiveness of your teaching goal.
Before: being clear about what your students will learn
When you decide what the students must learn in a lesson or series of lessons, you need to share this with them. Carefully distinguish what the students are expected to learn from what you are asking them to do. Ask an open question that gives you the chance to assess whether they have really understood. For example:
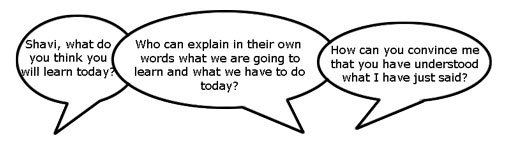
Give the students a few seconds to think before they answer, or perhaps ask the students to first discuss their answers in pairs or small groups. When they tell you their answer, you will know whether they understand what it is they have to learn.
Before: knowing where students are in their learning
In order to help your students improve, both you and they need to know the current state of their knowledge and understanding. Once you have shared the intended learning outcomes or goals, you could do the following:
- Ask the students to work in pairs to make a mind map or list of what they already know about that topic, giving them enough time to complete it but not too long for those with few ideas. You should then review the mind maps or lists.
- Write the important vocabulary on the board and ask for volunteers to say what they know about each word. Then ask the rest of the class to put their thumbs up if they understand the word, thumbs down if they know very little or nothing, and thumbs horizontal if they know something.
Knowing where to start will mean that you can plan lessons that are relevant and constructive for your students. It is also important that your students are able to assess how well they are learning so that both you and they know what they need to learn next. Providing opportunities for your students to take charge of their own learning will help to make them life-long learners.
During: ensuring students’ progress in learning
When you talk to students about their current progress, make sure that they find your feedback both useful and constructive. Do this by:
- helping students know their strengths and how they might further improve
- being clear about what needs further development
- being positive about how they might develop their learning, checking that they understand and feel able to use the advice.
You will also need to provide opportunities for students to improve their learning. This means that you may have to modify your lesson plans to close the gap between where your students are now in their learning and where you wish them to be. In order to do this you might have to:
- go back over some work that you thought they knew already
- group students according to needs, giving them differentiated tasks
- encourage students to decide for themselves which of several resources they need to study so that they can ‘fill their own gap’
- use ‘low entry, high ceiling’ tasks so that all students can make progress – these are designed so that all students can start the task but the more able ones are not restricted and can progress to extend their learning.
By slowing the pace of lessons down, very often you can actually speed up learning because you give students the time and confidence to think and understand what they need to do to improve. By letting students talk about their work among themselves, and reflect on where the gaps are and how they might close them, you are providing them with ways to assess themselves.
After: collecting and interpreting evidence, and planning ahead
While teaching–learning is taking place and after setting a classwork or homework task, it is important to:
- find out how well your students are doing
- use this to inform your planning for the next lesson
- feed it back to students.
The four key states of assessment are discussed below.
Collecting information or evidence
Every student learns differently, at their own pace and style, both inside and outside the school. Therefore, you need to do two things while assessing students:
- Collect information from a variety of sources – from your own experience, the student, other students, other teachers, parents and community members.
- Assess students individually, in pairs and in groups, and promote self-assessment. Using different methods is important, as no single method can provide all the information you need. Different ways of collecting information about the students’ learning and progress include observing, listening, discussing topics and themes, and reviewing written class and homework.
Recording
In all schools across India the most common form of recording is through the use of report card, but this may not allow you to record all aspects of a student’s learning or behaviours. There are some simple ways of doing this that you may like to consider, such as:
- noting down what you observe while teaching–learning is going on in a diary/notebook/register
- keeping samples of students’ work (written, art, craft, projects, poems, etc.) in a portfolio
- preparing every student’s profile
- noting down any unusual incidents, changes, problems, strengths and learning evidences of students.
Interpreting the evidence
Once information and evidence have been collected and recorded, it is important to interpret it in order to form an understanding of how each student is learning and progressing. This requires careful reflection and analysis. You then need to act on your findings to improve learning, maybe through feedback to students or finding new resources, rearranging the groups, or repeating a learning point.
Planning for improvement
Assessment can help you to provide meaningful learning opportunities to every student by establishing specific and differentiated learning activities, giving attention to the students who need more help and challenging the students who are more advanced.
Resource 3: Monitoring and giving feedback
Improving students’ performance involves constantly monitoring and responding to them, so that they know what is expected of them and they get feedback after completing tasks. They can improve their performance through your constructive feedback.
Monitoring
Effective teachers monitor their students most of the time. Generally, most teachers monitor their students’ work by listening and observing what they do in class. Monitoring students’ progress is critical because it helps them to:
- achieve higher grades
- be more aware of their performance and more responsible for their learning
- improve their learning
- predict achievement on state and local standardised tests.
It will also help you as a teacher to decide:
- when to ask a question or give a prompt
- when to praise
- whether to challenge
- how to include different groups of students in a task
- what to do about mistakes.
Students improve most when they are given clear and prompt feedback on their progress. Using monitoring will enable you to give regular feedback, letting your students know how they are doing and what else they need to do to advance their learning.
One of the challenges you will face is helping students to set their own learning targets, also known as self-monitoring. Students, especially struggling ones, are not used to having ownership of their own learning. But you can help any student to set their own targets or goals for a project, plan out their work and set deadlines, and self- monitor their progress. Practising the process and mastering the skill of self-monitoring will serve them well in school and throughout their lives.
Listening to and observing students
Most of the time, listening to and observing students is done naturally by teachers; it is a simple monitoring tool. For example, you may:
- listen to your students reading aloud
- listen to discussions in pair or groupwork
- observe students using resources outdoors or in the classroom
- observe the body language of groups as they work.
Make sure that the observations you collect are true evidence of student learning or progress. Only document what you can see, hear, justify or count.
As students work, move around the classroom in order to make brief observation notes. You can use a class list to record which students need more help, and also to note any emerging misunderstandings. You can use these observations and notes to give feedback to the whole class or prompt and encourage groups or individuals.
Giving feedback
Feedback is information that you give to a student about how they have performed in relation to a stated goal or expected outcome. Effective feedback provides the student with:
- information about what happened
- an evaluation of how well the action or task was performed
- guidance as to how their performance can be improved.
When you give feedback to each student, it should help them to know:
- what they can actually do
- what they cannot do yet
- how their work compares with that of others
- how they can improve.
It is important to remember that effective feedback helps students. You do not want to inhibit learning because your feedback is unclear or unfair. Effective feedback is:
- focused on the task being undertaken and the learning that the student needs to do
- clear and honest, telling the student what is good about their learning as well as what requires improvement
- actionable, telling the student to do something that they are able to do
- given in appropriate language that the student can understand
- given at the right time – if it’s given too soon, the student will think ‘I was just going to do that!’; too late, and the student’s focus will have moved elsewhere and they will not want to go back and do what is asked.
Whether feedback is spoken or written in the students’ workbooks, it becomes more effective if it follows the guidelines given below.
Using praise and positive language
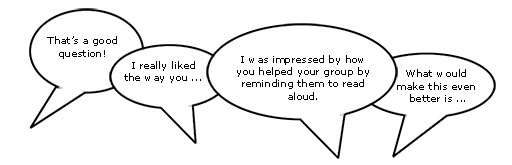
When we are praised and encouraged, we generally feel a great deal better than when we are criticised or corrected. Reinforcement and positive language is motivating for the whole class and for individuals of all ages. Remember that praise must be specific and targeted on the work done rather than about the student themselves, otherwise it will not help the student progress. ‘Well done’ is non-specific, so it is better to say one of the following:
Using prompting as well as correction
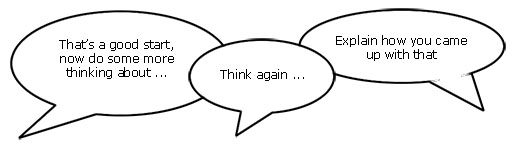
The dialogue that you have with your students helps their learning. If you tell them that an answer is incorrect and finish the dialogue there, you miss the opportunity to help them to keep thinking and trying for themselves. If you give students a hint or ask them a further question, you prompt them to think more deeply and encourage them to find answers and take responsibility for their own learning. For example, you can encourage a better answer or prompt a different angle on a problem by saying such things as:
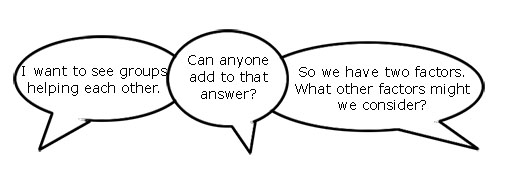
It may be appropriate to encourage other students to help each other. You can do this by opening your questions to the rest of the class with such comments as:
Correcting students with a ‘yes’ or ‘no’ might be appropriate to tasks such as spelling or number practice, but even here you can prompt students to look for emerging patterns in their answers, make connections with similar answers or open a discussion about why a certain answer is incorrect.
Self-correction and peer correction is effective and you can encourage this by asking students to check their own and each other’s work while doing tasks or assignments in pairs. It is best to focus on one aspect to correct at a time so that there is not too much confusing information.
Resource 4: Developing understanding
Alternative misconceptions can be hard to change and can interfere with meaningful learning in science. What you need to do, therefore, is to teach in a way that will help your students to reconstruct their ‘faulty’ ideas and change their conceptual understanding. Sanger and Greenbowe (2000) described conceptual change as requiring the realignment, reorganisation and replacement of ‘existing misconceptions in order to accommodate new ideas’ (2000, p. 522).
Learning is not necessarily simply a case of adding new information to existing ideas and theories. The existing ideas may need dismantling and new ones built to replace them. This is particularly the case in science. Vosniadou et al. (2001) pointed out that scientific explanations of physical phenomena are often not intuitive and contrary to our everyday experience.
There is a great deal of research literature on how teachers can develop students’ scientific understanding and change their alternative conceptions. Simply giving them information through telling is known to be unsuccessful in many instances. The students’ alternative conceptions interfere with their learning of new ideas, and may lead to their rejection. Some of the key approaches you could use are listed below.
- Cognitive conflict occurs when you experience evidence that conflicts with and discredits your existing ideas. For example, if you hold the idea that ice makes water colder, even when it is at 0 °C, it is easy to provide evidence that will be in conflict. You need to use cognitive conflict events carefully. It can be relatively easy to provide the conflicting evidence that results in dissatisfaction with ideas. However, something is needed to replace these ideas if the student is not to be left confused and revert to their previous ideas. So you need to present a better, plausible explanation, or a theory that is understandable and meaningful to the learner.
- Analogies and models can be useful when presenting new ideas. For example, you might use the students themselves to model the particles in water when it is heated and cooled.
- Discussion time contends that learning is not an individual activity but a social one. Through discussion, students can compare their own beliefs with others. Discussions enable students to raise questions and consider the value of supporting evidence for the new ideas. Discussion helps students to make sense of the cognitive conflict experience and new ideas. Even though discussions are time-consuming, they are essential if meaningful learning is to occur.
- History of science. Your students may find science difficult and associate it with ‘brainy’ people. The fact that some extremely clever scientists in the past have held ideas similar to their own is often a revelation. Several authors advocate the use of the storyline approach in teaching for conceptual change (Masson and Vázquez-Abad, 2006). This involves telling the story of the evolution of a scientific concept in chronological order. Such concepts often change from simple to complex and from intuitive to abstract. Through examining the ideas of past scientists, students can examine their own ideas and in a less threatening way.
Additional resources
- Common misunderstandings students may hold about all topics in science, including heat and temperature: http://www.eskimo.com/ %7Ebillb/ miscon/ opphys.html
References
Acknowledgements
This content is made available under a Creative Commons Attribution-ShareAlike licence (http://creativecommons.org/ licenses/ by-sa/ 3.0/), unless identified otherwise. The licence excludes the use of the TESS-India, OU and UKAID logos, which may only be used unadapted within the TESS-India project.
Every effort has been made to contact copyright owners. If any have been inadvertently overlooked the publishers will be pleased to make the necessary arrangements at the first opportunity.
Video (including video stills): thanks are extended to the teacher educators, headteachers, teachers and students across India who worked with The Open University in the productions.