Use 'Print preview' to check the number of pages and printer settings.
Print functionality varies between browsers.
Printable page generated Friday, 19 June 2026, 6:25 PM
TI-AIE: Using local resources: life processes
What this unit is about
In this unit you will develop strategies that will help you make use of your local environment to enhance your teaching. You will be encouraged to think about how to make the learning environment as attractive as possible, how you can improvise scientific equipment, how to use your students as a resource, and what expertise you might be able to draw on in the local community.
Ask any science teacher, anywhere in the world, whether they think they have enough resources to teach science to their satisfaction and you will more than likely find that their answer is ‘No!’ This is particularly true of teachers working in rural areas. It is easy to focus on the difficulties, but good science teachers are resourceful. Even if they do not have access to scientific equipment, they can improvise and make use of local resources in order to teach science. They will also think about the learning environment in their classroom and how to make links between scientific ideas and students’ lives. Trying to teach science without access to resources can be very challenging, even for experienced and knowledgeable teachers.
This unit encourages you to think about what you do have in terms of resources rather than thinking about what you do not have. It shows you how to use locally available resources more imaginatively and effectively to become a resourceful teacher. The teaching topic used to demonstrate these strategies is life processes for Class X. All of the strategies shown can be adapted for use elsewhere in the science curriculum.
What you can learn in this unit
- How to make the most of the resources available to you.
- How to use a range of local resources to support learning in science.
- The benefits of making the learning environment as attractive as possible.
Why this approach is important
Science is a practical subject that is relevant to all our lives. As well as understanding scientific concepts, students need to learn practical skills and be able to make connections between the science that they learn in school and their everyday lives. In order to encourage your students to become active participants in lessons, you need to find ways of engaging and motivating them, and relating the body of science knowledge in the textbook to their lives. If students are motivated and interested then they will learn more effectively.
Doing practical work is one way to help your students become actively involved, and one of the activities in this unit will help you to think about how to improvise practical equipment. However, you can also think about how to enhance the learning environment and how to draw on expertise within your school, or in the local community.
1 Being a resourceful teacher in a challenging context
The purpose of this section is to help you to focus on the resources that you have available in your school, in order to help you teach science. Case Study 1 describes how a group of teachers responded to the challenge of being resourceful.
Case Study 1: Teachers brainstorm how to be resourceful
A group of mixed subject teachers working in challenging circumstances recently brainstormed suggestions about how to be resourceful despite such difficult conditions. They came up with many ideas – the list below shows the eight that were thought to be the most useful:
- Make maximum use of the local environment as a teaching aid. All schools have an environment that can be exploited for discussion, investigations and sources of classroom data.
- Make maximum use of the local community as a teaching aid. Parents and others are an important source for stories, for remembering what things were like in the past, and for having opinions on everyday issues. They can also help to find materials for lessons such as plants (use vegetables such as onions and tomatoes), chicken feet (to look at muscles and tendons), fish (to look at gills and external structures) from the market – perhaps something that is left over at the end of the day or from the farm.
- Exploit the communication systems currently in place. Nearly all communities now have access to radio, often with many channels available. Use some of the programmes available to stimulate debate and discussion.
- Make teaching aids from materials around the school. Old boxes, magazines, newspapers and even plastic bottles can be turned into teaching aids. (One of the teachers in the discussion group described how she had built a model of a volcano using such materials. The model could be opened out to show the ‘inner workings’ of the volcano.)
- Cooperate with other schools, directly or by exchange of letters. This can be highly motivating for students and it opens up all sorts of possible exchanges of information (for example, exchanges of information between urban and rural schools can lead to interesting comparisons).
- Let the school become a resource for the local community: one teacher described how mothers came to some lessons and thus improved their own literacy.
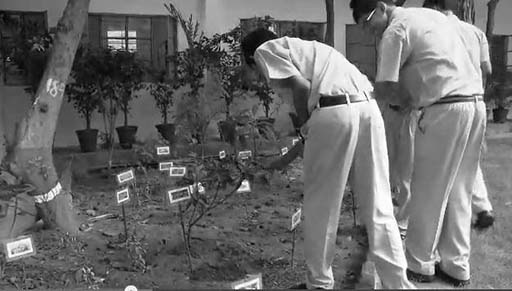
- Set up a school garden: Plants can be grown in even a small area. Students of all ages can benefit from participating in the planning, planting, growing and use stages in the development of a garden.
- Use the cybercafé in the local town to look at websites with more information about current topics.
For further ideas on using resources, look at Resource 1.
Pause for thought
|
Activity 1: Brainstorming to find resources
Like Case Study 1, this is an activity that is best done by you with a group of your science colleagues. The main purpose of this activity is to raise your awareness of the resources you have in your school. You might find that you are pleasantly surprised at the resources you have available that you were not aware of before.
Think about the next topic you are going to teach:
- Brainstorm all the resources available to you and your group of colleagues in your school.
- Brainstorm all the resources you would like to have available.
- Brainstorm alternatives could you use instead.
If you are not familiar with the ‘brainstorming’ technique, you might find it helpful to look at the unit on this topic.
The activity is also concerned with getting you into the mind-set to think imaginatively and creatively about resource problems. It may be the case that you can’t think of any alternatives to some or indeed all of the resource issues. If so, don’t be alarmed. Ideas may occur to you as you progress through this and other units, so you might want to revisit this section at a later stage.
2 Thinking about the learning environment
People put a considerable amount of time and energy into making their home surroundings as pleasant as possible. Making your classroom welcoming and interesting will help to engage your students in learning science. Magazines and newspapers are a helpful resource as they often have articles and pictures that are relevant to the science curriculum. You can also display your students’ work.
Activity 2: Making your classroom more interesting and exciting.
Start to keep a file or box of interesting articles and pictures to use in displays. Keep your eyes and ears open. Keep up to date with current and contemporary affairs across your local state, India and around the world. Any story related to science from any source is worth keeping. You never know when it might be useful!
When you have collected a number of pictures and articles, make a display relevant to the topics you are currently teaching. You could include some of your students’ work and you could ask some students to help you in preparing the display.
In Case Study 2, Mr Gupta describes how he improved the classroom environment by creating wall displays and gathering relevant items.
Case Study 2: Mr Gupta decorates his classroom
Mr Gupta reflects on how he used magazine and newspaper cuttings to decorate his classroom in a colourful and cheap way.
I had to travel into our nearby city one day to see a relative. We met in a hotel and while I was waiting I noticed that there were some interesting magazines on the tables in the reception area that had very good pictures of many unusual animals and their habitats. It occurred to me that these could be used in a wall display in my classroom. I asked the receptionist if she had any old magazines that I could take away. She gave me a large pile. Later I went into a few other hotels and they also gave me some magazines and travel brochures. I was surprised at how easy it was to collect these magazines.
Back at home I found more pictures in old newspapers which I carefully cut out, along with the photos from the magazines. We were about to start the topic ‘life processes’ so I made three displays relevant to that topic. On one display, I collected pictures of plants, with some questions: ‘How do plants make food?’ and ‘What are the transport systems in plants?’ I also put a white flower in a vase of water. I put some food colouring in the water, and gradually the flower turned blue. It was very helpful when we got on to the section on ‘transport in plants’.
On another display, I used pictures of people engaged in sport, with questions like ‘Where does he get his energy from?’ and ‘What sort of nutrition does she need?’ Finally, I used some adverts for medical supplements and a photograph of a hospital to create a display about maintaining a healthy heart. I stuck up all of the cuttings on the wall in my classroom. It took me a little while to get them arranged so that they looked appealing. I also wrote out the questions on some white paper which looked like a banner by the time I had finished with it.
The reaction from all my classes was the same when they walked into the room for the first time – that of amazement and great interest. Afterwards, a few students brought me some pictures they had found, inspired by seeing my display. During the topic, I was able to use the display to prompt discussion. It made the room seem more homely and it was such an easy thing to do. It certainly helped my students to see the relevance of the topics we were studying in class.
3 Using the local community and environment as resources
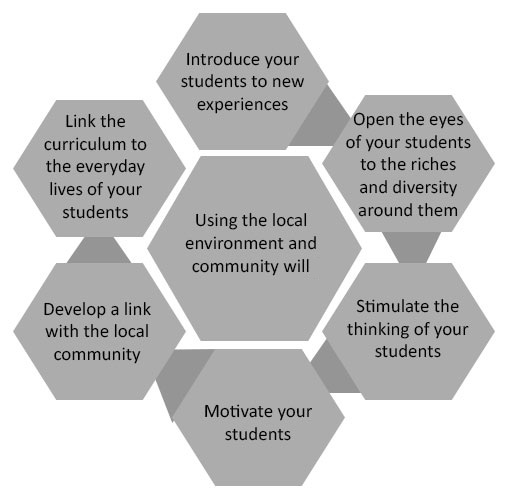
One important resource at your fingertips is that of the local community and environment. In your local community you have people who have expertise in a wide range of science topics. In your local environment you also have access to a range of natural resources. Figure 2 explains the benefits of using these resources.
Using local experts in your classroom
The local community is an often overlooked teaching resource. Maybe you are doing some work on transportation with Class X. How could you introduce this topic to your students in a way that will capture their interest? One way would be to invite in a local doctor or a nurse to talk about the heart and how they measure the blood pressure of their patients. For the topic of excretion, you could ask someone who has had a kidney transplant to talk about their kidney disease and operation. This could be a relative or a family friend of the students or staff. For respiration you could ask a local athlete to come in and explain the how lactic acid affects their performance.
Your students will be interested to hear about what these visitors do and will want to ask questions, so this needs to be carefully planned. If you choose to do this you need to be clear what you would like your students to gain and learn from the experience, and then follow the steps in Activity 3 to prepare for the visit.
Case Study 3: Mrs Kumar invites a visitor
Mrs Kumar invites an expert into her classroom.
One evening, I was out with a friend in the city. She is a nurse and had just started a new job in a health clinic for people with heart disease. I had just started ‘life processes’ with Class X, and while we were talking I had a brainwave! I decided to ask my friend to come into the school and talk to my students.
We arranged that she would bring a machine for measuring blood pressure. She measured my blood pressure and then talked to my students for about 15 minutes about the importance of measuring blood pressure, what causes it to be too high and the treatments available. I had a poster with a diagram of the heart which she used in her explanation.
My students had prepared some questions in advance, which they were able to ask, but the discussion soon moved on as they thought of more and more questions. Quite a few students stayed behind after the lesson to find out more about training to be a nurse.
Pause for thought
|
The next activity describes how to set up such a visit. If you have a suitable contact, you could do this activity as part of your work on ‘life processes’, or you could wait until you get to a topic for which you have a suitable contact. Whenever you do it, you will need to plan well ahead.
Activity 3: Inviting a local expert into your classroom
Identify an expert who you could ask to come into your classroom.
Part 1: Before the visit
- Ask your principal/head teacher’s permission to invite the visitor.
- Identify who you would like to ask.
- Ask if they would be willing to come.
- Talk to your class about the visit and what they would like to know.
- Ask them to write an invitation to the visitor.
- Plan with your class the questions they want to ask. See the unit on questioning or examples of how to involve your students in the generation of questions.
- Agree together with your class who will do this.
- Discuss how your students will sit when the visitor comes – in rows, or in a horseshoe shape so that everyone can see?
- Confirm the visit with your guest and tell them what will happen.
- Ask them to bring some things to show your students.
Part 2: On the day of the visit
Arrange for some students to meet the visitor at the appointed time at the school gate and bring them to the class. Introduce the visitor to your students and allow them to talk for a short time about what they do (10–15 minutes), showing what they have brought if appropriate.
Encourage your students to ask questions.
When the visit is finished, ask one of your students to thank the visitor for coming, on behalf of the class.
Part 3: After the visit
Think how you will use what your students have seen and heard. You could ask them to share their ideas in groups and make lists or posters of the key things they learned.
You could plan more lessons using the ideas and information as the context for them to learn more about the topic.
The students could research more about the topic. They could also share their ideas with other classes or their parents at a special parents’ evening or exhibition.
Using local environmental resources
The local environment can support the teaching of science. In your local environment you also have access to a range of natural resources. The outside environment can be seen as a place to collect resources but it can also be used as an extension of your classroom. Here are some ideas about how to use the local environment in a resourceful way.
Living things
Wherever your school is, there will be a variety of living things that you could collect and bring into the classroom for shorts periods for your students to investigate and observe. You could do the collecting yourself, or you could take your class outside to do the collecting.
Bringing in leaves, for example, will enable students to study these more closely. Growing plants from seeds will help students to appreciate how to care for them. Creatures such as preying mantis, certain spiders, mice, butterflies, squirrels or other insects can be kept in suitable conditions and containers for a short period of time.
Be clear what your students are going to learn, and give them time to observe the creatures safely so they are not frightened and they do not frighten the animals either. Make sure they respect the animals and plants and understand how important these are to the community.
Keeping insects or animals in the classroom creates a good learning environment. Plants can also be used to do practical work. One of the topics in the chapter on ‘life processes’ is photosynthesis. This is an important topic and it is difficult for students to understand, so doing practical work can be very helpful. You can check your own understanding of plants by doing the quiz in Resource 2 on ‘Understanding plants’.
Activity 4: Demonstrating photosynthesis
There are three experiments that are relatively easy to do that demonstrate photosynthesis. These are described in your textbook.
- Pond weed: Collecting the gas produced during photosynthesis. If you shine light on pond weed immersed in water, you can see bubbles of gas being produced. The more intense the light, the more bubbles are produced.
- Test leaves for starch: Leaves needs to be dropped into boiling water and then into ethanol to remove the chlorophyll. Then they can be tested with iodine in order to prove that starch is present. If variegated leaves are used, the pattern of the starch is the same as the pattern of the green on the original leaf.
- The importance of carbon dioxide: Two plants are wrapped in clear plastic bags. In one of the bags, add a chemical that will absorb carbon dioxide (for example, potassium hydroxide or sodium hydroxide). After two hours, test the leaves for starch. The plant in the bag with the chemical should contain less starch.
For each experiment, go through the method as described and if you do not have access to the equipment suggested, think of an alternative. If chemicals are involved, think about readily available options. For example, oven cleaner usually contains sodium hydroxide and could be used in experiment 3.
When you are teaching photosynthesis, try and carry out some or all of these experiments either as a demonstration or as a class practical.
Local materials
There are many other things that you might be able to collect from the local environment – whether you are in a rural or urban setting – that might help you in the classroom. These include rocks and stones to study, and recyclable materials such as card, paper, wire, wood, fabric and plastic containers.
All of these and many other materials could be gathered over time so that they are ready to use whenever you need them. For example, when you want your class to make posters about science you will always have some card for each group to write on. Always ask if you can have the materials you see. Ask your class to help you gather materials in advance of your lessons.
4 Using your students as resources
In Classes IX and X students study some ‘human biology’. Much of the work is directly relevant to their own bodies. For example, they can feel their muscles contract and relax as they bend their arms at the elbow. Students are naturally interested in their own bodies, so relating the science that you want them to learn to things that they can notice for themselves is highly motivating. Relating the science to themselves can also help them to learn how to live healthily. For example, in ‘Why do we get ill?’, they can reflect on their own lives in order to understand the link between personal hygiene and staying healthy. In the case study, Udita finds a way of teaching the digestive system.
Case Study 4: Teacher Udita explains how she taught the human digestive system
| Mr Singh | I saw you doing something that looked quite interesting as I walked past your classroom today, Udita. I would be most grateful if you could inform me about it. Your students looked most captivated! |
| Teacher Udita | Most certainly, Mr Singh. I was undertaking a lesson about the human digestive system. I asked my students to close their textbooks because I wanted to see what they could remember. I wrote a list of organs that form the digestive system on the blackboard. I divided my students into groups of five. Each group had one pair of scissors, some paper, some sticky tape and a pen. They had to cut out a shape to represent each organ and then stick it on a volunteer to show where the organ is in the body. |
| Mr Singh | How did you divide up the groups? |
| Teacher Udita | I decided to make sure that each group had higher and lower attaining students. I hoped that the higher attaining students would be able to help the others. I gave them about ten minutes to complete the exercise. Then all the volunteers lined up at the front with the paper shapes stuck on their clothes to show where the organs are situated. It was amazing how different they were! Everyone was amused. |
| Mr Singh | What did you do next? |
| Teacher Udita | I explained to my students that they would get credit for getting the relative sizes and the approximate positions of the organs correct. Each group used a diagram of the digestive system in their textbook to mark the volunteers. I then asked each group to say which volunteer they had given the highest mark, and to explain why. |
| Mr Singh | Well, they certainly seemed to be enjoying themselves. Do you think they learnt something about the digestive system? |
| Teacher Udita | Yes they did. In the first place, it helped some of them to remember the names of the essential organs. By making shapes and thinking about the size and location of the organs, they also had to think about the function of that organ and what happens during digestion. I listened to the conversations that they were having and could hear some of the high attainers explaining digestion to other members of their group. There was a lot of chatter, but they were all discussing the science. I photographed each of the volunteers on my mobile phone and I am going to use the photos to help me to remember what they got wrong so I can plan tomorrow’s lesson. |
Teacher Udita used her students to help them think about the organs that make up the digestive system. You could use your students in other ways: they could measure their pulse rates both before and after exercise (using the stopwatch on a mobile phone); you could ask them to reflect on their diet; or, if they are very keen on sport, you could ask them to reflect on why they feel stiff after exercise and what they can do about it. Alternatively, you could make up a story about what happens to a grain of rice as it travels through the digestive system, or ask your students to make up a play. To find out more on how to do this, see the key resource on 'Storytelling, songs, role play and drama'.
Pause for thought Identify two techniques or strategies that you have learned in this unit that you might use in your classroom, and two ideas that you want to explore further. |
5 Summary
This unit has given you some strategies that use a variety of locally available resources to help you teach the topic of ‘life processes’. All of these strategies can be used to teach many other aspects of the science curriculum.
The main idea in the unit is that as a resourceful teacher you focus your thinking on the stance that ‘this is possible with some creative and imaginative thinking’ rather than ‘this is impossible because we don’t have that particular resource’. Changing your thinking might take a little time. Now that you have some experience you are already on the journey to becoming a resourceful teacher.
Resources
Resource 1: Using local resources
Many learning resources can be used in teaching – not just textbooks. If you offer ways to learn that use different senses (visual, auditory, touch, smell, taste), you will appeal to the different ways that students learn. There are resources all around you that you might use in your classroom, and that could support your students’ learning. Any school can generate its own learning resources at little or no cost. By sourcing these materials locally, connections are made between the curriculum and your students’ lives.
You will find people in your immediate environment who have expertise in a wide range of topics; you will also find a range of natural resources. This can help you to create links with the local community, demonstrate its value, stimulate students to see the richness and diversity of their environment, and perhaps most importantly work towards a holistic approach to student learning – that is, learning inside and outside the school.
Making the most of your classroom
People work hard at making their homes as attractive as possible. It is worth thinking about the environment that you expect your students to learn in. Anything you can do to make your classroom and school an attractive place to learn will have a positive impact on your students. There is plenty that you can do to make your classroom interesting and attractive for students – for example, you can:
- make posters from old magazines and brochures
- bring in objects and artefacts related to the current topic
- display your students’ work
- change the classroom displays to keep students curious and prompt new learning.
Using local experts in your classroom
If you are doing work on money or quantities in mathematics, you could invite market traders or dressmakers into the classroom to come to explain how they use maths in their work. Alternatively, if you are exploring patterns and shapes in art, you could invite maindi [wedding henna] designers to the school to explain the different shapes, designs, traditions and techniques. Inviting guests works best when the link with educational aims is clear to everyone and there are shared expectations of timing.
You may also have experts within the school community (such as the cook or the caretaker) who can be shadowed or interviewed by students related to their learning; for example, to find out about quantities used in cooking, or how weather conditions impact on the school grounds and buildings.
Using the outside environment
Outside your classroom there is a whole range of resources that you can use in your lessons. You could collect (or ask your class to collect) objects such as leaves, spiders, plants, insects, rocks or wood. Bringing these resources in can lead to interesting classroom displays that can be referred to in lessons. They can provide objects for discussion or experimentation such as an activity in classification, or living or not-living objects. There are also resources such as bus timetables or advertisements that might be readily available and relevant to your local community – these can be turned into learning resources by setting tasks to identify words, compare qualities or calculate journey times.
Objects from outside can be brought into the classroom – but the outside can also be an extension of your classroom. There is usually more room to move outside and for all students to see more easily. When you take your class outside to learn, they can do activities such as:
- estimating and measuring distances
- demonstrating that every point on a circle is the same distance from the central point
- recording the length of shadows at different times of the day
- reading signs and instructions
- conducting interviews and surveys
- locating solar panels
- monitoring crop growth and rainfall.
Outside, their learning is based on realities and their own experiences, and may be more transferable to other contexts.
If your work outside involves leaving the school premises, before you go you need to obtain the school leader’s permission, plan timings, check for safety and make rules clear to the students. You and your students should be clear about what is to be learnt before you depart.
Adapting resources
You may want to adapt existing resources to make them more appropriate to your students. These changes may be small but could make a big difference, especially if you are trying to make the learning relevant to all the students in the class. You might, for example, change place and people names if they relate to another state, or change the gender of a person in a song, or introduce a child with a disability into a story. In this way you can make the resources more inclusive and appropriate to your class and their learning.
Work with your colleagues to be resourceful: you will have a range of skills between you to generate and adapt resources. One colleague might have skills in music, another in puppet making or organising outdoor science. You can share the resources you use in your classroom with your colleagues to help you all generate a rich learning environment in all areas of your school.
Resource 2: Understanding plants
This activity will give you the opportunity to see whether you have any misconceptions, and to learn more about the misconceptions that are commonly held by others.
What do you know about plants? The following questions will help to you to find out.
Here are some statements about plants. Are they true or false?
- A plant uses carbon dioxide at night.
- Plants carry out one process during the day and a different one at night.
- Carbon dioxide is used in plants for the same purpose as oxygen is used in animals.
- Part of the plant’s food is sunlight.
- Plants feed on sugars in the soil.
- Plants give out oxygen.
- Plants give out carbon dioxide.
- Plants use oxygen during the daytime.
- Plants use carbon dioxide during the daytime.
- Carbon dioxide and water are a plant’s food
Answers
- False: Plants use carbon dioxide in order to produce ‘food’ (glucose) through the process of photosynthesis. In order to do this the plants need sunlight (ultraviolet radiation).
- False: The common misconception is that plants undergo photosynthesis in the day and respiration at night. Like all living things they undergo respiration all the time. Respiration is the process through which stored food is converted into the energy that living things require to stay alive.
- False: This misconception arises because plants are often thought to be the opposite to animals.
- False: Children have a very human-centred view of food and nutrition, therefore anything the plant uses or takes in is regarded as food.
- False: It is a widely held misconception that plants take in their food from the external environment like animals do. After all, you can buy bottles of plant food in the shops! Plants getting sugars from the soil is a hybrid between this misconception and the idea that the plant’s food is glucose.
- True: Oxygen is a by-product of photosynthesis and is given out through small holes on the underside of the leaves called stomata.
- True: Plants are constantly respiring and carbon dioxide is a waste product of respiration. Both photosynthesis and respiration occur simultaneously during daylight, but there is a net input of carbon dioxide and net output of oxygen.
- True: Plants use oxygen for respiration
- True: Plants use carbon dioxide for photosynthesis
- False: Children have a very human-centred view of food and nutrition and therefore anything the plant uses or takes in may be regarded as food. They may find it hard to understand that plants manufacture their own food (glucose) from CO2 and water.
Additional resources
- Various video clips: http://www.bbc.co.uk/ learningzone/ clips/ topics/ secondary.shtml#science (accessed 20 May 2014)
- A series of detailed experimental guides including photosynthesis, respiration and transport in plants: http://www.biology-resources.com/ biology-experiments2.html (accessed 20 May 2014)
- A website with links for human excretion and absorption: http://www.internet4classrooms.com/ high_school/ human_anatomy_physiology_absorption_excretion.htm(accessed 20 May 2014)
- A podcast and supporting article on how to recreate one of the earliest experiments on the circulatory system: http://www.thenakedscientists.com/ HTML/ content/ kitchenscience/ exp/ veins/ (accessed 20 May 2014)
References
Acknowledgements
This content is made available under a Creative Commons Attribution-ShareAlike licence (http://creativecommons.org/ licenses/ by-sa/ 3.0/), unless identified otherwise. The licence excludes the use of the TESS-India, OU and UKAID logos, which may only be used unadapted within the TESS-India project.
Every effort has been made to contact copyright owners. If any have been inadvertently overlooked the publishers will be pleased to make the necessary arrangements at the first opportunity.
Video (including video stills): thanks are extended to the teacher educators, headteachers, teachers and students across India who worked with The Open University in the productions.