Use 'Print preview' to check the number of pages and printer settings.
Print functionality varies between browsers.
Printable page generated Sunday, 21 June 2026, 2:02 AM
Week 3: Selecting technologies: what to look for and how to choose
Introduction
This week will give you an overview of the main types of tools available for use online, what they offer, and how you might use them in your online teaching. This section does not aim to be, and could never be, completely comprehensive, and we’ll show you a few online resources that you may find useful for further exploration. We present some categorisations of these tools as a way of helping you to understand the potential of some of the main types of tools for your own context. The internet is replete with blog posts, categorisations, discussions, and sales pitches about these tools. So what we want to do is give you a starting point to better navigate and use it to your advantage in your work.
A brief note on privacy and personal information, which is particularly relevant to this week and next week, where you may find yourself registering for and trying different tools. If you are concerned by the privacy implications of using some of the tools covered in this week’s materials, one approach is to use an alias when creating your account with them, and to create a separate email address (e.g. using Google’s Gmail) for the purpose of registering for the service instead of using your usual email address. However, this approach will not make your actions truly anonymous or private, e.g. the telecom service provider or your Internet Service Provider (ISP) will be able to identify that it is your computer or mobile accessing the service. It is possible to take further steps such as using a service to anonymise your computer (such as using a VPN or Virtual Private Network, which masks your location and your computer’s identity). However, discussion of the pros and cons of such techniques is beyond the scope of this course.
Teacher reflections

This is a fictional scenario, perhaps from a few years in the future.
“Hello, I am Dr Thuzar and I teach botany to first and second year undergraduates at my university – I am also involved in the TIDE project. Over the years I have found that the more variety I can introduce into my teaching, the better the students respond. For example, when learning plant names and taxonomy, I used to give lists to memorise. The students did not enjoy it, and results were mixed. Now, I give them word-matching exercises (I started by doing this with cards bearing names and illustrations of the plants, and now I do it online) and make it into a game. It is more fun, and the students’ performance has improved because they are more willing to repeat the exercise until the names have fixed in their brain.
When I am thinking about introducing a new activity into my lessons using a new technology or type of teaching, I make three considerations:
- I consider the group of students I am working with for that particular course, and what skills do they need to develop? Can I, for example, find a way to teach them about the botany of the Irrawaddy Delta, whilst also teaching them how to share and receive information with online communities? Many of my students will find employment with forestry or rivers authorities, or in land management organisations, and these kinds of jobs almost always involve sharing and receiving information in partnership with other regions or states in Myanmar, and of course also our international neighbours. So whilst educating my students I must make them comfortable with sharing and collaboration.
- Secondly I consider the topic and the context. Some botany topics simply do not lend themselves to a technology-based delivery and that is fine with me (for example it can be difficult to distinguish between species of lamu (mangrove) just by looking at pictures online, whereas if I can give the students pieces of the plant to hold in their hand, they can quickly learn how to tell different species apart). But the online medium can be very helpful – for example I can set each student a task to find out what is the distribution within Myanmar of a different species of plant. It is not important that they memorise the precise distribution of every species in Myanmar – but it is important that they know how to find out when they need to do so. Therefore botany graduates need to be comfortable in an online environment and familiar with searching for key information and handling both large data sources and potentially conflicting information.
- Finally I consider which learning strategies I will use for teaching each topic, and then which tools I might use to do that. I have to consider the tool’s usability – there is no point asking students to use something that takes hours to learn how to use – and also its availability of free open access (I would never ask my students to pay for software, for example).
I make sure that I have a ‘visible’ presence online so that my students can ‘follow’ me and learn from my example how online technologies can be useful to an academic and to a botanist. I have a Twitter profile that I use to share interesting papers, news articles and so on that are relevant to my field. I create collections on Pinterest so that when I see online an interesting picture or article featuring one of Myanmar’s 91 species of Ficus (fig), I click to add it to my Pinterest page “Thuzar’s Figs”. I can use this to illustrate to students the value of online technologies, and in online classes I also pull up similar collections belonging to colleagues elsewhere in the country, to show the power of sharing online.”
By the end of this week, you should be able to:
- describe some of the ways to categorise educational technologies for online teaching
- explain how some of the tools available might help with certain learning objectives
- start making informed decisions about which tools you might try in your own context.
1 Technologies for content creation
There are so many technologies available that could be used for content creation, it is impossible to cover them all. New tools are produced regularly, and older ones disappear, so giving specific examples can be a tricky thing to do as tools can become outdated very quickly. Here we’ve provided an overview of the kinds of tools available and some brief guidance for things you should be aware of when using them.
1.1 Repurposing and extending slide presentations
Last week we touched on the idea of repurposing existing learning materials with some enhancements. Presentation tools like PowerPoint contain features for achieving such enhancement, for example, by adding narration to a slideshow, or adding sound clips to individual slides. These features can enable you to repurpose your classroom or synchronous online slideshow for an asynchronous online audience, giving that audience the benefit of your spoken accompaniment without you needing to be there. One advantage to adding individual sound clips to each slide is that the learner can choose when to begin listening – for example, they may wish to read the content of the slide first. Similarly, a vision-impaired student using a screen-reading program (more about these next week) can listen to the text being read aloud before selecting the audio clip. By contrast, a single narration file across the entire slideshow forces the learner to pause the narration if they cannot read and listen to everything in the time you allow before moving on, and the screen-reader user will hear the text being read aloud by their assistive technology at the same time as your narration, which can be incredibly confusing. If you are looking to share your presentations online it may be appropriate to look at services for this such as Slideshare.
Tip
Use a good quality microphone to ensure clear sound. If your university will not provide one, it is worth trying to buy one yourself - they will last for many years if you treat them well, and the benefit to your students in terms of sound quality in your online teaching will be huge.
1.2 Screencasting
This is a way of recording what you are doing on a computer screen, with a voiceover. It is ideal for demonstrations where learners benefit from seeing something being done. The learners can replay the screencast as often as they wish, and can pause and rewind. Applications of this kind of content creation tool include demonstrating how to use a certain software program or how to access a particular database (Peterson, 2007). Free screencasting tools, and free trials of paid-for tools, are available, although they may be limited in terms of the length of recording that can be produced, and sometimes the finished recordings contain a watermark ‘advertising’ the tool used. Paid-for tools offer a much greater range of features and flexibility in output. But you can try it out first and see if you or your institution considers it worthwhile to purchase a licence. Camtasia and Adobe Connect are examples of paid-for tools which offer a free trial at the time of writing. Google makes available for free web service of Google classroom and Google Meet. Wikipedia hosts a list of screencasting software that includes many free and paid-for tools.
Tip
Screencasts can quickly accumulate very large file sizes because they capture both audio and visuals. You may aid your learners by producing a number of shorter clips, for example, 3 minute maximum rather than long ones, as these will download or buffer more quickly.
Activity 1 Demonstrations of screencasting
Watch these two short screencasts. The first is demonstrating how to align or justify text in word processing software, the second shows some tips for using photo editing software. It is not the subject matter of these clips that you should note here, but you should use them as inspiration to think about the possibilities for which elements of your own teaching might be explained or demonstrated effectively by the use of screencasts. Note down some ideas for suitable topics in your own teaching.
Screencast 1: Aligning text
Screencast 2: Photoshop Lightroom
Discussion
Screencasts can be very effective for explaining or demonstrating certain concepts or topics. This activity should prompt some thoughts about elements of your own teaching that might make good subject matter for screencasts. The videos show some different approaches that can be taken and screencasts vary depending on the subject matter. If you think there is potential then we recommend trialling some of the software listed above as this can be a very powerful tool.
A related approach of sharing the screen during a ‘live’ video call is possible using many modern video conferencing tools. However, if this is not recorded it would not be available for later use in the way that these screencasts are.
1.3 Low-tech, low-complexity video recording
Whilst it can be valuable in some circumstances to utilise high quality video recording equipment and to create polished videos, often in online learning this degree of complexity is unnecessary and can even be detrimental to the learning process.
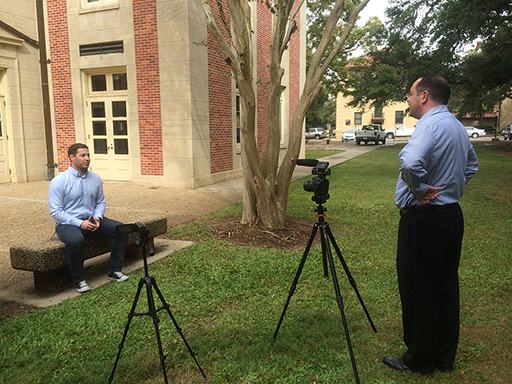
Activity 2 The potential for low-complexity uses of video
This video highlights the benefits of a low-tech, low-complexity approach to producing video content in online teaching:
Watch the video at YouTube.com and make notes about how achievable and effective this method could be in delivering your own teaching online.
Discussion
We really want to get across the idea that video does not need to be an expensive, high-tech venture. This activity is designed to demonstrate how achievable it can be for many teachers, and to help you to think about how it might be useful in your own online teaching.
To demonstrate how uncomplicated, low-tech videos made at home with just regular webcams or phone cameras can be effective in online teaching, an example teaching video was made by one of the TIDE team, Yin Tun. The content of the video is not important here - what is important is that Yin just prepared a few notes of points she wanted to talk about, she set up her visual aid on the wall, and set up her phone at an appropriate height and distance. There was no greater expertise involved than that, and yet the video she produced is a great example of how home-made video (or audio) clips can help to deliver online teaching effectively. (Note, however, that the volume is a little low, so if Yin were to make another video for her students she would need to try to speak more loudly or perhaps even use a microphone of some kind - with each attempt at creating such videos you can improve upon the previous attempt).

Tip
Even with low-tech approaches to video, certain techniques can make a big difference to the quality and effectiveness of your clips. Keep the camera stable (by placing on a firm surface or using a tripod, for example) and be aware of distracting elements in the background (such as screens, people or pets moving around, or even personal items such as family photographs).
1.4 Image manipulation
Images can be used to great effect in online learning – to illustrate a concept, provide emotional impact, reinforce learning, or simply add visual decoration. Rather than only including images in their original form, try using free graphics software to manipulate and annotate images. For example, a teacher could digitally alter one image and post it side by side with the original, asking learners to ‘spot the differences’, or the teacher could obscure elements of the image and ask students to predict what is hidden (this method works especially well with mathematical or chemical equations).
Tip
Ensure that the resolution and file sizes of your images are appropriate. If the resolution is too low, details may not be sufficiently clear, especially for students using certain displays or magnification software. Conversely, very high resolution images can mean huge file sizes that take a long time to download for anyone with a slower internet connection. File sizes can be checked through looking at the ‘properties’ of the file in your computer’s file manager. While software tools all differ, there are generally options when saving a file that allow resolution or quality to be changed. Also ensure that you have provided a description of the image so that students unable to view it can still understand what is being depicted (you will learn more about making your learning inclusive next week).
1.5 Small interactive tools with big impact
Tools that enable you to add interactive items to web pages, such as word clouds, quizzes, and drag and drop exercises are all freely available on the internet. If you have an idea for an online teaching technique that you’d like to try with your learners, the chances are that there will be a tool somewhere to help you to achieve it.
Tip
Some of these types of tools may use browser plug ins that add the ability to use technologies, such as Flash or Java software, to generate content for you. If this is the case, you may need to ensure that you and your students have up to date Flash and Java installations for these websites to work properly. Guidance on this can be found at Adobe Flash Player and Java. It is worth checking whether the interactive components work well on different kinds of browsers or platforms. For example, do they work on Firefox or Google Chrome, a tablet or mobile device?
1.6 E-learning development tools
Creating engaging teaching content using the tools outlined in this section should be within the capability of most computer-literate teachers. However, there are more complex tools available which can help you to generate comprehensive, multimedia, interactive online teaching materials. If you are interested in immersing yourself in new tools and techniques for content creation, you might try one of the following authoring tools. A web search for ‘e-learning authoring tools’ will bring up a range of current technologies you could try. At the time of writing, popular tools included Adobe Captivate, Articulate Storyline, Articulate Rise, Xerte Online Toolkits (free), Elucidant, iSpring, Camtasia,Canva, OpenLearn Create (free), and more – new tools emerge every year.
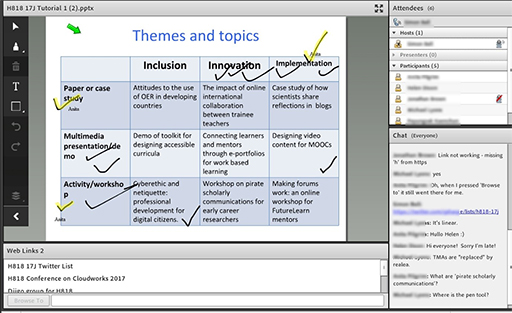
1.7 Web conferencing platforms
You may have heard of web conferencing platforms such as Adobe Connect and Blackboard Collaborate but there are many similar products available, including tools designed for individual use such as Skype, Zoom or Google Hangouts (or the newer Google Meet). These platforms provide the online teacher with opportunities for online classroom-like teaching scenarios, as well as offering opportunities for screensharing, group work, peer review and more. The greatest strengths of platforms like this tend to be in synchronous learning, although they can also be readily combined with tools like discussion forums to broaden the impact to asynchronous environments (Çakiroglu et al., 2016, Guo and Möllering, 2016, Kear et al., 2012). These tools can be used for replicating a seminar environment by wrapping synchronous discussion tools around a central presentation or video with voiceover.
1.8 Plagiarism detection
Plagiarism detection software is perhaps not a technology you would immediately think of as an online teaching aid. However, plagiarism prevention tools (which automatically compare assignments from students with each other, and with content found online) can be used quite successfully in meeting certain learning objectives in an online environment. Many institutions in the UK now provide staff and students with access to a plagiarism detection service. This can be employed to illustrate to learners how to write or compile assessment material in an appropriate manner, how to build on (rather than repeat) previous work, and how to reference and quote appropriately. In this way, these tools can be used to offer formative feedback rather than just being used to identify problematic assessment submissions. If you would like to know more then the first step could be to find out whether there are tools already in use at your institution, but Wikipedia also hosts a list of plagiarism detection software.
Activity 3 Incorporating technologies into your plans
From the eight technologies presented in this section, select two of interest and make notes about how you would like to use them in online teaching. Add these to your existing notes about your plans for moving into online teaching.
Discussion
As you build your plans for online teaching, you should already have some ideas of the kinds of technologies that you could use to deliver your teaching online. This activity helps you to identify several that you will explore further initially – you can always investigate the others later on.
2 Personalisation with tools for learning

Personalisation is the tailoring of teaching and teaching materials (and the environment in which they are delivered) to suit the needs and preferences of a range of learners. It links closely to accessibility for learners with disabilities, and we shall examine this aspect in more detail next week. This week, however, we are considering how technology can be used to support the whole range of learners, whatever their needs or preferences.
Online teaching usually has more opportunities for personalisation than face-to-face teaching, simply because it is easier for learners to use the available technology to modify their learning environment to suit their needs. (Imagine, for example, the ease of dimming a computer screen, compared to the difficulties in dimming a classroom environment without inconveniencing other learners.)

Asynchronous online learning usually has more opportunities for personalisation than synchronous learning because it gives the learners flexibility in terms of when and where they access the learning materials.
The ideal way to optimise personalisation in online teaching has two elements:
- Design teaching materials that will meet a wide group of needs and preferences, utilising a variety of media and teaching techniques.
- Put control in the hands of each learner, allowing them to adjust the materials to suit themselves.
2.1 Serving diverse audiences
It is worthwhile designing materials and utilising technologies with as broad a range of learners as possible in mind. By doing this, your materials are ready to reuse in later years or different contexts. This section delivers some general points, so that you may start to think about how these considerations would be applied to your own move into online teaching. Next week we cover this area in greater detail.
Instructions
Sometimes designing and delivering materials for a wide range of audience needs simply means enhancing clarity. Ensure your instructions are clear and unambiguous (be consistent with terms like Units, Pages, Weeks, Sections and so on) (Ernest et al., 2013). If you are creating audio or audiovisual material, ensure you speak slowly and clearly, taking pauses to allow digestion of key sentences or phrases.
Learners backgrounds
Be aware that your learners may not all have the same backgrounds, so be careful when using idioms or cultural references in teaching materials (Arbour et al., 2015). You may also need to consider your choice of images so that diversity is fully reflected.
Flexibility of schedule
Whilst it is vital to provide students with a schedule of key dates and deadlines in the course, and to ensure at regular intervals that they are aware of what is immediately ahead of them, you can also design in flexibility where possible. If there is not a strict need for every learner to complete a certain task at the same time, then allow a little more time to those who need it. Some learners may need individual attention from the teacher in order to keep to the overall schedule – this is a further element of personalisation (Ernest et al., 2013).
Promotion of communication and peer support
Online learners should be encouraged to comment and reflect on the learning. This may be achieved using their own spaces, such as blogs, or more ‘public’ spaces, such as discussion forums. Asynchronous forums allow everyone the chance to input on their own terms and at their own pace, whilst discussing and commenting upon each other’s posts. These interactions, if supported and moderated appropriately by the online teacher, can help to foster a sense of community among the learners, which in turn can lead to the development of peer support. Peer support is a key aspect of personalisation as it allows learners to explore and learn as a collective, with each member of the collective playing to their own strengths.
2.2 Giving control to learners
It may sound like a complicated process, but there are several ways of giving control to learners that involve little extra work on the part of the teacher.
Allow choice of formats
It is standard accessibility practice to provide transcripts for audio or audiovisual material, to provide captions for video material, to provide alternative text for images and so on. However, these alternative formats are often used by a much wider range of people than those for whom they were originally intended, so ensure that all of these format options are available as standard for all learners (Fidaldo and Thormann, 2017). Similarly, some learners may prefer to receive your feedback as an audio mp3 rather than written text. This can even be quicker to produce than annotating a document with text-based feedback.
Allow choice of display characteristics
Many online teaching materials, including web pages, documents and slideshow presentations, can be easily altered by learners to suit their needs in terms of font, font size, colour and contrast. Point out to your learners how they can personalise your materials, even linking them with guidance pages on the internet describing how to use built-in web browser features to achieve these changes.
3 Technologies for social communication

As you saw in the Week 1 section on backchannels, and the discussion of connectivism in Week 2, social media can have an important role in online teaching. There are a variety of social communication tools that can be employed in online teaching, each with its own potential advantages (and sometimes drawbacks too).
There sometimes needs to be a phased approach to the use of social media tools in online teaching. Skills in providing constructive feedback perhaps need to be honed in a relatively closed environment (such as a discussion forum, commenting first on a teacher-provided item, and later on each other’s contributions) before being moved to a more public arena (Jones and Gallen, 2016). Twitter and YouTube can both be used to great effect in demonstrating how public commenting can easily move away from ‘constructive’ and in an unhealthy direction.
If you wish to read more about the positive and negative effects of using social media in teaching, Haylett (2016) gathers together a variety of literature on the subject and draws the conclusion that there appears to be a significant effect on student engagement from the use of social media. However, there may potentially be negative effects on student attainment.
3.1 Social technologies for promoting community

Some social media tools can be used to enhance communication and cohesion among your group of online learners. ‘Collecting’ tools such as Pinterest can help learners discover a topic collectively and share their findings or ideas. Social bookmarking tools such as Diigo can aid in broadening learners’ research skills, connecting them with resources they hadn’t previously discovered. Of course, simply using the right technologies will not force a sense of community and shared learning to develop in any given cohort, but it will give it a chance of happening. If all members of your cohort are using Facebook, the creation of a class Facebook group can give learners an easy way to communicate with each other, as well as providing the teacher with an opportunity to provide prompt scheduling reminders, and to share relevant resources. Coughlan and Perryman (2015) have written about the use of student-led Facebook groups and their role in facilitating learning and achieving educational inclusion.
3.2 Social technologies for enhancing presence
Some social media tools can be utilised in online teaching to help the learners develop a sense of place within the ‘wider world’ and to start enhancing their online profile (Veletsianos, 2016). Blogs can be used to help learners become used to critically reflecting on a given topic, to become familiar with expressing themselves in a ‘public’ arena, to enable the teacher to put explanatory text alongside class materials to allow absentees greater context when catching up. Twitter can be used to demonstrate the power of the collective, to share discovered resources, to seek feedback, and to contact ‘experts’ in a given subject area.
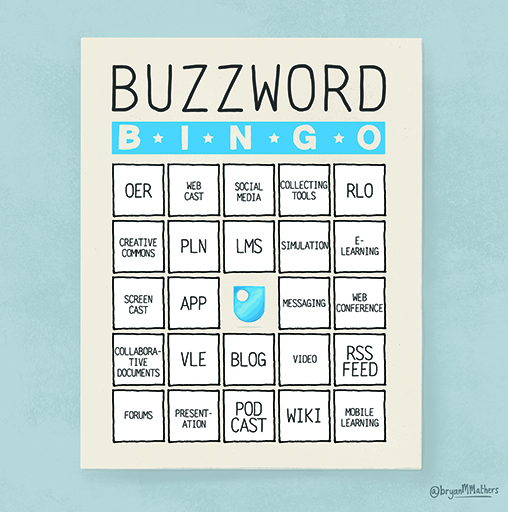
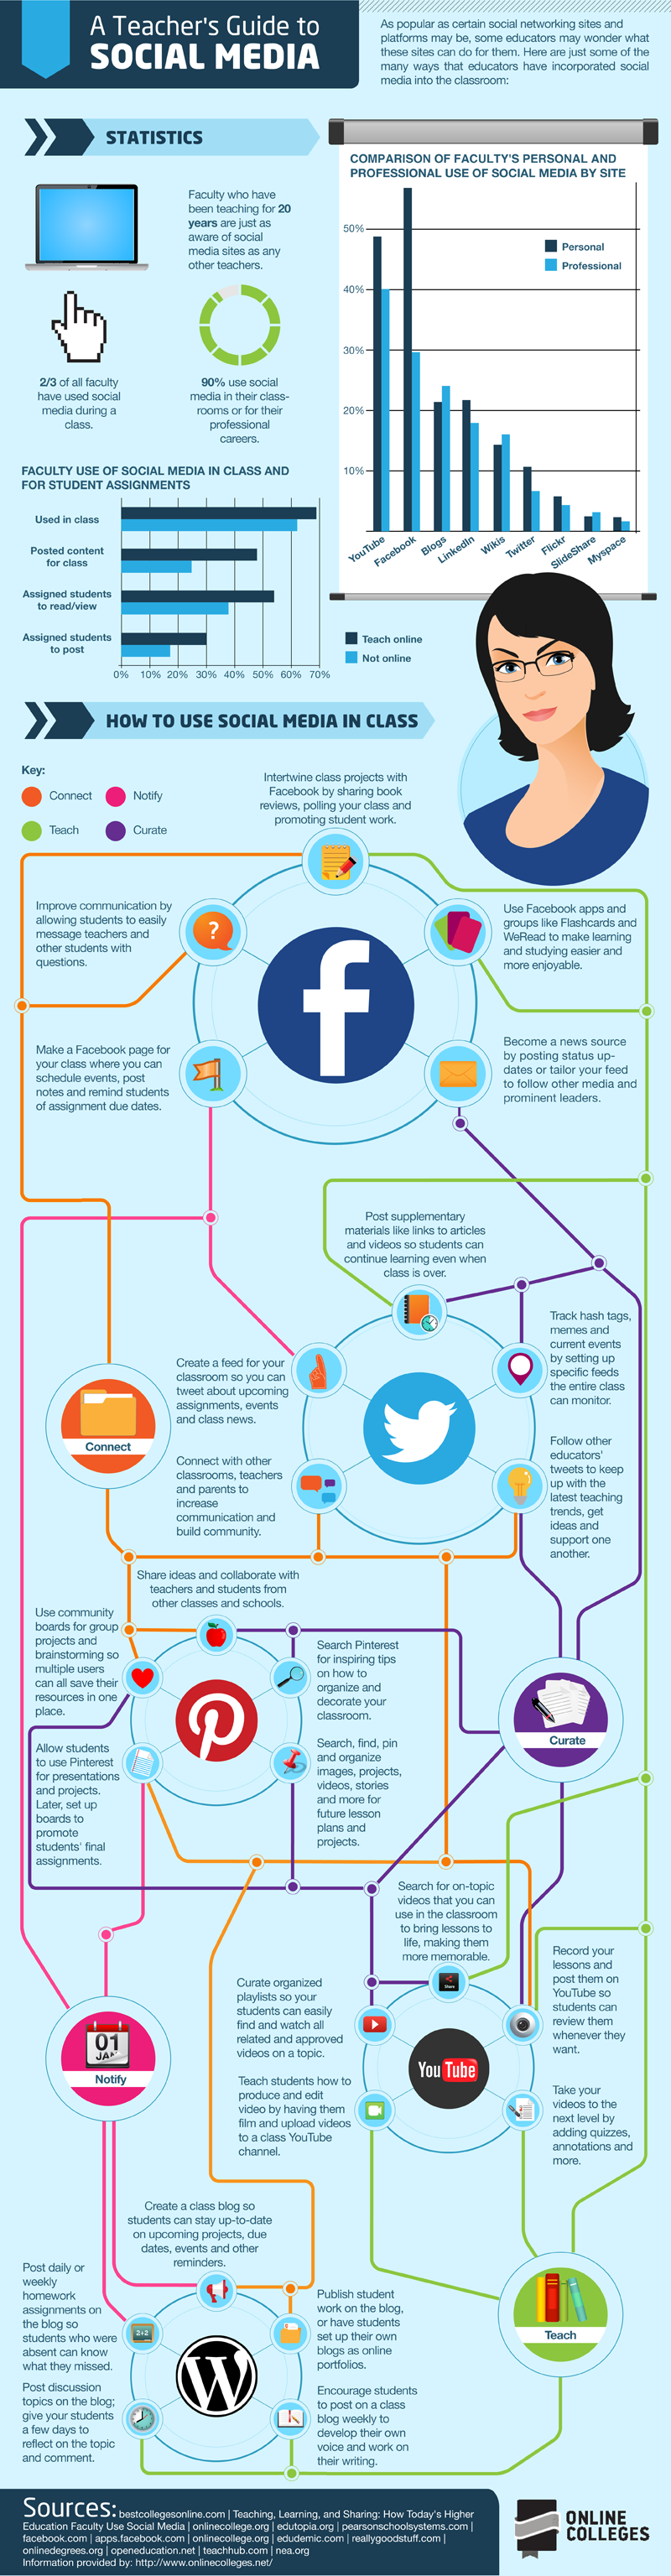
Activity 4 Thinking about the role of social media in online teaching
Take a look at this infographic which provides a wide range of suggestions for ways in which social media can be used in education: (You should be able to click on the image to zoom in closer).
Using the section entitled ‘How to use social media in class’, write down two to three ideas that you might like to try out one day.
Discussion
Social media tools can be useful in teaching, even though they may require careful implementation. This activity is designed to get you started with thinking about how social media may play a role in your online teaching, and what factors you need to consider when implementing them.
4 Dealing with change in the technology sector
Change is an ever-present topic of conversation in education, and particularly with respect to technology.

The rapid and constant evolution of technology means that some of the tools you read about today will have disappeared in a year, while new ones will become available. Hopefully, however, the principles will remain and you will be able to view the changed landscape with the ability to select the tools that help you to achieve your objectives in online teaching.
Before making substantial use of a tool, or committing to purchasing it, you may want to consider aspects such as whether it has a substantial user base, or what the developer or supplier’s model for sustainability, support or improvement is.
The next section provides some guidance on how to make choices, even if the tools we have mentioned in this course are no longer available or suitable.
5 How to choose

How you choose which technology to use can depend on a number of factors (Watson, 2011) such as:
- The intended learning outcomes for the course. Technology must serve the pedagogical outcomes, not determine them.
- The students’ situation (location, access to internet, number of students in the class, etc. This reflects the issues covered in Section 2 of this week).
- The activities or technical requirements of the course content (e.g. inclusion of large graphic files, collaborative tools, live chat features, external guest lecturer access, file sharing, discussions, etc.).
- The breadth and depth of the teacher’s previous online experience. While it is tempting to use every new tool and feature in your teaching, it is better to start slowly and build up your experience and confidence. Introduce one component, use it appropriately, evaluate its success, and then adjust your teaching where necessary. Slowly introduce more components once you and/or the students are more comfortable with the technology.
- The requirements or policies of the institution regarding the use of different online technologies.
- Whether a centralised learning management system (LMS) or free, open web technology is available or preferable.
- Cost, to yourself or your organisation, both directly in purchase costs and indirectly in the amount of time needed to become competent in its usage.
If you would like to read more about technology and tools for online learning, JISC (2016) have created a resource combining guidance with case studies, and including a useful checklist.
5.1 Linking learning outcomes, activities and tools
The University of New South Wales Sydney (2017) provide a very useful table grouping together common themes of learning outcomes, the kinds of activities often used with learners to achieve those outcomes, and some potentially useful online technologies for each. An edited version of this table forms the basis for Activity 5 below.
Activity 5 Identifying technologies that you might use
| Desired learning outcomes (the ‘what?’) | Rationale (the ‘why?’) | Relevant activities ( the ‘how?’) | Potential technological tools |
|---|---|---|---|
Information literacy. Global practice. Digital literacy. Ethical practice. Preparation for success. |
Exposure to, awareness of, contribute to external:
Appropriate referencing. Appropriate equipment of the 21st century graduate. Managing information load. |
Multi-dimensional evaluation. Sharing and reviewing online resources. Connecting with outside experts/communities. Check for plagiarism. Media making/mashups. Digital storytelling. Copyright/Creative commons discussions. Activities relevant and authentic to discipline. Embedded activities for generic attributes. Contextual prompts to evaluate sources. |
RSS feeds/aggregators. Blogs. Plagiarism prevention (e.g. Turnitin). Presentation sharing (e.g. SlideShare). Video sharing (e.g. YouTube, Vimeo). Podcasting. Online/distance learning platforms (e.g. Blackboard Collaborate, Adobe Connect). Screencasting. |
Self-directed learning. Reflective practice. Engaged learning. Co-learning. Quality learning environment and experience. |
Negotiate understanding. Feedback on the course. Reflection on learning. Global practice. Consistency of experience. |
Problem/case-based learning. Flexible access to material. Project planning and management. Student self-tests. Teacher (and technology) as facilitator of learning. Choice of modes and activities. Access to technology (e.g. mobile devices). Agreed code of conduct. |
Wikis. Quiz/survey. Recorded lectures. Video sharing (e.g. YouTube, Vimeo). Podcasting. Mobile learning (e.g. smartphone, tablet). Online/distance learning platforms (e.g. Blackboard Collaborate, Adobe Connect). |
| Giving and receiving feedback. | Multiple perspectives. Feedback on performance. |
Collaborative writing. Group negotiation and planning. Assessment of teamwork. Review (e.g. group work). Publishing. Reflection. |
Wikis. Blogs. Discussion forum. Peer review (e.g. via forum). Online/distance learning platforms (e.g. Blackboard Collaborate, Adobe Connect). Screencasting. |
Working in teams. Collaborative practice. |
Negotiate understanding. Multiple perspectives (for teacher). Management of group work. Digital literacy. Inclusivity. |
Collaborative writing. Group negotiation and planning. Project planning and management. Problem/case-based learning. Assessing team contribution. Media-based projects. Variety of communication styles supported. |
Wikis. Blogs. Peer review (e.g. via forum). Google Docs. Online/distance learning platforms (e.g. Blackboard Collaborate, Adobe Connect). Moderated discussion. |
Critical reviewing. Critical thinking. Independent learning. |
Negotiate understanding. Multiple perspectives. Feedback. Practice of critical reviewing. Practice of critical thinking. |
Reflecting. Debating. Reviewing. Social knowledge building. Review of / commentary on online material. Give and receive feedback. |
Blogs. Discussion forum. Online/distance learning platforms (e.g. Blackboard Collaborate, Adobe Connect). Seminar replicators (e.g. VoiceThread). Video sharing (e.g. YouTube, Vimeo). Podcasting. RSS feeds/aggregators. Peer review (e.g. via forum). |
Synthesis of learning. Apply learning (at high level). |
Able to solve new problems. Application of knowledge in integrated way. |
Experience ‘authentic’ practice. Integrative (could be group) project. Problem/case-based learning activities. |
Authentic voice via video/audio. Online/distance learning platforms (e.g. Blackboard Collaborate, Adobe Connect). Simulations e.g. virtual experiments. Animations. |
| Written communication. | Negotiate understanding. Contribute to external activity, conversations, resources. Appropriate referencing. |
Reflecting. Debating. Reviewing. Publishing. Checking for plagiarism. |
Blogs. Discussion forum. Plagiarism prevention (e.g. Turnitin). Presentation sharing (e.g. SlideShare). Messaging (e.g. Twitter, Yammer). RSS feeds/aggregators. |
Oral communication. Presentation skills. Language proficiency. |
Sharing audio/video material. Presenting. Digital storytelling. Audio/video discussion and feedback. |
Seminar replicators (e.g. VoiceThread). Video sharing (e.g. YouTube, Vimeo). Podcasting. Presentation sharing (e.g. SlideShare). Online/distance learning platforms (e.g. Blackboard Collaborate, Adobe Connect). Screencasting. |
Activity 6 Selecting tools
Think back to the activities in the previous two weeks, and retrieve your notes about what you want to deliver online and what kinds of tools you would need to employ to achieve this. Which tools from your lists already map across to some of your desired objectives in teaching online? Which objectives do not have an already-used tool mapped across to them? Have you discovered anything in this week’s materials that might help you meet these objectives?
Your answers are saved within the course, and you are likely to revisit them later.
Discussion
This activity should help you to develop further your responses from previous weeks – now you should be able to match possible tools to the tasks you wish your learners to achieve online.
6 This week’s quiz
Check what you’ve learned this week by taking the end-of-week quiz.
Open the quiz in a new window or tab then come back here when you’re done.
Summary
This week you have learned about a lot of different tools and technologies, including social media, that can be used in online teaching. You have learned how to choose the right tool for each task, beginning with the learning outcomes you want learners to achieve.
Next week we will be looking at another side to social media’s role in taking your teaching online – the role of facilitating the creation and development of your own networks.
While you contemplate all of the tools and technologies that you’ve been made aware of this week, let’s see how Rita’s been coping with all this useful information.

Transcript
Rita says that she is quite daunted by all of the different technologies available, but that she is also quite excited at the prospect of doing her teaching in different ways. She is planning to experiment with some tools to see what seems to be the best for her purposes - and the easiest to use!
Rita really likes the idea of screencasting, both for demonstrating practical techniques and for showing the students how to use the online learning systems. She is planning to repurpose her existing PowerPoint slides, and to try making little video clips using her phone or maybe her webcam.
Rita has started working through the big table of technologies we introduced this week. She has identified her objectives with online learning as a mixture of self-directed learning, co-learning, giving and receiving feedback, collaboration, and oral presentation and communication skills. So she is able to see from the table a range of relevant activities she could try, and tools that she might use.
Rita says that although there are so many possibilities, she feels less overwhelmed than she did, and that she is confident enough to start investigating some of the possibilities now.
You can now go to Week 4.