Use 'Print preview' to check the number of pages and printer settings.
Print functionality varies between browsers.
Printable page generated Friday, 10 July 2026, 11:12 PM
Lesson 3: Keeping your information safe online
Introduction
Welcome to Lesson 5 of Everyday computer skills: a beginner’s guide to computers, tablets, mobile phones and accessibility. This lesson will cover what you need to know to protect yourself and your information online. We begin with how to protect your privacy and what online threats look like. You will learn how to create a strong password and what you need to do to use Wi-Fi securely.
Key words and concepts are in bold. There is a course glossary you can refer to if any of these are unfamiliar to you.
This lesson is in four sections:
Learning outcomes
When you have completed this lesson, you will be able to:
protect your privacy on social networks
recognise online threats
create strong passwords
protect your wireless network.
3.1 Protecting your privacy on social networks
In Lesson 1, we looked at various forms of social networking that allow us to communicate and collaborate, and also to share news, ideas and resources.
Twitter and Facebook may help us keep in touch with family, old friends and new friends, but they also expose us to people who may want to steal our personal information. In this section, we will look at how to manage certain features on Facebook to ensure your privacy is protected, such as choosing who can see your profile and your posts. We will also show you how to avoid publishing information that identifies you and may put you at risk.
Facebook, Twitter and most other social media accounts have features to help you protect your privacy. When you go into your account, click on ‘Settings’ to go to a page where you can make changes. This section will show you how to do this on Facebook.
Managing privacy features on Facebook
The privacy settings on Facebook differ depending on the device you access the platform from. Through your internet browser, select ‘Setting’ and ‘Privacy’, then select ‘Privacy Shortcuts’. From your phone, go to your Facebook profile and click on the three dots (…) beside ‘Edit Profile’ and select ‘View Privacy Shortcuts’. You will have the following options:
|
Each of these has settings to give you more choice and control over the level of information you want to share. The privacy settings can be changed so that only select people see what you post. You can also make sure that personal information about you, such as your phone number and email address, remains private.
Activity 3.1: What can you do to protect yourself on social media?
Make some notes here on your concerns about privacy and security on social media.
If you have a Twitter or Facebook account, take a few minutes to explore the privacy settings. What options do you have in your account to address your concerns?
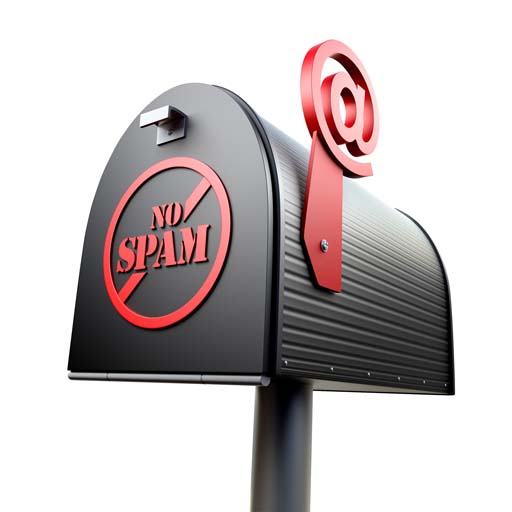
3.2 Email scams, spam and phishing
Sending and receiving emails keeps us in touch with friends, relatives, employers, companies and organisations. However, emails may also be used to deliver unwanted material that can potentially cause you and your computer considerable harm. These are sometimes called
Spamming is the sending of unsolicited messages. These messages may contain advertising, harmful or suspicious content. Some spam emails may have a link or file attached for you to click on or open. Opening these links or downloading the files may damage your computer.
If you see an email that doesn’t look right to you, do not open any links or attached documents, and never reply with your personal information. Delete the email and report it as spam so your email provider will know not to let it through to your inbox. If the email claims to be from an organisation, you could contact them through their official website and ask them if it’s genuine.
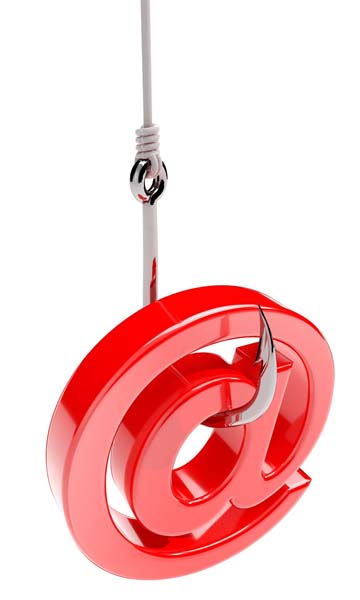
Phishing emails
A link in the email would take you to a website that may look exactly like the original site but is actually a carefully designed fake intended to trick you into giving away personal information.
Although the email message would look as if it were coming from a genuine source, there would be telltale signs that give it away. Fraudulent emails usually display some of the following:
![]() The sender’s email address is different from the trusted organisation’s website address. For example, instead of amazon.co.uk it may be amazon947.co.uk.
The sender’s email address is different from the trusted organisation’s website address. For example, instead of amazon.co.uk it may be amazon947.co.uk.
![]() The email is sent from a completely different address or a free
The email is sent from a completely different address or a free
![]() The email addresses you as ‘Customer’ because the sender does not know your name.
The email addresses you as ‘Customer’ because the sender does not know your name.
![]() The email expresses a sense of urgency. For example, the need to act immediately or have your account closed.
The email expresses a sense of urgency. For example, the need to act immediately or have your account closed.
![]() The entire text of the email may be contained within an image instead of the usual text format. The image would contain a link to a bogus site.
The entire text of the email may be contained within an image instead of the usual text format. The image would contain a link to a bogus site.
![]() The email message or the link requests your personal information, such as username, password or bank details. Your bank, or any other trusted company, would never request this information in an email.
The email message or the link requests your personal information, such as username, password or bank details. Your bank, or any other trusted company, would never request this information in an email.
Another sign would be that you weren’t expecting an email from the organisation that appears to have sent it. While a website link can seem very similar to the authentic address (URL), a single character difference may give away the fact that it is a fake website.
Sometimes, a fake email might have none of these characteristics because scammers take advantage of new and more effective technologies. It is not impossible to receive a fraudulent email with your name and address.
Guide: Phishing
This short animation from CPNI UK helps you spot a phishing email.
Please note: there is no audio narration.
Using email safely
Here are some things to consider that will help keep you safe from scammers and spammers:
![]() DO NOT open emails you suspect are scams.
DO NOT open emails you suspect are scams.
![]() DO NOT forward emails you suspect are scams.
DO NOT forward emails you suspect are scams.
![]() DO NOT open attachments from unknown sources.
DO NOT open attachments from unknown sources.
![]() DO NOT respond to emails from unknown sources.
DO NOT respond to emails from unknown sources.
![]() DO NOT make purchases or charity donations in response to emails.
DO NOT make purchases or charity donations in response to emails.
It is better to be safe than sorry, so if in doubt, delete the email or contact the person or organisation the email claims to be from. If you are suspicious of an email, you can check if it is on a list of known spam or scam emails that some internet security vendors feature on their websites.
Instead of clicking on links in the suspected email, it may be possible to roll your mouse pointer over the link, without clicking, to reveal its true destination. This will be displayed in the bottom left corner of your screen. If the web address (URL) is different from the content of the email, it suggests the email is suspicious.
If in doubt, check the URL
Symantec, an internet security firm, has a ‘WebPulse site review request’ feature that allows you to paste in a suspicious URL to check if it is malicious.
Typically, scammers send the same email to thousands of people. Other people’s email addresses are valuable to scammers. To protect people you send emails to, use the ‘Bcc’ (blind carbon copy) box for multiple recipients instead of the ‘To’ or ‘Cc’ box. This means there is less chance of your recipients receiving phishing or spam emails if your email falls into the wrong hands. When forwarding or replying to an email message, it’s a good idea to delete the multiple email addresses from previous messages that might appear in the ‘To’ or ‘Cc’ boxes.
Spam blocking and filtering
Most email providers come with spam filtering or blocking as standard. When choosing a webmail account, such as Gmail, Hotmail or Yahoo, make sure you select one that includes spam filtering and that it remains switched on.
Your email provider will send suspected spam to the ‘Junk Mail’ or ‘Spam’ folder. Most spam and junk filters can be set to allow email to be received from trusted sources, but sometimes legitimate emails could end up in the spam folder by mistake. You should check it regularly to make sure you’re not missing something.
Most internet security packages and
If you have lost money as a result of a phishing email or any other fraudulent activity, report it to Action Fraud, the UK’s fraud reporting centre.
Call 0300 123 2040 or visit https://www.actionfraud.police.uk/
If you are in Scotland, contact Police Scotland on 101.
Activity 3.2: How to spot a phishing email
Do a Google search for an example phishing email. Click on an image of an email that looks like it’s from a company you know. Have a look for some of the signs that the email is fake that we covered earlier in this section. How many signs can you spot?
Discussion
This sample email (Wikipedia.org) is designed to look like an official email from a bank. Here are the signs that it is fake:
It is addressed to ‘valued customer’ rather than a named person.
Some of the words are spelt incorrectly, such as ‘received’.
A real bank would never ask you to click on a link to verify your personal information.
The URL of the bank’s website looks a bit like the real one, but it actually links to the phishing scammer’s webpage. If in doubt, check the URL using Symantec’s ‘Site review request’, or contact your bank to see if it’s from them.
Remember: never click on a suspicious link or respond to a suspicious email.
3.3 What you need to know about passwords
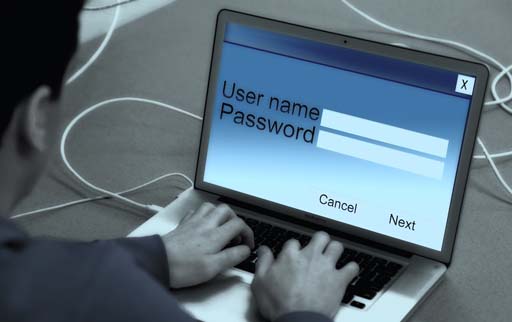
Millions of people use online services every day and it is important that systems are secure so that users can’t access one another’s information. To do this, we need a way of uniquely identifying each user so that no other users can access their account.
To verify your identity, you will be asked to create passwords and passcodes. Just as you need to remember your banking personal identifier number (PIN) when using a debit or credit card, you also need to remember your passcode and password when logging into your online accounts and services.
A
Never give out passwords or passcodes over the phone or via email. No trusted organisation will ever ask you for your password this way.
How to create a strong password
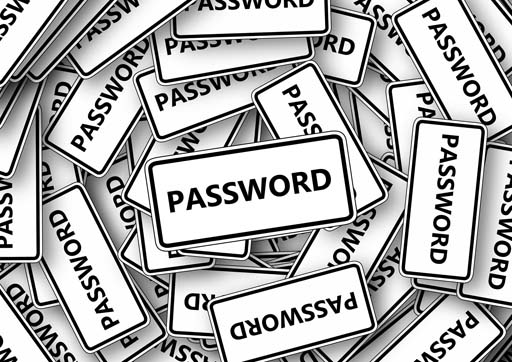
A strong password should be:
Memorable enough that you can recall it without writing it down.
Long and exclusive enough that no one else can guess it.
A good way to create strong, memorable passwords is by using three random words. Start each word with a capital letter. For example “RedPantsTree”. Do not use words that can be guessed; for example, your pet’s name or a well-known phrase like ILoveYou, AberdeenFootballClub, or GreatWhiteShark.
You can include numbers and symbols to make your passwords even stronger; for example, RedPantsTree4!
Never use the following personal details for your password:
Your name.
Your partner’s name.
Your child’s name.
Other family members’ names.
Your pet’s name.
Your place of birth.
Your favourite holiday resort.
Your favourite sports team.
Each year, the internet security firm SplashData releases a list of the worst passwords revealed through data leaks. In 2019, the five worst passwords were:
123456
123456789
qwerty
password
12343567
Clearly, not much thought went into creating these passwords! If any of your passwords are like these, you should change them.
Remembering your passwords
When you use different passwords for your important accounts, it can be hard to remember them all, but it is a good idea not to use the same password. If one password is compromised, your other data is also at risk. This is especially important for our emails, so we should always make sure we use a strong, separate password for our emails.
Saving your passwords in your browser will help you manage them. This means letting your web browser (such as Chrome, Safari or Edge) remember your password for you. This is safer than using weak passwords or using the same password in more than one place.
This can help:
- make sure you do not lose or forget your passwords.
- protect you against some cyber-crime, such as fake websites.
Make sure you protect your saved passwords in case your device is lost or stolen.
How to protect your saved passwords
Someone who gains access to your device may be able to use your saved passwords to access your accounts.
This kind of cyber-crime is much less common than remote attacks over the internet, where passwords are cracked using software.
To make sure you are protected, you should:
- turn off or lock your device when you are not using it.
- use a strong password to protect your device.
- turn on two-factor authentication for all your devices and accounts.
- turn on biometrics (Face ID or Fingerprint recognition), if your device supports this.
You should also back up your data regularly. This will help you recover important documents and information if your device is lost or stolen.
Hack check
Avast, an internet security firm, provides a ‘hack check’ on their website. This can help identify if your passwords have been leaked and need to be changed.
The National Cyber Security Centre provides some important tips to assist your
The NCSC website recommends that you create a strong and memorable password by using three random words, such as ‘GreenStreetGiraffes’. You could also think of three points on a regular journey you take to help it stay memorable, like 'SchoolFountainStation'.
Activity 3.3 Creating a strong password
Use the grid below to create some strong passwords.
| Choose three random words | Add a number and a symbol | Strong password |
|---|---|---|
When you’ve finished, check how secure your passwords are with OpenLearn’s ‘Password strength checker’. What could you do to make it more secure?
Discussion
If your password is weak, check out the tips from the National Cyber Security Centre to make it more secure.
3.4 Protect your wireless network
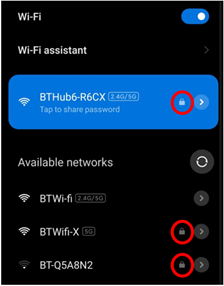
In this final section, we will look at wireless networks and how to protect them. A wireless network is how you connect to the internet if you have Wi-Fi. Some Wi-Fi networks are private and secure, while others are public and anyone can access them.
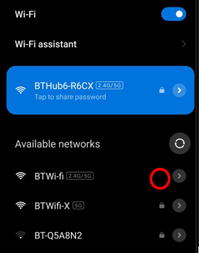
If you have a wireless router at home, check that your network is secure so that people living nearby can’t access it. It is best to set up your network so that only people with a wireless key or password can connect to your network. If your network is secured by a password, there should be a padlock symbol next to your wireless network when other people see it. This means anyone trying to connect will be asked for a password. If this doesn’t happen, your network isn’t protected and anyone can connect to your network.
Read the instructions that came with your router to find out how to set up a wireless key and make your network more secure.
Guide: Wireless networks and routers
DigitalLearn.org has a short visual guide to different types of wireless network and some privacy concerns for each. It includes a guide for securing your wireless router at home.
You can turn on captions by clicking on the icon in the bottom left corner. A transcript is also available.
Using public Wi-Fi
A hotspot is an area where Wi-Fi access is available. This may be through a home network or a public network in places such as restaurants or airports.
Wi-Fi hotspots in coffee shops, libraries, airports, universities and other public places are convenient, but often they’re not secure. If you connect to a Wi-Fi network and send information through websites or mobile apps, there is a possibility it might be accessed by someone else.
To protect your information when using wireless hotspots, send information only to sites that are fully
Tips for using public Wi-Fi safely
![]() When you’ve finished using an account, log out.
When you’ve finished using an account, log out.
![]() If asked to set up an account to access public Wi-Fi, do not use the same password as you have for other accounts.
If asked to set up an account to access public Wi-Fi, do not use the same password as you have for other accounts.
![]() Do not download anything using public Wi-Fi as there is greater risk of malicious programs.
Do not download anything using public Wi-Fi as there is greater risk of malicious programs.
![]() Ensure your browser and security software are up to date before using public Wi-Fi.
Ensure your browser and security software are up to date before using public Wi-Fi.
![]() Consider changing the settings on your mobile device so that it doesn’t automatically connect to nearby Wi-Fi. That way, you have more control over when and how your device uses public Wi-Fi.
Consider changing the settings on your mobile device so that it doesn’t automatically connect to nearby Wi-Fi. That way, you have more control over when and how your device uses public Wi-Fi.
![]() Never perform a retail or bank transaction using public Wi-Fi.
Never perform a retail or bank transaction using public Wi-Fi.
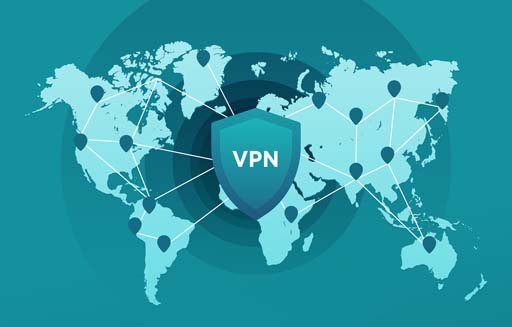
Virtual private networks
If you regularly access online accounts through Wi-Fi hotspots, you may wish to consider using a
Guide: What is a VPN?
This short video from F-Secure Connected Life answers ‘What is a VPN?’
You can turn on captions by clicking on the subtitles icon in the bottom right corner of the video.
Activity 3.4: Securing your wireless router
If you have a wireless router at home, check it is set up so that only people in your home can access it.
Discussion
Make sure that your network needs a password or security key to access it. If you’re not sure how to do this, read the instructions that came with your router. If you can’t find them, you can search for them on the manufacturer’s website.
Lesson 3: Summary
In this lesson, you looked at some of the risks from social networking and emails. You covered what you can do to protect yourself and your personal information online.
You looked at how to manage privacy settings in your Facebook account. You explored how email can be used to deliver unwanted material from spammers and scammers, and how you can spot suspicious emails. You can manage your email settings to block emails from untrusted sources.
To verify and protect your identity, you looked at creating strong passwords that are memorable for you but difficult for others to guess. The lesson ended with guidance about how to protect your wireless network and ensure safe use of public Wi-Fi.
Activity 3.5: Looking back over Lesson 3
Use this box to make notes on what you’ve learned in Lesson 3. Think about what was new to you and what you already knew.
Here are some ideas to get you started:
I know how to change my privacy settings on Facebook.
I can spot a phishing email.
I have checked my password to make sure it’s strong.
My router is password-protected.
Resources
Websites
Action Fraud: report cyber crime to the police.
Avast: ‘hack check’ allows you to check if your email address has been hacked.
DigitalLearn.org: ‘Online scams’ (online course).
National Cyber Security Centre: the UK government site for cyber security information and guidance.
OpenLearn: ‘Password strength checker’ allows you to check how strong your password is.
Symantec: ‘WebPulse site review request’ allows you to check if a URL is fake.
Text
- Structured text document – for use with assistive technology (Word document)
- Structured text document – for use with assistive technology (PDF)
- HTML
- Text in braille
- Text in large print
Audio and video
Languages
- Plik dźwiękowy po polsku (Polish Audio)
- Tekst polski (Polish Text)
- 普通话音频 (Simplified Chinese Audio)
- 简体中文文本 (Simplified Chinese Text)
- التسجيل الصوتي بالعربية (Arabic Audio)
- النص بالعربية (Arabic Text)
- ਪੰਜਾਬੀ ਆਡੀਓ (Punjabi Audio)
- ਪੰਜਾਬੀ ਟੈਕਸਟ (Punjabi Text)
- ਪੰਜਾਬੀ ਆਡੀਓ (Urdu Audio)
- اردو ٹیکسٹ (Urdu Text)
- Audio în limba română (Romanian Audio)
- Text în limba română (Romanian Text)
Useful videos
You can add captions to YouTube videos by clicking on the subtitles/closed captions icon. Please note that some of these YouTube videos may have adverts.
‘Anatomy of scam emails – how to recognise a phishing scam message’ (Atomic Shrimp).
‘How to make your Facebook completely private’ (Howfinity).
‘What is a VPN? Experts answer!’ (F-Secure Connected Life).
You should now try the quiz for this lesson before moving on to Lesson 4.
Acknowledgements
Except for third party materials and otherwise stated (see terms and conditions), this content is made available under a Creative Commons Attribution-NonCommercial-ShareAlike 4.0 Licence.
The material acknowledged below is Proprietary and used under licence (not subject to Creative Commons Licence). Grateful acknowledgement is made to the following sources for permission to reproduce material in this free course:
Every effort has been made to contact copyright owners. If any have been inadvertently overlooked, the publishers will be pleased to make the necessary arrangements at the first opportunity.
Images
3.1 Security: Image by Pixabay from Pexels Image released under a CC0 1.0 Universal (CC0 1.0) Public Domain Dedication https://creativecommons.org/ publicdomain/ zero/ 1.0/
3.1 Facebook and Twitter icons: Facebook and Twitter logo. Adapted Image by Gordon Johnson from Pixabay
3.2 Padlock code: Image by Darwin Laganzon from Pixabay
3.2 Spam warning signs: Image by Gerd Altmann from Pixabay
3.2 Phishing hook: Image by AbsolutVision from Pixabay
3.2 Warning symbol triangle: Image by Clker-Free-Vector-Images from Pixabay
3.2 Warning symbol circle: Image by Clker-Free-Vector-Images from Pixabay
3.2 No spam mailbox: Image by Gino Crescoli from Pixabay
3.3 Laptop username password: Image by Gerd Altmann from Pixabay
3.3 Password signs: Image by Gerd Altmann from Pixabay
3.4 Tip icon: Image by OpenClipart-Vectors from Pixabay
3.4 Map VPN: Image by Dan Nelson from Pixabay
3.4 Wireless Network: BT, British Telecom
3.4 Public Wifi: BT, British Telecom