Use 'Print preview' to check the number of pages and printer settings.
Print functionality varies between browsers.
Printable page generated Thursday, 14 May 2026, 10:16 PM
TI-AIE: Using games: electricity
What this unit is about
This unit explores how games can be used to teach and support your students to learn about electricity and provide a range of educational benefits.
Games are a useful tool to use in science lessons to play, engage and motivate students. Games are usually seen as fun things to play and so most students will want to participate. Your students will learn the science you are trying to teach more easily.
There is a range of games that you could use in your classroom, most of which do not require too much preparation. Many of these are well-known games that families play at home and, with some changes, they can be used to help students learn science. Once you have devised and made your games you can use them over and over again. Games can also be modified and adapted to most science topics.
Many students will enjoy playing these games when they have a spare moment as well as in lessons. All of this will help them to strengthen their understanding and build confidence in their knowledge.
What you can learn in this unit
- Develop, design and use games as a tool for learning.
- Engage and motivate children to develop and reinforce their understanding of electricity through playing games.
Why this approach is important
Games tend to be playful, which does not always fit well with some ideas about teaching and learning. But recent research shows that if learners are interested in what they learn and it is matched to their needs, interest and ability, they will achieve more. Games are a very good way to capture your students’ attention and interest, and they encourage creativity, collaboration and communication.
Games are also useful as, in order to participate and to succeed, students:
- need to show their knowledge or develop their understanding quite quickly in order to win
- are encouraged to compete – that can be healthy and motivating, but it is important to stress that just taking part and thinking is as important
- build individual confidence
- learn to take turns and develop other group social skills
- gain insight into their own understandings
- develop different skills and roles
- obtain immediate feedback about their performance
- share their ideas and so deepen their understanding.
1 Types of game
There is a wide range of online games that could be used in the classroom and in students’ own time to support their education. Many of these can be downloaded onto laptops and phones so that more students can access them. But access to electronic or online games is not universal and there are many other similar games that can be used in the classroom to help students in just the same way.
Board games, card games and active physical games can all be used to explore aspects of many science topics as well as electricity (see Resource 1). All these games could also easily be adapted to use with other science topics and with students of different age groups. Depending on your access to resources you can play games involving the whole class, or in groups, pairs or individually.
Activity 1: Using a memory pair game
Use the template given in Resource 2 to make a set of cards with electrical terms and pictures. Recycle old envelopes (or cards from boxes if paper is short) to make the cards.
Next ask a colleague to play with you. Spread the set of cards face down on the table or the floor. Take it in turns to turn over any two cards you like, placing them face up. If the cards match, i.e. you have a picture of a bulb and a card that says ‘the light in a circuit’, then the player keeps the pair. Now your colleague does the same. If the pairs do not match you have to turn the cards face down again. The aim is to gather as many matched pairs as you can.
Pause for thought
|
Activity 2: Playing the game in class
Play the same game with your students. If you have a large class and you can make more sets of the cards, they can all play in groups. If you do not have access to more resources to make more sets then choose one group to play with for this activity.
Explain how to play and let them play the game once or twice, observing how they play each time. Do not interact with them at all once they understand the rules.
Pause for thought
|
Playing games to help clarify concepts and to reinforce learning is an enjoyable and inclusive approach that you could take. It will give those students who are unsure and less confident the chance to develop their self-belief and learn from their peers. Case Study 1 uses another type of game and shows how students respond.
Case Study 1: Lighting a bulb game
Mrs Vijay explains how, by playing a game, she helps her students to distinguish whether circuits are incomplete or complete and therefore light the bulb.
I was a little nervous about teaching electricity, but finding some simple equipment in an old science resource box gave me confidence to do some demonstrations to show them how it worked.
I then used a game to help my students consolidate their understanding of a circuit. I was introduced to the game at a support session at the local DIET Centre and I was keen to have a go. I planned my lesson in two parts. The first was to give the students time to help me light the bulb using just one cell (battery), one bulb and one piece of wire. This took some time but we did it eventually. Next I asked them whether I could use a second piece of wire. I asked them for ideas and did what they said until we got the bulb to light.
As I wanted to help them understand better how to build a circuit, I used the game I had made, a game based on observation and picking up pieces to make their own circuits. [See Resource 3 about how to make and play this game.] I made one set of pieces for the game and three students made the other sets during their break.
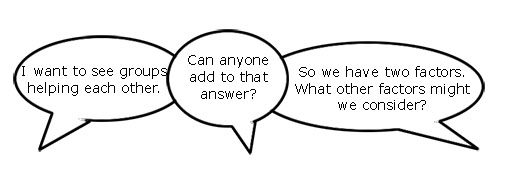
I explained to the class how to play the game and showed them the rules, which I had written on a piece of flipchart paper and stuck to the wall. As they played I went round to see how they were managing and helped explain some problems such as whether their answers were right, or asked questions about circuits to help them enjoy playing the task and to assist their learning. [See Resource 4, ‘Monitoring and giving feedback’, for more information.] The winner in each group was the person with the most number of complete circuits. The students were totally engrossed in their games and I did not have to interact at all towards the end as they were helping each other.
At the end of the lesson I asked the students to write a sentence to say what they thought a circuit was. I also asked if they had enjoyed the game and was delighted at their positive attitude and by their comments about how it helped them to learn about and remember circuits.
Pause for thought
|
After first demonstrating how to light a bulb, Mrs Vijay used her game to help reinforce her students’ understanding. But she also wanted to develop her students’ confidence in themselves as learners. As she did not have enough resources for all students to work with bulbs, wires and cells (batteries) in her lesson, she had to be creative.
2 Being resourceful
The discovery and spread of electricity have made a big difference in many people’s lives. Understanding what electricity is and how it works is therefore very important for everyone so that they know how to use it well and safely. If you do not yet have electricity in your school it is not easy to teach except by using batteries, wires and bulbs, which are expensive and not readily available. Therefore using games that model different aspects of electricity can help your students to explore simple ideas about electricity.
To make these games you need to be a resourceful teacher. Being resourceful may involve you in regularly collecting and saving cardboard boxes, plastic bottles, old envelopes and other reusable and recyclable resources so that you have materials that you can use to make artefacts that will enhance your teaching. There are other ways that you can use a range of local resources; these are explored in Resource 5, ‘Using local resources’, which can help you extend your ideas and enhance your teaching.
Activity 3: Gathering classroom resources
Spend a few minutes thinking about what resources you have access to in your school, beyond textbooks.
- What have you got that you can use to make resources for your students?
- What else would you like or need?
- How can you add to these?
- Can you involve your students in helping you to gather card, paper, bottles and other containers for science?
Plan how you might gather these resources and put your plan into action. You could involve all the students in helping to catalogue what you collect. It could even be a good opportunity to do some graphs to show what types and amounts of recyclable and reusable material they have collected locally.
Video: Using local resources |
Pause for thought
|
This activity is an ongoing one because as you gather and then use your resources you need to add to them regularly. Developing such a culture in your class and even in your school will help you plan and teach more investigative activities in science that will help your students’ learning. Making games that model some of the real investigations related to electricity can help students’ understanding and they can revisit the games to reinforce their learning.
The next case study explores how to use static electricity to play a game.
Case Study 2: Applying science in a game
Ms Sutapa, a teacher in a small rural school, explains how she played a simple game using static electricity.
I had collected over a period of time some plastic pen cases and made game boards [like those in Resource 6]. I also had two children tear two sheets of old newspaper into tiny pieces and then divided these into piles, one to go with each board, and four pen cases.
At the start of my lesson I blew up a balloon, much to the excitement of my class, and asked if I could stick it to the wall. They said no. So next I rubbed the balloon on my head for a moment or two and then placed the balloon on the wall. The students were amazed to see the balloon stay on the wall. I asked them why they thought this happened and some gave their ideas, which I recorded on the blackboard, such as there was something on my hair that was like glue.
Next I gave them the game sets and explained the rules of the game and let them play for a few minutes. The game involved them using the pen tops to generate static electricity and use it to pick up and deposit small pieces of paper onto different parts of the board in turn as they spun a spinner. The first group to fill their board with the number of pieces of paper equal to the number listed was the winner. The students liked the game and in fact it got quite noisy at one point as students dropped their pieces of paper. I had to remind them to keep their voices down so as not to disturb other classes doing quieter activities.
At the end of ten minutes, when everyone had played the game twice, I asked them for their thoughts on how easy was it to pick up the paper and what caused them to drop. How did they manage to pick up more pieces, or fewer pieces? What did they have to do differently?
I wrote their ideas on the board and then at the end I asked them to think about why and what they thought was happening. I gave each group a piece of paper to write their ideas down and to give these to me at the end of the lesson. At the end of the day I looked at their answers in more detail and planned how I would introduce them to the idea of electrons, neutrons and protons to extend their understanding.
I was pleased at their efforts and even though some of their ideas were only half-formed it meant I could build on these in the next lesson by using some clear diagrams linked to the activity they’d done. I would explore the fact that two objects with the same charge repel each other while unlike charged objects attract each other. This would help to develop the students’ understanding of the existence of two different kinds of charge in nature.
3 Making your own games
Once you become more confident and competent in using games at appropriate times in your teaching you will begin to want to adapt existing games. These adaptations could be specific to your learning intentions and also match your students’ interests better. They also provide you with activities that you can give to groups to play while you work with a section of your class. This is helpful if you have a large class. Once you have made many games, they will be available to be used at different times, such as when students finish their work. Doing this will raise student concentration and motivation. The next two activities follow on from each other so try to do them close together, if possible.
Activity 4: Making your own game
You are to design and make your own game about electricity to use with one of your classes. To do this you might like to look at Resources 1 and 3 first, to remind yourself of the types of game you could make. Then you need to consider the following questions:
- What do I want my students to learn from playing the game?
- What content do I want to incorporate into the game? Is it about the properties of electricity, or is it more about what electricity is used for or how it is produced? This will affect what type of game you might select to make.
- Do I want to use a game similar to those in Resource 3 or devise something different? Do I want it to be a sedentary game or a physical game that the students could play outside that explores electricity?
- Do I want to set the game in a particular context, e.g. with static electricity thinking about the best material to make a comb for the hair?
- What instructions do I need to write on how to play the game? Do I have to do different instructions for my special educational needs students?
- How long should they have to play such a game?
- Will the game involve all the students? You may want to read the key resource ‘Involving all’ to understand more about what this really means in your classroom.
- When and how can I make the game? What resources do I need to gather to make the game? Could my students help bring resources in to make the game?
- Could they help make the bits for the game? When?
- How can I store the games to keep them safe and protected from damage for use over and over again?
Video: Involving all |
Activity 5: Testing your game
Ask your students to play your game. Explain the rules and the purpose of the game before they play. When they have finished, ask for their constructive feedback:
- What did they think they learned from playing the game?
- Were the instructions clear?
- Did I give them long enough to play the game?
- Would they play the game again?
- How could the game be improved?
Pause for thought
|
Making and testing your game will have shown how exciting students find games. It is even more exciting for them in a lesson because it is not what they would normally expect. You will also have had clear indications of what they thought and so can modify the game where appropriate.
This will help to improve your games expertise so that you can extend the use of games to other science topics such as looking at life processes. For example, a board game about digestion could help your students remember the stages in digestion.
4 Summary
This unit has shown how, by using games in the classroom, you can achieve higher levels of participation in your elementary science lessons on electricity.
Games have many educational benefits, such as reinforcing learning, developing social skills and providing speaking and listening opportunities. Games enable students to explore their scientific knowledge in active, challenging and motivating ways, and are especially helpful to students with learning difficulties beacuse they allow for repeated practice but in a meaningful context.
A range of games can encourage collaboration and support, ensuring the participation of students of all abilities and building confidence and a sense of belonging. Classroom games do not have to be expensively produced and can be easily made (or invented) by you and your students.
Resources
Resource 1: Games to support learning
Board games
There are many types of board game that you can play to help students learn. Each kind will need some preparation and thought but once designed and made can be used again and again with different students.
There are board games for two to six players, where a dice has to be thrown and each person takes it in turn to move a set number of places along a route to a destination. The number of places they move can be determined by turning up a card with the numbers 1 to 6 on them or by throwing a dice and counting on from there. On the way, the players may have to answer questions on the topic and only advance if they get those right. The winner is the one who gets to the destination first.
There are many variations that you could include in these games, such as having forfeits for people to do if they get the question wrong or collecting objects on the way that have certain properties. The winner is the person with the most objects or the least forfeits when all the players get to the end.
Students can be involved in designing and making their own board games based on a topic they have studied. It is one way to see how much they have learnt and understand. It also provides a resource for them to use and play with when they have a few moments to spare and they want to remind themselves of the science they have been taught.
Card games
These can test students’ understanding of what is needed to make a bulb light. The cards can be cut from any material and the information needed written on the cards. On some of the cards draw the electrical symbols and then write their proper term on other cards (see the samples in Resource 2). You need to have the same number of pictures and words so that they make complete pairs.
All the cards are placed face down on the floor or on a table and each student takes it in turn to turn over two cards. If the word and the picture match, then the student takes the pair. If the cards do not match, the student turns the cards face down again. The next student has a turn – they again have to turn over two cards and, if the cards match, the student takes the pair. As each student turns over cards everyone will see where some cards are, and so, if they remember well, they can make up pairs when it is their turn. If a student makes a pair, they have another go before the turn passes to the next player. The winner is the one with the most pairs (symbol/picture and correct terminology or definition, e.g. the word ‘bulb’ and a small picture of a light bulb).
Crosswords
There are simple crosswords that you could make to test your students’ understanding of different aspects of electricity, such as electrical terms, and students could make their own crosswords too. Making up their own clues for answers will give you good insight into your students’ understanding of the concepts behind the words. They could then complete each other’s crosswords.
Physical games
There are many games you could play that involve students having to move around more and still link it to science; for example, team quizzes, during which either you or a student asks the questions. The student with the right answers then runs up and around a chair and returns to the back of the team. The team that wins is the one where the leader is back at the front first.
Students could be different units in a circuit like a bulb battery and wire. You or a student calls out the kind of circuit they have to make and the students have to join up and make the circuit; e.g. one bulb, two wires and two batteries. Anyone not in a circuit drops out and the last circuit is one bulb, one wire and one cell. The students run around until you call out which circuit to make. If they stick close together as they run around they will be asked to sit out for one round. You could also use the cards provided in Resource 3, Game 2, so that students can identify which electrical component each one is as they run around.
Team games
Students are divided into teams of four to eight students. They have to answer questions either individually or collectively, where they can share ideas to answer questions set by you or other students. Sometimes the teams have to do or make something, either together or individually, but the points are given to the team. The team with most points wins.
Quizzes
Questions need to be prepared but the questions can be focused on a particular aspect of any science topic you want your students to deepen their understanding about. Once these questions are done, you can use them with other classes or next year.
You can vary the questions between those that ask for one-word answers and those where students have to think more about how to solve a problem. You can either ask the questions yourself or, if you have the resources, you could duplicate the question sheet and every student works on their own. The winner is the one with the highest score.
Resource 2: Set of simple circuit cards
Resource 3: Instructions for the games described in this unit
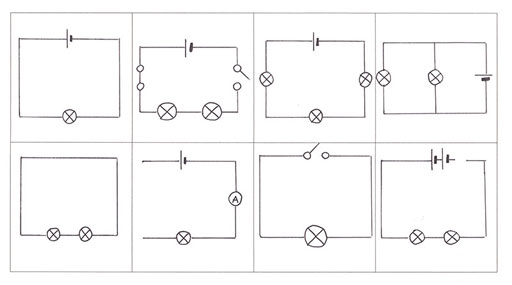
Game 1: Will the bulb light?
Before playing:
To play this game you need to copy or do similar drawings to those given in Figure R3.1. You will need at least one set of cards per group of three students. If you use two sets of cards per group you could have four or five students playing at once.
Cut out each card, making sure they are the same size. Keep each set separately in a dry box or bag until you need them.
To play:
The group finds a place to play and one person spreads out all the cards face down. Each person takes a turn to turn over a card and look to see if it is a card that shows that the bulb will light. If the student decides that they think it does light he or she keeps the card. The next person then has a turn, and this goes on until they are sure there are no complete circuit cards left. They count up the number of cards each one has and the student with the most cards is a winner.
When they first play, students may not be as able to decide if they have turned up all the complete circuits so you should check their answers and encourage them to become more adept at identifying those bulbs that will light.
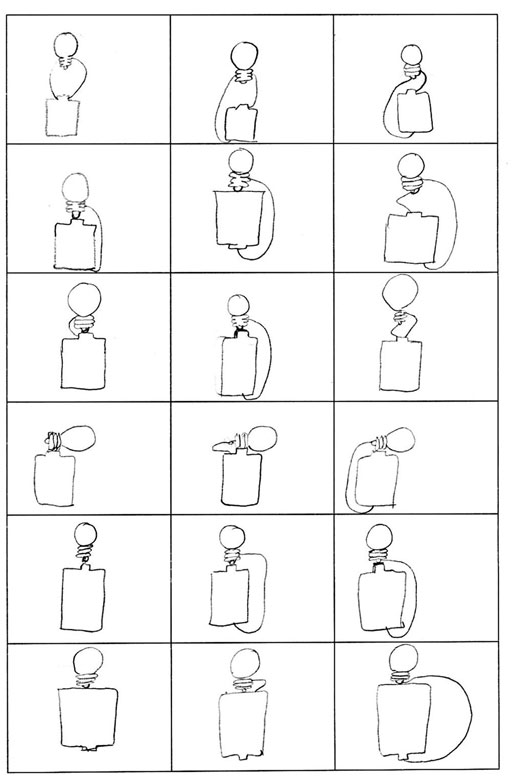
Game 2: Making a circuit
Before playing:
Make copies of Figure R3.2 – you will need at least three sets per group – and ask your class to cut out the cards, or you can fold them and tear carefully. If you do not have access to a copier you could get your students to draw the diagrams onto a piece of paper and then cut them out.

To play:
Divide your class into groups or teams and number them. Next give each group the same number of bulbs, batteries and wires. Each group needs twice as many wires as they do the other items.
You can play this game in two ways:
- You ask each group or team to make a complete circuit with two wires, one bulb and one battery. The first group to finish gets a point. You record the points on the board.
- You could ask one person in each group to make a circuit that you call out. The first student to finish and get it right is given a point for the team. You carry on playing until everyone has had a turn. You could go round the groups twice if you think they need more practice.
Some possible circuits students could make:
- one bulb, one cell, one wire
- one bulb, one cell, two wires
- one bulb, one cell and three wires
- one bulb, one cell and four wires
- one bulb, two cells, two wires
- one bulb, two cells, three wires
- one bulb, one cell, four wires
As your students become more competent you can call out more complex circuits, such as two bulbs, one battery, two wires and each time vary the amount of each item. When you do these more complex circuits you can ask students questions about what effect more or fewer bulbs, batteries or wires would have.
You could also ask them what kind of light they might get if, for instance, they had one cell and several bulbs but only a few wires. This way you can explore their growing understanding.
If you can demonstrate with real cells and light bulbs, some of the effects of varying the circuit structure will help them to link the cards with the reality of lighting bulbs.
Resource 4: Monitoring and giving feedback
Improving students’ performance involves constantly monitoring and responding to them, so that they know what is expected of them and they get feedback after completing tasks. They can improve their performance through your constructive feedback.
Monitoring
Effective teachers monitor their students most of the time. Generally, most teachers monitor their students’ work by listening and observing what they do in class. Monitoring students’ progress is critical because it helps them to:
- achieve higher grades
- be more aware of their performance and more responsible for their learning
- improve their learning
- predict achievement on state and local standardised tests.
It will also help you as a teacher to decide:
- when to ask a question or give a prompt
- when to praise
- whether to challenge
- how to include different groups of students in a task
- what to do about mistakes.
Students improve most when they are given clear and prompt feedback on their progress. Using monitoring will enable you to give regular feedback, letting your students know how they are doing and what else they need to do to advance their learning.
One of the challenges you will face is helping students to set their own learning targets, also known as self-monitoring. Students, especially struggling ones, are not used to having ownership of their own learning. But you can help any student to set their own targets or goals for a project, plan out their work and set deadlines, and self- monitor their progress. Practising the process and mastering the skill of self-monitoring will serve them well in school and throughout their lives.
Listening to and observing students
Most of the time, listening to and observing students is done naturally by teachers; it is a simple monitoring tool. For example, you may:
- listen to your students reading aloud
- listen to discussions in pair or groupwork
- observe students using resources outdoors or in the classroom
- observe the body language of groups as they work.
Make sure that the observations you collect are true evidence of student learning or progress. Only document what you can see, hear, justify or count.
As students work, move around the classroom in order to make brief observation notes. You can use a class list to record which students need more help, and also to note any emerging misunderstandings. You can use these observations and notes to give feedback to the whole class or prompt and encourage groups or individuals.
Giving feedback
Feedback is information that you give to a student about how they have performed in relation to a stated goal or expected outcome. Effective feedback provides the student with:
- information about what happened
- an evaluation of how well the action or task was performed
- guidance as to how their performance can be improved.
When you give feedback to each student, it should help them to know:
- what they can actually do
- what they cannot do yet
- how their work compares with that of others
- how they can improve.
It is important to remember that effective feedback helps students. You do not want to inhibit learning because your feedback is unclear or unfair. Effective feedback is:
- focused on the task being undertaken and the learning that the student needs to do
- clear and honest, telling the student what is good about their learning as well as what requires improvement
- actionable, telling the student to do something that they are able to do
- given in appropriate language that the student can understand
- given at the right time – if it’s given too soon, the student will think ‘I was just going to do that!’; too late, and the student’s focus will have moved elsewhere and they will not want to go back and do what is asked.
Whether feedback is spoken or written in the students’ workbooks, it becomes more effective if it follows the guidelines given below.
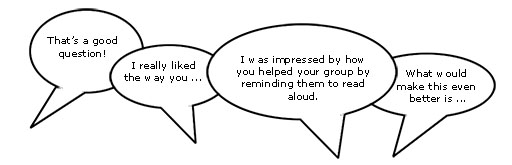
Using praise and positive language
When we are praised and encouraged, we generally feel a great deal better than when we are criticised or corrected. Reinforcement and positive language is motivating for the whole class and for individuals of all ages. Remember that praise must be specific and targeted on the work done rather than about the student themselves, otherwise it will not help the student progress. ‘Well done’ is non-specific, so it is better to say one of the following:
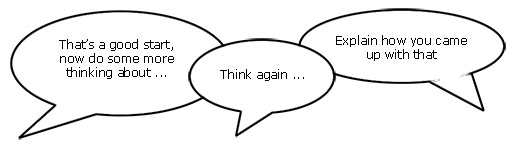
Using prompting as well as correction
The dialogue that you have with your students helps their learning. If you tell them that an answer is incorrect and finish the dialogue there, you miss the opportunity to help them to keep thinking and trying for themselves. If you give students a hint or ask them a further question, you prompt them to think more deeply and encourage them to find answers and take responsibility for their own learning. For example, you can encourage a better answer or prompt a different angle on a problem by saying such things as:
It may be appropriate to encourage other students to help each other. You can do this by opening your questions to the rest of the class with such comments as:
Correcting students with a ‘yes’ or ‘no’ might be appropriate to tasks such as spelling or number practice, but even here you can prompt students to look for emerging patterns in their answers, make connections with similar answers or open a discussion about why a certain answer is incorrect.
Self-correction and peer correction is effective and you can encourage this by asking students to check their own and each other’s work while doing tasks or assignments in pairs. It is best to focus on one aspect to correct at a time so that there is not too much confusing information.
Resource 5: Using local resources
Many learning resources can be used in teaching – not just textbooks. If you offer ways to learn that use different senses (visual, auditory, touch, smell, taste), you will appeal to the different ways that students learn. There are resources all around you that you might use in your classroom, and that could support your students’ learning. Any school can generate its own learning resources at little or no cost. By sourcing these materials locally, connections are made between the curriculum and your students’ lives.
You will find people in your immediate environment who have expertise in a wide range of topics; you will also find a range of natural resources. This can help you to create links with the local community, demonstrate its value, stimulate students to see the richness and diversity of their environment, and perhaps most importantly work towards a holistic approach to student learning – that is, learning inside and outside the school.
Making the most of your classroom
People work hard at making their homes as attractive as possible. It is worth thinking about the environment that you expect your students to learn in. Anything you can do to make your classroom and school an attractive place to learn will have a positive impact on your students. There is plenty that you can do to make your classroom interesting and attractive for students – for example, you can:
- make posters from old magazines and brochures
- bring in objects and artefacts related to the current topic
- display your students’ work
- change the classroom displays to keep students curious and prompt new learning.
Using local experts in your classroom
If you are doing work on money or quantities in mathematics, you could invite market traders or dressmakers into the classroom to come to explain how they use maths in their work. Alternatively, if you are exploring patterns and shapes in art, you could invite maindi [wedding henna] designers to the school to explain the different shapes, designs, traditions and techniques. Inviting guests works best when the link with educational aims is clear to everyone and there are shared expectations of timing.
You may also have experts within the school community (such as the cook or the caretaker) who can be shadowed or interviewed by students related to their learning; for example, to find out about quantities used in cooking, or how weather conditions impact on the school grounds and buildings.
Using the outside environment
Outside your classroom there is a whole range of resources that you can use in your lessons. You could collect (or ask your class to collect) objects such as leaves, spiders, plants, insects, rocks or wood. Bringing these resources in can lead to interesting classroom displays that can be referred to in lessons. They can provide objects for discussion or experimentation such as an activity in classification, or living or not-living objects. There are also resources such as bus timetables or advertisements that might be readily available and relevant to your local community – these can be turned into learning resources by setting tasks to identify words, compare qualities or calculate journey times.
Objects from outside can be brought into the classroom – but the outside can also be an extension of your classroom. There is usually more room to move outside and for all students to see more easily. When you take your class outside to learn, they can do activities such as:
- estimating and measuring distances
- demonstrating that every point on a circle is the same distance from the central point
- recording the length of shadows at different times of the day
- reading signs and instructions
- conducting interviews and surveys
- locating solar panels
- monitoring crop growth and rainfall.
Outside, their learning is based on realities and their own experiences, and may be more transferable to other contexts.
If your work outside involves leaving the school premises, before you go you need to obtain the school leader’s permission, plan timings, check for safety and make rules clear to the students. You and your students should be clear about what is to be learnt before you depart.
Adapting resources
You may want to adapt existing resources to make them more appropriate to your students. These changes may be small but could make a big difference, especially if you are trying to make the learning relevant to all the students in the class. You might, for example, change place and people names if they relate to another state, or change the gender of a person in a song, or introduce a child with a disability into a story. In this way you can make the resources more inclusive and appropriate to your class and their learning.
Work with your colleagues to be resourceful: you will have a range of skills between you to generate and adapt resources. One colleague might have skills in music, another in puppet making or organising outdoor science. You can share the resources you use in your classroom with your colleagues to help you all generate a rich learning environment in all areas of your school.
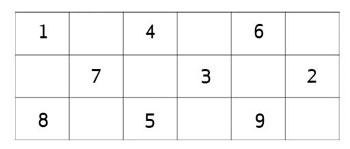
Resource 6: Template for static electricity game
Additional resources
- Games and Toys in the Teaching of Science and Technology, edited by Norman K. Lowe: http://www.unesco.org/ education/ pdf/ 325_41.pdf
- ‘The art and science of teaching/Using games to enhance student achievement’ by Robert J. Marzano: http://www.ascd.org/ publications/ educational-leadership/ feb10/ vol67/ num05/ Using-Games-to-Enhance-Student-Achievement.aspx
- Physics tutorial on charging by friction: http://www.physicsclassroom.com/ class/ estatics/ Lesson-2/ Charging-by-Friction
- Static electricity: http://www.sciencemadesimple.com/ static.html
References
Acknowledgements
This content is made available under a Creative Commons Attribution-ShareAlike licence (http://creativecommons.org/ licenses/ by-sa/ 3.0/), unless identified otherwise. The licence excludes the use of the TESS-India, OU and UKAID logos, which may only be used unadapted within the TESS-India project.
Every effort has been made to contact copyright owners. If any have been inadvertently overlooked the publishers will be pleased to make the necessary arrangements at the first opportunity.
Video (including video stills): thanks are extended to the teacher educators, headteachers, teachers and students across India who worked with The Open University in the productions.