Use 'Print preview' to check the number of pages and printer settings.
Print functionality varies between browsers.
Printable page generated Tuesday, 9 June 2026, 10:55 PM
TI-AIE: Effective demonstrations: teaching light and vision to Class X
What this unit is about
Demonstrations form an important part of science lessons. There are several potential benefits from using a demonstration:
- An engaging demonstration can make the science ideas and concepts more meaningful for students.
- It ensures that students see the correct procedure.
- You only need one set of equipment.
- Compared to other practical approaches, it allows you the greatest control. This is especially important when the practical work is complex or hazardous.
- It allows you to direct attention to the chosen focus throughout the activity.
However, without careful planning, your students may not be fully engaged in the demonstration. When students are not adequately engaged, they do not learn effectively.
This unit is about developing effective demonstrations to help your Class X students learn about light and vision (related to Chapters 10 and 11 in the Class X textbook). The strategies and techniques that you will learn in this unit will apply to demonstrations in other topics as well.
What you can learn in this unit
- Different ways in which classroom demonstrations can support learning about light and vision.
- How to plan for more effective demonstrations.
- How to use focused questioning during a demonstration to direct attention and find out about your students’ understanding.
Why this approach is important
Teachers recognise that practical work is an important part of learning in science and can have several different purposes. If you teach large classes with restricted specialist facilities and resources, this will often mean that your students will not be able to do the practical learning activities themselves. You will need to use classroom demonstrations.
Practical demonstrations can be used to illustrate particular concepts, to show students how to carry out specific laboratory techniques (for example using a particular piece of equipment) or to develop students’ observational skills. The purpose of the practical demonstration will depend on the topic, the students involved and the time and resources available.
All practical demonstrations need careful planning to be effective learning experiences. You should be clear about what you want to achieve and how you will ensure that your students are fully engaged. When students are not adequately engaged they do not learn effectively. In this unit the focus is on practical experiences in the ‘light’ topic for your Class X students.
Learning about light involves learning and applying definitions and conventions such as how to measure angles of incidence, reflection and refraction. These are easy to illustrate with a practical demonstration. Demonstrations can also help your students to understand the construction of ray diagrams and the nature of images formed by objects at different distances from lenses.
Improvements in your students’ understanding will be greater if they are actively involved in the demonstration, not just passive observers. Active involvement means that your students are thinking – they are cognitively active. Some ways to do this are to involve them in observing the images and constructing the diagrams as you direct attention to relevant features and introduce the correct terminology. You can also use demonstrations to probe your students’ understanding as they progress through the topic.
1 Choosing when to do a demonstration
Where you have a choice, a demonstration may not always be the best approach to use to support your students’ learning. For example, students need to handle equipment in order to learn basic laboratory skills and techniques.
But in some cases a demonstration is the best option. Teachers often choose to use demonstrations rather than group practical activities because they:
- use only one set of specialist equipment for an activity
- may be quicker to do than organising the equivalent group practical activity
- give teachers greatest control, something that is especially important when a practical activity is complex or hazardous
- make it more likely that your students will see the correct procedure and results
- allow you to direct your students’ attention to things you want them to notice as you do the demonstration.
Pause for thought
|
Case Study 1: Miss Varsani plans when to use demonstrations in teaching ‘light’
Miss Varsani reviewed the practical activities related to reflection in the Class X textbook ‘light’ topic as part of her lesson planning.
I would like to include a range of practical approaches in my work with Class X, so I want to make sure that when I choose to do a demonstration it will be the most effective way of carrying out the activity. In making a decision about each practical, I took three issues into consideration:
- There are many students in Class X and I do not have much equipment.
- I have not done much group practical work before, and I am still a bit worried about control and safety issues when there are lots of students doing an activity at the same time.
- Whatever way I choose to plan an activity, my students must see the point of the activity quickly and not get distracted.
I drew up a table to help me decide where demonstrations would be most effective [Table 1].
| Activity | Key teaching points What do I want my students to learn? |
Demonstration or other type of practical activity? Key reason for choice? Comments? What else do I need to do? |
|---|---|---|
| 10.1 | Shiny spoon is like a convex mirror on one side and a concave mirror on the other side. Image in a concave mirror at different distances. Image in a convex mirror at different distances. Size of image? Erect or inverted? Real or virtual? |
Teacher-directed activity, but every student needs to try out the activity. Quickest and most effective if everyone has a shiny spoon. No changes with convex side, but everyone needs to see two types of image with the concave side. |
| 10.2 | Concave mirror converges rays of light from the Sun to a point. Very bright light at this point – energy delivered to one spot enough to cause damage or burning! Distance from mirror centre to point is roughly the focal length of the mirror. Conventions: Drawing curved mirrors and rays; rays from a distant object are parallel. Arrows are from object. Terminology: pole P, principal focus F, focal length f, principal axis, centre of curvature C. |
Demonstration. Safety: Potential hazard from bright light reflected into eyes, so I will do this. Draw the mirror, parallel rays from Sun and converging rays reflected from mirror to introduce drawing conventions and terminology. May be difficult to show that the image of the Sun is inverted! Leave to next activity? |
| 10.3 | Properties of images in a concave mirror for six different object positions. Position, size and nature of image. Using the terminology and conventions. |
Demonstration. Timing issue and ensures correct procedures and results. Quite lengthy and technical, so needs lots of questions and student involvement to keep attention. Different student ‘assistant’ for each situation. Issues about viewing images – everyone needs to see each image. |
| 10.4 | Ray diagram construction for each of six object positions from activity 10.3 to illustrate use of rules for constructing ray diagrams. | Demonstration. Timing issue and ensures correct procedures and results. Quite lengthy and technical, so needs lots of questions and student involvement to keep attention. Different student ‘assistant’ for each situation. Needs immediate follow-up by students drawing own diagrams. |
| 10.5 | Images in a concave mirror are always virtual, diminished and erect. | Teacher-directed activity with a convex mirrorfor each group. Enough mirrors for this so not resource issue. More effective and quicker for everyone to see this way. |
So, three of the six activities don’t present a resource issue and would be best done by my students, but the other three are still better done as demonstrations.
Pause for thought
|
Activity 1: Planning your own teaching
This activity will help you to plan for teaching and learning about refraction as part of the Class X textbook chapters ‘Light’ and ‘The human eye and the colorful world’. You will need Resource 1 for this activity, or to make a copy of this in your notebook.
Look at the activities used for teaching and learning about refraction in the Class X textbook, Chapters 10 and 11. For each of them, make a note of:
- what you want students to learn from the activity
- whether you plan to do the activity as a demonstration or other type of practical activity. Give a reason for your choice: for example, resources, timing, motivation, safety, showing correct procedure and results.
Use the example in Case Study 1 above to help you complete the table in Resource 1.
How many of the activities in Chapter 10 would be best done as demonstrations? How many of the activities in Chapter 11 would be best done as demonstrations?
If there is another science teacher at your school, talk to them about how they make these decisions – and which demonstrations are they planning? To find out more, read Resource 2, 'Planning lessons'.
2 Planning for effective demonstrations
Pause for thought Think of a demonstration you saw when you were a student at university or college.
|
Before planning how to carry out any demonstration with your class, it is important to ask yourself: ‘What do I want my students to learn?’ and ‘When will my students learn that from this demonstration?’ If a demonstration does not deliver what you want your students to learn, then no matter how impressive it is, it is not an effective demonstration.
Case Study 2: Ask a colleague to help you plan your demonstrations
Miss Bulsara asked another science teacher to review her plans for a demonstration of images formed by a convex lens (Activity 10.12).
This is the first time I have taught this topic. There are a lot of points to cover in the practical activity about images in lenses, and I was worried that my students might lose interest or become distracted if the demonstration took too long. I wanted to get someone else’s opinion on what I was planning to do, so I asked my colleague Mrs Gupta if we could meet after school in the room where I will teach the lesson, and talk through the demonstration.
The room has a nice, large demonstration bench, so I put my equipment tray down on the bench and began to set up the demonstration.
Mrs Gupta asked ‘Which lens are you planning to use first? It will affect how you set up the lines and the lens holder.’
I hadn’t decided, so I spent a few minutes checking the focal length of three different convex lenses, then putting one of them in a lens stand and drawing the parallel lines on the table. I made a note on my plan about which lens to use for the demonstration and how far apart the lines needed to be. I would need this information to help me set up quickly in the lesson.
I was starting to mark the F and 2F positions when Mrs Gupta commented, ‘This is a very quiet class today, isn’t it?’
We laughed, because I was so absorbed in following the instructions that I had forgotten about how it would appear to my students. I was about to say, ‘I’m marking this line as F’ when I stopped myself. Perhaps it would be better to ask one of my students why they thought I had lines drawn at these particular distances, and why I was labelling them F and 2F? Another quick note to myself on the plan!
I set up the screen and lit the candle, then made a few adjustments to get a nice sharp image on the screen with the candle as far away as possible.
‘Where will your students be? Will everyone be able to see the image?’ asked Mrs Gupta. It was worth checking. It would have been difficult for some of my students to see the image from where they would normally stand. Another quick note on my plan!
I drew up a table like Table 10.4 on the blackboard, with all the different object positions in the first column but with everything else left blank. After showing everyone the first example, for all the other object positions I planned to ask a student to show me where I should place the candle each time, and someone else where they thought the image would be. I would ask someone else to describe the image they could see on the screen.
I was going to tell my students to fill in the information themselves during the demonstration, so they would need to keep paying attention. But Mrs Gupta suggested that this might be more of a distraction, especially when everyone would know that the table with all the answers was in the book. Instead, I decided to fill in the table on the board as we worked through all the different positions, so students could see how we had arrived at the completed table. Another note on the plan!
By the end of our discussion, I felt I had a plan that would really help me to deliver a more effective demonstration. Our discussion had also made me think about what I could do to improve my demonstrations for other topics, too.
Pause for thought
|
Now try planning your own demonstration in Activity 2.
Activity 2: Planning for effective demonstrations
This activity will help you to develop your planning for effective demonstrations.
Look at Activity 11.3 in the Class X textbook. You are going to prepare a plan for a lesson including this activity as a demonstration, addressing each of points 1 to 8 below, and then carry out the plan. Refer to Resource 2 for general suggestions about how you might address points 3 to 8.
- What do I want my students to learn?
- When will my students learn that from this demonstration? What is it that they need to observe or hear?
- What do I need to do to make sure the demonstration works as intended?
- What do I need to do to ensure that it is physically possible for everyone to see what I want them to see?
- What do I need to do to ensure that everyone is ready to see what I want them to see?
- What can I do to keep my students actively involved during the demonstration rather than simply watching it?
- How will I prepare my students for the demonstration?
- How will I help them to consolidate what they have learned from the demonstration?
Compare your plans to the suggestions in Resource 2. Were there any suggestions you hadn’t thought of? Which suggestions did you find most useful?
Carry out your plan as soon as possible. Afterwards, discuss the lesson with a colleague. What went well? Did your students learn what you wanted them to learn? Where could you improve your plan for next time?
Remember that scientific observation has to be taught. Students will only be able to make good scientific observations when students know what to look for, how to look for it and how to recognise the significance of what they see. It is also important to teach students about observations: that our senses can be mistaken and that observations are influenced by theories that we hold. So all observations should be critically evaluated. These ideas can be explored with your students by using planned questions during the demonstration.
3 Using questioning during demonstrations
Pause for thought Think back to when you were a student.
|
In order to make sense of a demonstration and remember it, your students need to draw on prior knowledge of concepts and procedures. Learning happens when your students are supported to assimilate new information and understanding into an existing framework, and this may involve challenges to their existing understanding.
Using questions can help you to direct your students’ attention to details that you want them to notice and remember. Ask them: ‘What seems to be happening here? Is that what you would have expected? What do you think caused that?’ Asking questions wherever possible is preferable to telling your students lots of information, because it demands that they think about what is going on in relation to what they already know. This is active learning. At the same time, it allows you to check your students’ understanding as you work through the demonstration with them, and to remind them of relevant information or concepts before you move on.
To be most effective, your questions need to go beyond recall of definitions so that your students apply their knowledge and understanding. For example, instead of asking for a definition of ‘angle of refraction’, you might ask where you would need to make the measurement on your demonstration.
Some ways in which you can help your students to develop more complete and thoughtful responses are through prompting, seeking further clarification and in refocusing a student’s response. You can find out more about these techniques in the unit on questioning and the key resource ‘Using questioning to promote thinking’.
Activity 3: Detailed planning for demonstrations
This activity will help you to develop your planning and teaching practice. If possible, work with another teacher on this activity so you can share ideas.
Look at Activities 11.1 and 11.2 in the Class X textbook. They deal with refraction of light through a prism and dispersion of white light by a prism. For each of these two activities in turn:
- Write down:
- a.the conceptual knowledge and understanding that your students will need for this demonstration
- b.the questions you could ask to remind them of this, and when you will ask these questions – for example, will you ask the question in the introduction to the demonstration, or at a particular point during the demonstration, or both?
- Write down:
- a.the procedural knowledge and understanding that your students will need for this demonstration (this is knowledge about how to do the task)
- b.the questions you could ask to remind them of this (or find out what they remember) and when you will ask these questions.
- Write down:
- a.the new concepts and definitions you will need to introduce as part of the demonstration
- b.when and how you will introduce each of these.
- Write down:
- a.what you want students to notice and learn from this demonstration
- b.how you will direct attention to this feature
- c.what questions you will use after the demonstration to help consolidate the learning.
Now integrate these ideas into your lesson plan and carry out the demonstrations with your students.
Pause for thought Reflect on the planning you did in Activity 3, and answer the following questions:
|
4 Summary
In this unit, you have learned about some of the ways in which demonstrations can support learning about light and vision, and how you can plan to make more effective use of demonstrations.
You can also apply the strategies you practised to demonstrations in other topics.
One of the ways in which a demonstration becomes memorable is when it produces a result that your students did not expect. Not all topics include the possibility of surprise in a demonstration, but when the opportunity arises it is important to have planned to make best use of it.
Resources
Resource 1: Planning demonstrations for light and vision
This resource is for use with Activity 1.
Table R1.1 below shows practical activities related to refraction in the Class X textbook chapters on light and on the human eye & the colourful world.
| Activity | Key teaching points/What do I want my students to learn? | Demonstration or other type of practical activity? Key reason for choice? Comments? What else do I need to do? |
|---|---|---|
| 10.7 | ||
| 10.8 | ||
| 10.9 | ||
| 10.10 | ||
| 10.11 | ||
| 10.12 | ||
| 10.13 | ||
| 11.1 | ||
| 11.2 | ||
| 11.3 |
Resource 2: Planning lessons
Why planning and preparing are important
Good lessons have to be planned. Planning helps to make your lessons clear and well-timed, meaning that students can be active and interested. Effective planning also includes some in-built flexibility so that teachers can respond to what they find out about their students’ learning as they teach. Working on a plan for a series of lessons involves knowing the students and their prior learning, what it means to progress through the curriculum, and finding the best resources and activities to help students learn.
Planning is a continual process to help you prepare both individual lessons as well as series of lessons, each one building on the last. The stages of lesson planning are:
- being clear about what your students need in order to make progress
- deciding how you are going to teach in a way that students will understand and how to maintain flexibility to respond to what you find
- looking back on how well the lesson went and what your students have learnt in order to plan for the future.
Planning a series of lessons
When you are following a curriculum, the first part of planning is working out how best to break up subjects and topics in the curriculum into sections or chunks. You need to consider the time available as well as ways for students to make progress and build up skills and knowledge gradually. Your experience or discussions with colleagues may tell you that one topic will take up four lessons, but another topic will only take two. You may be aware that you will want to return to that learning in different ways and at different times in future lessons, when other topics are covered or the subject is extended.
In all lesson plans you will need to be clear about:
- what you want the students to learn
- how you will introduce that learning
- what students will have to do and why.
You will want to make learning active and interesting so that students feel comfortable and curious. Consider what the students will be asked to do across the series of lessons so that you build in variety and interest, but also flexibility. Plan how you can check your students’ understanding as they progress through the series of lessons. Be prepared to be flexible if some areas take longer or are grasped quickly.
Preparing individual lessons
After you have planned the series of lessons, each individual lesson will have to be planned based on the progress that students have made up to that point. You know what the students should have learnt or should be able to do at the end of the series of lessons, but you may have needed to re-cap something unexpected or move on more quickly. Therefore each individual lesson must be planned so that all your students make progress and feel successful and included.
Within the lesson plan you should make sure that there is enough time for each of the activities and that any resources are ready, such as those for practical work or active groupwork. As part of planning materials for large classes you may need to plan different questions and activities for different groups.
When you are teaching new topics, you may need to make time to practise and talk through the ideas with other teachers so that you are confident.
Think of preparing your lessons in three parts. These parts are discussed below.
1 The introduction
At the start of a lesson, explain to the students what they will learn and do, so that everyone knows what is expected of them. Get the students interested in what they are about to learn by allowing them to share what they know already.
2 The main part of the lesson
Outline the content based on what students already know. You may decide to use local resources, new information or active methods including groupwork or problem solving. Identify the resources to use and the way that you will make use of your classroom space. Using a variety of activities, resources, and timings is an important part of lesson planning. If you use various methods and activities, you will reach more students, because they will learn in different ways.
3 The end of the lesson to check on learning
Always allow time (either during or at the end of the lesson) to find out how much progress has been made. Checking does not always mean a test. Usually it will be quick and on the spot – such as planned questions or observing students presenting what they have learnt – but you must plan to be flexible and to make changes according to what you find out from the students’ responses.
A good way to end the lesson can be to return to the goals at the start and allowing time for the students to tell each other and you about their progress with that learning. Listening to the students will make sure you know what to plan for the next lesson.
Reviewing lessons
Look back over each lesson and keep a record of what you did, what your students learnt, what resources were used and how well it went so that you can make improvements or adjustments to your plans for subsequent lessons. For example, you may decide to:
- change or vary the activities
- prepare a range of open and closed questions
- have a follow-up session with students who need extra support.
Think about what you could have planned or done even better to help students learn.
Your lesson plans will inevitably change as you go through each lesson, because you cannot predict everything that will happen. Good planning will mean that you know what learning you want to happen and therefore you will be ready to respond flexibly to what you find out about your students’ actual learning.
Resource 3: Planning for effective classroom demonstrations
This resource is used for Activity 2.
It provides general suggestions for how planning might address each of the following four points. Effective demonstrations:
- work as intended
- make everyone aware of the points you want them to notice
- ensure that students are involved in the demonstration rather than passive observers of it
- are part of a whole lesson.
1 Effective demonstrations work as intended
It is important to try out any new demonstration before you use it with a class.
This is obviously the case for safety issues, but it is also important to make sure you have the right equipment and know-how to make something work in front of your class without having to make lots of adjustments. Your class may lose interest if you have to spend a lot of time on ‘setting up’ a practical demonstration.
- How much can you set up in advance so that they don’t lose interest, or become distracted by unnecessary details?
- If there is more than one demonstration that you want students to see in a single lesson, would it be more effective to have each of the demonstrations set up in different parts of the laboratory ready for you to show students?
- If the setting up is an important part of the practical, then having separate trays of equipment for each demonstration will make it easier to pick up only the things that you need instead of searching around for them.
Before you try out a new demonstration, check for any possible hazards and ask a more experienced colleague to show you how to carry out the demonstration safely.
2 Effective demonstrations make everyone aware of the points you want them to notice
If your students don’t see the important features of the demonstration, then it will not help their learning.
- What are the things that your students need to observe in the demonstration (the image produced by an object at a particular distance from a lens, or how you measure the angle of incidence, for example)?
There are two aspects to ensuring that your students see what you want them to see. The first is ensuring that it is physically possible for students to see what you want them to see. The second is ensuring that they are ready to see what you want them to see.
2.1 Ensuring that it is physically possible for students to see what you want them to see
As you rehearse a demonstration, think about how it will look to your students.
- Where will you carry out the demonstration?
- Where will students stand or sit as you do this?
- How will you ensure that everyone is able to see what you want them to see? Will students need to move to somewhere they can view the feature? Will you need to pass equipment round for students to try things out as you talk?
2.2 Ensuring that your students are ready to see what you want them to see
This means students need to look in the right place to see something as it happens. It also means that they are ready to make sense of what is happening.
- What concepts or prior experiences do you need to remind students of so that they will understand what they are looking for? Do you need to have any images or other resources as reminders to help your students recognise relevant details and ignore irrelevant ones?
- How will you make sure that everyone is looking in the right place at the right time? Of course, it is important to tell them where to look and when, but you can also help by pausing to get everyone’s attention or repeating the key part of the demonstration as necessary.
3 Effective demonstrations ensure that students are active learners rather than passive observers
You can make your demonstrations more effective by involving your students and making them more active learners during the demonstration:
- Ask questions about the demonstration rather than telling students whenever possible. (‘Where should I measure the angle of reflection from?’ rather than ‘I’m measuring the angle of reflection from here’, for example, if this is not the first time you have used the term.)
- Ask your students to make predictions about what will happen and give reasons for their predictions. (‘Where would you expect the image to be this time? Why?’)
- Ask questions that refer back to previous learning.
- Use students to help with parts of a demonstration that are not hazardous.
4 Effective demonstrations are part of a whole lesson
Demonstrations contribute to learning as part of a complete lesson. To do this effectively, you need to ‘set the stage’ in a starter section, make sure your demonstration delivers all the learning points you want it to, then consolidate the learning in a plenary section.
Use the starter to:
- identify a maximum of four learning outcomes for the lesson
- direct attention to key questions that your students should ask themselves or things they should look out for during the demonstration
- help your students relate what they are about to do to what they have already learned about.
During the plenary:
- ask individual students to summarise what they found out from the demonstration (Was it what they expected? Did they find anything odd or surprising?).
Additional resources
- The UK National Strategies science study guide: http://webarchive.nationalarchives.gov.uk/ 20110809091832/ http://teachingandlearningresources.org.uk/ node/ 42729 (accessed 19 May 2014)
- Information on practical activities in physics for 11–19-year-olds: http://www.nuffieldfoundation.org/ practical-physics (accessed 19 May 2014)
References
Acknowledgements
Except for third party materials and otherwise stated below, this content is made available under a Creative Commons Attribution-ShareAlike licence (http://creativecommons.org/ licenses/ by-sa/ 3.0/). The material acknowledged below is Proprietary and used under licence for this project, and not subject to the Creative Commons Licence. This means that this material may only be used unadapted within the TESS-India project and not in any subsequent OER versions. This includes the use of the TESS-India, OU and UKAID logos.
Grateful acknowledgement is made to the following sources for permission to reproduce the material in this unit:
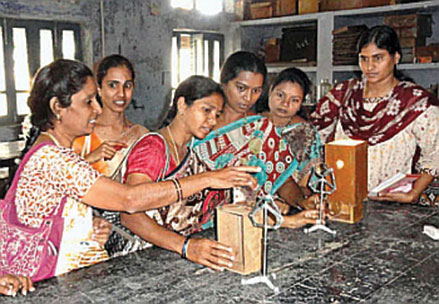
Figure 1: Vigyan Prasar Science Club (http://www.frontline.in/ static/ html/ fl2822/ stories/ 20111104282212600.htm).
Every effort has been made to contact copyright owners. If any have been inadvertently overlooked the publishers will be pleased to make the necessary arrangements at the first opportunity.
Video (including video stills): thanks are extended to the teacher educators, headteachers, teachers and students across India who worked with The Open University in the productions.