Use 'Print preview' to check the number of pages and printer settings.
Print functionality varies between browsers.
Printable page generated Tuesday, 9 June 2026, 10:56 PM
TI-AIE: Hands-on learning and embodiment: constructions in geometry
What this unit is about
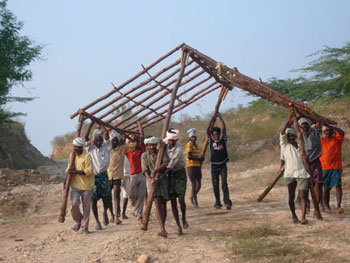
When you look around, there are angles to be noticed everywhere. Life without angles does not seem possible. There are angles in objects, in buildings, in hills, in trees, in the waves of the sea – even in people, in the movement of our arms and legs (Figure 1).
In this unit you will learn how hands-on learning and embodiment can be used when working on constructions in geometry with your students. The unit contains suggestions on using the outdoors as a mathematical arena. Working in this way can help your students become independent learners, able to think through the ideas they have studied in the classroom and apply them outside. To help your students further with this, the unit also discusses ways to help them become ‘unstuck’ in their learning of mathematics.
What you can learn in this unit
- How to use embodiment and make large-scale constructions to promote learning and enjoyment in doing mathematics.
- Some ideas to help your students deal with being stuck by themselves, so that they develop personal strategies for moving forward with their learning.
- Some ideas on how to use hands-on approaches to teach constructions in geometry.
This unit links to the teaching requirements of the NCF (2005) and NCFTE (2009) outlined in Resource 1.
1 Constructing angles by folding paper
Angles play an important role in life. Yet somehow, students often do not see these angles around them or associate them with the angles that they work with in the mathematics classroom. When students think of angles, they often restrict their thoughts to intersecting lines drawn on paper that can only be measured and constructed by using a protractor and a pair of compasses.
Activity 1 aims to introduce students to how they can ‘construct’ angles through paper-folding using nothing but a rectangular piece of paper. This hands-on experience of manipulating angles can help students to explore the meanings behind the symbols, representations and concepts relating to angles. This is intended as a quick revision of angles that they will have studied in elementary school.
Before attempting to use the activities in this unit with your students, it would be a good idea to complete all (or at least part) of the activities yourself. It would be even better if you could try them out with a colleague, as that will help you when you reflect on the experience. Trying the activities yourself will mean that you get insights into learners’ experiences that can in turn influence your teaching and your experiences as a teacher. When you are ready, use the activities with your students. After the lesson, think about the way that the activity went and the learning that happened. This will help you to develop a more learner-focused teaching environment.
Activity 1: Constructing angles by folding paper
Tell your students that any straight edge represents a straight angle of 180°. When you fold an angle so that the initial ray falls on the terminal ray, this results in what is termed bisecting an angle.
Using this knowledge, ask your students to try to construct angles that measure 180°, 90°, 77.5°, 50°, 45°, 30°, 22.5° and 11.25°.
Then they should answer these questions:
- Which ones were easy to fold?
- Which were difficult or impossible to fold?
- Why are these angles all less than 180°? Is it possible to bisect angles beyond that value?
Case Study 1: Mr Rawool reflects on using Activity 1
This is the account of a teacher who tried Activity 1 with his secondary students.
The students had never done a paper-folding exercise before (or at least not for a long time) and seemed to be a little confused at the start. Somehow they seemed to find the concept that you can halve angles unusual. I asked questions to explore what they were thinking and it turned out they saw angles as something static, something fixed, and not as a description of movement or turning. So I first asked them to stand up, hold both arms up forward, and turn clockwise/anti-clockwise through 180°, 360°, 720°, 90°, 45°, half of 360°, double 45°, half of 360°, followed by 45°, etc., trying to hold one arm in place and move the other to indicate the size of the angle so that they began to see measuring an angle as measuring a turn or rotation.
After this they were happy to do the paper-folding. What they noticed was that getting the angles accurate became a major problem, especially when trying to fold the smaller angles.
Reflecting on your teaching practice
When you do such an activity with your class, reflect afterwards on what went well and what went less well. Consider the questions that led to the students being interested and being able to get on and those where you needed to clarify. Such reflection always helps with finding a ‘script’ that helps you engage the students to find mathematics interesting and enjoyable. If they do not understand and cannot do something, they are less likely to become involved. Use this reflective exercise every time you undertake the activities, noting, as Mr Rawool did, some quite small things that made a difference.
Pause for thought Good questions to trigger such reflection are:
|
2 Scaling up and scaling down
Every image can be enlarged or reduced by a scaling factor. This is something we do constantly in real life. The original image and the scaled image are ‘similar’ to each other. The concept of ‘similarity of triangles’ covered in Class X often baffles students if they have never involved themselves in scaling images or have never studied the relationship between a scaled and an original image before.
In the next activity, you help students to discover their own technique for scaling a triangle. They then determine the scaling factor of the enlargement or reduction by defining the size of the enlarged triangle. This works best if the students work outside the mathematics classroom, and work on a larger scale than they are used to when working on paper. The issues of working with ‘real-life’ measurements, and the mathematical learning they gain, are described in the case study after this task and will also be explored further in Activity 3.
Activity 2: Scaling up and scaling down
Preparation
This activity works well when the students collaborate in groups of threes or fours. Plan who will be in each group and why – perhaps you could mix more confident students with less confident ones. It is important that this activity takes place outside, for example on the playground, where students can write on the ground with chalk or trace drawings in soil or dust. Newspaper might be a better choice than a sheet of paper, as it is bigger. When asking students to work in groups, it is important that the resources, such as writing paper, are big enough, so they all can see at the same time. That means bigger paper sheets, and bigger writing.
The activity
Tell your students the following:
- You are given a sheet of paper. Fold it so it forms a triangle. The shape of the triangle is not important.
- Measure the triangle (angles and sides) and calculate its perimeter.
- Draw a triangle of the same shape on the ground with a perimeter that is ten times the size of your paper triangle. Is there more than one solution?
- Measure the larger triangle.
- Using the same technique as you did earlier, draw a triangle inside your paper triangle whose sides are exactly half of the corresponding sides of the original triangle.
- Compare the original triangle to any one (reduced or enlarged) triangle.
- Now think about what is the same and what is different about these three triangles.
- In your groups, without writing it down, could you think of one or more methods to describe how to get from one triangle to the others? Check whether the methods would also work for starting with one of the other triangles.
- Now write down your method.
Look at Resource 2, ‘Using groupwork’, to find out more.
Case Study 2: Mrs Mohanty reflects on using Activity 2
The groups started to discuss [the activity] but there were several students who were not contributing at all. I realised that they were not finding the task easy, but I did not really understand what it was they were stuck on. The first part of the question asked them to make a triangle out of paper – surely, I thought, that is not that hard. I began to think that perhaps they had forgotten what they were supposed to know already about triangles and maybe I should ask them to quickly look in their textbooks to refresh their memory.
However, we were in the playground, and the books were in the classroom, so that would take too much time. So I thought, ‘OK, I actually do not know what they are stuck on – maybe I should simply ask!’ At the same time I thought, ‘I actually don’t like it when they are stuck.’ They always seem to wait for me to help them become unstuck by telling them what to do. They expect me to break down the questions further into mini-steps. I don’t think that helps them become good independent learners or problem solvers, which is what we need them to be in life outside school. So I said exactly what I was thinking:
You all seem to be stuck. Being stuck is part of life. What is important is to become unstuck and know how to become unstuck. So could you please first discuss in your groups what you are stuck on, and how you could become unstuck. We will then discuss some of your ideas with the whole class.
It took us less than five minutes, and they had some good ideas about becoming unstuck. The discussion actually gave us a sense of togetherness within the whole group – a sense of joint responsibility to help each other with learning, and getting unstuck, and the realisation that we all can do that. There were lots of smiles for the rest of the lesson. As a result, later on, we were able to discuss similarity and also congruency, scale factor and the properties of all triangles. So rather than learning just one aspect of mathematics, they started to connect different aspects.
The question asking them to construct a similar triangle with ten times the perimeter caused some head-scratching – but not frustration. I overheard students saying, ‘We are stuck’ and ‘Now we have to become unstuck.’ One group asked for string to get unstuck. I had not thought of that, so had not brought it. Luckily I had a bobbin of strong sewing thread in my classroom that they happily used.
The question asking what was the same and what was different was interesting. I could see the students physically walking around their triangles, looking at them from different angles. They voiced all kind of conjectures, thought again and then rephrased their conjectures. It led automatically to describing a method. I think it was good that they did not write their ideas down immediately, because they seemed more willing to come up with different descriptions, and could go at a faster speed – writing always seems to slow things down. They also had to become more precise in their use of mathematical language, because otherwise the others could be standing looking at the triangles from a different place, and getting confused when a student said ‘that angle’.
They wrote first on a big sheet of paper, with diagrams, and then copied their method into their exercise books. Then of course I did not know what to do with those big sheets of paper! Eventually we stuck them on the walls of the classroom. It did not look particularly neat; however, it looked exciting, and it was an example of their mathematising. We called it the ‘thinking work wall’. I noticed that over the days and weeks, the students, and other teachers, would read and discuss it. I really liked that there was still talk about a lesson and the learning that happened long after the lesson was over! The same thing happened with the chalk drawings in the playground: people were intrigued and talked about it. The wall display stayed up until we replaced it some weeks later with different ‘thinking work’ from the students.
The activity made me reflect on the effect that making mathematical constructions outside can have. Outside they work on a larger scale than they can in their exercise books, but why would I bother doing this with my students? I still have not figured it out completely why it seems so useful, and I doubt I ever will, but these are my thoughts:
- It was big enough so they all could see what was happening at the same time and take part in the discussion, truly collaborating.
- They had to work together in constructing the triangles. They could not do it on their own because it was too big and there were too many things to do. Because of that, they had to communicate and talk about mathematics. There was also a sense of joint responsibility for the learning.
- It did not have to be precise and accurate from the word go, and that allowed the students to explore more and try out more ideas.
- Their world of mathematics was literally enlarged. The students went from having to sit down in the classroom with a textbook, into their ‘outside’, ‘real’ world of the playground, where they hang out with their school friends.
What also struck me was how full of joy and excitement the lesson had been, together with deep thinking and mathematical contemplations: the smiles and lit-up eyes when they came up with a conjecture, and then the realisation that their conjecture actually held true (at least for a while!). They gleamed with pride and a sense of achievement, and so did I!
Pause for thought
|
3 Embodying mathematics
‘Body mathematics’ is a technique that requires the student to physically experience the mathematics that they are learning about. This is also known as ‘embodiment’, or giving concrete form to an abstract concept. The concept of embodied cognition is that of using the body to shape the thinking of the mind (Dreyfus, 1996; Gibbs, 2006). Embodying mathematics can:
- overcome the barrier of seeing mathematics as a theoretical subject, far removed from the student’s life experiences
- build more imagery for mathematical concepts
- get an emotional, and playful, link with mathematical properties.
In Activity 2 you worked with your students on large measurements. The next activity takes this a step further: working outside with large measurements again, but also requiring students to be the mathematics – to represent mathematics in a bodily form. Students will be asked to represent a point on the circumference of a circle and then to construct the centre of that circle precisely. Consequently each student/point has to be convinced they actually are at the same distance from the centre as all the others. The activity requires students to stand up for their rights and let their voice be heard when they think they are being discriminated against by not being the same distance from the centre as all the other circumference points. This type of activity is not easy to manage the first time you try it, but if you persist your students will gain more sense of mathematical properties.
Activity 3: Being mathematics
Preparation
For this task you will need enough space for all of the students to hold hands and stand in a circle, with some more space outside the circle to be able to enact the construction of its centre. This task is to embody constructing the centre of a circle using ‘a perpendicular bisector of a chord pass[ing] through the centre of a circle’, as discussed in the textbooks for Class IX. If you think the group is too large to be able to complete the discussions they are asked to have in this task, it might be a good idea to ask them to discuss their ideas first in groups of three before sharing them with the whole class. You might need some rope or string, a ball, and a whistle.
The activity
- Tell your students: ‘The purpose of this activity is to identify the student that can run the fastest in the class.’Ask your students to all hold hands and stretch as much as they can to form the largest circular arrangement possible.
- Once the students are standing in a circular formation, pick a student at random and ask: ‘Can you put a ball inside the circle so that it is at the same distance from every student, as precisely as possible? If you place the ball at the wrong spot, you cannot compete later on in this activity.’ (But they could still act as ‘judges’ in the competition.)
- As soon as the ball is placed, tell the other students: ‘It is in your interest to reduce competition if you want to win. Can you convince us that the ball is not at the same distance from every one on the circumference so the student who placed the ball can be eliminated from the competition?’
- After a couple of students have been eliminated, pose the following question: ‘How can you locate with more precision and certainty the centre of the circle that you have formed? Can we come up jointly with a way to place the ball exactly at the centre?’
- Ask them to discuss this in twos and threes; then ask some groups to share their ideas with the whole class. After each group shares its ideas, ask the class whether they would be convinced that this is a good method. There is no need to ask all the groups to tell the class their ideas; after two or three have spoken, ask if anyone has a very different idea to those already given. If no one thinks of using construction with chords and perpendicular bisectors, it might be useful to give them a hint (but without telling all!) such as: ‘Now there was this kind of magical construction tool, called a bisector …’
- Ask them how they would do that construction, and what assumptions they would need to make because they are doing it outside using their bodies and on a large scale; then actually do it.
- When the ball has been placed in the centre of the circle correctly, blow a whistle to signal that the remaining students should run towards it and kick it. The first one to kick the ball wins the contest.
Case Study 3: Mrs Bhatia reflects on using Activity 3
Oh, they loved the competition element of this task! It made them so eager to think and come up with ideas. They all thought it would be so easy and simple to find the centre of the circle.
It was real problem solving – there were problems to be solved, both by thinking and by coming up with ideas to enact/embody the construction. There was a lot of getting stuck, and thinking about how to get unstuck. When they realised after several goes at placing the ball in the centre that it was difficult to be exact, they were kind of stunned. They did find it hard to come up with a fool-proof method, and again, I was tempted to walk them through the chapters relating to circles.
But the hint of the bisector did the trick – although thinking of using a chord or tangent to act as line segment took some time. But they got there on their own, and the sense of achievement, joy and pride, that they had thought of it themselves, was so much worth waiting for. I think that self-discovery and the ‘struggle’ to get there will also help them remember it much better – perhaps even in the exam.
Actually, in that process of thinking of what method would work, they came up with nearly all the different properties and theorems related to the circle. So it was good revision at the same time, together with the realisation that these theorems and properties might help them solve the real problem they were facing in the playground.
Pause for thought
|
4 From embodied mathematics to representations on paper
In Activities 2 and 3 you gave the students concrete experiences of making mathematical construction on a large scale. This offers different learning experiences from doing tasks in the class, or using a textbook. But at some stage your students’ mathematical learning needs to be transposed to a pen and paper approach, and to answering examination questions. Bruner (1966), an eminent educator, described these different worlds as ‘enactive–iconic–symbolic’.
The next activity aims to make that transition and take the learning from doing mathematics outside (Bruner’s ‘enactive’ phase), to making drawings or pictures that represent enactive learning (Bruner’s ‘iconic’ phase), and finally to using mathematical symbolic notation and making sense of such notation (Bruner’s ‘symbolic’ phase). Such mathematical symbolic notation is found in textbooks and examination papers.
Activity 4: From embodied mathematics to exam questions
Part 1
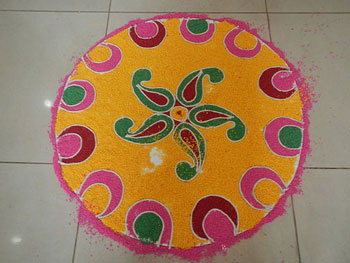
Tell your students to think back to Activity 3, where they tried to find the centre of a circle in the playground by putting down a ball in the centre and seeing whether they could do the same on paper. You will now ask them to redraw the circle they made in the playground with a smaller one that fits into their exercise books. They could draw the circle with the help of a bangle, a pair of compasses or anything round. If time allows, they could turn their circle into a rangoli (Figure 2).
Ask your students to answer the following questions:
- How can you get its precise and undisputed centre?
- Outside school, where and when do you think you would need to find the centre of a circle? Use your imagination!
Part 2
Tell your students to think back to Activity 2, where they made larger versions of triangles. How can they turn that into a classroom activity that they can do in their exercise books?
Part 3
Tell your students the following:
- Take your textbooks and, if available, examination papers.
- Find the chapters and questions that you think relate to the mathematics you learned from Activities 2 and 3, and Parts 1 and 2 of this activity.
- In what way are those questions the same or different?
- Do you get stuck on the same issues?
- How do you get unstuck on your own?
- Pretend you are a textbook writer or an author of examination questions. Can you come up with three new questions on this topic that could be used in the textbook or examination – one easy, one medium and one hard? (Remember you have to be able to answer these questions correctly yourself!)
Case Study 4: Mrs Mehta’s reflections on Activity 4
The change in my students after doing these activities was rather profound. Although they do not find these tasks easy, and could not do them quickly, they seemed to have so much more confidence in their ability to do mathematics. They seemed to be more in control of their own learning powers.
They happily engaged with the first part of the task, coming up with the most unlikely stories as to why they would need to construct the centre of a circle. Nearly all of the stories involved the rationale for having to draw on paper as one of scaling to make a model, suggesting that they could see beyond the mathematics in their exercise books.
For Part 2 of the activity, I asked the students to work in pairs, because talking through it might help to get unstuck and get more ideas.
We started off looking at the textbook chapters and discussing what actually was in these chapters. Again, they worked further on this in pairs. For the construction of new questions, this is one of the questions they came up with:
- A proportion for two triangles, ABC and PQR, is as follows:
- Find the proportion of the perimeters of the two.
- Use the information you found out to find the possible sides of the bigger triangle.
Another question was:
- Draw a triangle that is of another, original triangle.
- Draw a triangle that is of that other, original triangle.
- Discuss how you would draw a triangle that is of the original triangle.
Pause for thought
|
5 Summary
In this unit you have studied how hands-on learning and embodiment can be used when working on constructions in geometry. You have seen how you can use the outdoors as a mathematical arena – where ideas can be explored and links and relationships in mathematics can be established. Working in this way can help your students become independent learners who are able to think through the ideas they have studied in the classroom and apply them outside. As you have seen, this will help them when they come to examinations – but more importantly, it will help them to use mathematics in their lives and in their careers as they reach adulthood.
Pause for thought Identify three ideas that you have used in this unit that would work when teaching other topics. For example, you might take the ideas from Activity 4, moving from enacting mathematics through to pictures and symbols. Make a note now of two topics you have to teach soon where those ideas can be used with some small adjustments. |
Resources
Resource 1: NCF/NCFTE teaching requirements
This unit links to the following teaching requirements of the NCF (2005) and NCFTE (2009) and will help you to meet those requirements:
- Engage with the curriculum, syllabuses and textbooks critically by examining them rather than taking them as ‘given’ and accepted without question.
- Appreciate the potential of hands-on experience as a pedagogic medium both inside and outside the classroom; and work as integral to the process of education
- Support students to learn to enjoy mathematics rather than fear it.
- Help students to see mathematics as something to talk about, to communicate through, to discuss among themselves, to work together on.
Resource 2: Using groupwork
Groupwork is a systematic, active, pedagogical strategy that encourages small groups of students to work together for the achievement of a common goal. These small groups promote more active and more effective learning through structured activities.
The benefits of groupwork
Groupwork can be a very effective way of motivating your students to learn by encouraging them to think, communicate, exchange ideas and thoughts, and make decisions. Your students can both teach and learn from others: a powerful and active form of learning.
Groupwork is more than students sitting in groups; it involves working on and contributing to a shared learning task with a clear objective. You need to be clear about why you are using groupwork for learning and know why this is preferable to lecturing, pair work or to students working on their own. Thus groupwork has to be well-planned and purposeful.
Planning groupwork
When and how you use groupwork will depend on what learning you want to achieve by the end of the lesson. You can include groupwork at the start, the end or midway through the lesson, but you will need to allow enough time. You will need to think about the task that you want your students to complete and the best way to organise the groups.
As a teacher, you can ensure that groupwork is successful if you plan in advance:
- the goals and expected outcomes of the group activity
- the time allocated to the activity, including any feedback or summary task
- how to split the groups (how many groups, how many students in each group, criteria for groups)
- how to organise the groups (role of different group members, time required, materials, recording and reporting)
- how any assessment will be undertaken and recorded (take care to distinguish individual assessments from group assessments)
- how you will monitor the groups’ activities.
Groupwork tasks
The task that you ask your students to complete depends on what you what them to learn. By taking part in groupwork, they will learn skills such as listening to each other, explaining their ideas and working cooperatively. However, the main aim is for them to learn something about the subject that you are teaching. Some examples of tasks could include the following:
- Presentations: Students work in groups to prepare a presentation for the rest of the class. This works best if each group has a different aspect of the topic, so they are motivated to listen to each other rather than listening to the same topic several times. Be very strict about the time that each group has to present and decide on a set of criteria for a good presentation. Write these on the board before the lesson. Students can the use the criteria to plan their presentation and assess each other’s work. The criteria could include:
- Was the presentation clear?
- Was the presentation well-structured?
- Did I learn something from the presentation?
- Did the presentation make me think?
- Problem solving: Students work in groups to solve a problem or a series of problems. This could include conducting an experiment in science, solving problems in mathematics, analysing a story or poem in English, or analysing evidence in history.
- Creating an artefact or product: Students work in groups to develop a story, a piece of drama, a piece of music, a model to explain a concept, a news report on an issue or a poster to summarise information or explain a concept. Giving groups five minutes at the start of a new topic to create a brainstorm or mind map will tell you a great deal about what they already know, and will help you pitch the lesson at an appropriate level.
- Differentiated tasks: Groupwork is an opportunity to allow students of different ages or attainment levels to work together on an appropriate task. Higher attainers can benefit from the opportunity to explain the work, whereas lower attainers may find it easier to ask questions in a group than in a class, and will learn from their classmates.
- Discussion: Students consider an issue and come to a conclusion. This may require quite a bit of preparation on your part in order to make sure that the students have enough knowledge to consider different options, but organising a discussion or debate can be very rewarding for both you and them.
Organising groups
Groups of four to eight are ideal but this will depend on the size of your class, the physical environment and furniture, and the attainment and age range of your class. Ideally everyone in a group needs to see each other, talk without shouting and contribute to the group’s outcome.
- Decide how and why you will divide students into groups; for example, you may divide groups by friendship, interest or by similar or mixed attainment. Experiment with different ways and review what works best with each class.
- Plan any roles you will give to group members (for example, note taker, spokesperson, time keeper or collector of equipment), and how you will make this clear.
Managing groupwork
You can set up routines and rules to manage good groupwork. When you use groupwork regularly, students will know what you expect and find it enjoyable. Initially it is a good idea to work with your class to identify the benefits of working together in teams and groups. You should discuss what makes good groupwork behaviour and possibly generate a list of ‘rules’ that might be displayed; for example, ‘Respect for each other’, ‘Listening’, ‘Helping each other’, ‘Trying more than one idea’, etc.
It is important to give clear verbal instructions about the groupwork that can also be written on the blackboard for reference. You need to:
- direct your students to the groups they will work in according to your plan, perhaps designating areas in the classroom where they will work or giving instructions about moving any furniture or school bags
- be very clear about the task and write it on the board in short instructions or pictures. Allow your students to ask questions before you start.
During the lesson, move around to observe and check how the groups are doing. Offer advice where needed if they are deviating from the task or getting stuck.
You might want to change the groups during the task. Here are two techniques to try when you are feeling confident about groupwork – they are particularly helpful when managing a large class:
- ‘Expert groups’: Give each group a different task, such as researching one way of generating electricity or developing a character for a drama. After a suitable time, re-organise the groups so that each new group is made up of one ‘expert’ from all the original groups. Then give them a task that involves collating knowledge from all the experts, such as deciding on what sort of power station to build or preparing a piece of drama.
- ‘Envoys’: If the task involves creating something or solving a problem, after a while, ask each group to send an envoy to another group. They could compare ideas or solutions to the problem and then report back to their own group. In this way, groups can learn from each other.
At the end of the task, summarise what has been learnt and correct any misunderstandings that you have seen. You may want to hear feedback from each group, or ask just one or two groups who you think have some good ideas. Keep students’ reporting brief and encourage them to offer feedback on work from other groups by identifying what has been done well, what was interesting and what might be developed further.
Even if you want to adopt groupwork in your classroom, you may at times find it difficult to organise because some students:
- are resistant to active learning and do not engage
- are dominant
- do not participate due to poor interpersonal skills or lack of confidence.
To become effective at managing groupwork it is important to reflect on all the above points, in addition to considering how far the learning outcomes were met and how well your students responded (did they all benefit?). Consider and carefully plan any adjustments you might make to the group task, resources, timings or composition of the groups.
Research suggests that learning in groups need not be used all the time to have positive effects on student achievement, so you should not feel obliged to use it in every lesson. You might want to consider using groupwork as a supplemental technique, for example as a break between a topic change or a jump-start for class discussion. It can also be used as an ice-breaker or to introduce experiential learning activities and problem solving exercises into the classroom, or to review topics.
Additional resources
- A newly developed maths portal by the Karnataka government: http://karnatakaeducation.org.in/ KOER/ en/ index.php/ Portal:Mathematics
- Class X maths study material: http://www.zietmysore.org/ stud_mats/ X/ maths.pdf
- National Centre for Excellence in the Teaching of Mathematics: https://www.ncetm.org.uk/
- National STEM Centre: http://www.nationalstemcentre.org.uk/
- OpenLearn: http://www.open.edu/ openlearn/
- BBC Bitesize: http://www.bbc.co.uk/ bitesize/
- Khan Academy’s math section: https://www.khanacademy.org/ math
- NRICH: http://nrich.maths.org/ frontpage
- Mathcelebration: http://www.mathcelebration.com/
- Art of Problem Solving’s resources page: http://www.artofproblemsolving.com/ Resources/ index.php
- Teachnology: http://www.teach-nology.com/ worksheets/ math/
- Maths is Fun: http://www.mathsisfun.com/
- National Council of Educational Research and Training’s textbooks for teaching mathematics and for teacher training of mathematics: http://www.ncert.nic.in/ ncerts/ textbook/ textbook.htm
- LMT-01 Learning Mathematics, Block 1 (‘Approaches to Learning’) Block 2 (‘Encouraging Learning in the Classroom’), Block 6 (‘Thinking Mathematically’): http://www.ignou4ublog.com/ 2013/ 06/ ignou-lmt-01-study-materialbooks.html
- Learning Curve and At Right Angles, periodicals about mathematics and its teaching: http://azimpremjifoundation.org/ Foundation_Publications
- Central Board of Secondary Education’s books and support material (also including the Teachers Manual for Formative Assessment – Mathematics (Class IX)) – select ‘CBSE publications’, then ‘Books and support material’: http://cbse.nic.in/ welcome.htm
References
Acknowledgements
Except for third party materials and otherwise stated below, this content is made available under a Creative Commons Attribution-ShareAlike licence (http://creativecommons.org/ licenses/ by-sa/ 3.0/). The material acknowledged below is Proprietary and used under licence for this project, and not subject to the Creative Commons Licence. This means that this material may only be used unadapted within the TESS-India project and not in any subsequent OER versions. This includes the use of the TESS-India, OU and UKAID logos.
Grateful acknowledgement is made to the following sources for permission to reproduce the material in this unit:
Figure 1: courtesy of Rob Towner.
Figure 2: http://commons.wikimedia.org/ wiki/ File:Kolam@TamilWedding.jpg – this file is licensed under the Creative Commons Attribution-Share Alike 3.0 Unported licence.
Every effort has been made to contact copyright owners. If any have been inadvertently overlooked the publishers will be pleased to make the necessary arrangements at the first opportunity.
Video (including video stills): thanks are extended to the teacher educators, headteachers, teachers and students across India who worked with The Open University in the productions.