1. Organising an investigation of 3D shapes
As your pupils work it is important that they feel that they are doing the investigation, that they are solving the problem. As a teacher, you need to be able to stand back and watch your pupils taking over the central stage. At first, this is often difficult to do, but if you can find a way to set up your classroom that gives pupils the space to think, talk and explore, many of them will surprise you with their imagination and understanding. For more information, see Key Resource: Using investigations in the classroom [Tip: hold Ctrl and click a link to open it in a new tab. (Hide tip)] .
Activity 1 and Case Study 1 explore ways of allowing pupils to discover the nets for different shapes themselves.
Case Study 1: Investigating a net for a tin
Mrs Sawula in South Africa was doing work on shape. First, she took her class out into the local environment to look at all the different shapes they could find.
The next day, she wanted to start her lesson on nets by having her pupils discover a simple net for themselves.
Mrs Sawula asked them to think how they could make a paper plan of some of the shapes they had seen. She listened to some of these ideas. Then, having asked her pupils to bring in a tin (she collected a few herself for those who forgot or couldn’t bring one in), she asked them this question to discuss in pairs: ‘Your tin can was made from a flat piece of tin. Imagine your piece of paper is a piece of tin to be made into a can – what shape would have to be cut from the paper? Can you use the can to help you draw this shape on your paper?’ Resource 1: Net of a tin (a cylinder) shows how a 2D net can be folded to make a 3D object.
She gave the pupils time to try and solve this puzzle. Mrs Sawula enjoyed watching her pupils working and did not interfere unless she saw they were stuck.
She was pleased at how many were able to produce the net.
Activity 1: Identifying the net of an open box
For this activity ask each pupil to bring in an empty box. You should collect some too.
- Give each group of four some glue or sticky tape and four sheets of A4 paper.
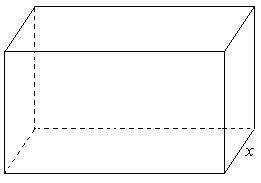
Tell pupils that together they are going to explore how to make a box the same shape as the box (a rectangular prism – see below), using one A4 sheet and by drawing, folding and sticking.
- Ask them to work together and discuss how to do it before they start. Once they are happy with what they are doing, ask them to use one piece of paper to test their ideas.
- If some groups are stuck, give them a clue about how to start by suggesting they undo the box to make it flat.
- Walk around silently; only help if a group is stuck or asks for support.
- Ask each group to show their work to the class.
- In the next lesson, ask pupils to decorate their boxes and hang them from the ceiling.
- Finally, ask them to draw their plans or nets for the box they made and display these too.
Section 2: Practical ways from sheet to cube