Low-tech video recording
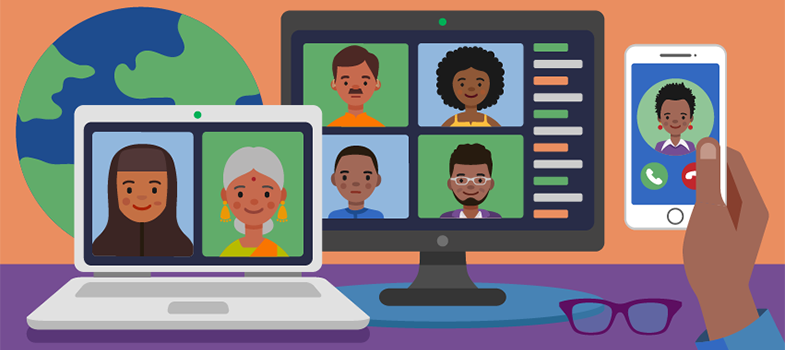
You may be able to find existing videos available on the internet that you can incorporate in your training (see the section Off the shelf: using existing online materials [Tip: hold Ctrl and click a link to open it in a new tab. (Hide tip)] for more information on this) but you may also want or need to make your own.
This does not need to be complicated nor require sophisticated equipment. A simple set up with a phone camera can work well.

Activity: Using low-tech video
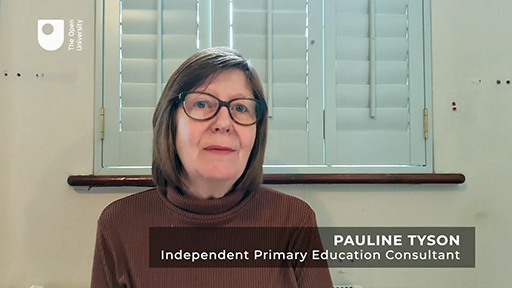
Watch this short video, which was created by Pauline Tyson, an independent Primary Education Consultant, to show people teaching numeracy skills how to create a simple ‘arrow cards’ tool.
Transcript
PAULINE TYSON:
Hello. My name's Pauline. I'm making this video today to demonstrate some of the ways that you can use the arrow cards. I cut arrow cards out of old cardboard packaging, making sure that the cards are exactly the same height, the arrows are the same size, and that when they were fitted together, you could see the correct part of the number.
You can see that I've made number 213 here. You can show learners the value of each digit in a three-digit number by expanding it. So, I can take this number apart. The 2 is worth 200. The 1 is worth 10. And then we've got the 3.
You can ask learners to make the number out of the arrow card. So, if, for example, you would like them to make number 132, you'd expect them to get a 100, the 30 -- important thing is to line up the arrows in the right places -- and a 2, 132.
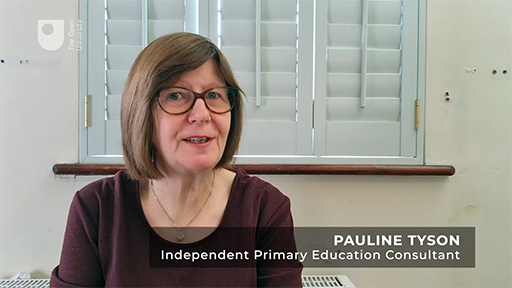
Now watch the next video, in which Pauline gives some practical tips about how to make short videos like this to use in your training.
Transcript
PAULINE TYSON:
Hello, my name's Pauline. I'm going to share with you some tips and techniques for making training videos I've picked up over the last few years. Let's start with some technical tips. Always film landscape and in HD. Keep the background simple. Wear plain, non-branded clothing. Make sure your face is clearly visible.
Good sound quality is important. If your device doesn't have a good microphone, use a headset or an external microphone. Speak clearly and try not to talk too fast.
You don't need any special equipment to make a training video. I often prop my phone up on a pile of books if I don't need to move the camera. A tripod can come in useful, though, if I need to change the focus, for example, from my face to the desktop. I often ask a friend or a colleague to help with that.
If I want to share myself writing, I take the glass from the bottom of the fridge, prop it up on two piles of books, and put my camera face down on the glass. Choose a technique that works best for the point you want to make and for your particular audience. When making a training video, I go through a process that involves four P's -- purpose, plan, prepare, and practise.
First, purpose. What are the key points that I want to get across? What does my audience really need to know? Writing these down helps me to keep focused and make sure the video is not too long.
Second, plan. I write myself a script. And against each point, I put the props that I'm going to need, the kind of resources that will help to get my point across. Third, prepare. Now I need to make all of the props that I've decided I needed, and I write myself a prompter sheet. This saves me reading from the script, which sounds really artificial.
I make sure everything is really easily available for me so that I don't have to move away from the camera. So, here are the arrow cards that I made to use with the arrow cards video and the book that I used. You see they're just here right in front of me.
Once you've got everything ready, expect to do quite a lot of practicing. It takes a while to get it the way that you want it and to remember all the words that you want to say in the right order. Once you've got it so that you're happy with it, you're ready to shoot your final film. Remember, enjoy yourself. Have fun. And just be yourself.
Spend some time practicing, and you'll soon feel confident to film yourself. Short to-the-point videos with lots of visual aids are a great way of training and will prove an invaluable tool for you.
Make some notes below about when it might be useful for your own training to make some videos yourself.
Discussion
Your own notes will obviously be specific to your own circumstances, but here are a few general possibilities. You could use video for:
- Demonstrating something physical, like Pauline’s arrow cards
- Talking about a prepared diagram and using a pointer to draw attention to specific parts of it as you speak.
- Making a voice recording describing what you are doing while you are in the process of writing or drawing, in the same way you might talk while writing on a whiteboard or flipchart in a face-to-face setting.
- Recording interviews with other people. Note that if you do this, you must tell them what you intend to do with the recording and get their permission to use it first, preferably in writing.
- Recording scenes, views or people engaged in particular activities, indoors or outside, that you can use to illustrate the topics of your training. Again, if you include people you must ask their permission to use the video for your training first.
Further Resources
If you would like to explore the possibilities of making low-budget videos further, you can study this free course Low-Budget Video Production: Visual Communication for Small Charities from The Open University
Repurposing and extending slide presentations