
Find out more about The Open University's Science courses and qualifications
In theory, you can make soap by treating almost any fat or oil with sodium hydroxide or potassium hydroxide (for a 'soft' soap). Some recipes use animal fats like tallow (from beef) or lard (from pork). Others use vegetable oils, like coconut or olive oil. Soapmaking (or saponification as the chemical reaction is called), like any chemical experiment, is sensitive to the purity of the reactants, the reaction conditions used and the care with which you carry it out.
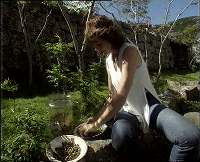
In our first attempt at making soap, we tried to produce sodium hydroxide from seawater using electrolysis. This was scuppered when the windmill electricity generator was blown down in high winds.
We then resorted to dissolving wood ashes in water to give a dilute potassium hydroxide solution, which we boiled with olive oil, but this too was unsuccessful.
By purifying our starting materials, and paying closer attention to every step in the process, our third attempt (again with potassium hydroxide) eventually produced a liquid soap.
In this activity, we'll use a mixture of coconut and olive oil, with sodium hydroxide (sometimes called caustic soda), to make a solid soap. Homemade soap is particularly good for your skin because the glycerine formed as a byproduct of saponification remains in the soap, to soften your skin.
The experiment takes about three hours, but your soap product will need to be 'matured' over a four- to six-week period before you can use it.
Make your own
What You'll Need:
For 250g of soap, you’ll need the following:
- 32g solid sodium hydroxide*
- 125g vegetable fat
- 55g pure olive oil (50cm3)
- 55g white coconut oil*
- 100cm3 distilled or rain water (not tap water) **
- 5g essential oil* of your choice, or the juice of a lemon (optional)
- spectacles or goggles
- rubber gloves
- cotton housecoat or apron (not nylon)
- kitchen scales
- plastic or glass measuring jug
- 2 one-litre heat-resistant glass bowls
- 2 plastic tablespoons (one for the oils and one for the sodium hydroxide solution)
- thermometer (0 to 100°C)
- suitably sized plastic moulds
- newspaper
* available from most pharmacies or health food shops
** 1cm3 is the same as 1ml
Precautions:
- You MUST wear protective rubber gloves and eye protection (prescription spectacles should do) throughout, as well as a cotton housecoat or apron to protect your clothes from splashes.
- You MUST read and understand all the warnings printed on the caustic soda container before you start this experiment. The solutions you’ll be handling are caustic, and will burn your skin on contact. They will also damage most kitchen surfaces.
- If you get any:
– on your skin, rinse it off with copious amounts of running water, until your skin no longer feels soapy
– in your eyes, wash them immediately with cold running water, and go to a hospital
– in your mouth, wash it out with water until the unpleasant taste has disappeared. - Never use aluminium or zinc utensils; they will react with the sodium hydroxide solution.
- Have a large bowl of clean, cold water handy, for use in the event of an accident.
- Remove all food and drink from your work area, and keep children and animals well away from your workspace and chemicals.
- Always work in a well-ventilated area (if possible, outside), and avoid working on your own.
Procedure
FIRST PUT ON YOUR PROTECTIVE GLOVES, APRON AND SPECTACLES
- It’s advisable to do this first step outside. Stirring continuously, gradually add the sodium hydroxide carefully to 200cm3 of cold distilled water in one of the mixing bowls. Never add the water to the pellets! Avoid inhaling the fumes while doing this. The temperature of the solution will rise as you continue stirring, until all of the solid has dissolved. Let this solution cool to around 45° C.
- Next weigh out the vegetable fat, olive oil and coconut oil into one of the mixing bowls. Warm the mixture gently by standing the bowl in hot water, stirring all the time, until it reaches 45° C. Don’t let the temperature of this mixture rise above 50° C.
- When the sodium hydroxide solution and the mixture of fat and oils are both at the required temperature, pour the former slowly into the latter and stir thoroughly for 15 minutes with a spoon.
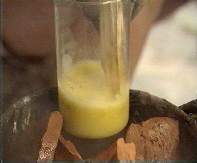
- Saponification doesn’t happen instantly! With some vegetable oils it can take weeks to complete, but you should see something happening after 5 or 10 minutes; the mixture should start to thicken up. The process involves several stages, the first of which is called ‘tracing’. If you let the mixture run off the back of the spoon into the mixing bowl, you should see that the soap that’s formed floats on top; in other words, it leaves a ‘trace’ on the surface.
The time it takes to trace depends on the particular fats and oils you use; the lighter the fats or oils, the longer they’ll take to trace.
Stir the mixture gently for 5 minutes or so, then leave it for 15 minutes, before stirring for a further 5 minutes . . . and so on, until after about an hour the mixture thickens to the consistency of custard.All this may just seem like cooking, but there’s some serious chemistry going on here. As saponification proceeds, the oils, fat and caustic soda react together, heat is generated, water evaporates and the soap begins to harden.
- If you want fragrant soap, stir in the essential oil or lemon juice at this stage.
- Pour your traced mixture into the plastic moulds and put them in an airing cupboard.
- Tidy up your work area straightaway and thoroughly wash all of the utensils you’ve used in hot soapy water.
- After a week or so, your soap should be hard enough to remove it from the moulds. Put your rubber gloves on to do this! At this stage, it will still contain some unreacted sodium hydroxide. To make it safe to use, stand it on newspaper in the open air at room temperature for two to three weeks, after which saponification should be complete. The longer you leave it, the better your soap will be.
UNDER NO CIRCUMSTANCES SHOULD YOU USE YOUR SOAP UNTIL YOU’RE SURE THAT IT CONTAINS NO UNREACTED CAUSTIC SODA! EVEN THEN, TO BE ON THE SAFE SIDE, ONLY USE IT TO WASH YOUR HANDS; NEVER USE IT TO WASH YOUR FACE.
You might like to try to and improve on the above recipe by using different oils and fats, or different reaction times. You could also add food colours to your soap to improve its appearance. This is the way practising synthetic chemists work, experimenting with different starting materials and reaction conditions, until they get the result they want. So experiment away and have fun!
Study a free course
-
Discovering chemistry
Learn more to access more details of Discovering chemistryChemistry lies at the centre of our modern life, playing a part in areas as diverse as the development of new drugs and materials, analysing our environment through to more mundane activities such as washing your clothes and making your tea. But to truly understand the role chemistry plays you need to have a sound grasp of a number of ...

-
Basic science: understanding experiments
Learn more to access more details of Basic science: understanding experimentsThis free course, Basic science: understanding experiments, introduces you to science-based skills through simple and exciting physics, chemistry and biology experiments.

-
Ethics in science?
Learn more to access more details of Ethics in science?This free course, Ethics in science? discusses how scientists have a moral and ethical responsibility to consider whether they should carry out an experiment. In this short course you will learn of the first clinical trials undertaken for scurvy and small pox and gain an understanding of how much more rigorous today’s clinical trials are. You ...

Rate and Review
Rate this article
Review this article
Log into OpenLearn to leave reviews and join in the conversation.
Article reviews