3. Organising project work
In this section we have been exploring patterns in living things. There is a basic pattern to the life cycle of all living things. There is fertilisation and development of an embryo in a seed/egg/womb. Then there is a process of birth/hatching/germination. Next comes feeding and growth through a number of stages. At maturity, the final stage of reproduction can take place and the cycle begins again.
In Case Study 3 teachers use story wheels to help pupils understand this pattern in life cycles.
Story wheels are useful tools to use because they:
- show the stages in the life cycle of the plant or animal;
- help pupils to organise their ideas about life cycles;
- help pupils to move from the known to the unknown – from the pictures to the labels with the scientific terms.
Read the case study for more detail about how story wheels can be used with pupils.
You might like to try story wheels with your classes; there are some labels and pictures to help you in Resource 6: Story wheel of the life cycle of the bean.
All types of living things have their own distinctly different life cycle pattern. It is interesting for pupils to find out how different living things have adapted their own life cycles. Having discussed the basic life cycle pattern in class, and perhaps done some plant story wheels, your pupils will be ready to do some research projects of their own on life cycles in the Key Activity. This activity builds on pupils’ observations of living things in their environment. Pupils take responsibility for planning, doing, reporting and assessing their own learning on their chosen animal. At the end of the activity, it is important to look at all the life cycles and discuss how they all have the same basic pattern.
You might like to look at the Key Resource: Researching in the classroom [Tip: hold Ctrl and click a link to open it in a new tab. (Hide tip)] to help you plan this activity.
Case Study 3: Plant life cycle patterns
Mrs Aderinto gathered her class round her, held up a green bean pod and told the story of the life cycle of the bean. She used the words seedling, germination, growing and adult plant so that her pupils learned the correct words.
Then she divided her class into four groups: Groups 1 and 2 each had three pictures showing one of the stages in the bean’s life cycle, Group 3 had the rectangular labels (describing the pictures) and Group 4 had the round labels (describing the steps in the life cycle story). Resource 6 shows these labels and pictures.
Mrs Aderinto then drew a large circle on the board and divided it into six equal parts. She asked the group with the first picture to come and put it in the story wheel. She then asked what came next and asked the pupils to put in the next picture. When each part of the wheel contained a picture, she asked Group 3 to add their labels. Finally, Group 4 placed their labels in sequence on the story wheel and explained the steps to the class. She finished by asking pupils to copy the story wheel and explain in their own words the story of the bean’s life cycle – they could start anywhere on the cycle.
Mrs Aderinto found this lesson worked really well with her pupils and they wanted to do story wheels for other plants and animals.
Key Activity: Animal life cycle projects
- Organise your class into groups of three or four.
- With your pupils, make a long list of animals that can be found in your local environment. Write this list on the board or on a large piece of paper stuck to the wall.
- Ask each group to choose an animal from the list; try to ensure that no two groups choose the same animal. Suggestions include: grasshopper, butterfly, frog, turtle, mosquito, beetle, elephant, bird and fish.
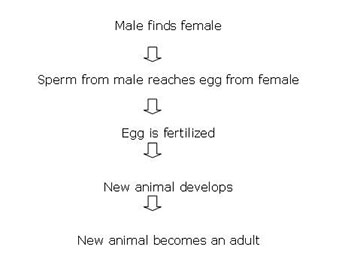
- Give the class some basic guidelines for the work on life cycles; how long they have, what you expect from them and how they should display their work. For younger pupils, you would expect them to give you three/four pictures in the story wheel shape and to put some basic labels on the pictures such as egg, chick, adult, baby and to have the pictures in the correct order. Older pupils should be able to discover something about each of these five stages:

They should draw detailed diagrams with clear labels and notes. They should include the number of babies born together, the time for each stage and how the animal gets its food at each stage. You will need to guide them so that they can work fairly independently with confidence. One way to help the pupils is to have a list of useful words on the classroom wall; they can then feel confident about spelling these words.
- Encourage each group to start by recording what they already know about their animal. Then they should find out more by investigation, research and observation. Pupils might want to ask people in the community or to use books or the Internet (see Key Resource: Using new technologies) if you have access to these.
Working in this way, your pupils will really be thinking and acting scientifically. Did your pupils seem interested in this activity? What do you think they learned?
2. Making models in groups


