1.1 Understanding dark adaptation
By its very nature, astronomical observing takes place in darkness and many of the objects that you wish to view will be very faint, even when seen with the aid of a telescope or binoculars. It is therefore important to understand how your eyes adapt to these conditions and to know how to make the most of your night-adapted vision to get the best possible view of the night sky and the objects visible in it.
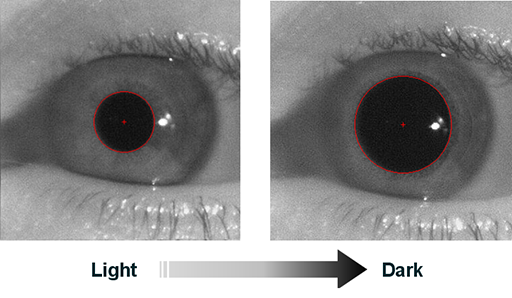
When light levels fall your eyes will respond in two ways: the first and more visible of these is that the pupil in your eye expands in order to admit more light. The second change takes place in the retina.

The expansion of the pupil takes place quite rapidly – typically in a few seconds. If you remain in dark conditions for long enough a second, slower change takes place, this time in the retina, which is the light-sensitive surface inside your eye. Over time the retina responds by producing more of the light-sensitive chemicals, increasing its sensitivity to light. It can take up to 20 minutes for this process to happen so it is important to be patient and allow time for your eyes to become fully dark-adapted.
Once in this dark-adapted state your eyes can be up to 10,000 times more sensitive to light than in normal daylight conditions. Given that it takes this long for your eyes to fully dark adapt it is important to be careful with your night vision. In particular, exposure to bright light will rapidly reverse the adaptation, so to avoid spoiling your night-adapted vision and having to go through the process all over again, it is a good idea to pick an observing site away from roads and bright street lights.
For the same reason, you should avoid using a bright light to read your star charts or notes. Astronomers are familiar with the idea that red light affects your dark adaptation far less than white light, and for this reason it is a good idea to use a red-light torch to help you move around and read your star chart. A red rear bicycle light makes an excellent astronomy light, or you could fit a red filter over an ordinary torch.
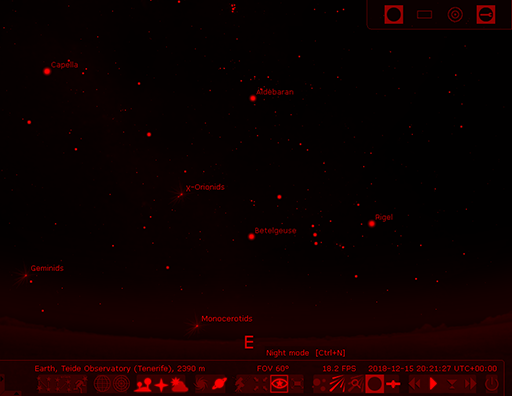
For similar reasons you should also avoid looking at a bright computer or a mobile screen while observing. Turning the brightness down as much as you can will help, and Stellarium has a night mode function which turns the screen red to protect your night vision. You can turn this mode on and off using the ‘starry eye’ symbol in the secondary menu.

Activity 1 Bright object in the sky
What bright object in the night sky could affect your ability to see faint stars?
Answer
The full Moon is bright enough to prevent your eyes becoming fully dark-adapted and its light will also obscure any faint objects nearby. For this reason it is best to avoid the few days around the full Moon each month when planning astronomical observing either by eye or using a telescope (unless, of course, the Moon is the object you wish to observe).
