2.2 Plotting points
Plotting points is essentially the same as reading the coordinates of a point. This means going along the x-axis to the given coordinate, and then vertically upwards until you are opposite the correct place on the y-axis. The point can then be marked with one of three symbols: a dot, as in the examples here, a cross, or a dot with a circle around it. This last option just makes the plotted point clearer if the points are joined with a line.
The next activity will give you some practice at plotting points. It would be useful to do this exercise on graph paper because it is much easier to plot the points accurately if you have a grid to work with. Fortunately, you don’t have to rush out and buy lots of graph paper because you can print out as much as you need [Tip: hold Ctrl and click a link to open it in a new tab. (Hide tip)] , if you have a printer.
Activity 2 Plotting points
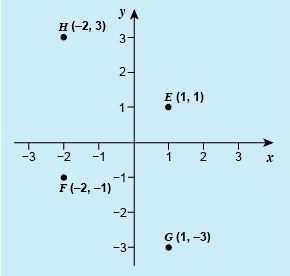
Draw x- and y-axes, with a scale on these from -3 to 3. Mark the points E at (1, 1), F at (–2, –1), G at (1, –3) and H at (–2, 3).
In the examples so far, all the coordinates were whole numbers and the scales were also marked at whole unit intervals. As with a number line though, there is nothing to stop us also showing fractions of whole units. Let’s take a look at this now.

