3.1 From mind maps to structured mapping diagram
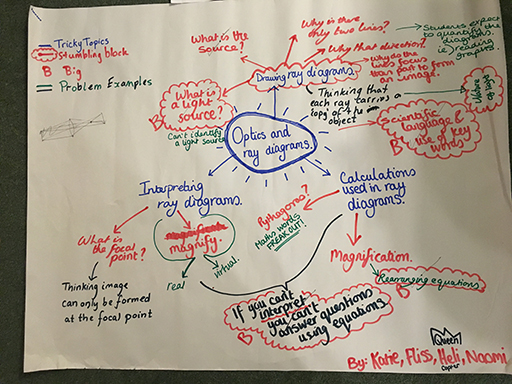
In Week 2 you saw a video in which trainee teachers were working out the difference between a stumbling block and a problem example. Let’s take another look at the tricky topic that they were working on. First of all, let’s look again at the mind map they created while thinking about the problems that secondary students have with optics and ray diagrams. You saw that mind map again in Step 3 of the tricky topics guide.
It’s shown again in Figure 7:
Activity 4 Create a mapping diagram from a mind map
Go to the tricky topic website downloads page [Tip: hold Ctrl and click a link to open it in a new tab. (Hide tip)] and download a blank tricky topic structure chart.
You can also download this from the IRIS Connect group under the ‘downloadable resources’ tab.
If you can print the structure chart out, it may be better to do this exercise by hand. If you do not have a printer, no problem, you can fill in the mapping diagram electronically in the PDF.
Use the mind map created by the trainee teachers and their comments from the video to think about how they formulated that into tricky topic, stumbling block and related problems.
Now, fill in your mapping diagram with the tricky topic, stumbling blocks and problem examples for the optics and ray diagrams tricky topic.
Answer
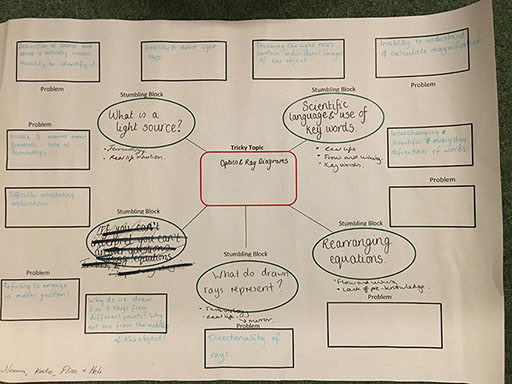
Here is the one they created. Did yours look something like this?
As you can see, it’s not a simple process. It’s an iterative process – it may take several attempts before you are happy with what the tricky topic consists of. Remember that some of the problem examples may link to more than one stumbling block. Notice also that they have begun to classify why students may have these problems, using the problem distiller.


