

2.1 Observing dispositions for learning
Many teachers and teaching assistants record observations using post-it slips or their own personal form of shorthand. There is no particular format required to make classroom observations, but many professionals use a form to remind them of what they are looking for.
The image below is an example of a flexible observation form that a teacher created. It could be used to observe any activity in a classroom, or in the playground. The teacher will write notes in the large box and will use the words in the smaller box to remember the aim of the form: to observe dispositions for learning.
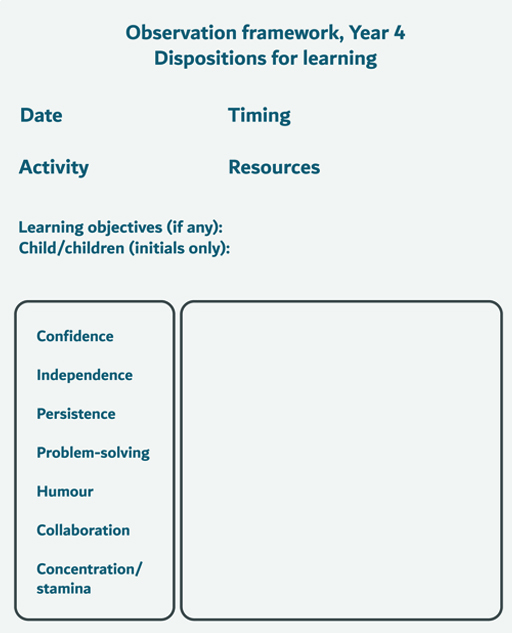
Next, you’ll try out using this observation framework.
Activity 2 Observing ‘Kevin’
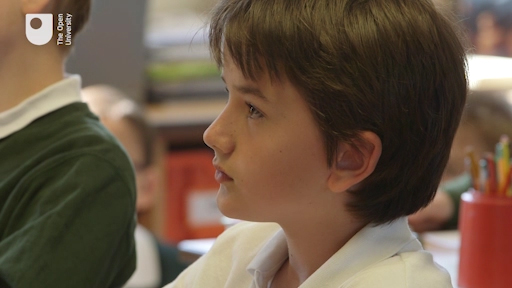
Now watch the video of a boy in a classroom lesson. ‘Kevin’ (not his real name) is 11 years old. In line with BERA guidance, which you learned about in Session 1, real names of children are not used.
This is an edited sequence of an art lesson that lasted one hour. In the lesson, children are observing a live snake (safely in a terrarium). A camera in the terrarium is projecting a magnified, highly detailed image of the snake’s skin. The teacher has asked the children to draw the patterns, shapes and shades that they can see on the snake’s scales.
As you watch, use the descriptions in the observation form above to identify the child’s dispositions for learning. You may see other dispositions that are not listed on the form – so make a note of these too.
Transcript: Video 2
[BELL RINGING]
TEACHER
Anything else? Any other ideas why it might have scales? And--
STUDENT
Is it something to do with the shedding?
TEACHER
Well, not really. They do shed their scales, but they shed as a whole skin. So they don't shed them individually. So hatching like this, OK? Series of parallel lines, it just helps to give some shading, OK? Now you might want to do them quite far apart, if it's a lighter scale. Or you might want to do them very close together, which gives the impression of a darker scale. Cross-hatching is when we then go the other way. So I've got my hatching, and then I'm going the other way. And can you see how it starts to give me different depths of shade? So again, have a little practise, find a different area in your sketchbook. Try this. So hatching and cross-hatching, try making the lines closer together. You'll find that it's darker. Spreading them out, it's lighter. That's good. Try doing a mixture so maybe one area is slightly darker. It's better like that. Oh, I like those scales. Is it? Good.
[TEACHER SPEAKS QUIETLY TO A CHILD]
STUDENT
Is it possible to get this bit?
TEACHER
OK. But well, you've got the right idea. I think if you try and get your lines closer together, then it's going to make it more even. And also, can you see this one, that's a bit more pointy, isn't it? So that one's a bit pointy, and that one's quite curved. So try and keep them parallel. Yeah? Like that. And try keeping them the same distance apart.
STUDENT
I'll just do the same as that, just the other way around on top of it.
TEACHER
Yes. Yeah. Try that. This is nice. I like that. So with these, try doing them like this. I would like you to use a whole page, please. So these scales are going to be big. All right? Scales are going to be big, but I really want you to focus on the shading. Look at the shape. Look at where the shade is. Look at those colours. Think about the hatching and the cross-hatching, and the pattern. Yeah. Thank you very much. Right. OK. Alright Michael? Have you tried doing some of the scales with more shapes like the diamonds? Yeah? Let's do that. And also, you look at these ones over here, where the scales themselves are darker, the lines in between are actually quite light, aren't they? So it's almost as if you've got to draw the inside bit of the scale. And then you leave the outside as a border. Does that make sense?
STUDENT
Try doing this.
TEACHER
Shall I show you?
STUDENT
[INAUDIBLE]
TEACHER
Yeah? So try and get the overall shape so that it's just like a--
STUDENT
In 3D?
TEACHER
It's going to be 3D, yes. That's fine. That's why you do the shading. Have a go. Have a go. Yeah? Yes. Yep. You practicing doing those ones? So you make sure to press down too hard at this point. Do you want a different pencil or sharpen that one. Yeah? Sharpen that one. Oh, yes, I like that. That's looking good. It's looking good. So what I want you to do then. So think about shape-- got an shape, because you look. It's like a squashed S, isn't it? That's it. That's it. Got the idea, then you can go the opposite way. OK. I think you can make it a bit bigger. You might find it easier. Yeah? So draw it out so that it is slightly-- make it quite chunky. Yeah? I think because it's so narrow, it is difficult to put it in. So draw a cylinder, essentially. Make it quite big. Perhaps there. OK. So just to remind you that it's a cylinder, just do a rounded end there. You all right?
STUDENT
Yeah, is it like this?
TEACHER
I'll come and have a look in a moment, yeah? Just-- right, OK. And then again. Do another go-around. Right. So if it helps you, imagine if it was totally flat, it would just be double that, OK? Its consistency, OK? Right. OK, I'm coming around. Oh, I like that.
[INTERPOSING VOICES]
OK. Well, that was just going to help you. So when you do your outline, you can put those lines in there, if you wish to, as a guideline. OK, that's nice and [INAUDIBLE] pencil, because then you do scales at the top. I really like the shades you've got there. What we need to do is just put shading in the end of each one. You look here. Yeah. It's-- just remember, we're going in the same direction, so whichever end you do, do it in the same end. That's it. And so pretend.
TEACHER
No, don't [INAUDIBLE] properly. So going in the same direction.
STUDENT
Below it.
TEACHER
Oh, the one below, yes. Yeah, so the one below will be the same place.
TEACHER
Yeah. That's it. I like it.
STUDENT
OK.
TEACHER
OK. What?
STUDENT
So what is the finished picture supposed to look like?
TEACHER: Right. So it's going to look like this, as near as possible. So we've got the shape, OK, which is your cylinder. I mean, he's coiled round there. But can you see if you take that part there? That's your cylinder shape, which is why, if you then want to put those very faint pencil lines, because that's going to sort of help to guide you to where the scales need to go. And then you put the detail in. So look at each scale, put the shading in. Think about where the colours are so you've got patches. Yeah. Yeah.
STUDENT: [INAUDIBLE]
TEACHER: Are you feeling comfortable with that?
STUDENT: Yeah.
TEACHER: You'll be all right. You'll be all right.
TEACHER: Yeah, of course. How are you doing? Fabulous. OK, so I like this. I thought that's exactly the shape. So can you see you've got different sizes of scales? Wait a minute. Different sizes of scales as well, some of them slightly smaller, some of them slightly larger. OK? Don't make them too small all over. Because I'm just having a look. Some of those are quite small. They're not all small is what I'm saying. Yeah? OK? But I really like you've got lines in there. It's helping you to get the direction? Remember to put your shading, as well, because that makes the 3D effect. OK? Yes?
STUDENT
I'll do this bit and I'll shade it. And I'll do this bit, and I'll shade it.
TEACHER
Yeah. Yeah, OK, very methodical. I like that. Yeah. Well, actually, when you look.
[INTERPOSING VOICES]
So I like that, yeah.
STUDENT
Yeah, it's like almost what see there.
TEACHER
That's nice. I like that.
STUDENT
And almost what we've just done that to the--
TEACHER
They're a little irregular, aren't they?
TEACHER
How they're spaced out. [INTERPOSING VOICES]
TEACHER
That's nice. Good, you've got the shape.
TEACHER
It does. It does.
STUDENT
He's smelling you.
STUDENT
He can't smell me.
TEACHER
Ashton. OK, so we've got that. And I've got to get the scales at the top, so two hands. So you can stroke him. Do you want to hold him?
STUDENT
Hold him.
TEACHER: It'll just be a quick hold. So there you go. He's heavy, isn't he?
STUDENT
Yeah.
TEACHER
Yeah?
STUDENT
You can kind of see [INAUDIBLE].
TEACHER
Yeah. There we go. Well done.
STUDENT
[INAUDIBLE]
TEACHER
There we go. Yeah, well done. That's a good idea, actually. As soon as you held him.
STUDENT
Feels so weird.
TEACHER
Yeah. Very rubbery isn't he. Would you like to hold him or would you like to stroke him?
TEACHER
You don't have to.
STUDENT
I'll hold him.
TEACHER
You want to hold him?
STUDENT
Yeah.
TEACHER
Yeah? That's the substrate.
STUDENT
Are you going to hold him?
TEACHER
Well done.
STUDENT
It's around his mouth, detect [INAUDIBLE].
TEACHER
The heat. That's it there.
[INTERPOSING VOICES]
Discussion
What you have done is sometimes called ‘naturalistic’ observation. You looked carefully and jotted down your impressions of the child’s attitudes, actions and behaviours. You used some criteria to guide your observation – you weren’t looking at everything, but at the child’s dispositions for learning. Your notes may have been words or phrases, or even drawings, to record what you saw.
The video you watched is an interesting observation of a child who has been identified as gifted and talented. He shows concentration, focus and perseverance in the drawing task, looking carefully and for long periods of time. He seldom speaks. When he does talk it is either to the teacher or to the child sitting next to him. By way of context, other children in the classroom (who you do not see in the video) chat and laugh quietly with each other as they do the drawing activity.
Kevin appears to be a confident and independent learner, and he shows considerable stamina in sustaining the drawing task. But he also shows some insecurity, and perhaps even some anxiety, checking with the teacher to make sure he has understood what to do and that he is doing it correctly. The teacher asks him if he feels confident and reassures him. He is cautious and careful in his drawing, working silently. He looks intently at the image of the snake’s skin, projected onto a screen, and asks the teacher to clarify the instructions for making the drawing. At one point, he shows a great deal of patience, keeping his hand raised for over two minutes, waiting for the teacher to respond, and he asks the teacher what the drawing is meant to look like. He draws with very small, precise movements, using a tiny corner of his art sketchbook. He looks at the projection of the live snake, the teacher’s drawing on the whiteboard, and at his own sketchbook, making connections between these three sources. The teacher encourages him to make some of his drawing larger, and comments that he is very methodical. Towards the end of the lesson, he looks at his friend’s drawing and chats with the friend about it. When he is allowed to hold the snake in his hands, he smiles with pleasure.
Next you will look at a different way to observe, using codes.