

3.2 Ideas for tasks using four cubes
So far, only 2D shapes have been considered but now you will think about 3D shapes or models.
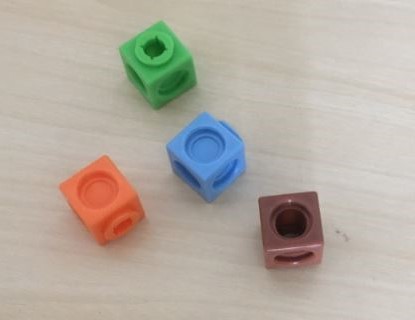
Most mathematics departments have sets of interlocking cubes, or multi-link cubes as they are sometimes known (Figure 14). The bigger ones which are 2 cm along their edges are best to use as they are easy to handle.
There are several tasks which you can ask learners to do with four interlocking cubes.
- Make a four-cube model and hide it behind a book or other appropriate hiding place. Now try to describe it to another person so that they could make the same model using four cubes.
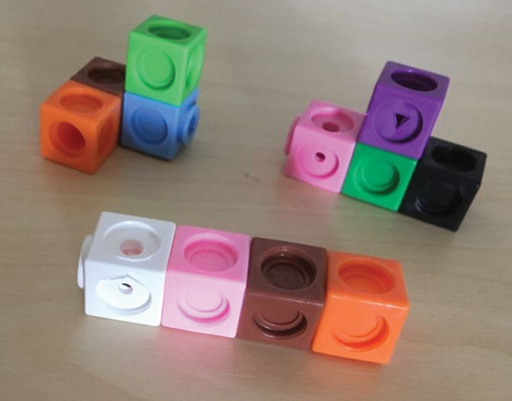
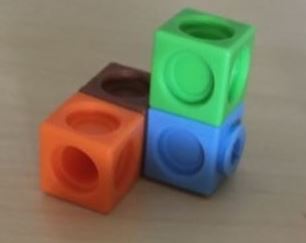
- Find all of the different models which can be made using four interlocking cubes. How can you be certain that you have them all?
- Which four-cube model has the largest or smallest surface area?
- Draw the models on isometric paper.
- Draw the plan and elevations of each model.
- Choose one of the models, devise its net and make it up using card.
Activity _unit7.3.5 Activity 15 A task using four cubes
Choose one or more of the tasks above to try for yourself (having first procured four cubes). Then read the following suggestions and points regarding each suggested activity.
Make a four-cube model and describe it to another person so that they could make the same model using four cubes
Learners may find it helpful to use terms such as:
base
next to
above
in a row
Find all of the different models which can be made using four interlocking cubes
As with the pentomino activity, it helps to be systematic. In addition, shapes which are congruent to other shapes are not considered to be different. Think about cutting a 3D-shaped hole to fit the four-cube model. If another four-cube model can be fitted into the same hole then it is congruent and not different.
Which model has the largest or smallest surface area?
All of these four-cube models have the same volume because they have the same number of cubes. If the edge is considered to be one unit then the area of the face of a cube is one square unit and the volume of one cube is one cube unit. So, the four-cubed models each have a volume of four-cube units. However, their surface areas, which can be counted and recorded in square units, will be different.
Drawing the models on isometric paper
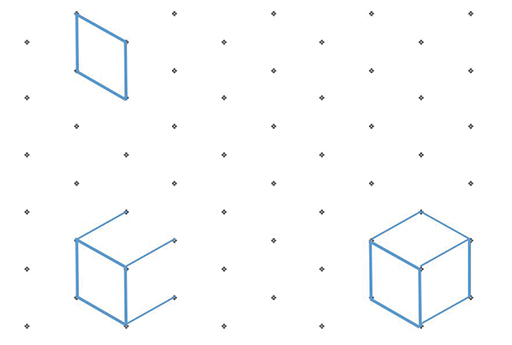
There is an art to drawing representations of 3D images on isometric paper. Learners may need some advice. Isometric paper is based on equilateral triangles and the orientation of the paper is important. Make sure that the paper looks like the example in Figure 16, with vertical lines of dots. If not, turn it 90⁰.
The first step is to draw one cube:
- Draw a rhombus shape, which will represent a square face in perspective.
- Next put three parallel lines from each of the three corners to provide the depth of the cube as shown.
- Finally complete the cube as shown.
Once the learner has mastered the skill of drawing a cube on isometric paper they will be able to draw the four-cube models by extending the original cube to represent cubes added on.
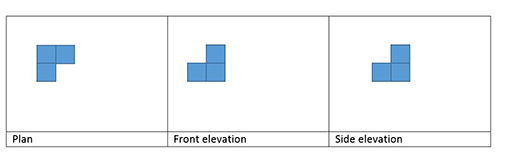
Drawing the plan and elevations of each model
This work is related to the work of architects on plans and elevations for buildings. The plan is the footprint of the model, which sits on the table. The elevations are the front and the side views imagined as if they were flat.
The side and elevations of the (four-cube model) are shown in Figures 17 and 18. Squared paper is useful for this activity.
Extensions to this work could be to provide the plan and elevations for a cube model. Learners then have to make the model and sketch it in 3D on isometric paper.
Devise a net for a four-cube model and make it up using card
This task can be easy or hard, depending on the choice of four-cube models. It is not as difficult as it might first seem if the model is placed on to paper and the learner considers the shape of the base, what needs to be folded up to make the sides and then what needs to be attached to the sides to fold over to make the top. Trial and improvement is a useful strategy since if the net does not work it can be modified and tried again until it does work.