2 Realising notation as sound
Reading staff notation involves not only associating notes on the staff with their names, of course, but also realising these as sounds. The following activity will develop this skill through the use of a keyboard instrument. Its goal is to help you to internalise staff notation through a form of learning that connects concepts, symbols, sounds, and physical actions.
You are welcome to find creative ways to adapt these exercises to use with a keyboard app or with another instrument. The advantage of working with a keyboard instrument here is that the keyboard presents all of the notes of the Western gamut in a simple sequence: there is a clear correspondence between the layout of the instrument and how the notation looks.
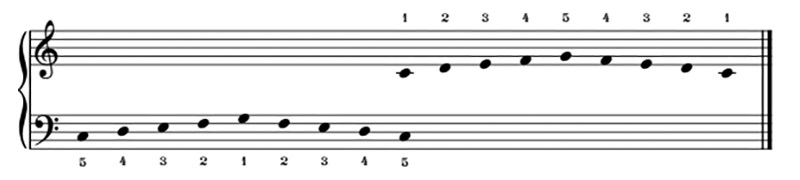
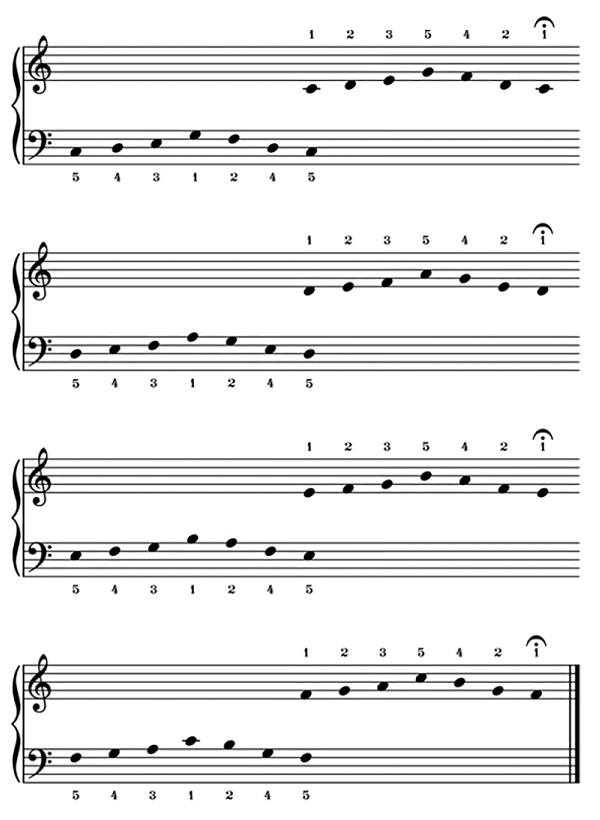
Activity 4
Examples 1 and 2 present basic patterns on the white keys of the keyboard. Play the notes in the bass clef with your left hand (LH) and the notes in the treble clef with your right hand (RH). Then play the exercises again, this time saying or singing the note names as you do so.
Audio demonstrations are provided beneath each example. You might find these to be a useful guide as you play.
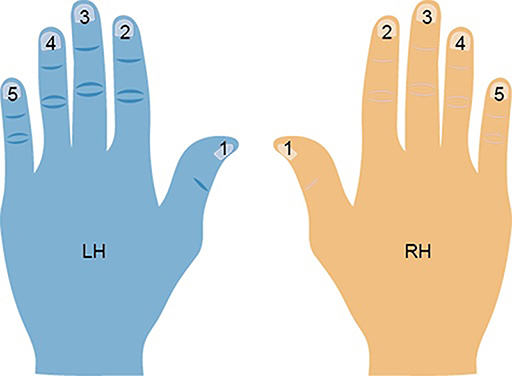
The numbers accompanying the notes indicate which fingers to use; as Figure 5 shows, 1 designates the thumb, 2 the index finger, 3 the middle finger, and so on.
Work towards being able to realise the exercises at a steady, even pace, such that each note is equal in duration. Don’t worry if this means you end up playing very slowly, or if you don’t make much apparent progress in an hour, especially if you are new to the keyboard. You can always revisit these exercises later for further practice.
In Example 2, there is a symbol that looks a little like a bird’s eye above every seventh right-hand note. It is a fermata, and indicates that you should hold that note a little longer than the others.