

4.7 Signals and noise
In this section, you will see some remarkable applications of the ideas in the preceding sections. To get going, right-click on the link below the image to open Interactive 5 in a new tab, then – if necessary – click on the microphone icon to enable the interactive to use your computer’s microphone.
If there is a tick in the ‘Use logarithmic Y scale on FFT’ box, click on it to remove it.
If there is a tick in the ‘Add noise tone’ box beneath the ‘zoom’ slider, click on the box to remove it.
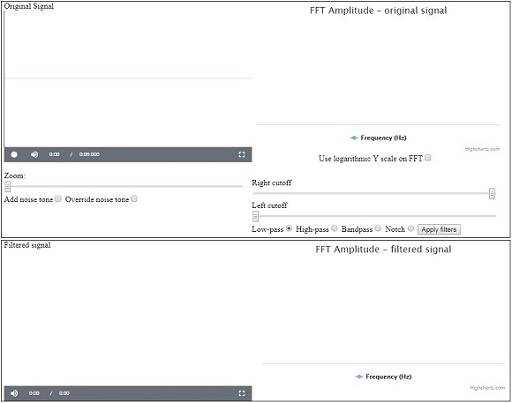
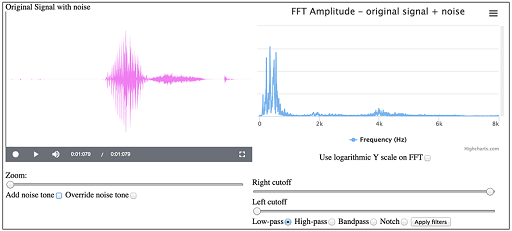
When you are ready, press the record button (the circle), say the word ‘yes’, then click on the square button to stop recording. Your screen should now be similar to Figure 32.
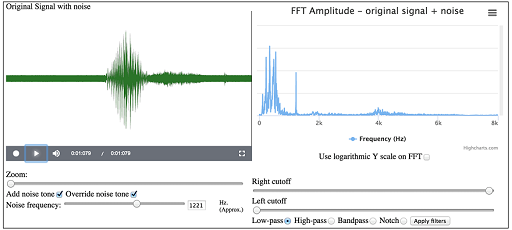
Tick the ‘Add noise tone’ box by clicking on it. Also tick the ‘Override noise tone’ by clicking on it. This will give a ‘Noise frequency’ slider. Move this to the right until the figure in the box is about 1200 Hz. This will add a sine wave with this frequency as noise to your sound. Look at the frequency spectrum on the right and you will see a peak close to 1200 Hz. Note that as you move the slider, the position of this peak will change, but for the moment make sure it is set at around 1200 Hz.
Now click on the play button (the triangle) and you will hear your ‘yes’ played back with a whistling noise in the background. Your screen should be similar to that shown in Figure 33.
Keep the interactive open with your ‘yes’ recording in it. In the next section, you will see how the noise you added can be ‘clinically’ removed, restoring the signal to almost exactly what it was without the noise.