3.3 Description of the bridge
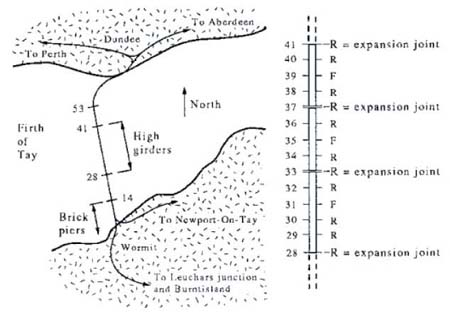
An outline plan of the bridge shows the main piers on which the bridge was laid (Figure 10). To allow shipping to pass up the Tay to Perth, a height of about 88 feet was required between the bridge girders and the high water mark in the middle of the firth. On the south bank, at Wormit, the land rose steeply to a height of about 200 feet, and this proved ideal as a jumping-off point for the bridge.
After leaving the bank on a short curve, the track climbed gradually at 1 in 490 until it reached pier 29 (pier numbering is shown in Figure 10). It then ran level to pier 36. After passing pier 37 the track fell rapidly at 1 in 74, until it reached the north bank at Dundee. At pier 53, the track entered a large, sweeping curve that took it alongside the bank and down to a height of about 40 feet above high water. The overall length of the bridge from bank to bank was over 2 miles, which at the time made it by far the longest bridge in the world.