4.2 An introduction to the Board of Trade photographs
It is important to bear in mind that these shots show the bridge remains in the state they were in just after the accident, and are almost exactly what the investigators would have seen when they inspected the bridge (see Input 8, linked below).
Click 'View document' below to open Input 8
View document [Tip: hold Ctrl and click a link to open it in a new tab. (Hide tip)]
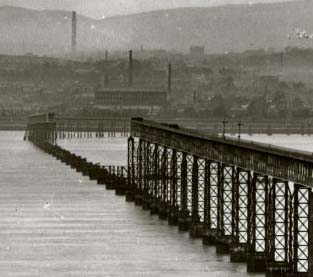
The weather cleared after the storm, and the piers were examined in bright sunshine. The photographer took views from the four cardinal compass points. The north and south views were taken from the next pier along, while the east and west shots were taken on the pier itself. The latter are especially interesting, because they provide the nearest we have to close-up shots of specific broken components.
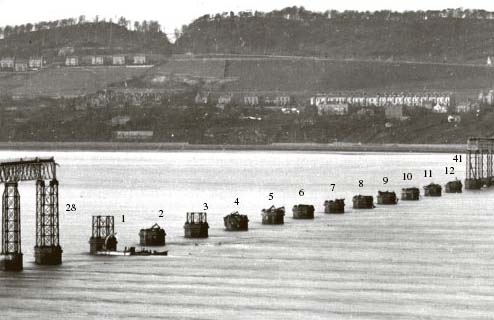
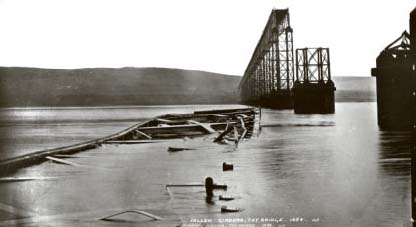
So what do the pictures show? The long shots show the section of high girders disappeared almost entirely (Figures 20 and 21), together with a close-up of the wrought iron girders from the top of the bridge lying in shallow water beside the stone platforms left standing (Figure 22). Those remaining platforms can be seen in perspective view in Figure 20, where they have been labelled for ease of reference, starting at the standing pier 28, and proceeding along the line of stone piers from pier 1 – two tiers left standing – through to pier 12. The final pier at the extreme right of the shot is the other pier left standing, on the north side of the firth, pier 41.