
4 Effective questioners give students time to think
Mary Budd Rowe (1986) researched the ‘wait time’ that teachers allowed after asking a question. ‘Wait time’ is the length of quiet time that teachers allow after asking a question before they expect a student to answer, or before they rephrase the question or even answer the question themselves. Her team analysed 300 tape recordings of teachers asking questions over six years. They found the mean wait time was 0.9 seconds.
If you ask a question that requires the students to think, are you really giving them enough time to think, or are you only giving them time to instantly react?
The teachers in Budd Rowe’s research were trained so that they became able to increase their wait time to between three and five seconds. The increased wait time resulted in:
- an increased length of student response
- an increased number of unsolicited, but appropriate, replies
- a decreased failure to respond
- an increased confidence of response
- an increase in the incidence of students comparing their answers to those from another student
- the number of alternative explanations offered multiplying.
In other words, the students had more time to think and that increased the level (and quality) of discussion that went on in the classroom, which in turn meant the teachers learnt more about their students thinking and were able to act on any misconceptions. Increasing wait time is not easy to do and can feel odd when you start, but if your students are to think, they must be given sufficient time.
Activity 4 asks you to experiment with increasing the wait time in your classroom in a similar way.
Activity 4: increasing the wait time
Like the teachers in Budd Rowe’s research, in your next lesson, increase your wait time for students to respond to five seconds. After the lesson, reflect on whether you observed:
- an increased length of student response
- an increased number of unsolicited, but appropriate, replies
- a decreased failure to respond
- an increased confidence of response
- an increase in the incidence of students comparing their answers to those from another student
- the number of alternative explanations offered multiplying.
The next activity links together many of the ideas that have been discussed so far. It suggests that you:
- ask the students to work with concrete objects to answer some challenging questions
- ask the students to work together so that they can support one another
- give them more time to think.
Activity 5: Learning about fractions
Preparation
This activity is an example of the kinds of rich activity that students need to build their understanding of fractions. For this task you will need a quantity of paper plates, or card cut into rectangles of the same size.
Arrange the students to work in groups of three or four, and give them a pile of paper plates or cards. You may want to look at the key resource ‘Using groupwork [Tip: hold Ctrl and click a link to open it in a new tab. (Hide tip)] ’ to help you prepare for this.
The activity
- Ask your students first to show you half of a plate, then a quarter of a plate. It is important not to tell them to take one plate here; let them think this out for themselves.
- Then ask each group to show you ‘half of six’ using the plates.
Make sure everyone is able to do this before carrying on.
- Ask the students to suggest several fraction problems that they can solve using the plates. Each time ask the class to show you the solution using the plates. If they don’t suggest questions using just one plate then prompt them.
The idea is to give everyone time to play a little with fractions and to think about what fractions are.
- Ask the students what is the same and what is different about the two types of questions they have worked on so far. This will help the students recognise some of the different ways that fractions are used in mathematics.
Now move on to problems that mix the two ideas.
- Ask the class to find of 12, then ask them to find of 13.
- When the class have had time to solve this, ask one group to explain the process they went through in order to solve the second problem.
- Now ask the students to suggest how they could record the problem and the answer using mathematical notation. Spend time on this, as it is important that the students recognise the relationship between the way the problems are written and what they are doing with the plates.
- Now ask the class to solve other ‘hard fraction problems’ using the plates, for example of 12, or of 10, which require two plates to be shared out.
- Again, ask for suggestions and discuss how these ideas might be written down.
- Ask each group to make up an easy problem and a hard problem with fractions to give to another group to do. Ask each group to record their answers.
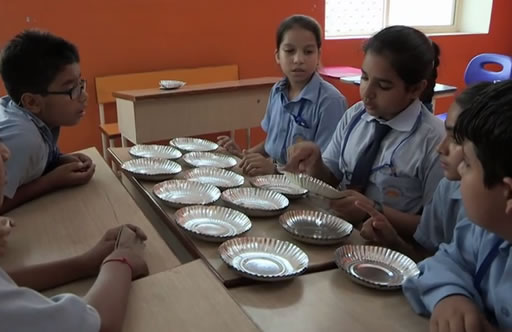
Case Study 3: Mr Bhatia reflects on using Activity 5
I gave each group 12 paper plates. The plates were to help to support the students’ thinking that finding fractions is about sharing out equally.
First, I set them the task of dividing the plates into quarters. I asked several of the groups to talk about the process of dividing into quarters. Then I asked them to divide their 12 plates into thirds. When they had done this, I once again asked the students to explain how they did it. I made sure that everyone was comfortable sharing out the objects that they were working with, in this case the plates. The students enjoyed working and collaborating together in groups and completing the task.
I then decided that the class was ready for a more challenging question. I gave each group one more plate, so that they then had 13 plates, and again asked them to divide the plates into quarters and then thirds. This time the students discovered that they needed to subdivide the extra plate in order to share out the plates equally into quarters and thirds.
This time I spent more time on the feedback session in order to make sure that everyone understood the reason why one of the plates had to be subdivided. I then asked the class to divide the plates into thirds, and this time I offered them scissors as well. Several students gave some good reasons why they needed to divide up the extra plate, but working in groups helped them all to try out their ideas first before telling the whole class.
Pause for thought
|
3 Asking questions effectively