
4 Thinking beyond the doing
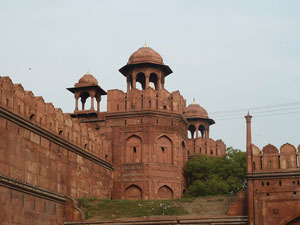
Figure 5 The Red Fort or Lal Qil'ah in Delhi.
Learning mathematics in school can result in students simply following procedures and not having to think why a certain algorithm of method is used, why it works or why it could give answers to questions.
The next activity is about working out the height of a tree, a tall object or a local landmark that is too high to measure with rules or ropes or anything else. You ask students to make a clinometer, which is a tool used by land surveyors to work out heights. Instead of being given a manual showing how to use it, the students are asked to design such a manual, so they will first have to work out by themselves how and why a clinometer is a suitable tool – and, as such, what the mathematics of using a clinometer is. They have to make decisions on how to go about it, what to write in the manual and how to express their mathematical explanation.
Activity 3: Students make a clinometer
Tell your students the following:
In this activity you are asked to make a clinometer. This is a tool to help surveyors measure the height of tall structures such as trees, landmarks or buildings. You are then asked to imagine you work for a company that produces such clinometers and you have to write a manual on how to use it. Remember that your clients are surveyors who are quite knowledgeable about mathematics and trigonometry, so feel free to include mathematical explanations on how and why a clinometer can be used for working out heights.
To make a clinometer you will first need to modify your protractor and use it as shown in Figures 6 and 7.
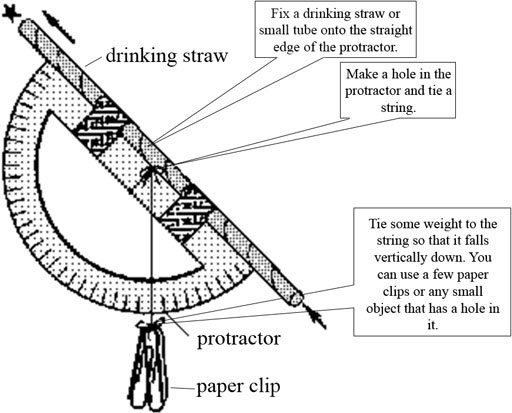
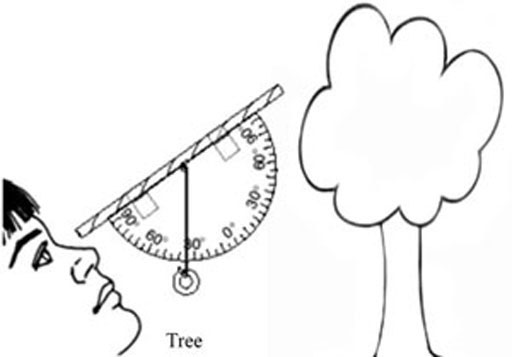
The clinometer measures what is called the ‘angle of elevation’ and you use it as shown in Figure 7.
Answer these questions to help you design your manual:
- What are the components of this instrument and how does it work? What is the mathematics involved? It might help to make a drawing of what you think happens.
- Work out how you can use your clinometer to work out the heights of a tall object. What is the mathematics involved? It might help to draw what you think happens.
- What happens if you stand on a hill and the object you are measuring is at the top of the hill? Do you need a different method or not?
- Write your manual to explain to its users how the clinometer works and how to use it. Remember that drawings might make it clearer.
Case Study 3: Mrs Meganathan reflects on using Activity 3
At the start I felt unsure about using this task. Normally the tasks are broken down into small activities or exercises, guiding the students what to do step-by-step. This task seemed so unstructured in comparison!
I decided to tell the students my concern about this task being less structured compared with the usual problems we use in class and that I thought they might need more guidance and steps. Well, perhaps they took that as a challenge, but they took to the task with enthusiasm and determination. They worked in pairs and groups of three. We introduced a short feedback session every 10–15 minutes or so, to share ideas and discuss issues and observations, and to put my mind at rest that the students were coping well with this less structured task.
We first worked on the task in the classroom, thinking about heights to the top of the blackboard, the light and the height of the classroom. When they had developed their theories about how the clinometer worked we went outside, took rope and tape measures and tried to work out the heights of the school, some trees and the distance to a window on the first floor. Comparing the calculations between the groups made the students consider their methods, the accuracy of their calculations and the precision of their measurement. The students really enjoyed putting together their manual and volunteered to take it home to finish.
This task also made me think about breaking down problems in step-by-step instructions. I now think I might not be doing the students any favours or supporting their learning or thinking in these step-by-step tasks: it tells them what to do and how to think, so there is little choice or opportunity for creativity. I am not sure I will be able to turn these step-by-step tasks into more unstructured tasks, but I will make a start by perhaps removing some of the steps, removing a given table, etc., so that the students have to figure that out for themselves.
Pause for thought How did it go with your class? What questions did you use to probe your students’ understanding? Did you feel you had to intervene at any point? What points did you feel you had to reinforce? Did you modify the task in any way like Mrs Meganathan did? If so, what was your reasoning for this? |
3 Using the question ‘What happens if …?’