
Resource 2: How to construct a concept map
There is not one way to construct a concept map. However, there are some key principles that need to be kept in mind:
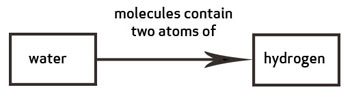
- A concept map is not the same as a brainstorm diagram (see the unit Brainstorming: sound). The main difference is that pairs of concepts are linked by words that describe their relationship to one another connecting in a concept map (Figure R2.1).
Figure R2.1 Linking two concepts.
- Writing in the link words is a crucial step. Without this, concept maps are of little value (White and Gunstone, 1992).
- The arrow indicates the direction in which to read – which word is first. The example in Figure R2.2 shows why taking notice of the arrow is very important!
Figure R2.2 The direction of the arrows in a concept map is important.

- Concept maps are not flow diagrams. Although a concept might be linked to several others, the reading of relationship is between pairs of words only. You do not link three concepts to make a whole phrase, for example. Each pair of linked concepts is independent of others.
The following instructions to construct a concept map are adapted from Probing Understanding by White and Gunstone (1992).
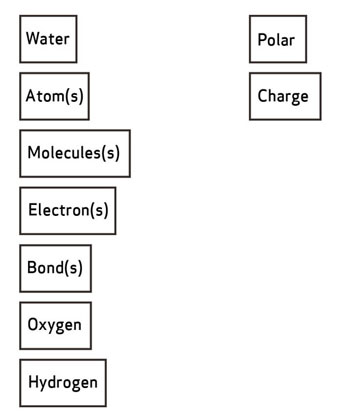
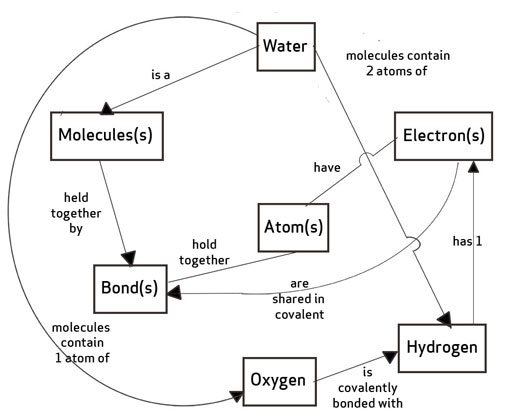
- Identify the key concepts. This might be through a brainstorm or looking at the chapter in the textbook. Single words should be used to represent each concept, so for example, the chemistry of water might include ‘molecule(s)’, ‘water’, ‘electron(s)’, ‘charge’, ‘polar’, ‘atom(s)’, ‘bond(s)’, ‘oxygen’ and ‘hydrogen’.
- Write the concept words on small pieces of paper so that they can be moved about. Sort through the concepts and leave out ones you do not know or do not think are related to the other terms (Figure R2.3).
Figure R2.3 Sorting concepts.
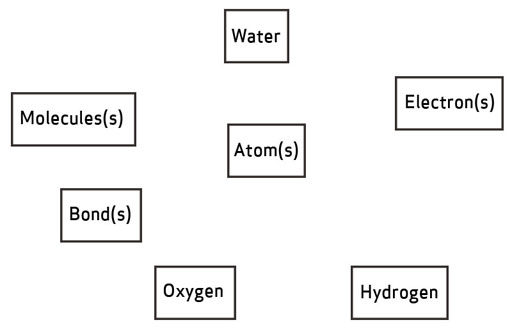
- Put the remaining concept words on a sheet of paper. Arrange them in a way that makes sense to you, so that terms that you see as closely connected are near each other (Figure R2.4).
Figure R2.4 Arranging concepts.
- When you are happy with your arrangement, stick them to the paper.
- Draw lines between pairs of concept words that you see as being positively connected (Figure R2.5).
Figure R2.5 Linking concepts.
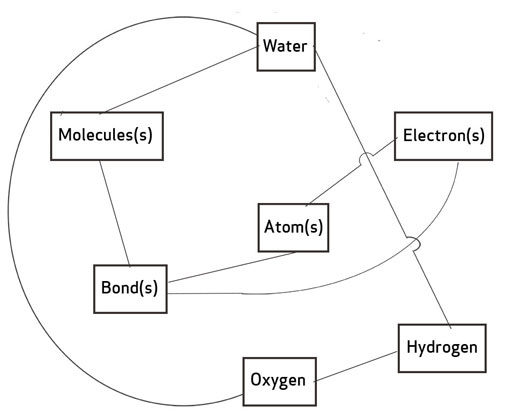
- Write words on the lines to show how the concepts are connected. Put the arrow head on the line to show the direction it should be read (Figure R2.6).
Figure R2.6 Adding details.
- Go back to any concept words that you did not include in the first step and see if you can add them in.
Back to previous pagePrevious
Resources