
1 Developing observation skills
Encouraging your students to look more closely and accurately will take time and involves giving them opportunities to observe and investigate their world. However, it is a worthwhile investment as it will make them more interested and enthusiastic about their world and in science as a subject.
There are a number of activities that you can use to help your students observe and learn about shadows. These include shadow puppets, a shadow game where students have to catch someone by stepping on their shadow as well as more methodical investigations of shadows. For younger students, encouraging them to play with such ideas is important before they meet the more accepted ideas of how shadows are formed and change shape.
Through playing, students begin to construct their own ideas about what is happening – these will not all be the same for each student. Your role is to develop, extend and challenge their thinking to accept what really happens. To do this, you will also need to provide opportunities for them to talk together about their ideas.
Case Study 1: Observing shadows during the day.
Mrs Latika, a Class V science teacher, tried this activity with her students. Here she explains what she did
At first, I wanted to find out if my students understood how shadows are formed. I started by asking them a riddle: ‘What follows you around all day, but sometimes disappears?’ They guessed it was a shadow. I asked them what made their shadow. I used a torch and showed them how a shadow is made when an object blocks a light source. They then made their own shadows in the playground using the sun, and in the classroom using a torch. The students really enjoyed making funny shapes and animal shadows using their hands and seeing how they could change the shape of the shadow by moving the torch.
In the next lesson, I asked the students ‘Does the shadow stay the same through the day?’ Some of them had noticed they change, but some students had not. I asked ‘How do they change?’ They weren’t too sure exactly how they changed, so I asked them to work in small groups to discuss how we could investigate whether shadows changed and how they did change. The discussion was very lively and they had lots of ideas as to how we could observe the shadows. In the end, we decided it was easiest to observe the shadow of an object in the playground at different times of the day to confirm our ideas.
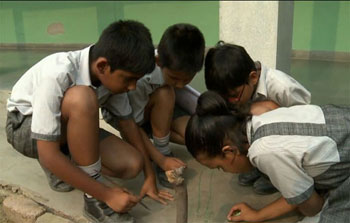
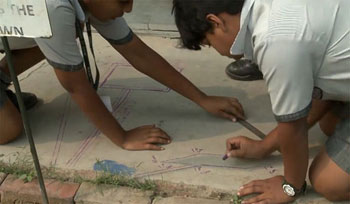
The groups chose their object and took a piece of chalk and a notebook and pencil out, as well as a ruler. In the playground they made their shadows and marked the spot where they did the measuring (so that they could go back to the same spot each time) and drew the shadow on the ground with their chalk [Figure 2]. Some students did their shadows on the hard ground where the chalk didn’t work. They decided to use a stick to draw the shadow on the ground and then did their measurements. The students measured the length and width of their shadows and noted down the time of day. They also noted where the sun was in the sky, although I made sure to tell them not to look at the sun directly. One person in each group drew the shadow in their notebook and put in the observations they had made. During the day, we went out another three times to do more measurements. I noticed how much they talked about what they were doing and shared their ideas about what would happen over the day. I also took photos of them at work and of their shadows over the day for them to see later in order to compare and identify the changes.
At the end, I asked the students to look at their drawings and observations and discuss what they could deduce. Most of the students understood that the shadows changed and also moved around, and that it was the position of the sun in the sky that caused changes to shadows. Others found it easier to see the difference from the photos on my phone.
Pause for thought How did Mrs Latika find out what ideas her students already had about shadows? |
Mrs Latika was very pleased with the outcome of this activity, because more students this year understood about how shadows are formed and how they change than they did the previous year, when they learnt from the textbook alone. She felt this was because they had done the observations and been able to see a pattern over time. They were also able to talk in their groups about their observations and photographs agree what they had found out. (You may want to look at the key resources ‘Using groupwork’ and ‘Talk for learning’ to learn more about how to plan and organise your classroom for groups and talk.)
The way you start a lesson or new topic can have a big influence on how your students respond and participate in lessons. Spending some time thinking of creative and stimulating ways to capture students’ interest and finding out what they know is therefore important. Mrs Latika introduced the idea of shadows by using a riddle. You could use a story. Write a short story about shadows or use a traditional tale with your students to capture their interest about shadows. For example, your story might be about a child who is lonely and befriends his or her shadow, and is sad when the shadow keeps disappearing.
Activity 1: Observing patterns in the classroom
Before you do some of these activities with your students, try those listed below for yourself and consider how much they would help your students develop their understanding of the patterns. You may need time to gather information about your students’ observation skills.
- Try ‘playing’ with shadows and different light sources yourself. What patterns can be seen? How valuable will allowing your students some time to ‘play’ with phenomena like shadows be to their understanding?
- Try the activity that the students did in the playground with the stick in Case Study 1. What do you think your students could learn from doing an investigation like this?
- How developed are your students’ observation skills? How do you know this? How often do you provide opportunities for them to observe and record information to use later in an investigation or for problem solving? How could you extend the opportunities?
Make notes about what you think students would learn and think how you could use them with your students.
You are now going to set up an observation investigation for your students. You could do a similar activity to the one done by Mrs Latika, or plan a simple observation based on the activity given below. If you are located near to the equator, a sundial will not produce obvious changes. In this case you might get your students to investigate changes to shadows when the light source (such as a lamp or torch) is at different distances from the object being measured.
Activity 2: Planning and teaching for observation
Read through the activity description and also read Resource 1, ‘Planning lessons’, to help you do this task and identify what you want your students to learn and how. Create a lesson plan that is suited to the ages and abilities of the students in your class.
Making a sundial
- Choose a sunny spot in an outdoor area that is not shady and is free of shadows.
- Organise your students into small groups of three or four.
- Choose a tall object that will stand up by itself, such as a brick or bottle of sand, or ask the students to push a thick stick or pole into the ground. Whatever you use, the object needs to be stable and cast a measurable shadow.
- Tell your students to mark the shadow that is created by the tall object or stick, placing a small stone at the shadow’s tip or making a chalk mark. Write the time on the stone or next to the chalk mark.
- Repeat this activity throughout the day.
- Ask your students to describe what is happening to the shadows over time. Ask them to explain why they think the shadows are changing.
- The following day, show your students how to use the sundial to tell the time. Take your students outside at half past the hour and ask them to tell you what the time is.
- In the classroom, ask your students to write a report or draw a picture of what they observed. This can be displayed in the classroom.
- Ask your students to draw a diagram that explains how shadows are created.
Extending the activity
- You could extend this activity by asking your students to measure the length of each shadow and to create a bar chart that represents the changes that occur. Can the students identify any patterns in the data? Can they explain any of the patterns that they find?
As the lesson proceeds, watch how the students work and listen to them as they talk. Afterwards, think about the following:
- What went well during the activity? What would you change for next time you teach this topic?
- How did the students respond to the activity?
- What did the students learn? How do you know this?
- What did your students need support with?
How did you challenge your more able students?
Video: Planning lessons |
Why this approach is important