
1 Technique: ‘think–pair–share’
‘Think–pair–share’ is a powerful technique that provides the opportunity for students to learn with their classmates. The case study will show you how the technique works.
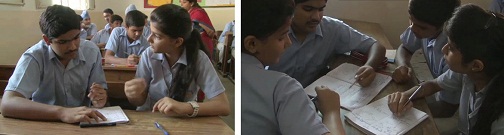
Think–pair–share involves setting a task for students to do on their own. The task could be some simple true/false questions, matching words with definitions, or putting a set of instructions into order. Once they have had about five minutes to do the questions on their own, students compare notes with a partner. In Case Study 1, the pairs share their answer with another pair (Figure 1).
Case Study 1: A training session that uses the think–pair–share technique
Mr Singh attended a training session at the local DIET. Instead of sitting and listening to the trainer, the group were asked to take part in a number of activities. He then tried this activity with his students.
Last week I attended a training session at the DIET. It was much better than usual because we had the opportunity to try out the activities that we were being told about. The trainer drew nine diagrams on the blackboard [see Resource 3]. We had to label each diagram as an element, compound or a mixture. I was worried! I am a biology teacher and I could not remember much about this topic. The trainer encouraged us to guess if we weren’t sure.
We then compared notes with the person next to us. The person next to me was Anju, a physicist, so she wasn’t very sure either. I changed some of my answers and she changed some of hers, and eventually we agreed on the answers. Then we shared them with another pair. I realised that I had been correct about ‘E’ – I thought it was an element but couldn’t explain why. Anju had convinced me that it was a compound because it contained molecules. Shanka, in the next group, explained that it was an element because all the atoms were the same. Finally, the four of us compared our results with another four and found that we agreed.
I realised that I had learnt quite a lot during the exercise as a result of talking to my colleagues. And nobody else in the class knew how I did at first, so I did not feel embarrassed about how little I knew!
A few days later, I was teaching chemical reactions to Class X. I asked them for the definition of an element. Only three people put their hands up and the first one I asked got it wrong, so I did the pair work exercise with them. It took a mere 15 minutes, and although we did elements, mixtures and compounds in Class IX, some of them did not do very well in the exam. I am sure they will find ‘chemical reactions’ easier now that they understand the underlying ideas. I watched them carefully and listened to the discussions. Susamma understood very well, but Rahanna struggled. I will make sure that they sit together when we do chemical formulas, so that Susamma can help Rahanna.
Pause for thought
|
When using think–pair–share, you can ask your students to compare their answers with a partner, or you can do as Mr Singh did and ask them to compare with another pair. You can stop at four or continue until you have groups of eight or 16. The key is that the group has to agree on the right answers before it talks to another group. The benefit comes from giving your students the chance to talk and co-construct knowledge.
If you walk around while students are working, you will soon observe and hear who understands and who doesn’t. You will know which students are likely to need support. You will also find that in some cases, students who got the answers wrong at first, have, as a result of talking to their classmates, change their ideas. This will give you chance to praise your students and increase their confidence.
Activity 1: Using think–pair–share
This activity will help you to prepare and carry out a think–pair–share exercise with your class. You can use it to consolidate understanding of writing chemical formulas.
First, think of chemicals with formulas that are complicated (i.e. involve brackets) or ones that, in your experience, students often get wrong (see Resource 4 for some ideas). Choose five of these chemicals and write their names on the blackboard.
Give your students five minutes to work out the formulas on the own. Then get each student to compare answers with their neighbour. If they do not agree, they each need to try and convince their neighbour that they have got the answer correct by explaining why they got that answer. When they agree on the answers, ask them to share with another pair. While they are working, move around the room and listen carefully to the conversations.
Finally, ask your students to stop their conversations. Choose students to share their answers with the whole class. If there are students who get the formulas wrong, ask them to explain their thinking and other students to explain the correct answers.
Pause for thought Were you surprised, pleased or disappointed by how your students did? |
Once you start to probe your students’ understanding in this way, you may be disappointed to learn that they have not understood some of the things that you have taught. This does not mean that they can’t understand. It means that you need to find other ways of helping them develop their understanding. Giving them a chance to have short discussions in pairs is a very good way of doing so.
Why this approach is important