
3 Using the local community and environment as resources
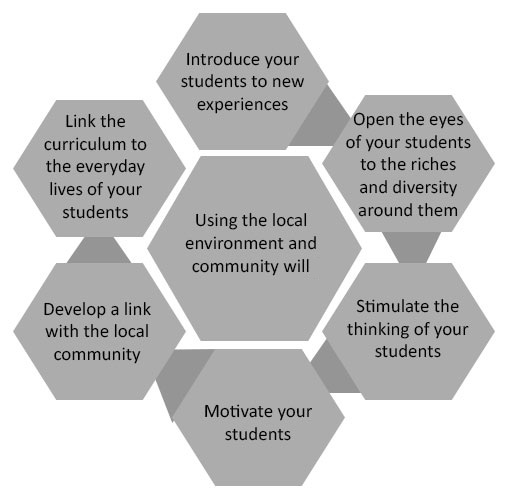
One important resource at your fingertips is that of the local community and environment. In your local community you have people who have expertise in a wide range of science topics. In your local environment you also have access to a range of natural resources. Figure 2 explains the benefits of using these resources.
Using local experts in your classroom
The local community is an often overlooked teaching resource. Maybe you are doing some work on transportation with Class X. How could you introduce this topic to your students in a way that will capture their interest? One way would be to invite in a local doctor or a nurse to talk about the heart and how they measure the blood pressure of their patients. For the topic of excretion, you could ask someone who has had a kidney transplant to talk about their kidney disease and operation. This could be a relative or a family friend of the students or staff. For respiration you could ask a local athlete to come in and explain the how lactic acid affects their performance.
Your students will be interested to hear about what these visitors do and will want to ask questions, so this needs to be carefully planned. If you choose to do this you need to be clear what you would like your students to gain and learn from the experience, and then follow the steps in Activity 3 to prepare for the visit.
Case Study 3: Mrs Kumar invites a visitor
Mrs Kumar invites an expert into her classroom.
One evening, I was out with a friend in the city. She is a nurse and had just started a new job in a health clinic for people with heart disease. I had just started ‘life processes’ with Class X, and while we were talking I had a brainwave! I decided to ask my friend to come into the school and talk to my students.
We arranged that she would bring a machine for measuring blood pressure. She measured my blood pressure and then talked to my students for about 15 minutes about the importance of measuring blood pressure, what causes it to be too high and the treatments available. I had a poster with a diagram of the heart which she used in her explanation.
My students had prepared some questions in advance, which they were able to ask, but the discussion soon moved on as they thought of more and more questions. Quite a few students stayed behind after the lesson to find out more about training to be a nurse.
Pause for thought
|
The next activity describes how to set up such a visit. If you have a suitable contact, you could do this activity as part of your work on ‘life processes’, or you could wait until you get to a topic for which you have a suitable contact. Whenever you do it, you will need to plan well ahead.
Activity 3: Inviting a local expert into your classroom
Identify an expert who you could ask to come into your classroom.
Part 1: Before the visit
- Ask your principal/head teacher’s permission to invite the visitor.
- Identify who you would like to ask.
- Ask if they would be willing to come.
- Talk to your class about the visit and what they would like to know.
- Ask them to write an invitation to the visitor.
- Plan with your class the questions they want to ask. See the unit on questioning or examples of how to involve your students in the generation of questions.
- Agree together with your class who will do this.
- Discuss how your students will sit when the visitor comes – in rows, or in a horseshoe shape so that everyone can see?
- Confirm the visit with your guest and tell them what will happen.
- Ask them to bring some things to show your students.
Part 2: On the day of the visit
Arrange for some students to meet the visitor at the appointed time at the school gate and bring them to the class. Introduce the visitor to your students and allow them to talk for a short time about what they do (10–15 minutes), showing what they have brought if appropriate.
Encourage your students to ask questions.
When the visit is finished, ask one of your students to thank the visitor for coming, on behalf of the class.
Part 3: After the visit
Think how you will use what your students have seen and heard. You could ask them to share their ideas in groups and make lists or posters of the key things they learned.
You could plan more lessons using the ideas and information as the context for them to learn more about the topic.
The students could research more about the topic. They could also share their ideas with other classes or their parents at a special parents’ evening or exhibition.
Using local environmental resources
The local environment can support the teaching of science. In your local environment you also have access to a range of natural resources. The outside environment can be seen as a place to collect resources but it can also be used as an extension of your classroom. Here are some ideas about how to use the local environment in a resourceful way.
Living things
Wherever your school is, there will be a variety of living things that you could collect and bring into the classroom for shorts periods for your students to investigate and observe. You could do the collecting yourself, or you could take your class outside to do the collecting.
Bringing in leaves, for example, will enable students to study these more closely. Growing plants from seeds will help students to appreciate how to care for them. Creatures such as preying mantis, certain spiders, mice, butterflies, squirrels or other insects can be kept in suitable conditions and containers for a short period of time.
Be clear what your students are going to learn, and give them time to observe the creatures safely so they are not frightened and they do not frighten the animals either. Make sure they respect the animals and plants and understand how important these are to the community.
Keeping insects or animals in the classroom creates a good learning environment. Plants can also be used to do practical work. One of the topics in the chapter on ‘life processes’ is photosynthesis. This is an important topic and it is difficult for students to understand, so doing practical work can be very helpful. You can check your own understanding of plants by doing the quiz in Resource 2 on ‘Understanding plants’.
Activity 4: Demonstrating photosynthesis
There are three experiments that are relatively easy to do that demonstrate photosynthesis. These are described in your textbook.
- Pond weed: Collecting the gas produced during photosynthesis. If you shine light on pond weed immersed in water, you can see bubbles of gas being produced. The more intense the light, the more bubbles are produced.
- Test leaves for starch: Leaves needs to be dropped into boiling water and then into ethanol to remove the chlorophyll. Then they can be tested with iodine in order to prove that starch is present. If variegated leaves are used, the pattern of the starch is the same as the pattern of the green on the original leaf.
- The importance of carbon dioxide: Two plants are wrapped in clear plastic bags. In one of the bags, add a chemical that will absorb carbon dioxide (for example, potassium hydroxide or sodium hydroxide). After two hours, test the leaves for starch. The plant in the bag with the chemical should contain less starch.
For each experiment, go through the method as described and if you do not have access to the equipment suggested, think of an alternative. If chemicals are involved, think about readily available options. For example, oven cleaner usually contains sodium hydroxide and could be used in experiment 3.
When you are teaching photosynthesis, try and carry out some or all of these experiments either as a demonstration or as a class practical.
Local materials
There are many other things that you might be able to collect from the local environment – whether you are in a rural or urban setting – that might help you in the classroom. These include rocks and stones to study, and recyclable materials such as card, paper, wire, wood, fabric and plastic containers.
All of these and many other materials could be gathered over time so that they are ready to use whenever you need them. For example, when you want your class to make posters about science you will always have some card for each group to write on. Always ask if you can have the materials you see. Ask your class to help you gather materials in advance of your lessons.
2 Thinking about the learning environment